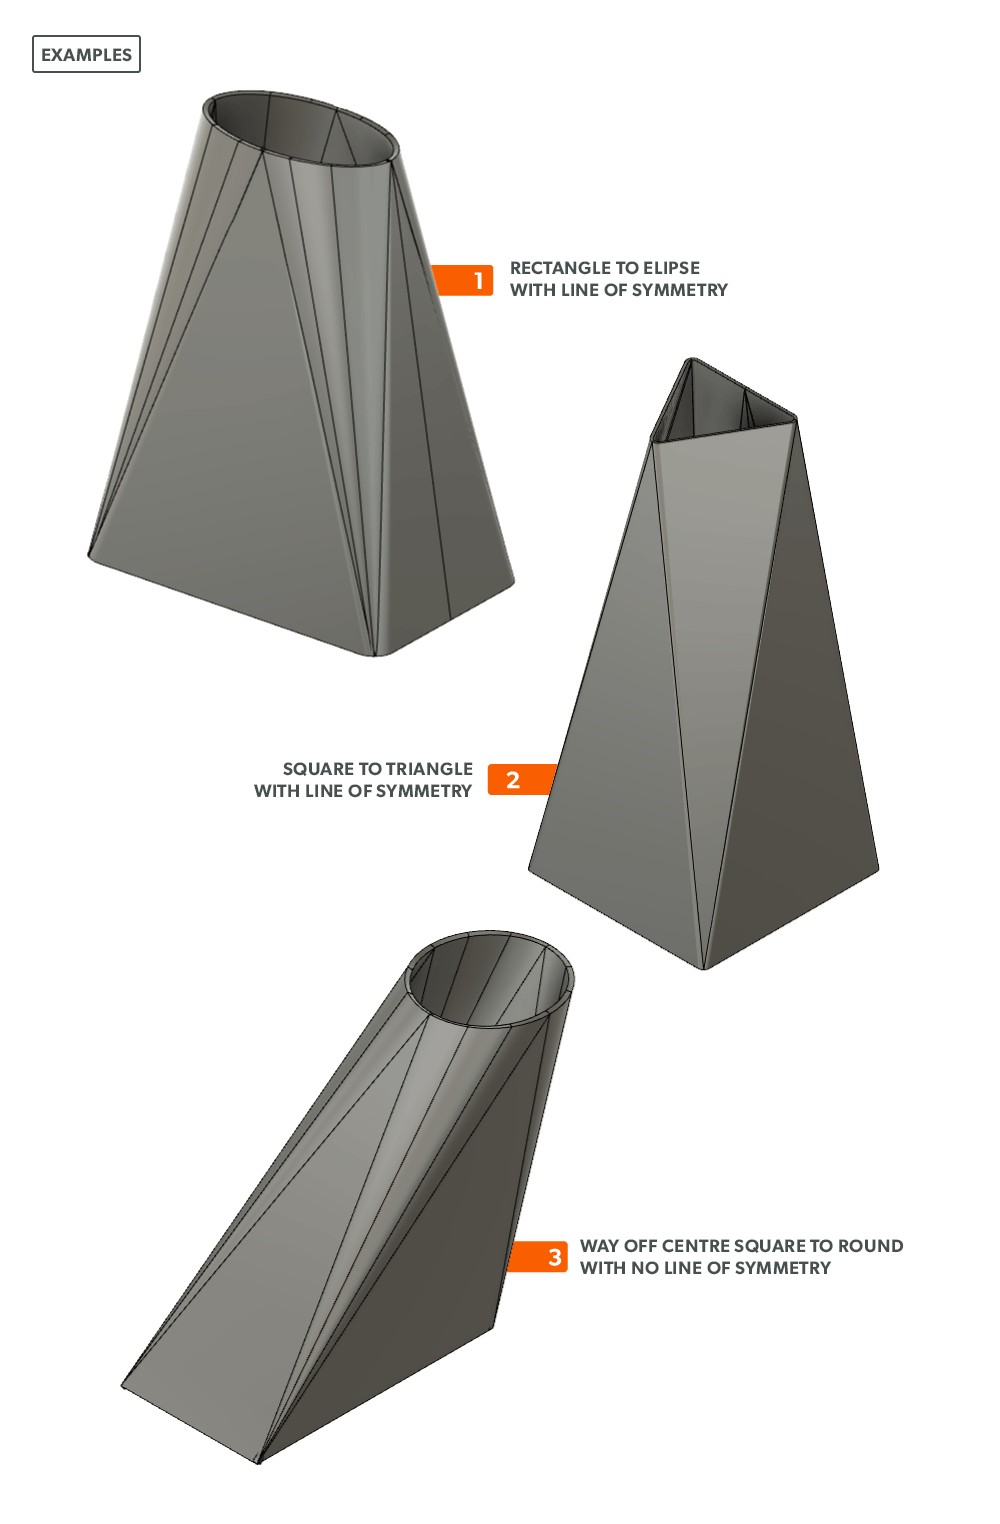
When we looked at both parallel line and radial line pattern development, we saw fairly simple and limited layout process. We have conditions that must be met in order to use them. Triangulation is the process used when nothing else works. There are very few conditions in which triangulation will not work. It is the most complex and time consuming, but it allows us to create patterns of endless possibilities. When all else fails, triangulation will work.
- Understand the process of Triangulation Pattern Development and its uses.
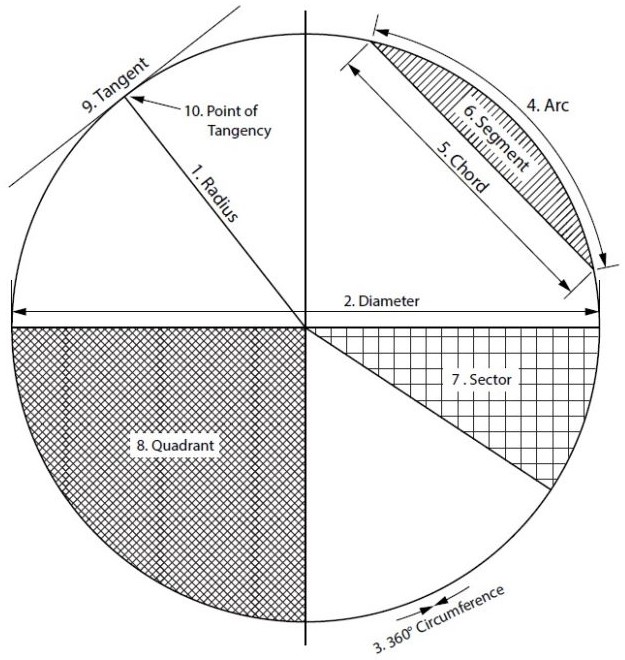
- Learn Triangulation terms.
- True Length – a dimension or line that is not distorted by the view.
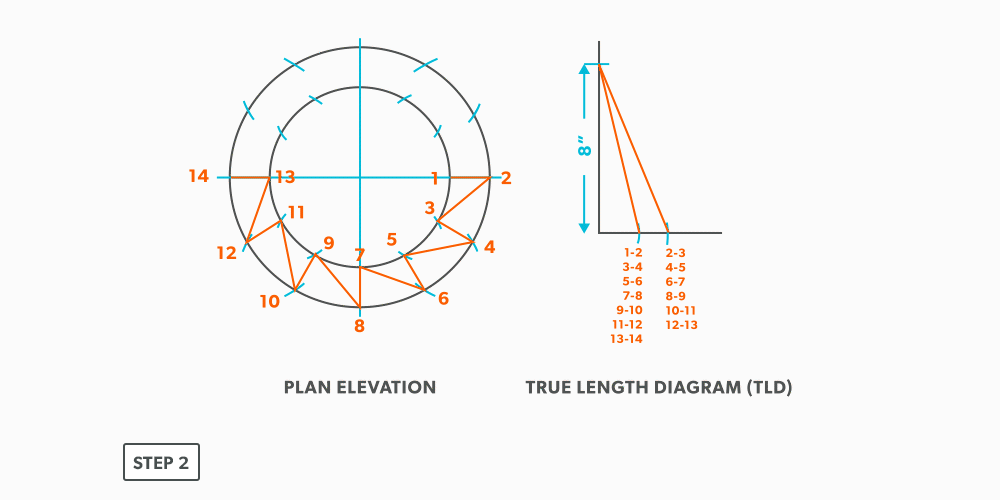
- True Length Diagram (TLD) – a 90° corner in that we use to find the actual length of a line.
- Triangulation from Plan View – the length of an element line, set 90° to the vertical height, gives the true length of that line.
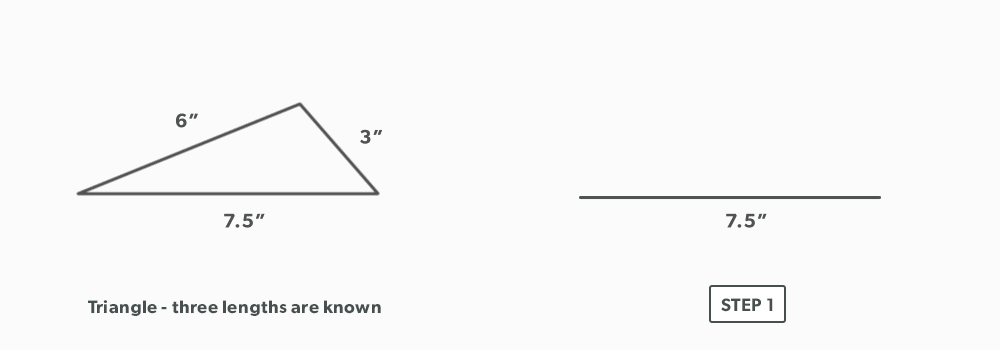
Triangulation is defined as using two known points to create a third. If we think back to geometric construction, we created triangles such as a 3-4-5 in this manner. The development of patterns using triangulation is an extension of that process. Developing one triangle after another, we build 2D patterns for 3D objects.
In this unit, we will focus on Triangulation from plan view.
Let’s look at a right triangle in orthographic terms. If we look down on a triangle (plan view), we only see the one leg of the triangle. If we look from the front (elevation view), we see the other leg. When we look from the right side, we see a full view of the triangle, with all three legs. The right side is the only view that gives enough information to see the whole triangle.
The same is true when we think of these ideas in relation to a 3D object. With few exceptions, we don’t actually see true lengths of the element lines for an object in the plan or elevation views. They are representations. Think again of the triangle in orthographic projection. If only the hypotenuse was drawn, not a full triangle, the plan and elevation views would still look the same as it did when we looked at the triangle. This is true of any 3D object. The plan and elevation views only show a representation of the hypotenuse from different views. Remember that the element lines or edges only represent the outside of the object.
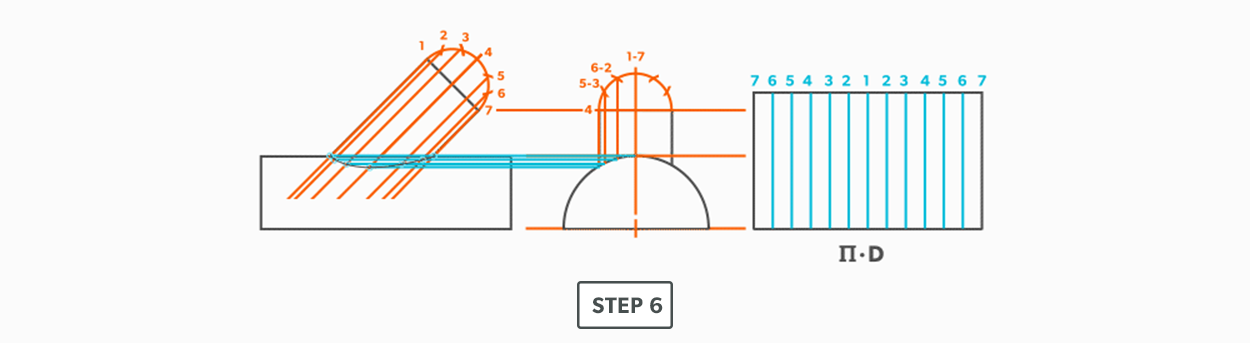
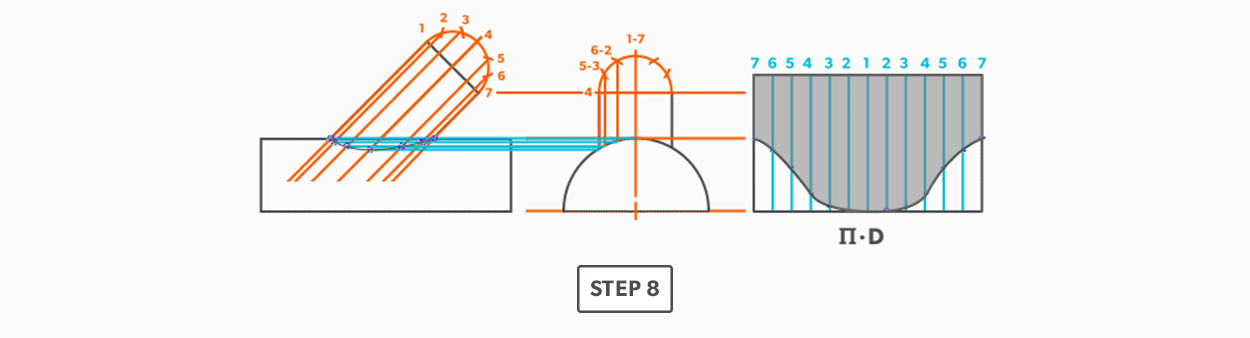
So, to triangulate a pattern for an object, we must find the outside lengths of all the element lines, the hypotenuses. We must get all element lines from an object into a right side view. With a 3D object, this takes rotating the object over and over, putting each line individually into a right side view. This would take a tremendous amount of work, but, we can do this quite easily by using what is called a true length diagram. This is know as finding true lengths and is the foundation that all triangulation is built upon.
For triangulation, we must find the true lengths of the element line before we create any triangles. And the true lengths are the hypotenuses between the plan length and vertical height. This is the way we triangulate from plan view.
If we again think of the plan view, we have the length of one leg. It doesn’t matter how the line is orientated, it is shows us how much the outside edge (hypotenuse) is leaning. We also have the vertical height of the triangle in the front view. So, if we take these two known lengths and place them in a 90° corner, it shows us the same as the right side. It show us the hypotenuse. It shows us the true view of the element line. This is known as a true length diagram.
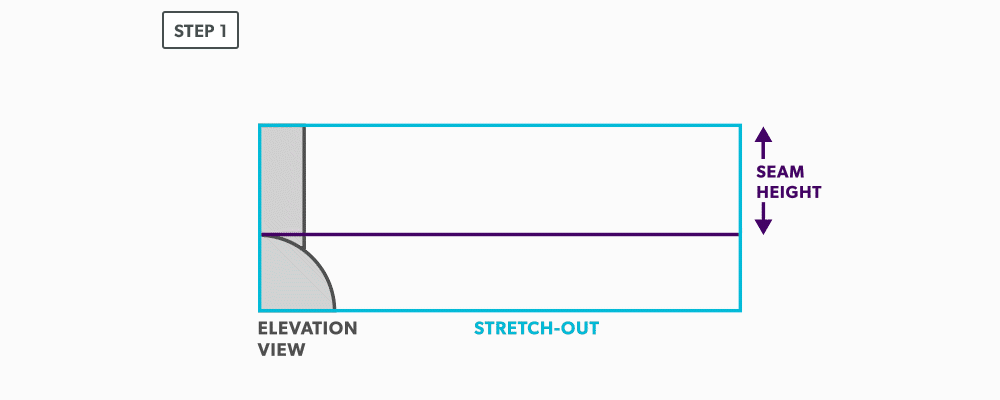
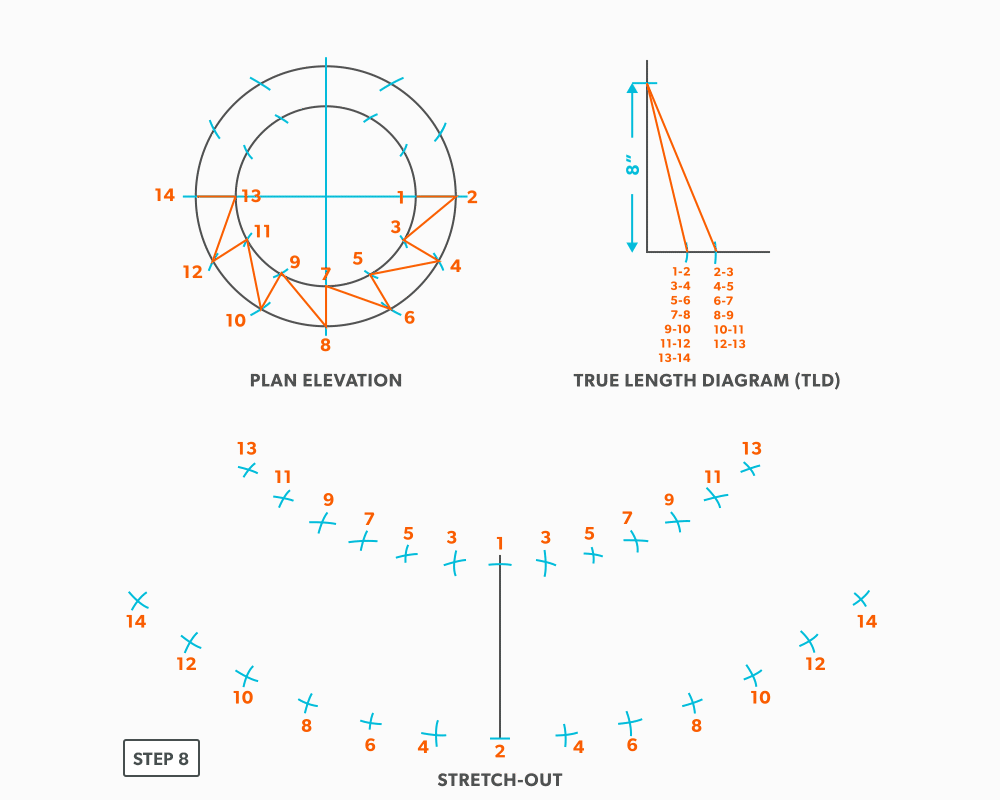
Basic Steps
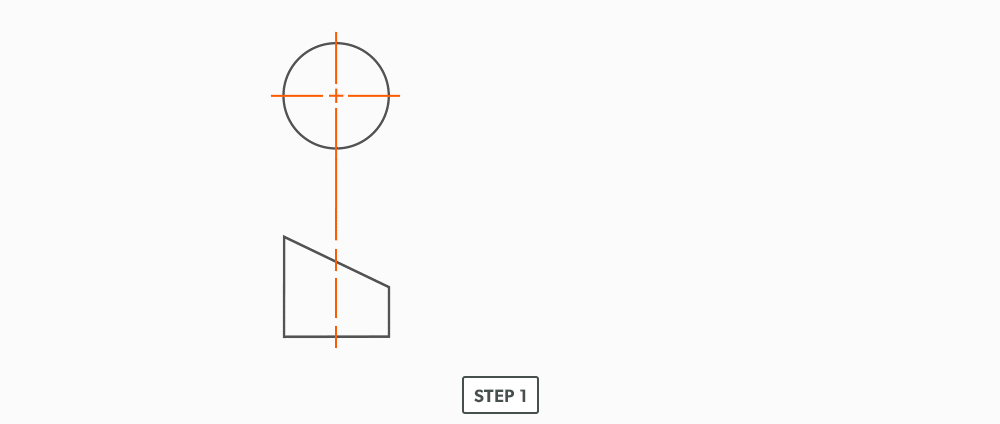
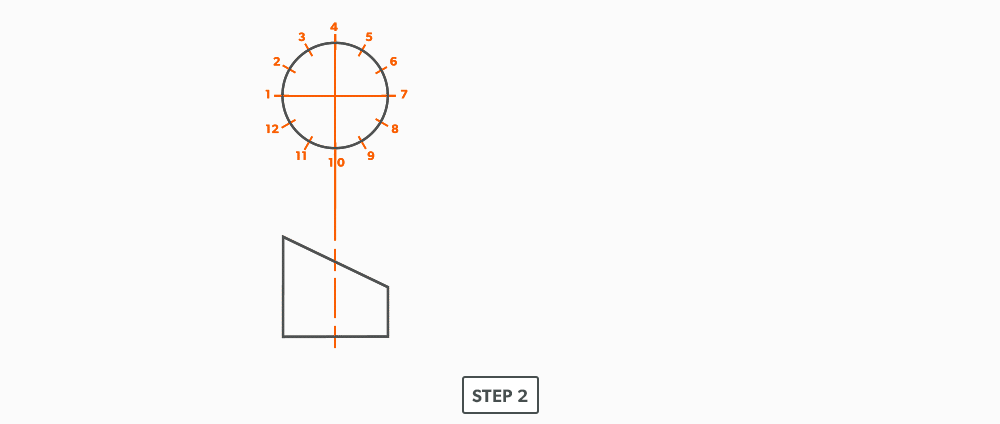
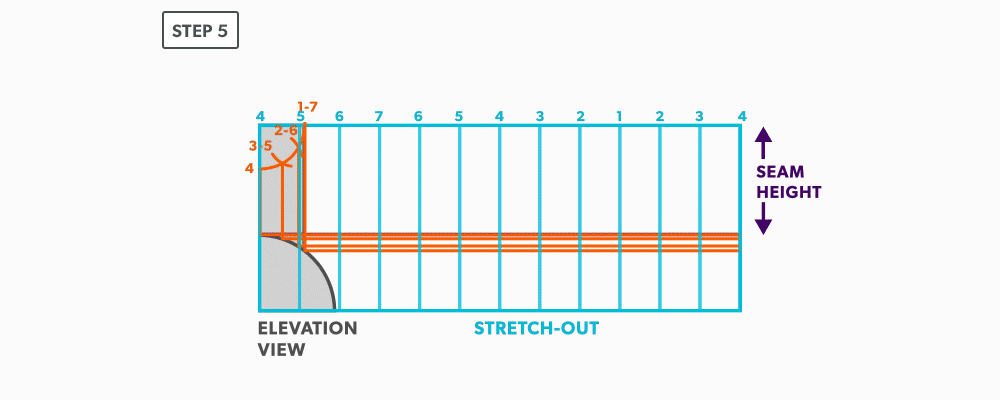
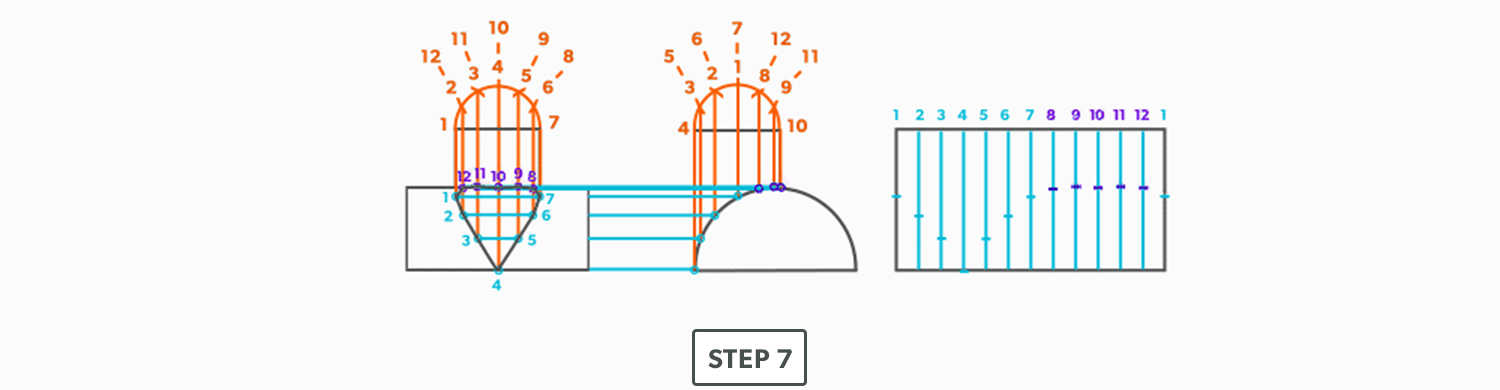
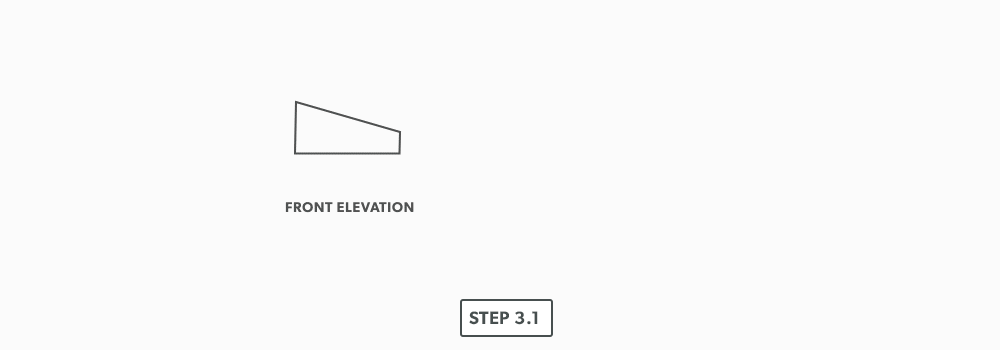
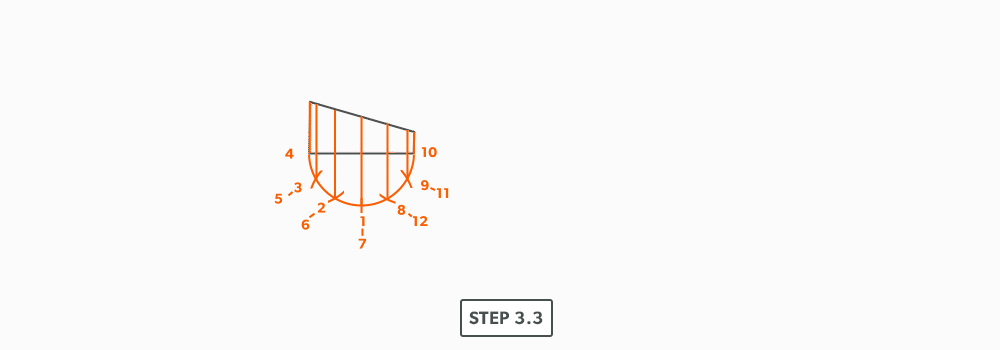
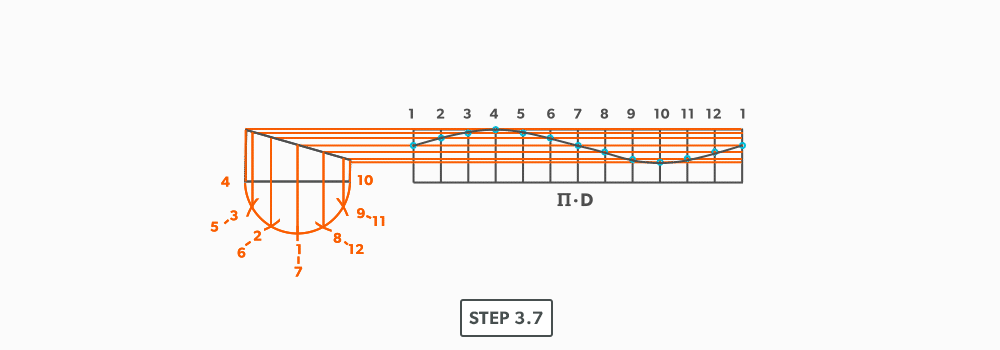
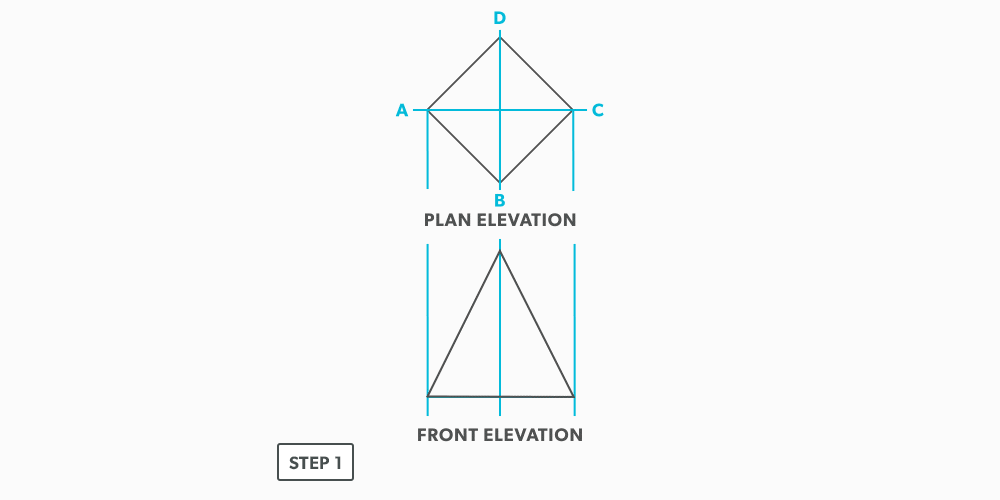
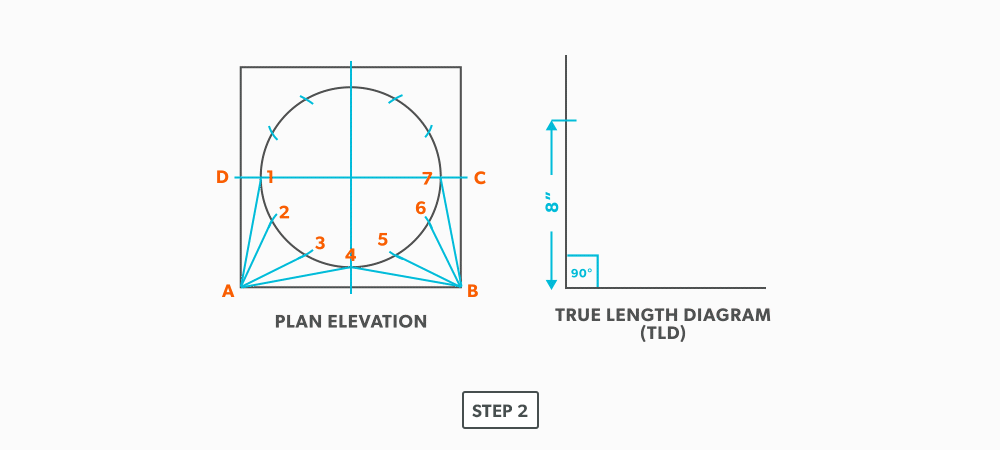
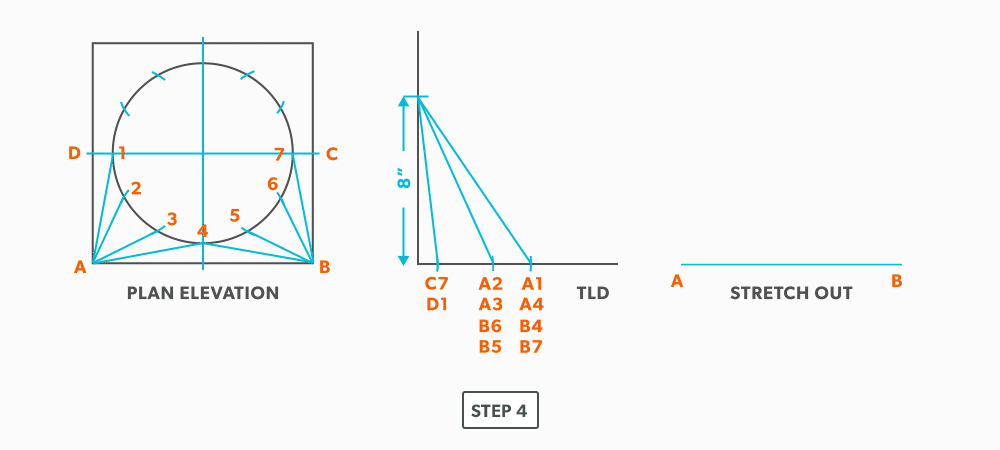
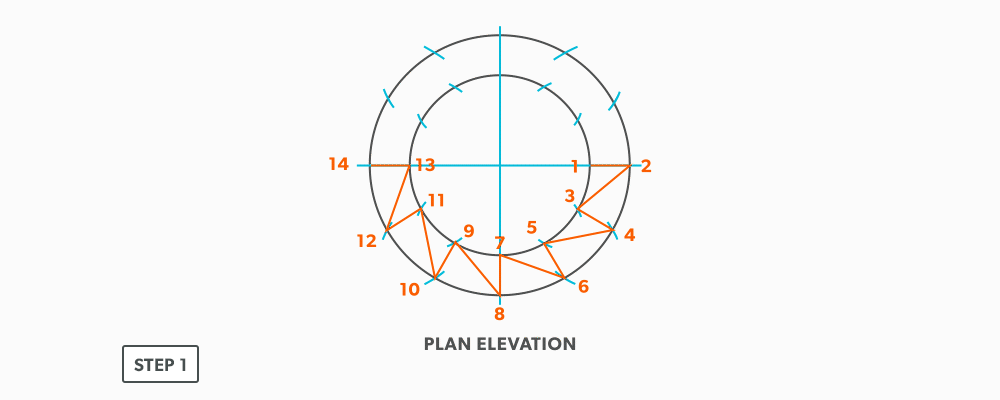
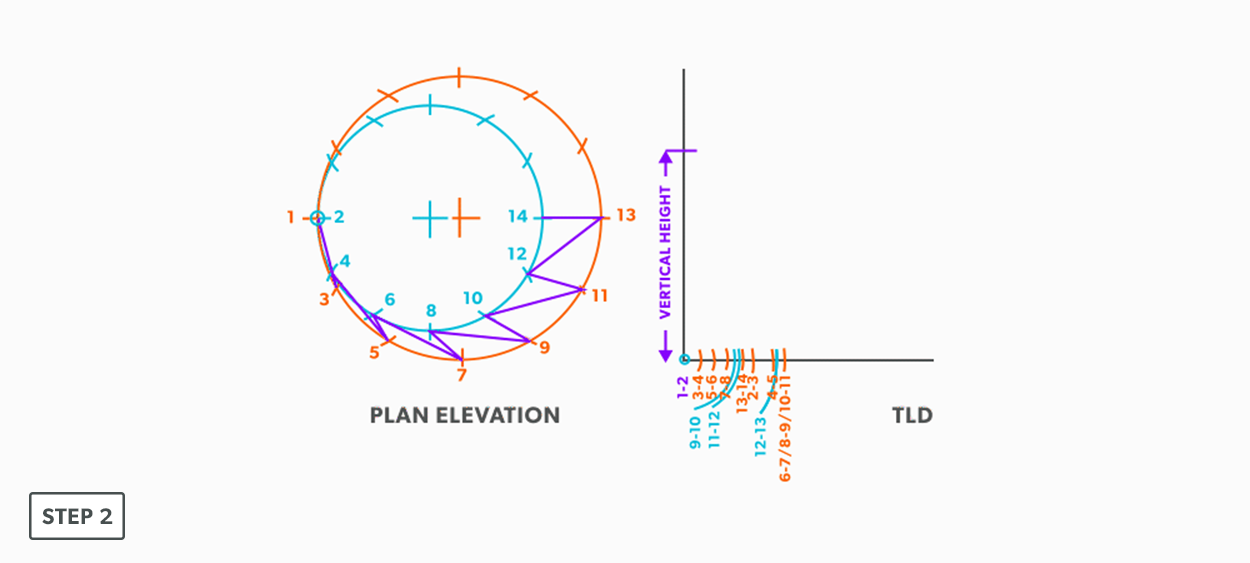
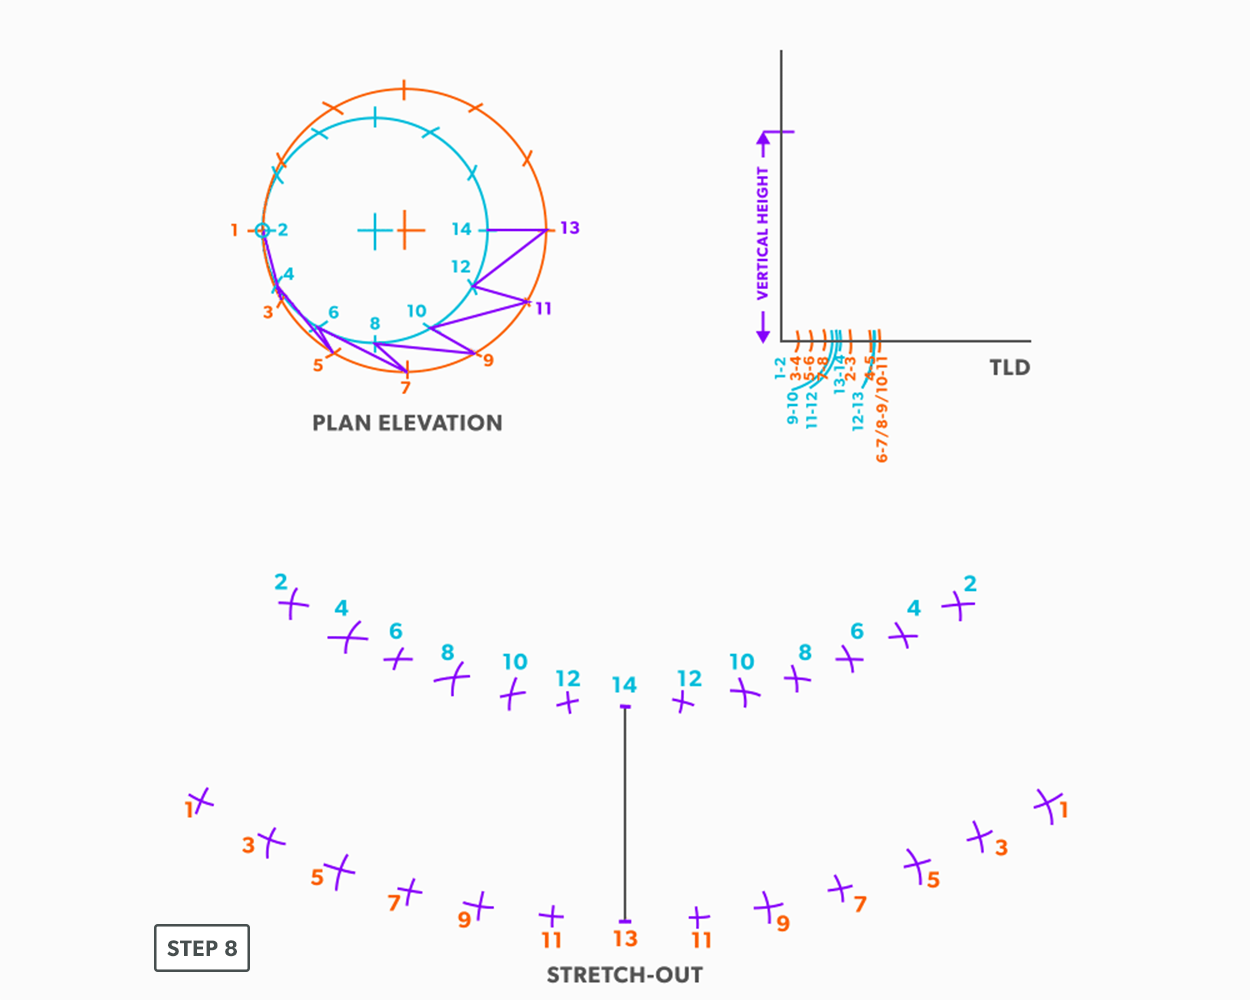
- Draw a full elevation view and plan view.
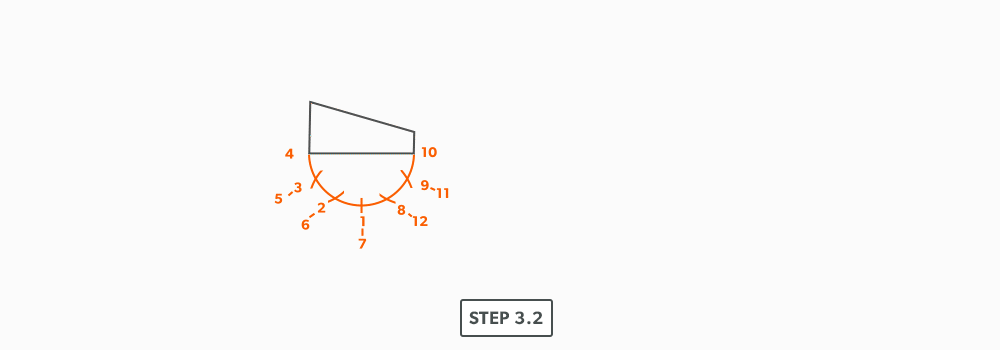
- Draw in all element lines in both views. An element line which appears as a dot in one view, is a true length in the other view. As well, a line parallel to the x-axis in the plan view is also a true length in the elevation view.
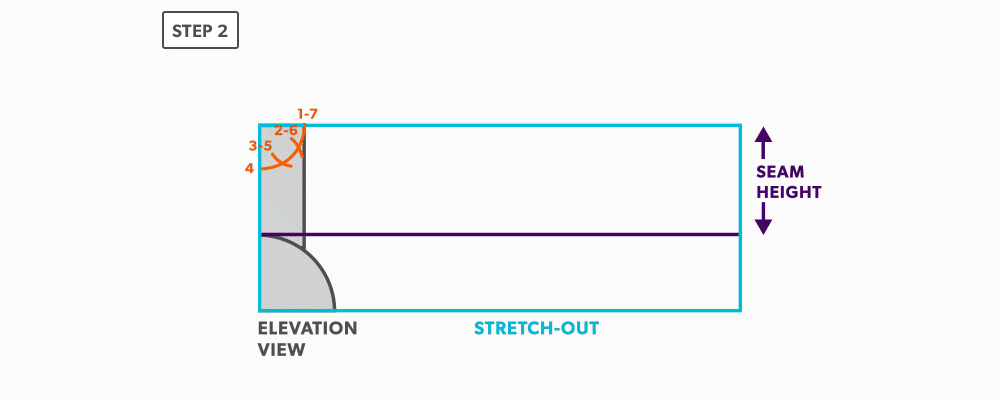
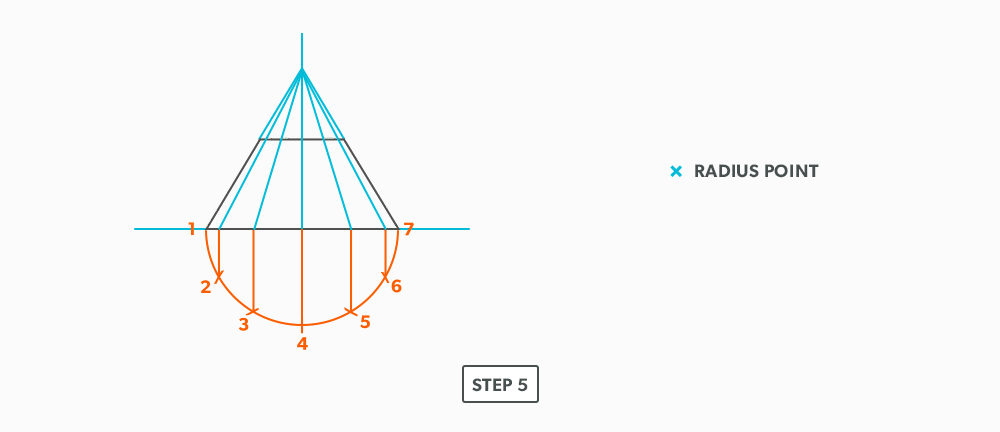
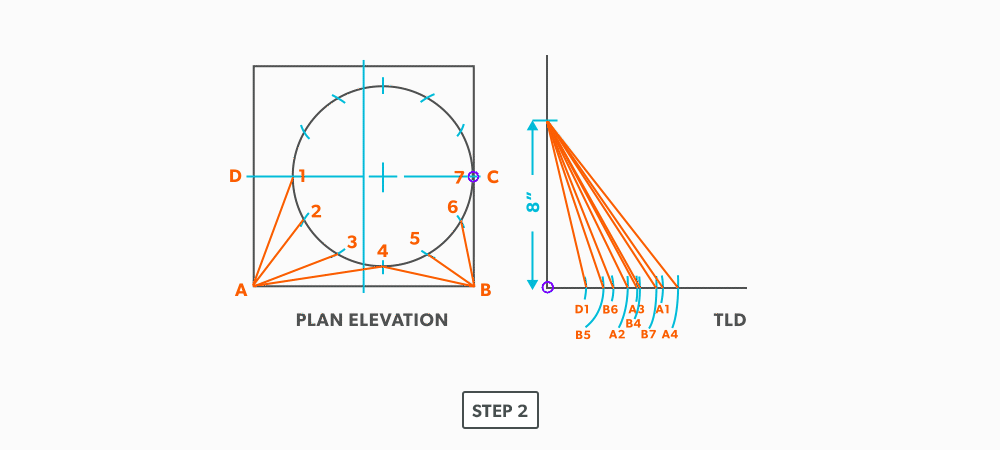
- Label the element lines. It is common to label round shapes with numbers and square/rectangular with letters.
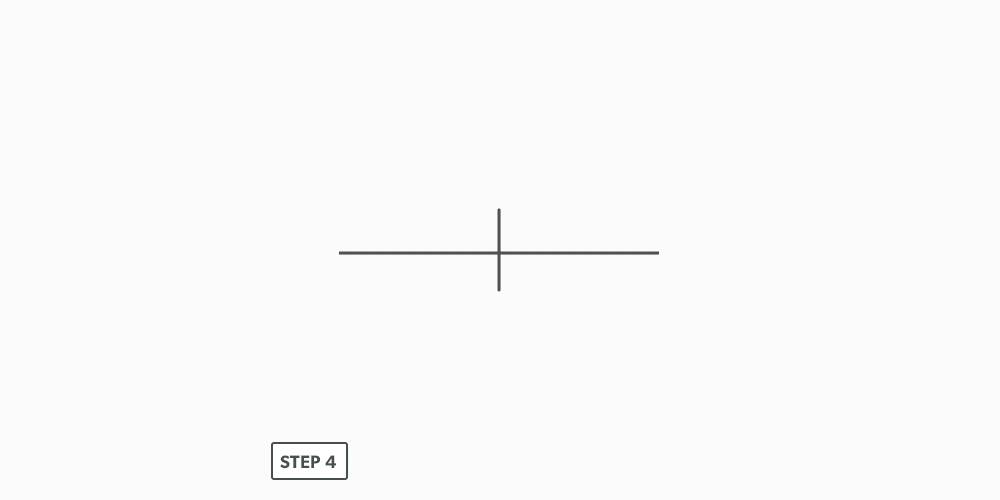
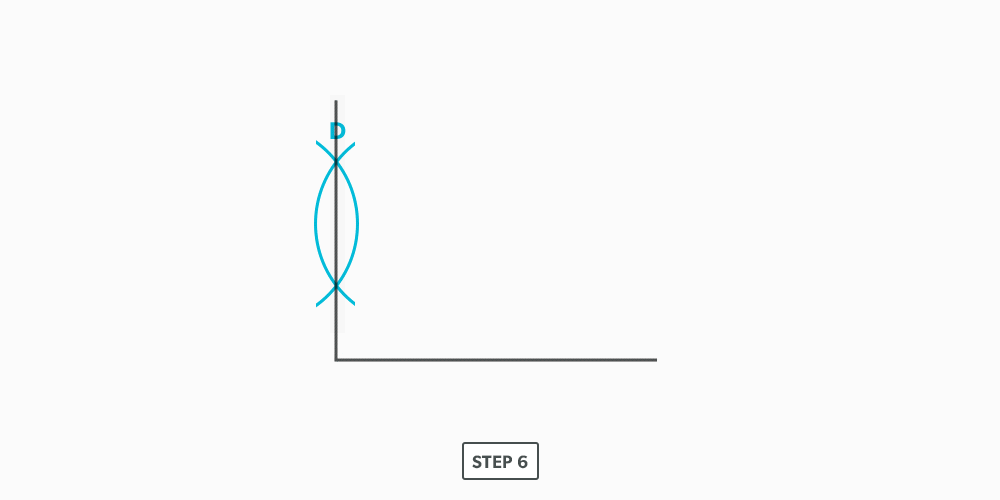
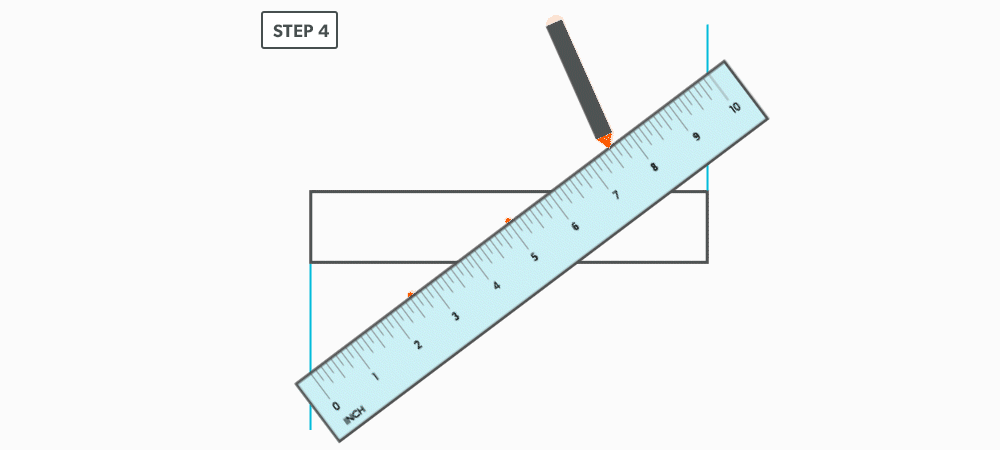
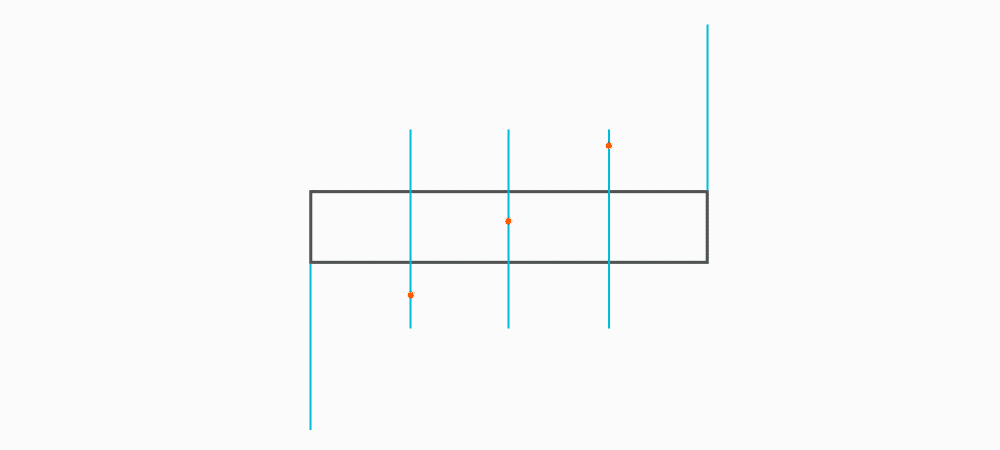
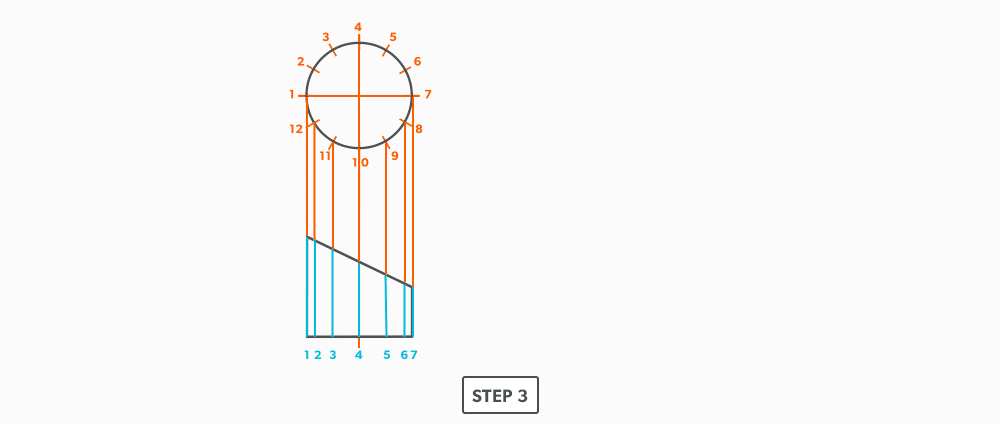
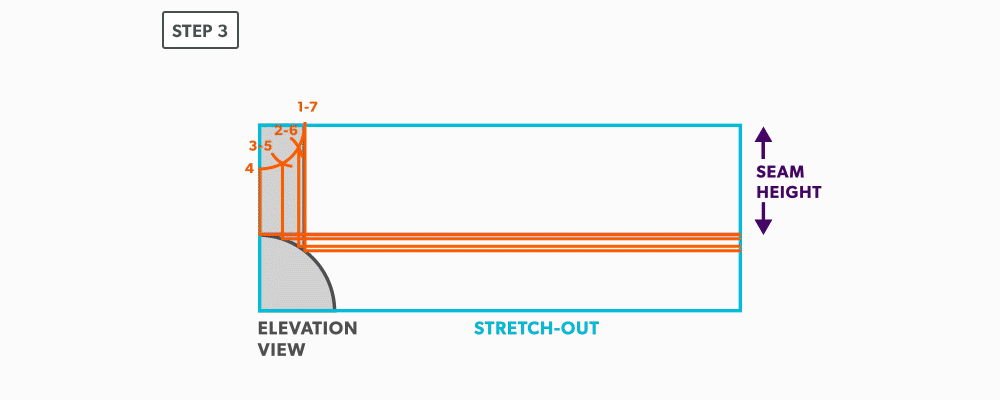
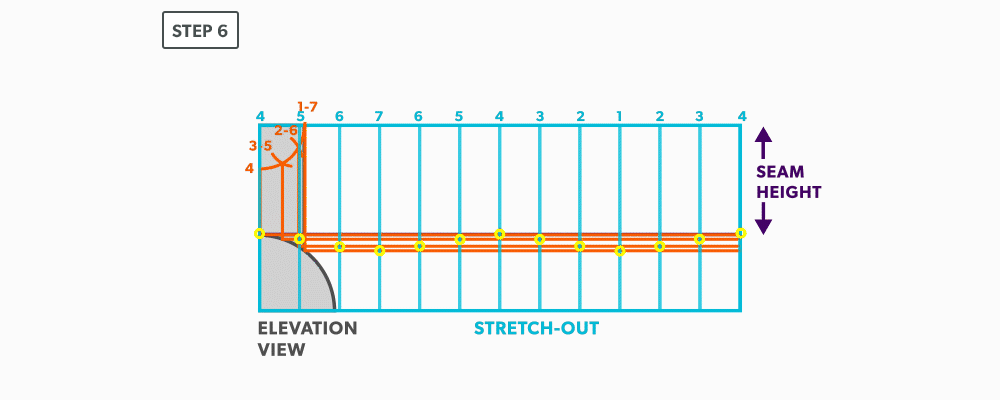
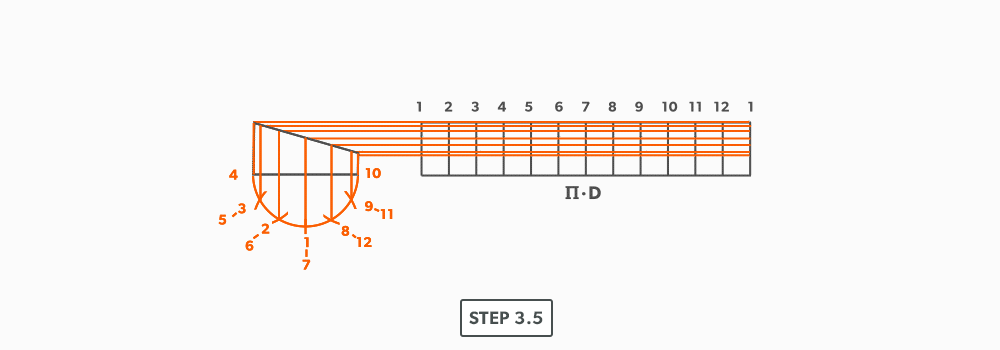
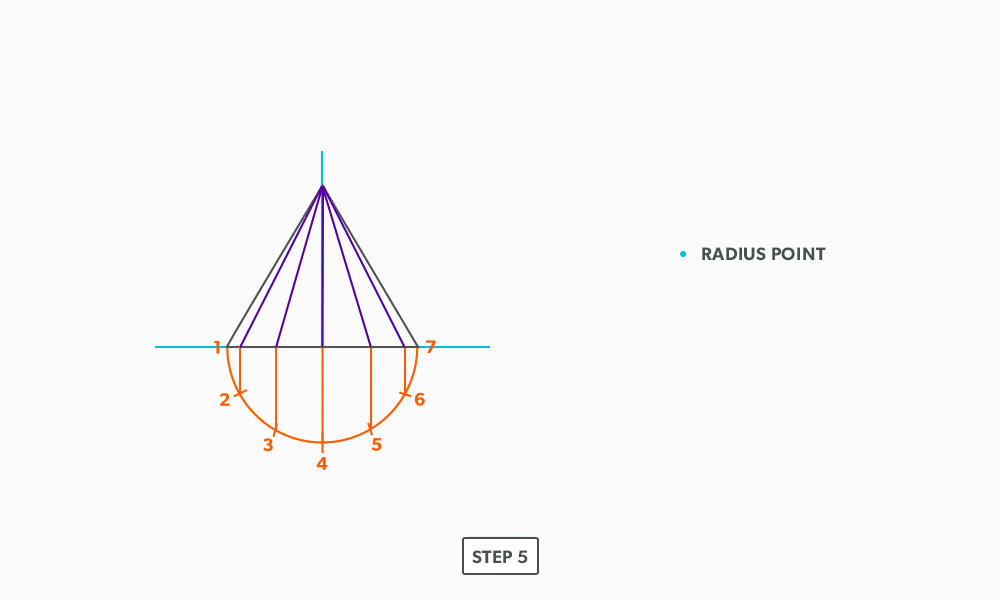
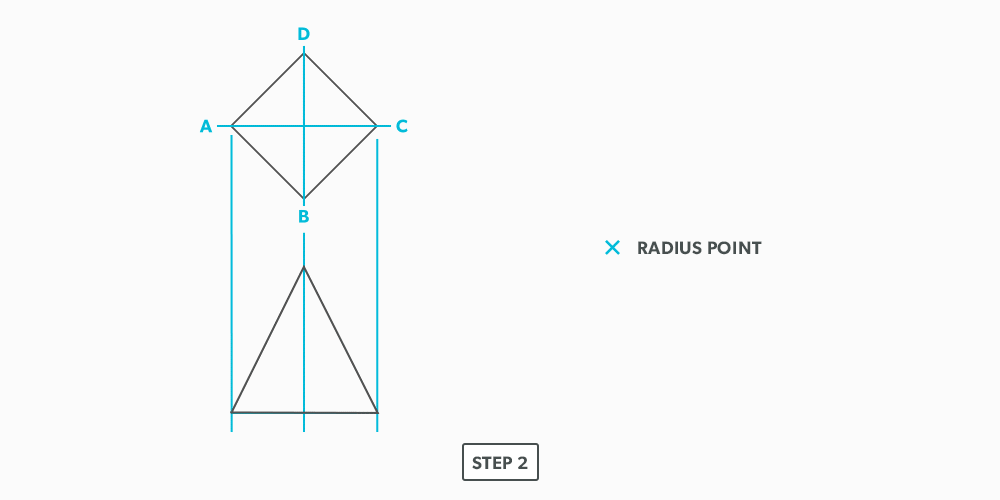
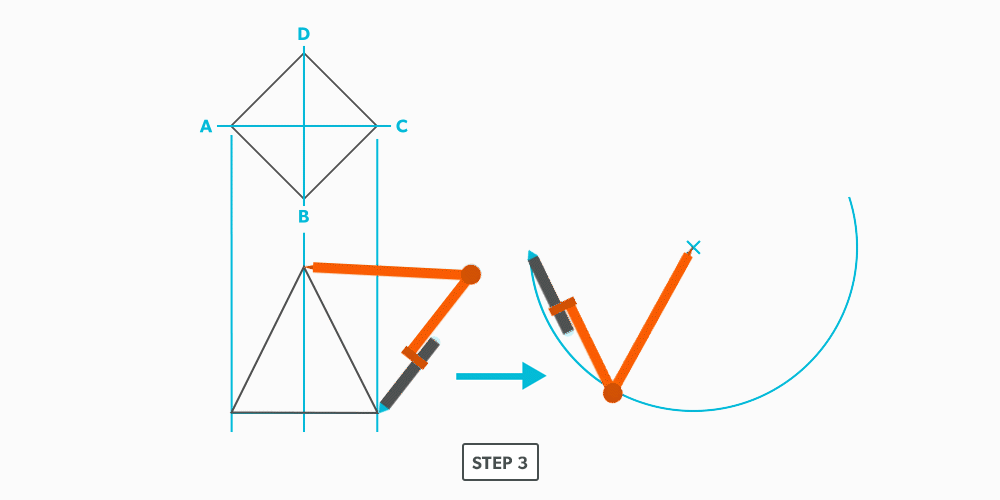
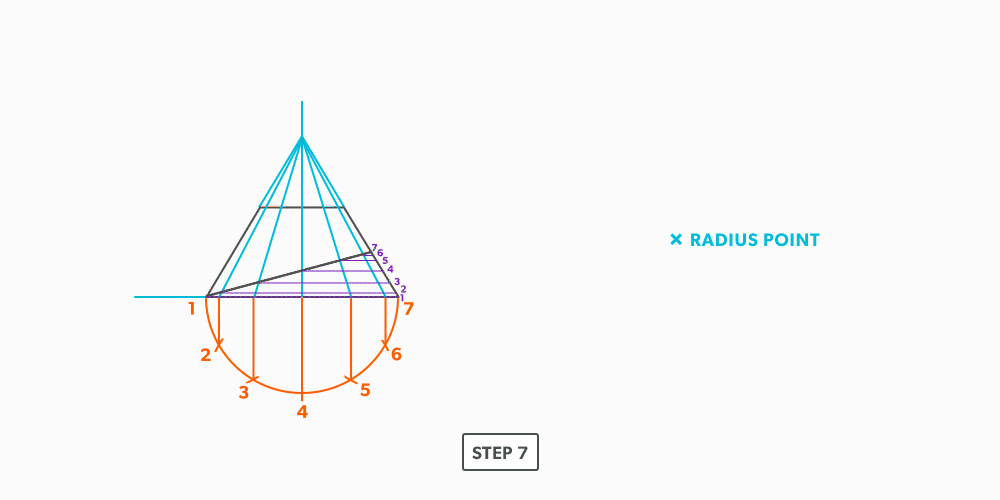
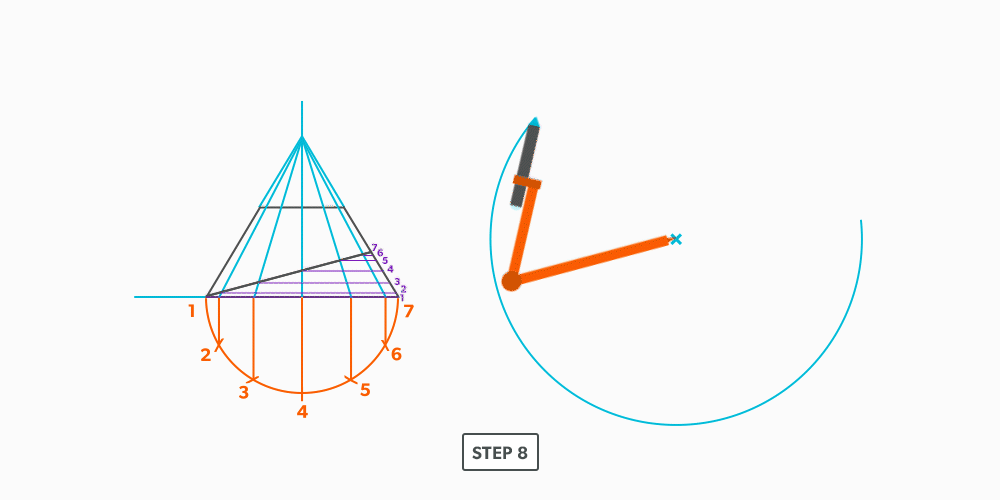
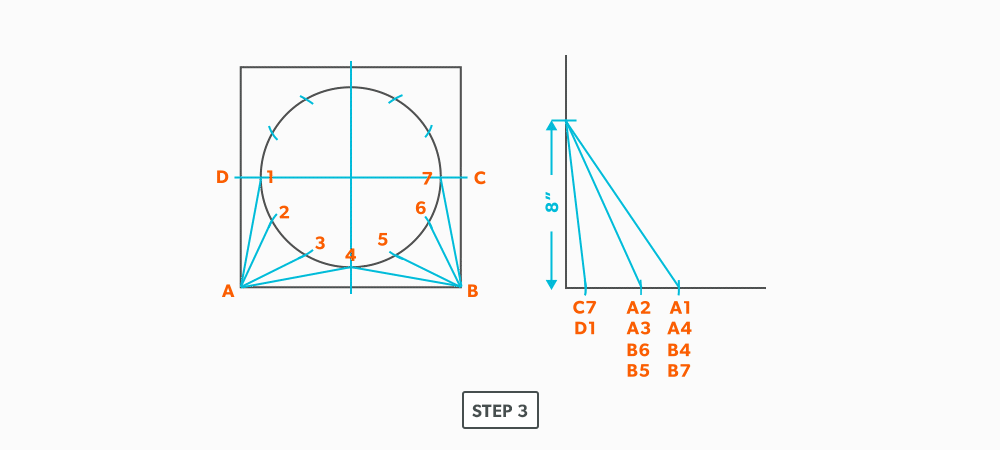
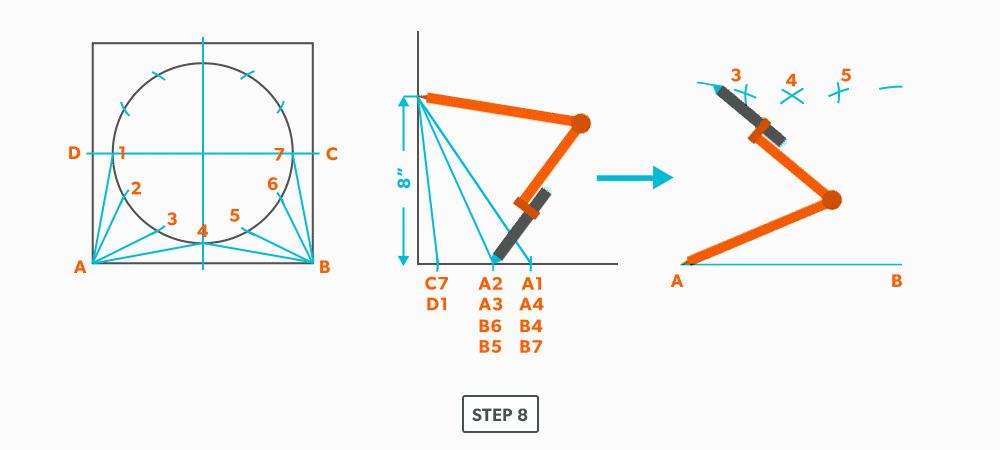
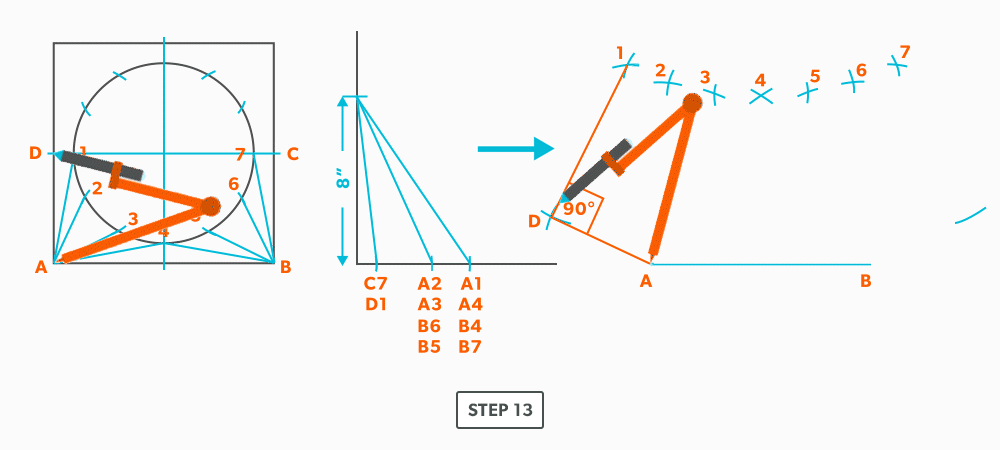
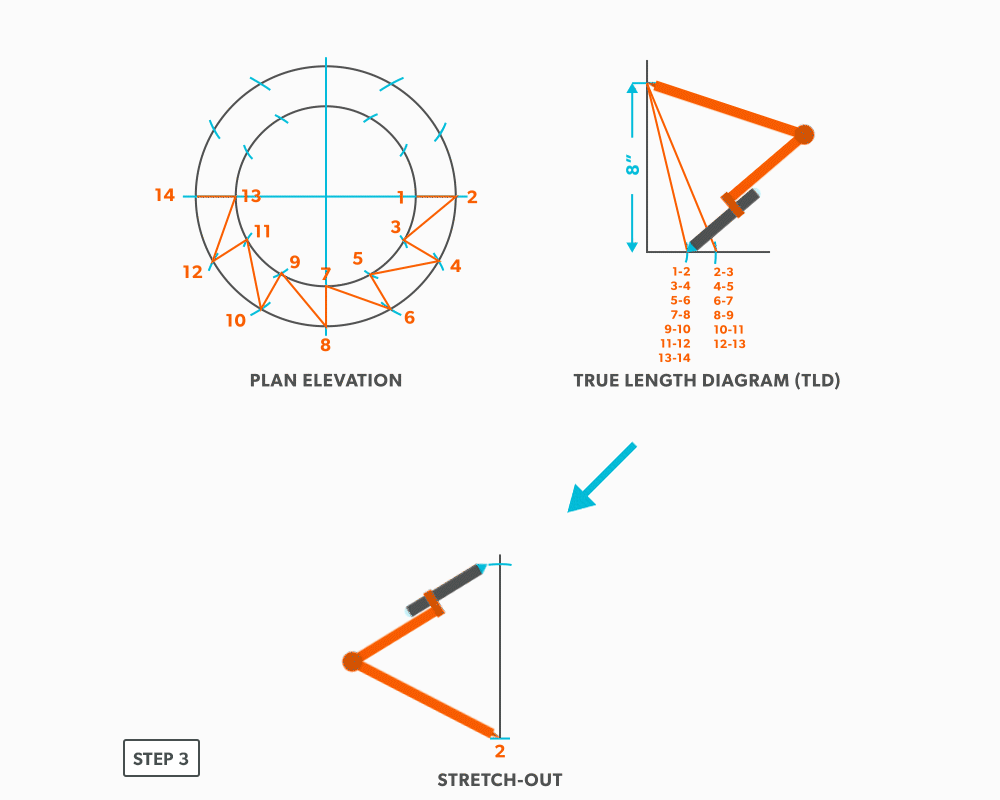
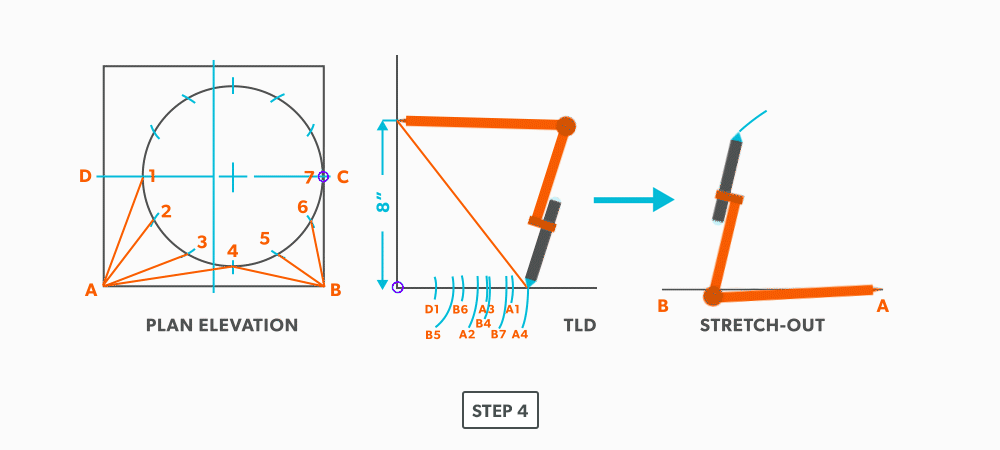
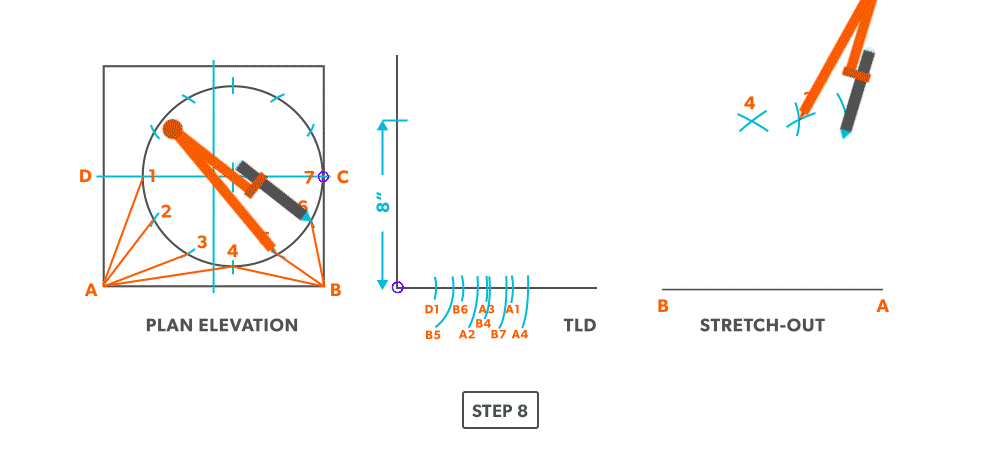
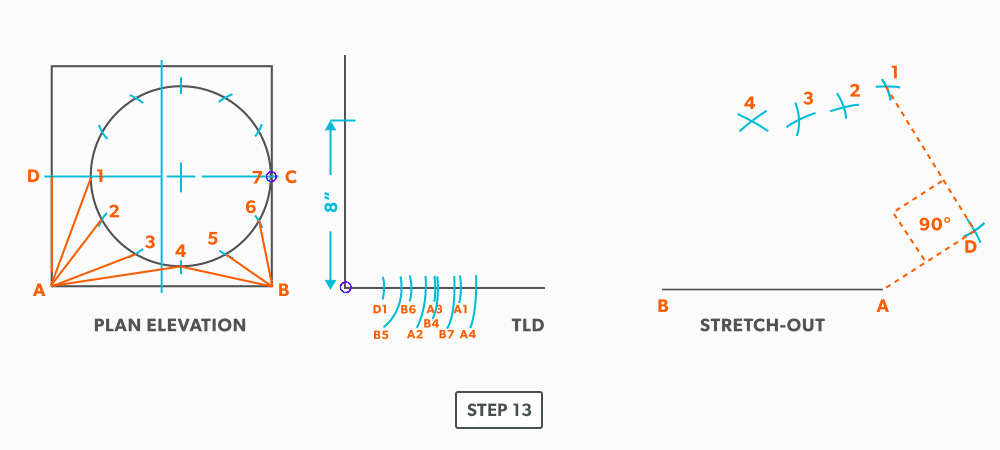
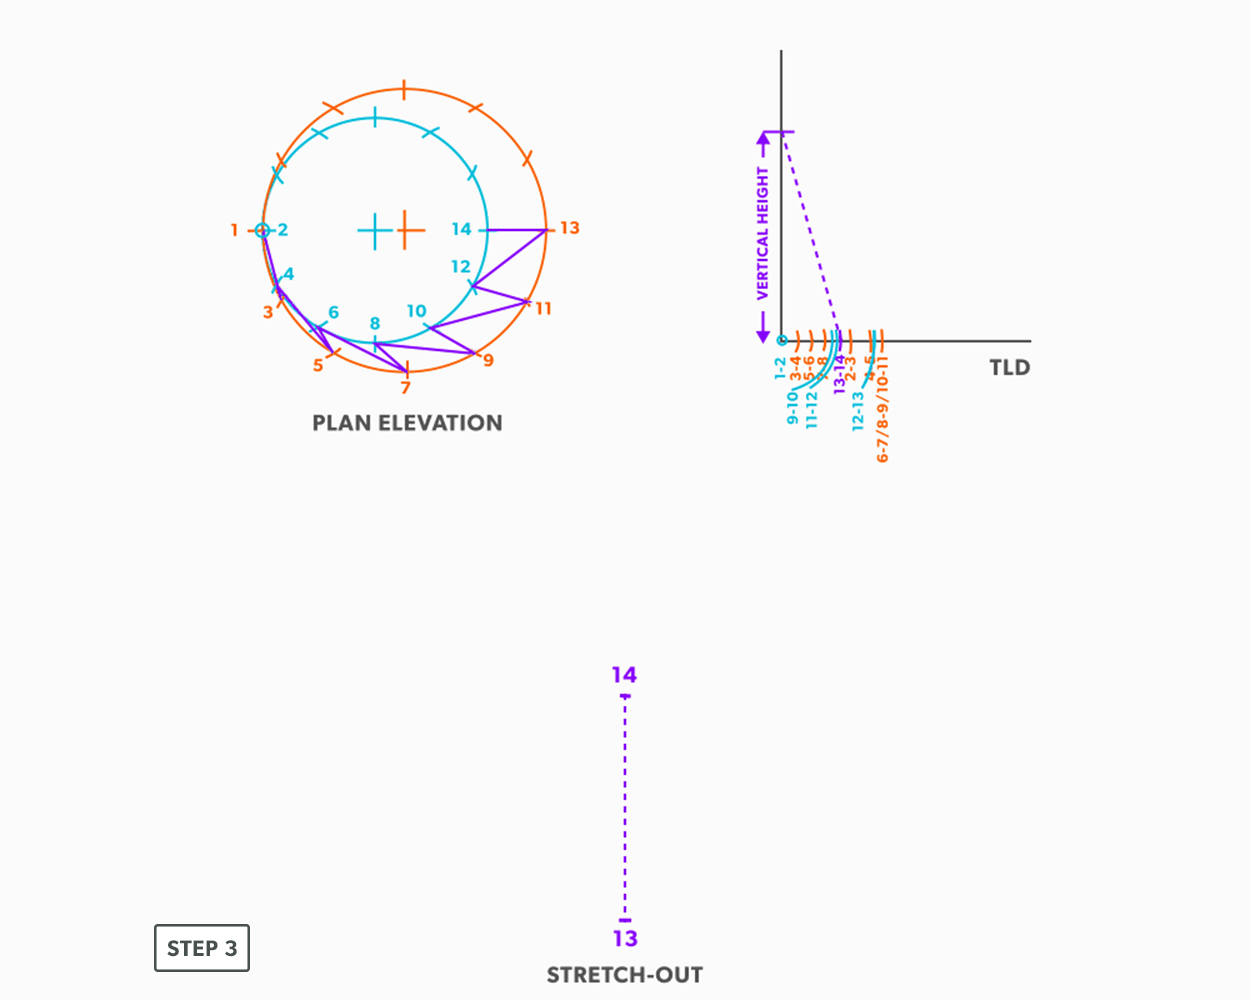
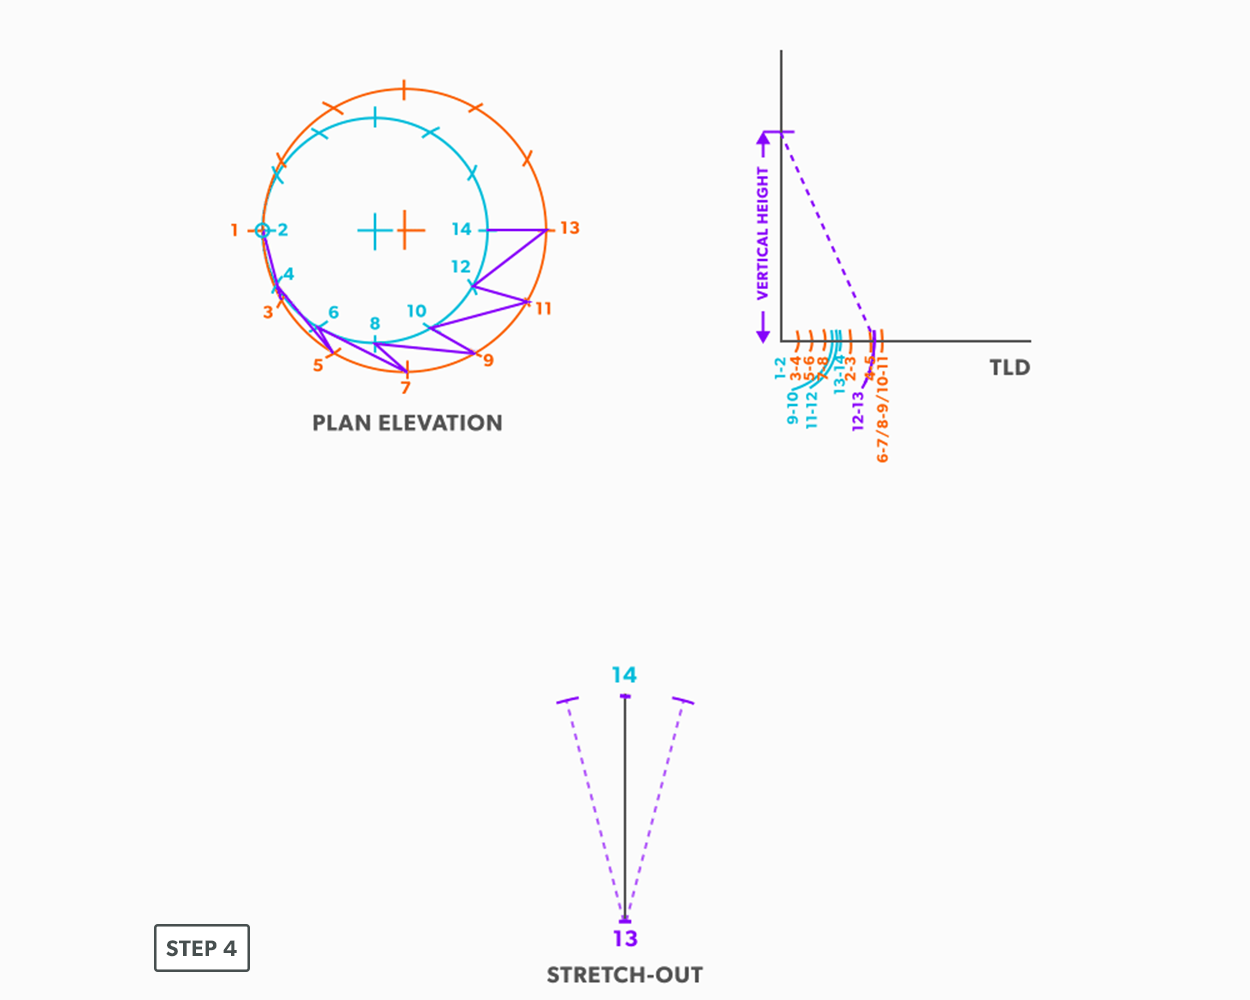
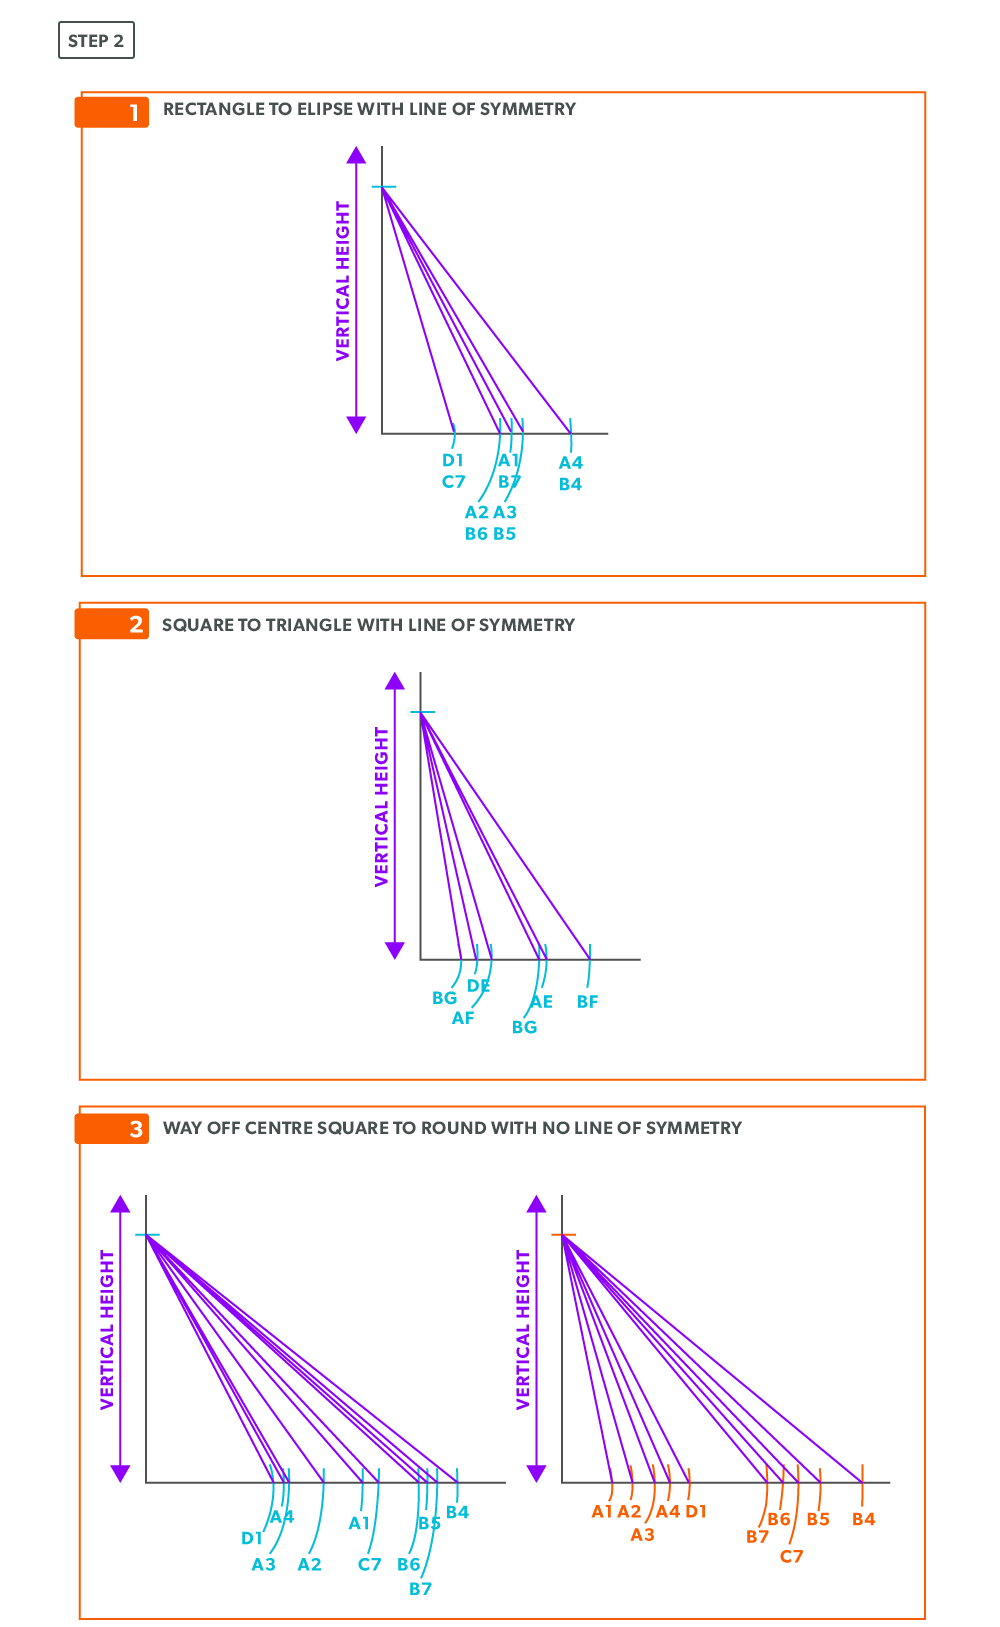
- Create a 90° corner for a true length diagram and transfer all the element lines from the plan view into it.
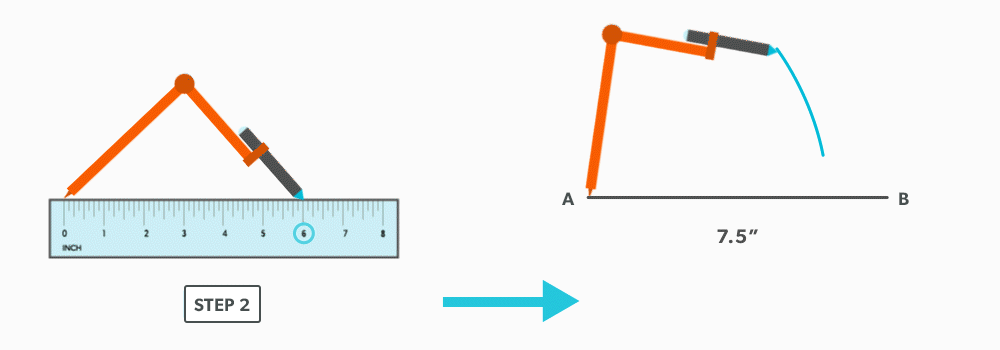
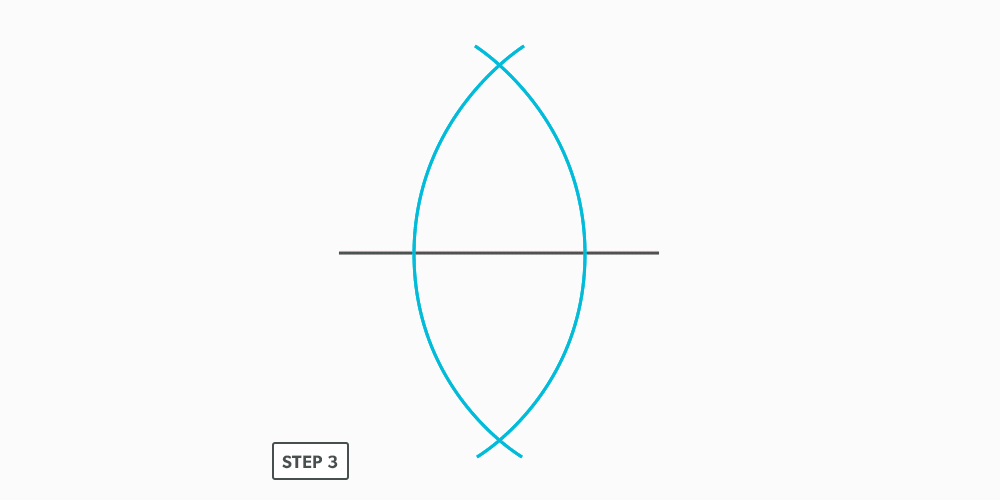
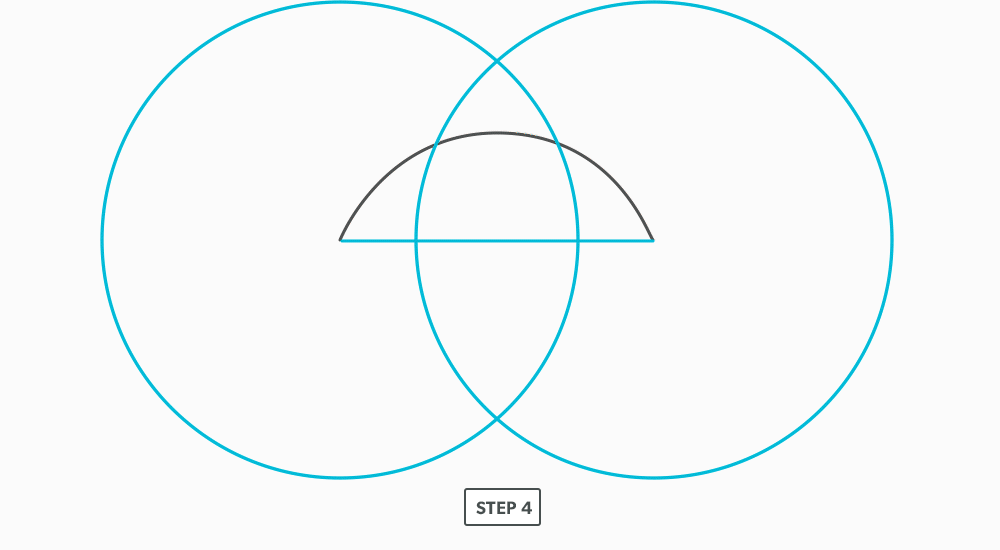
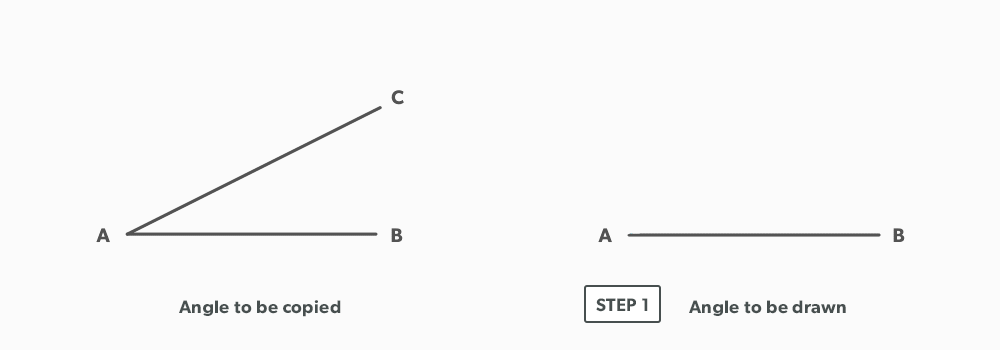
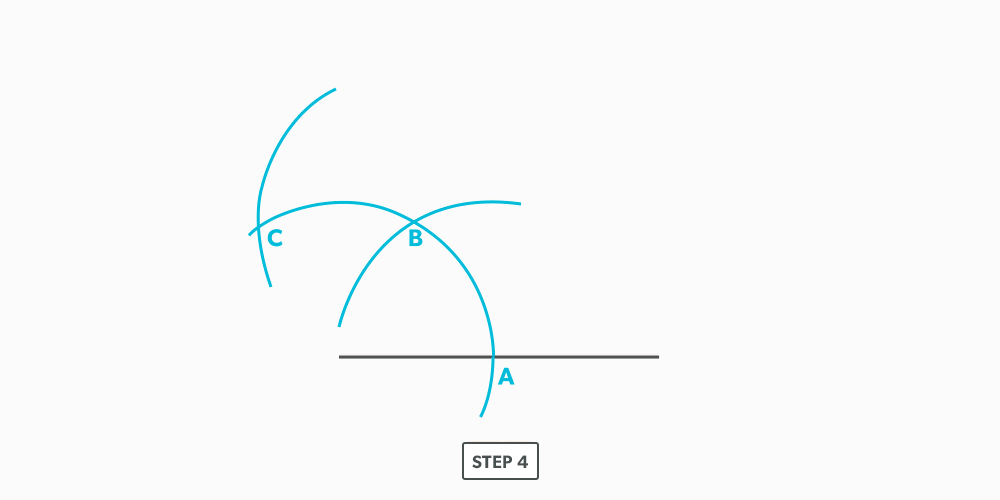
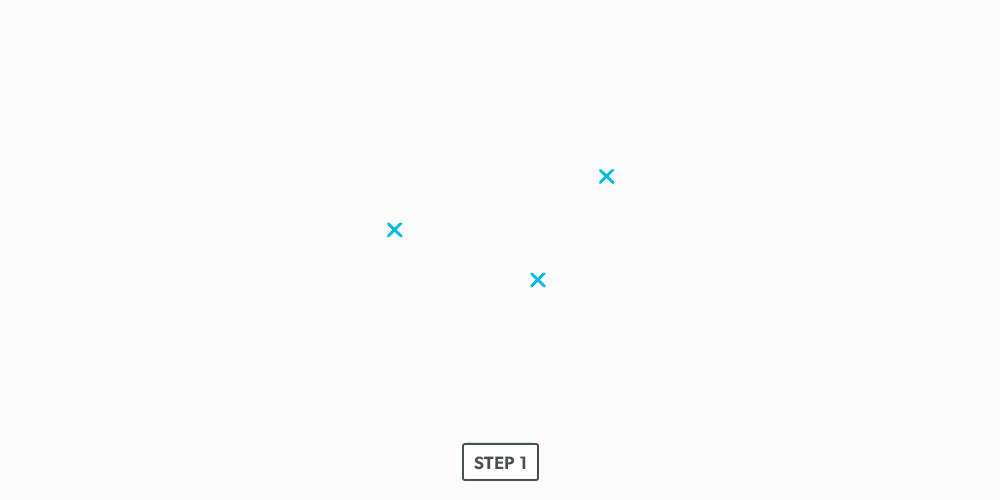
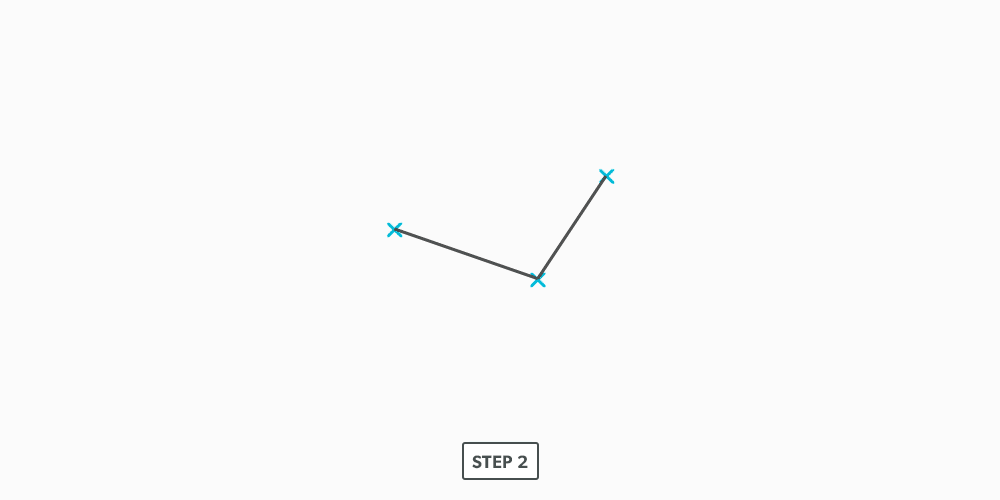
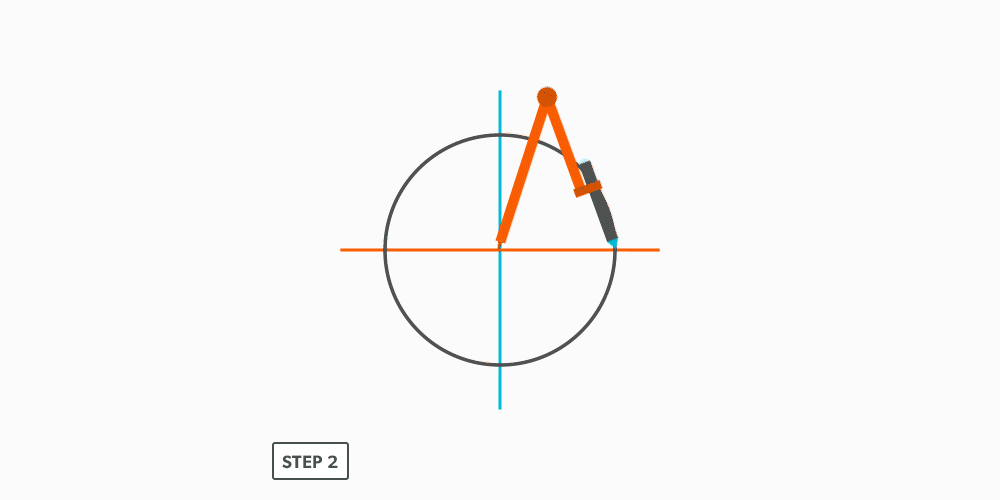
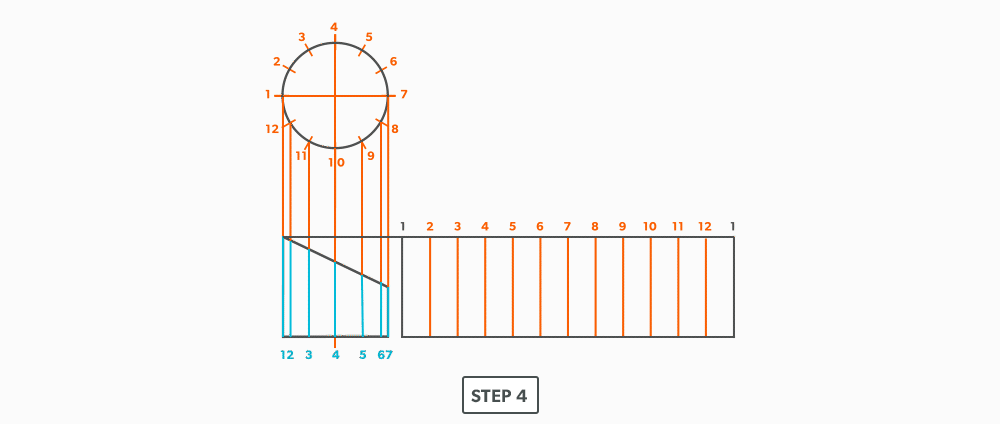
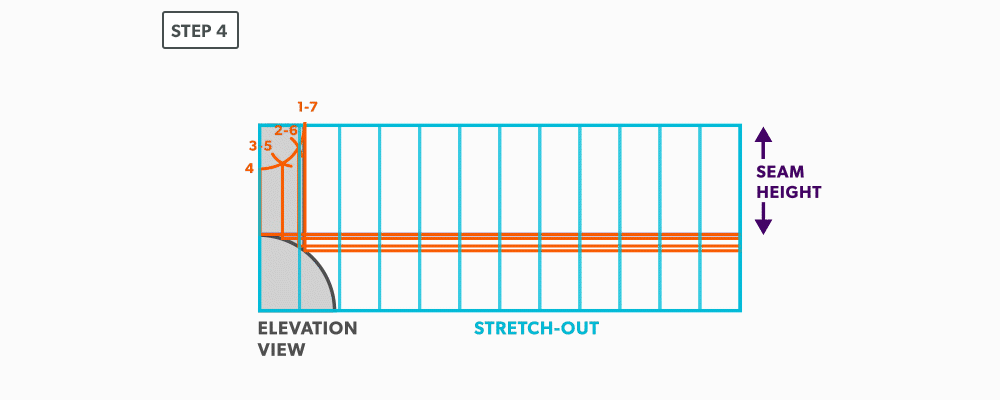
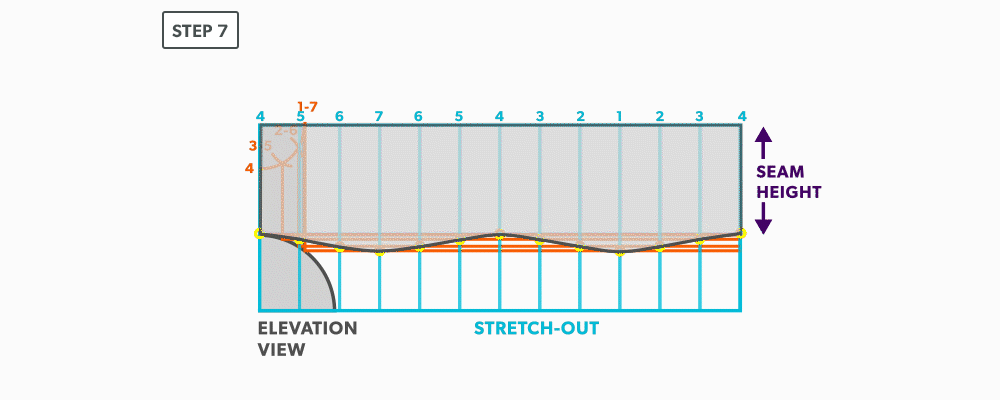
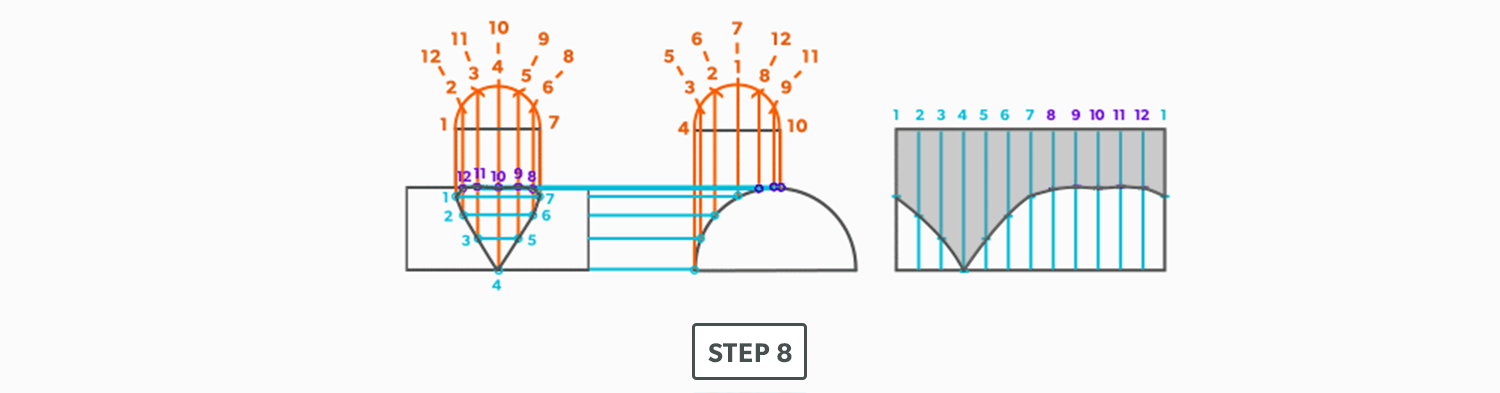
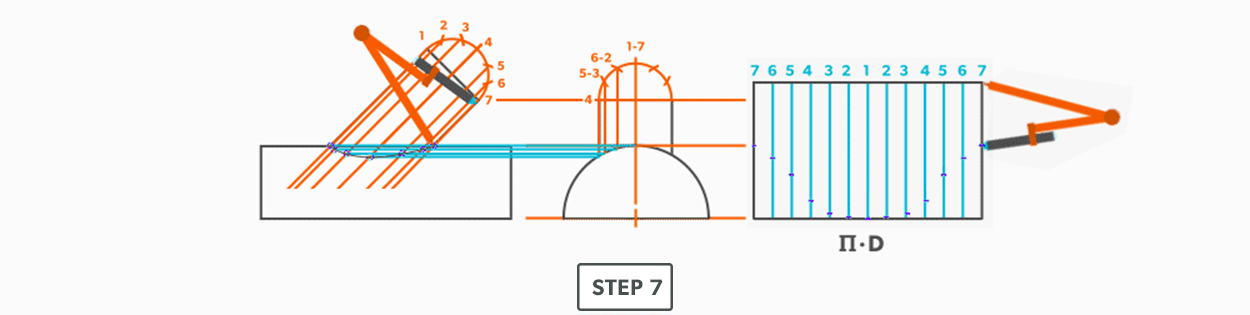
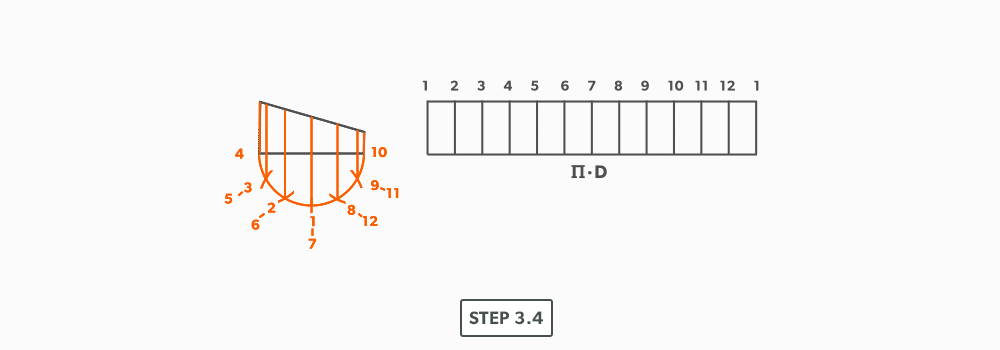
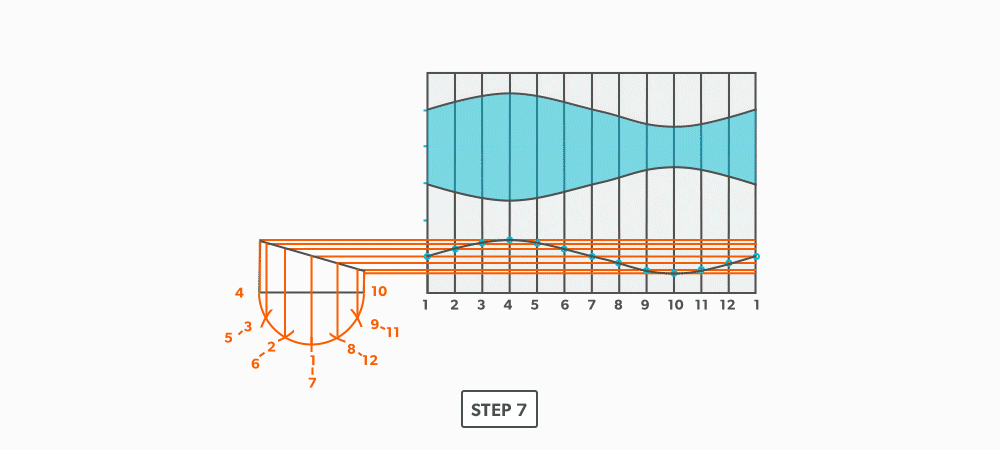
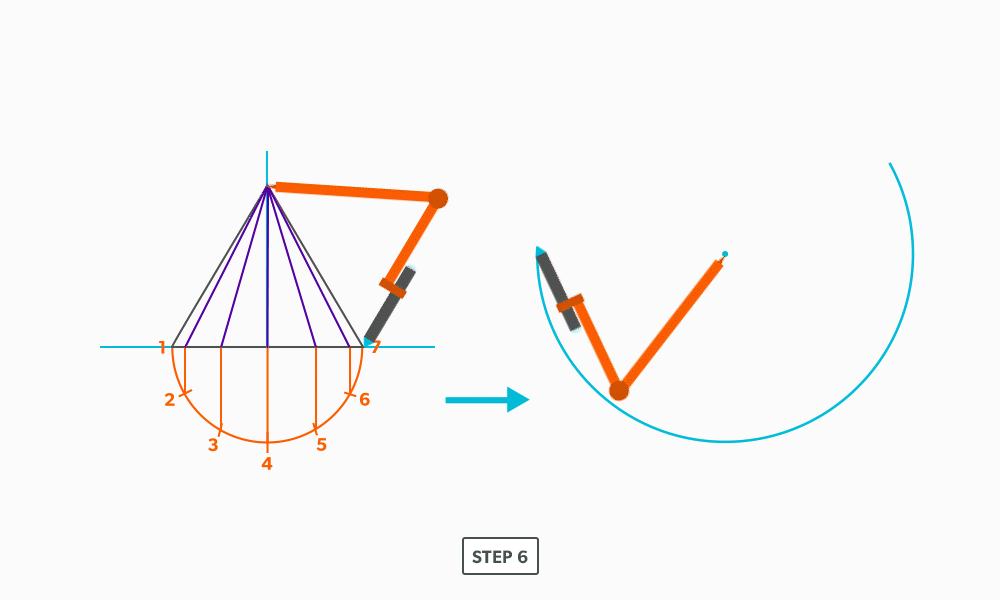
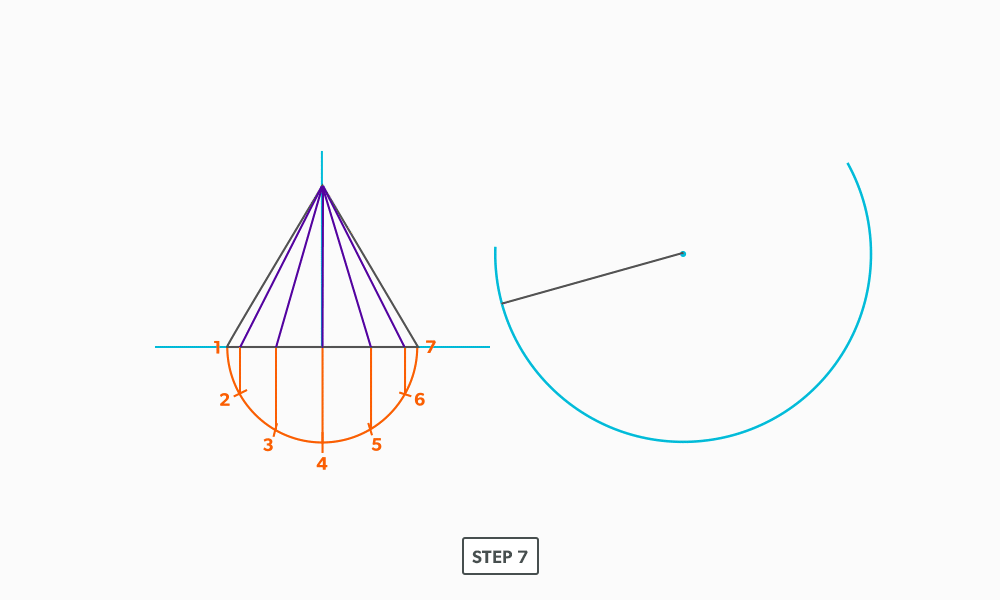
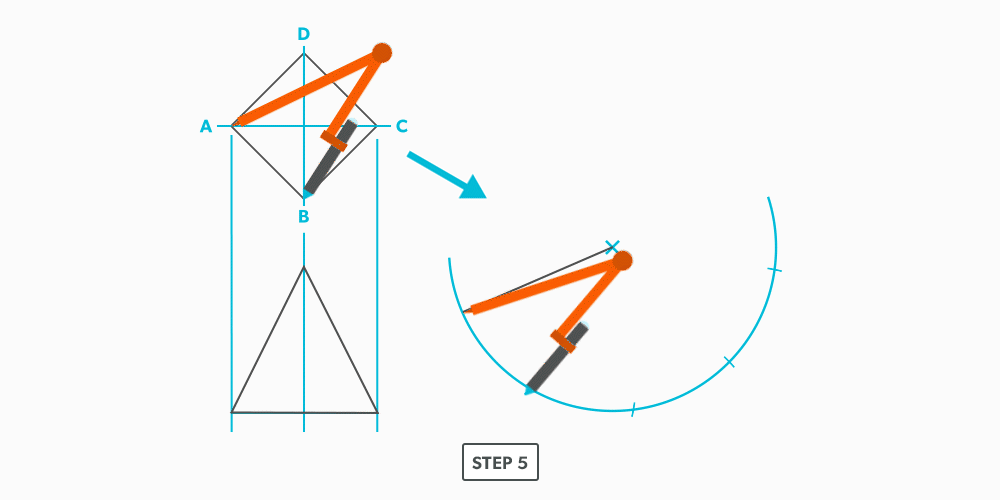
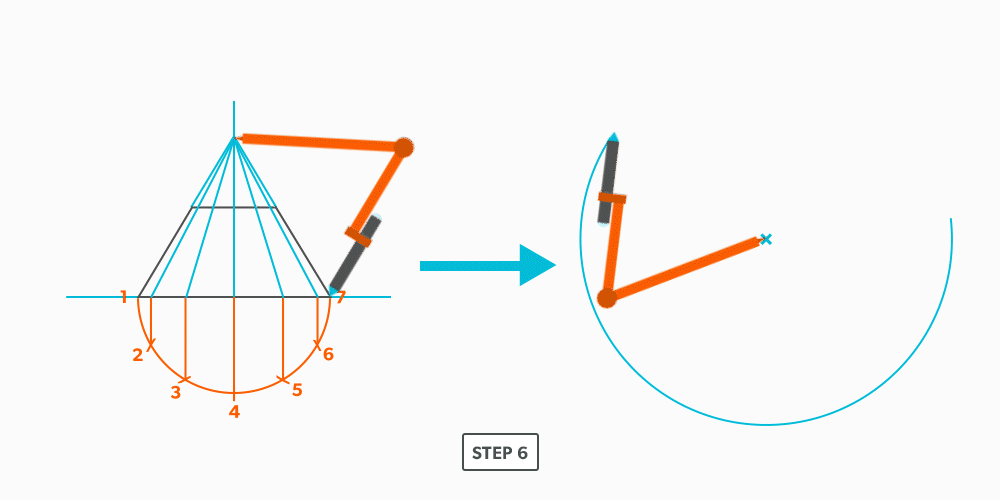
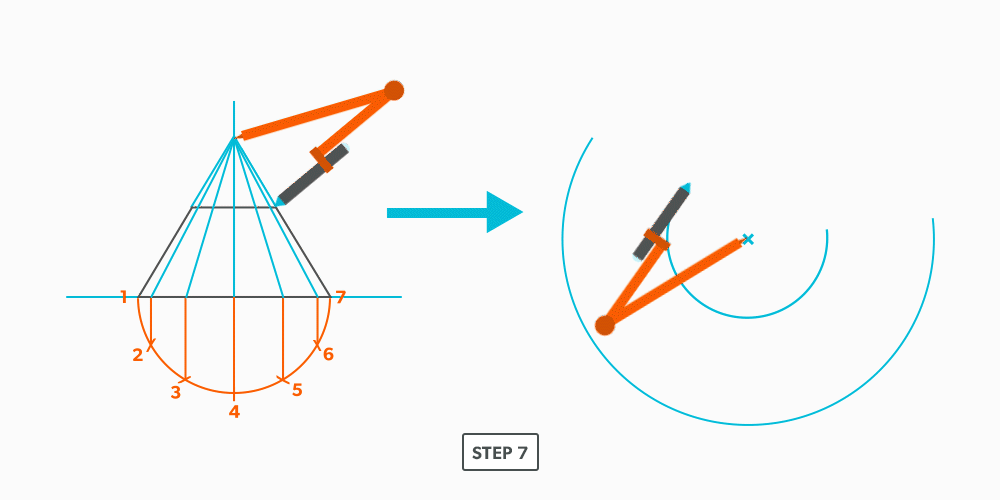
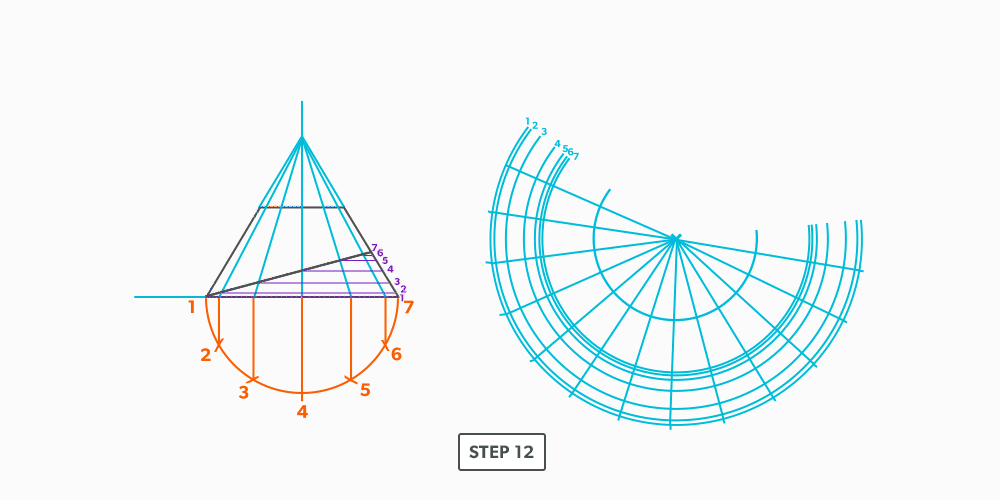
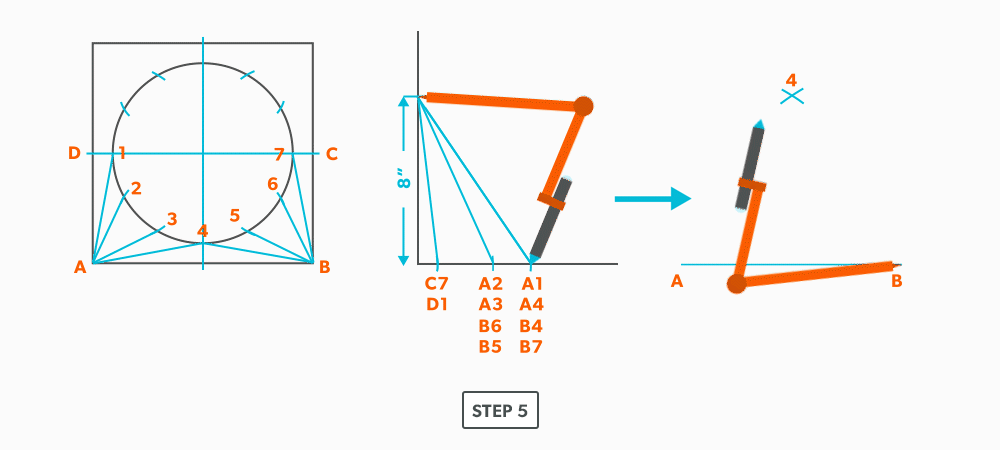
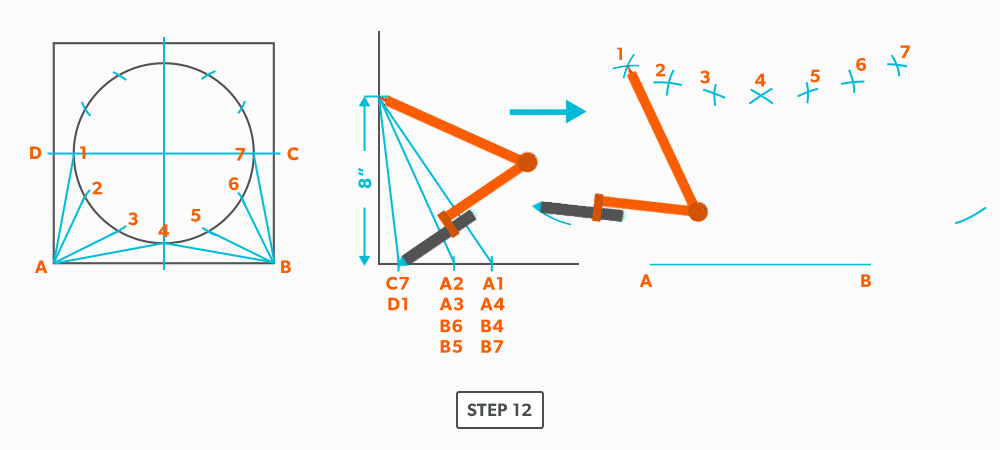
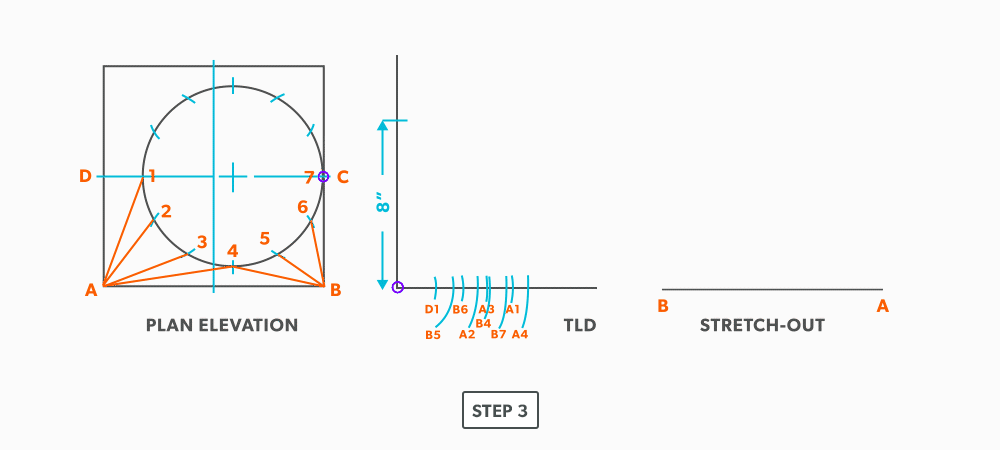
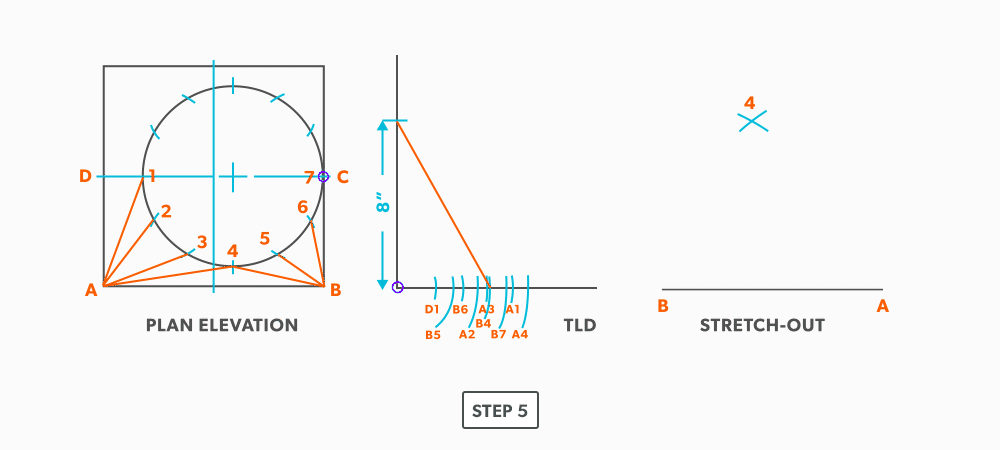
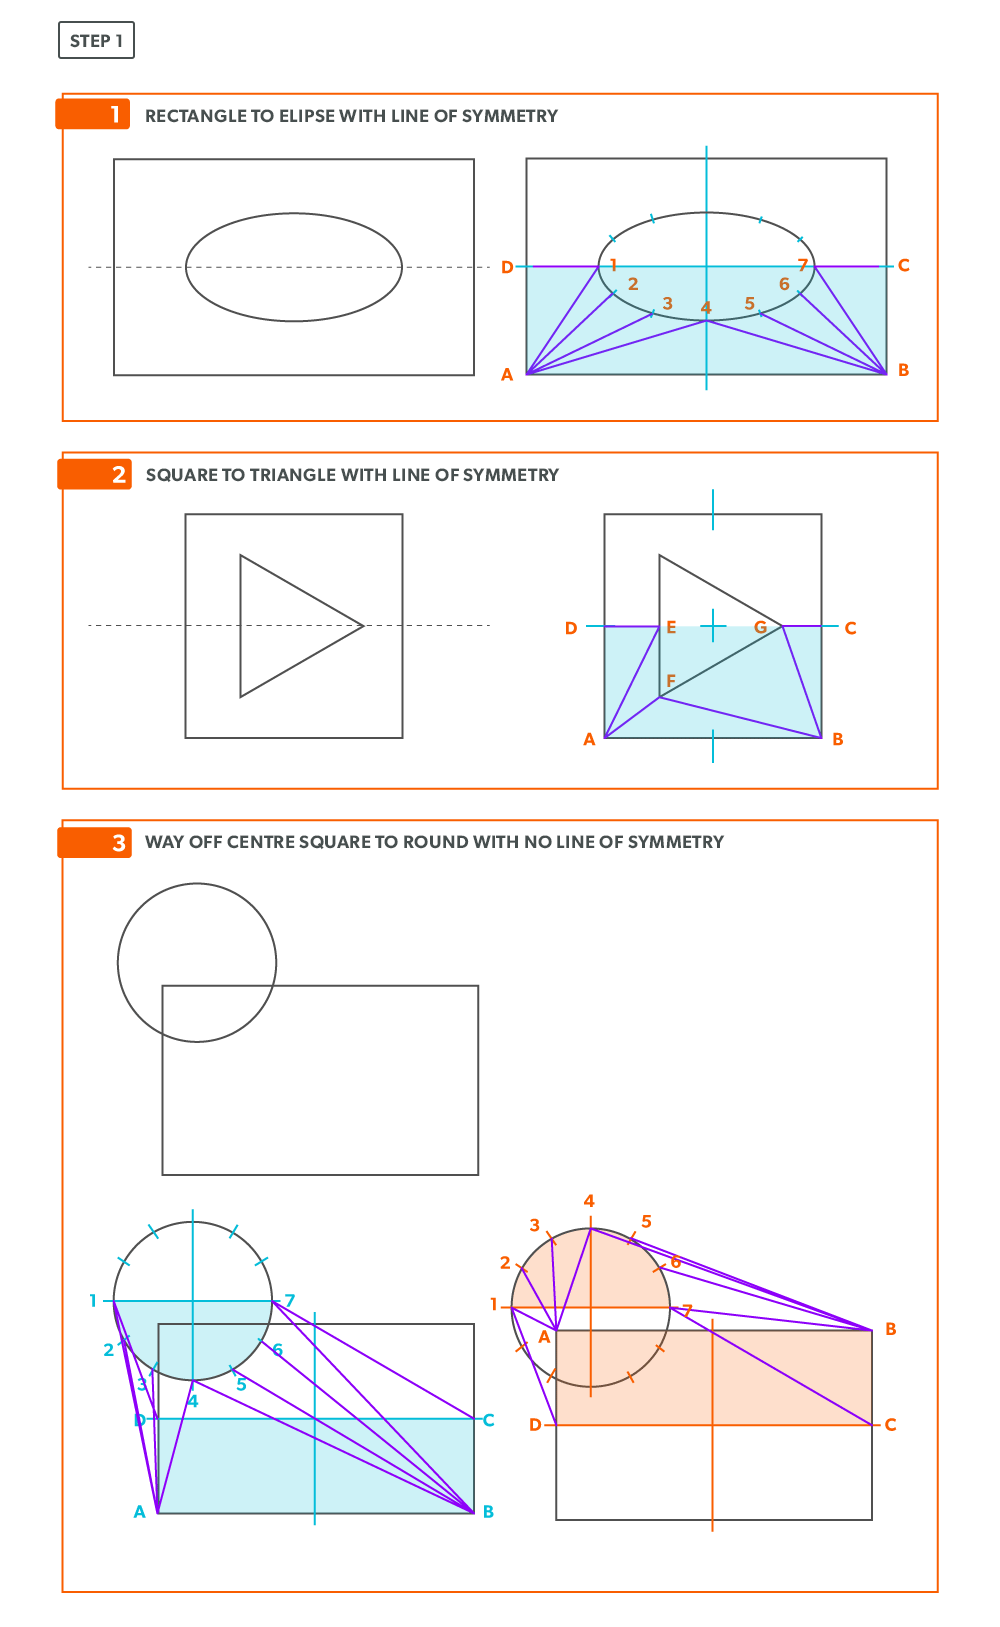
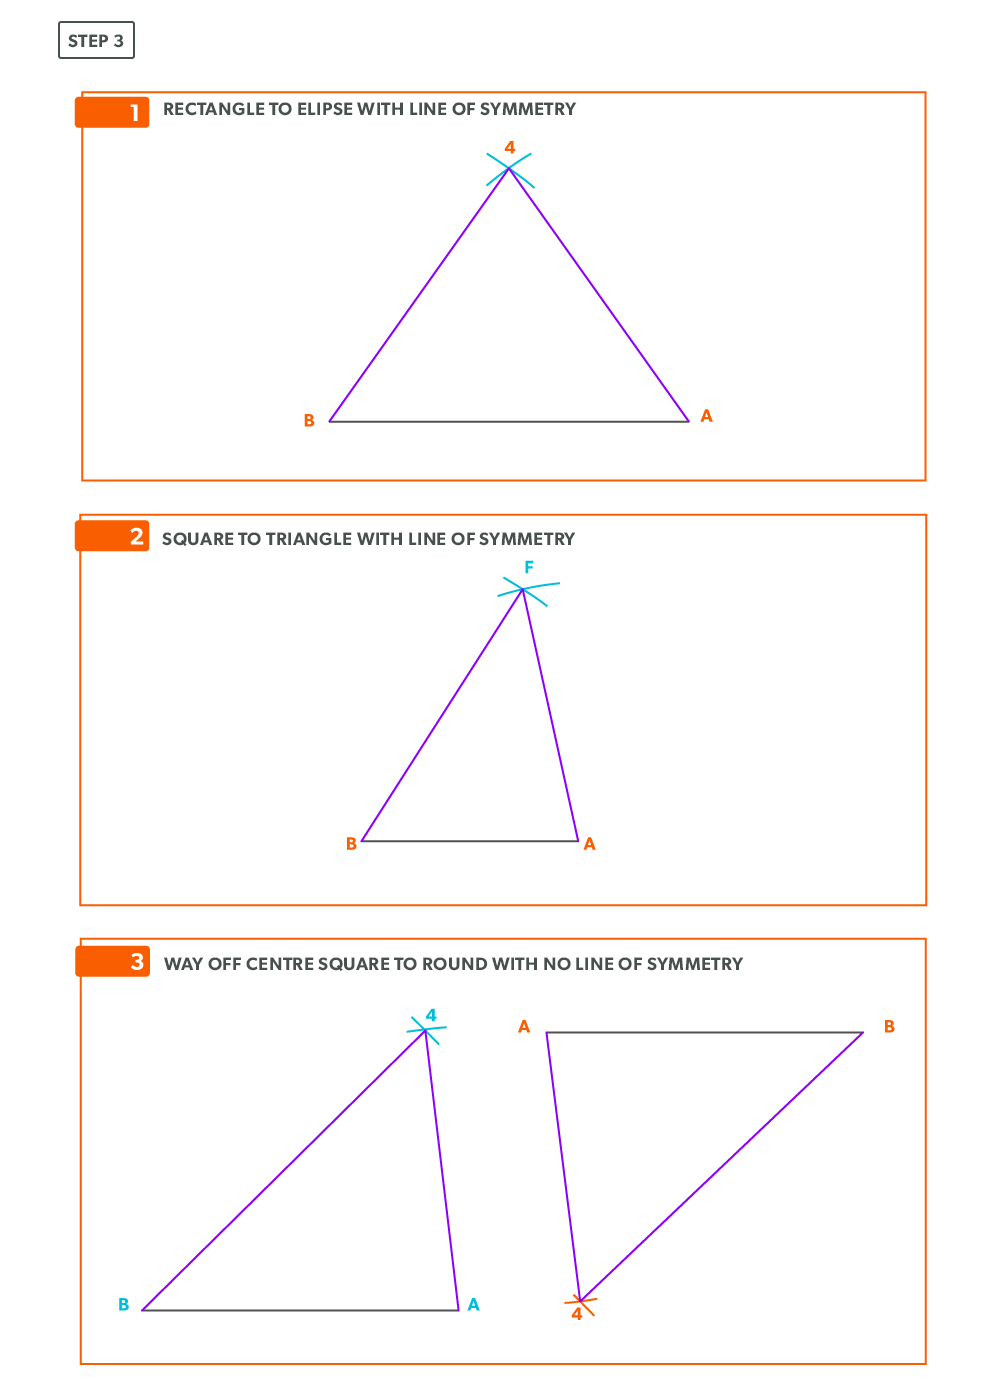
- Start the pattern with a line of two known points. There will always be two known points to start from, either a horizontal or vertical line.
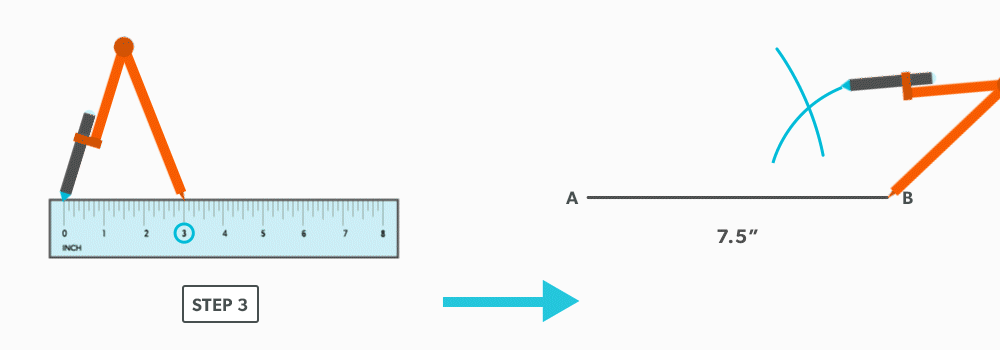
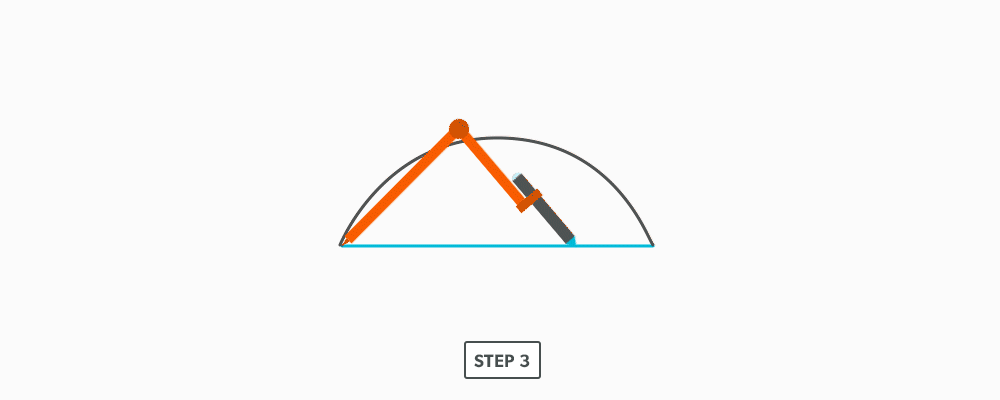
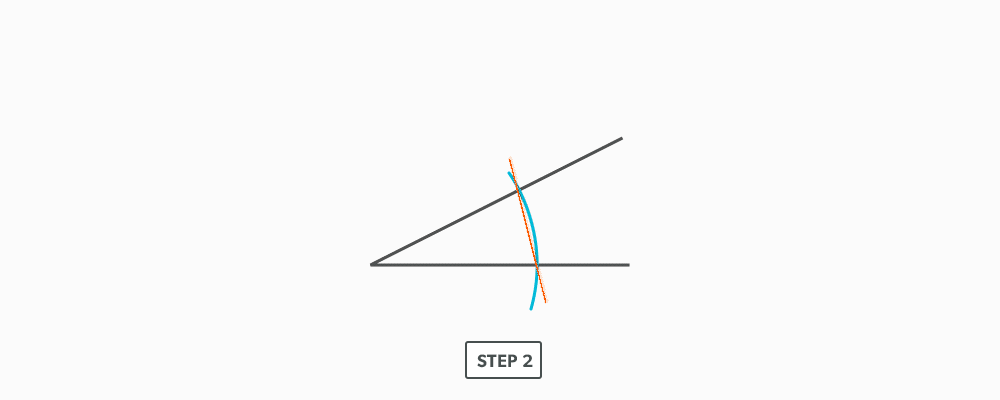
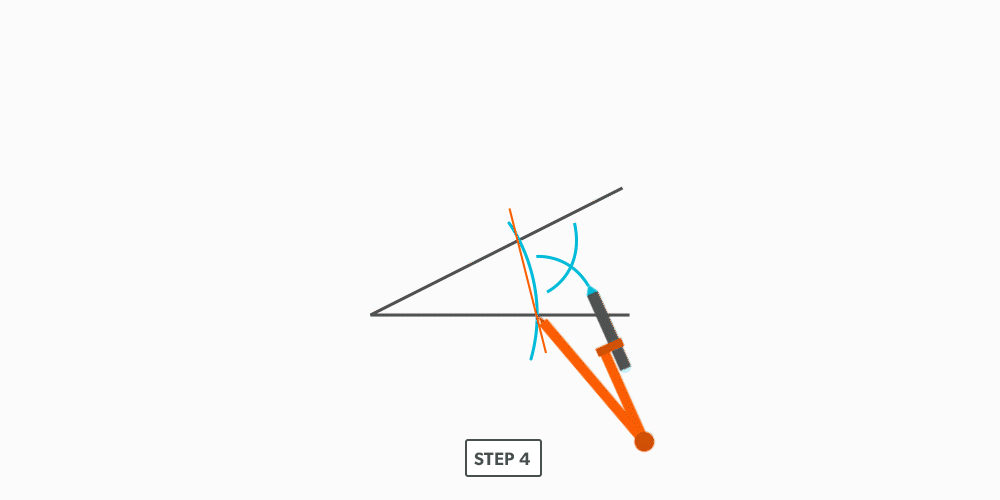
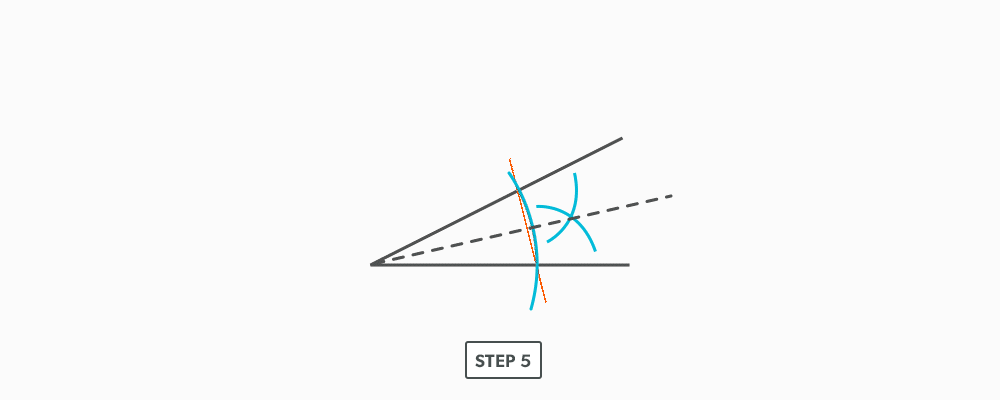
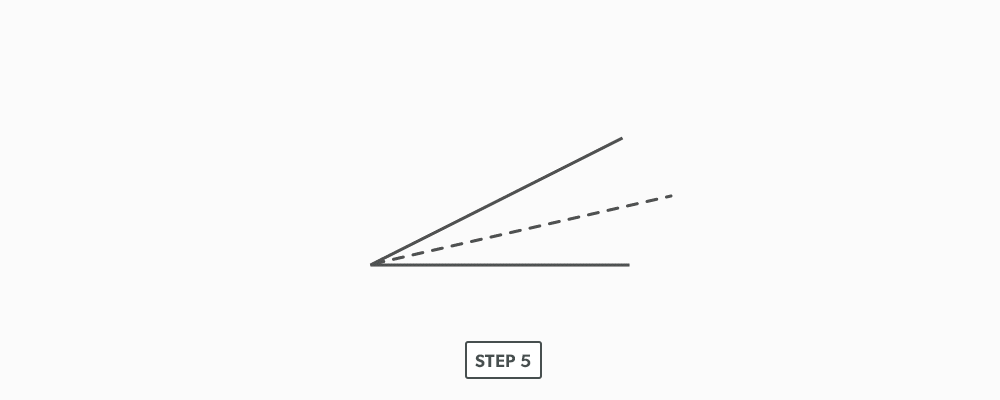
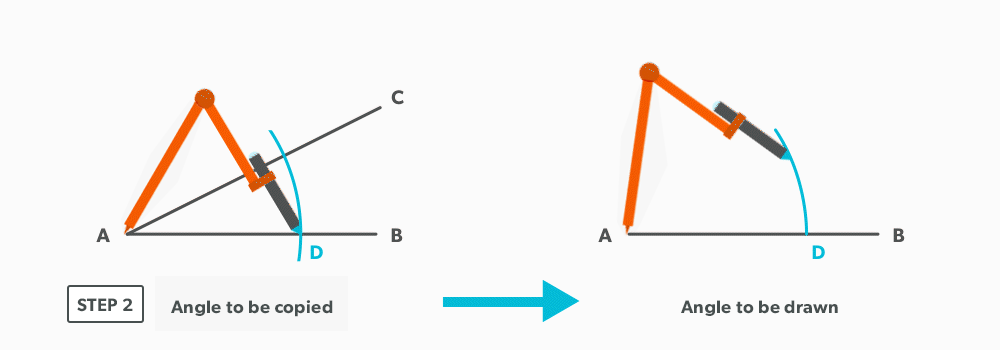
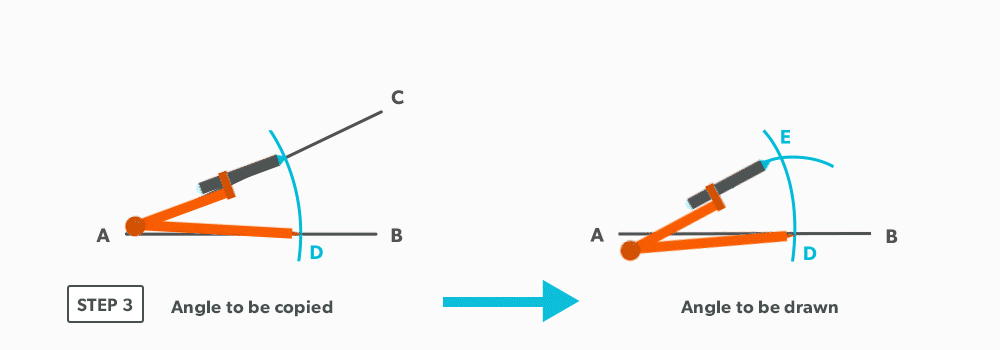
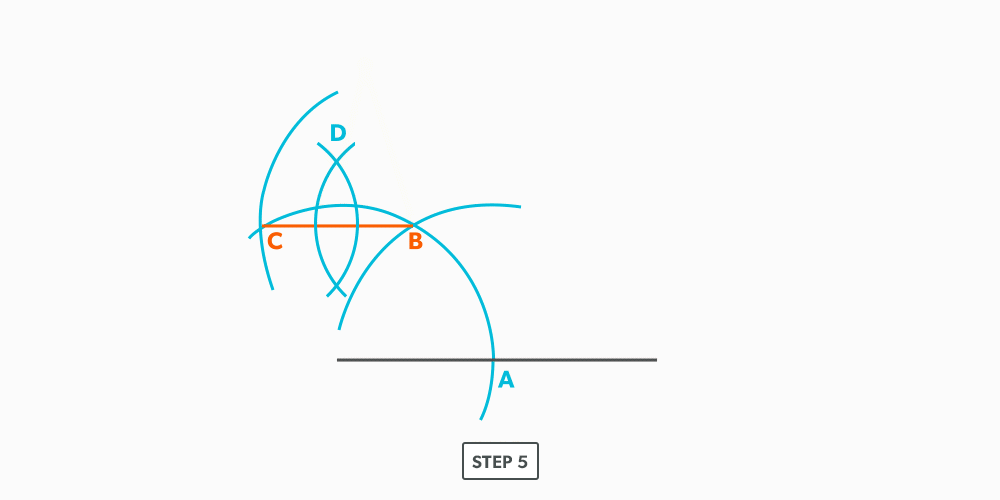
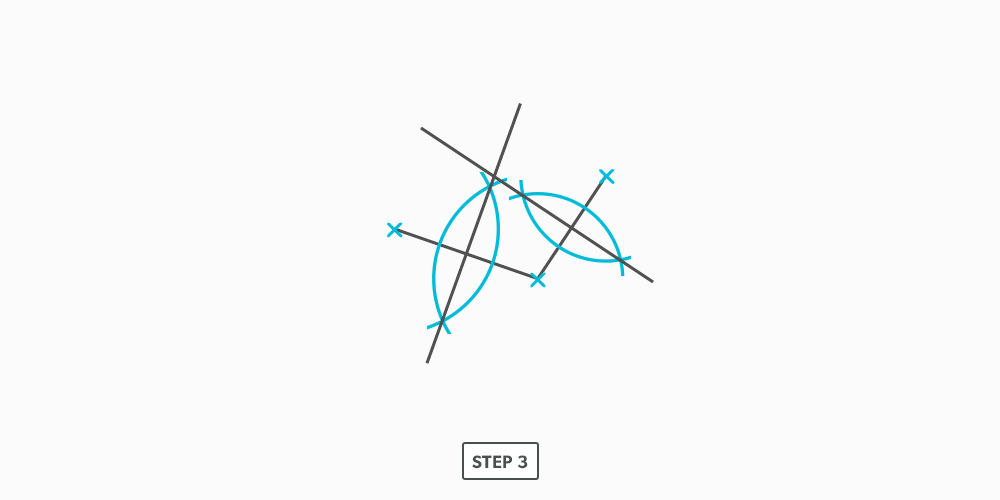
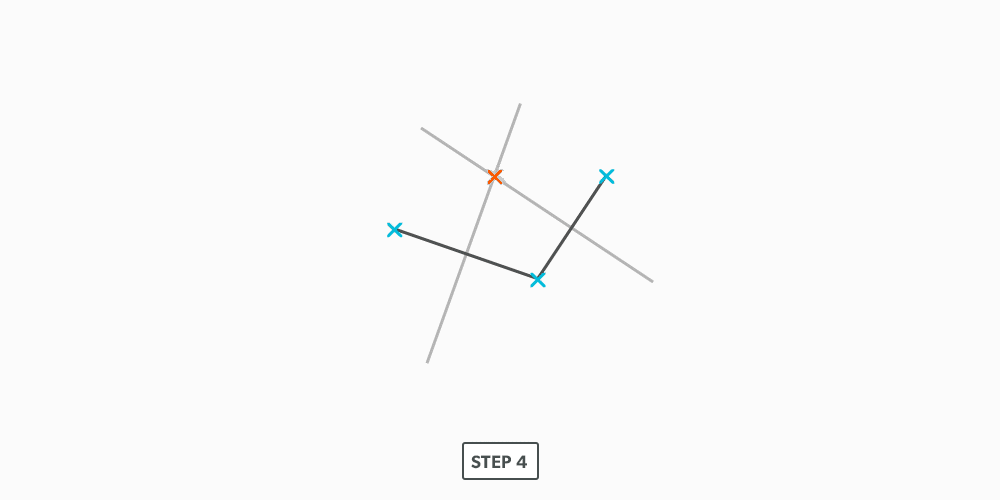
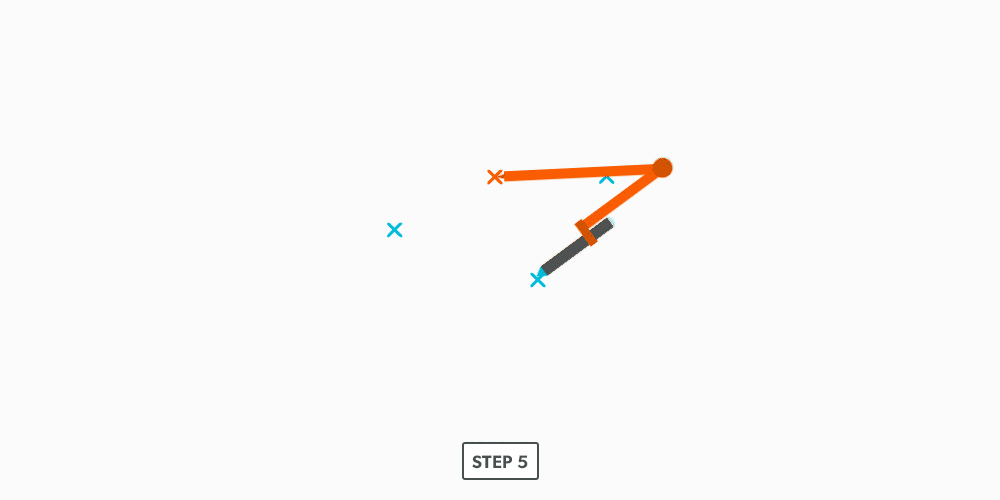
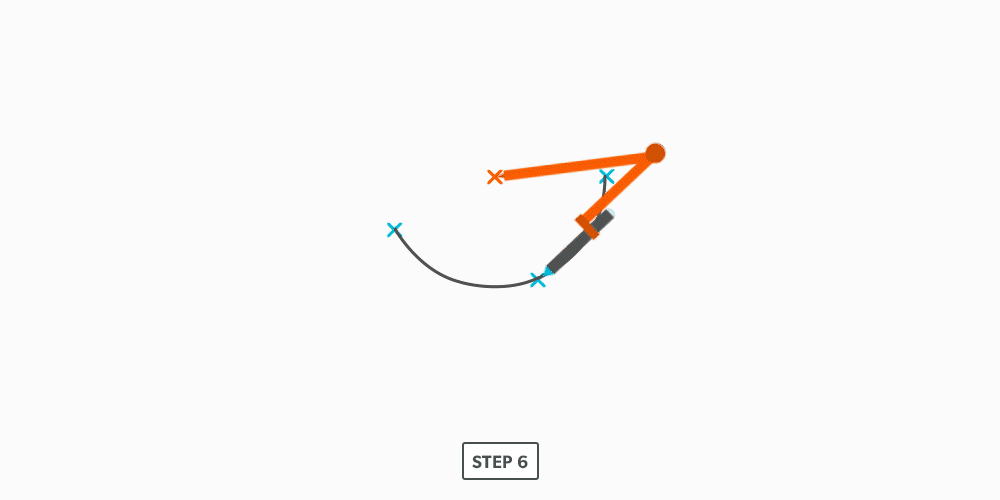
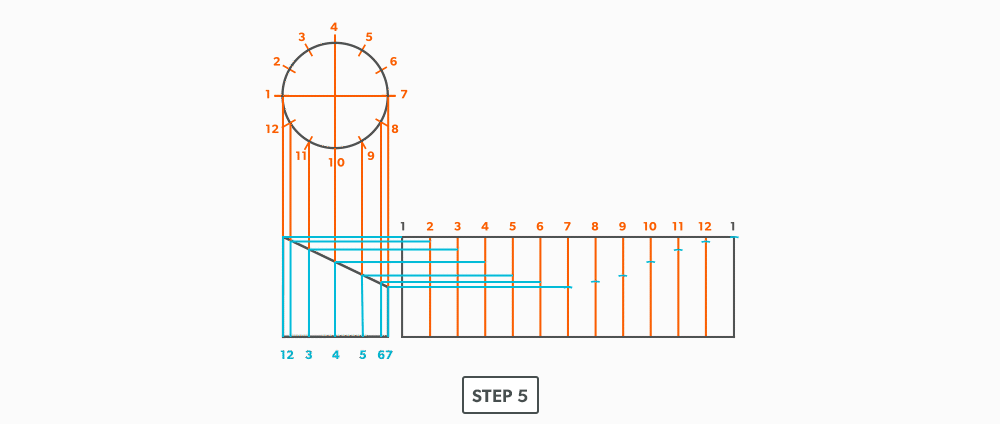
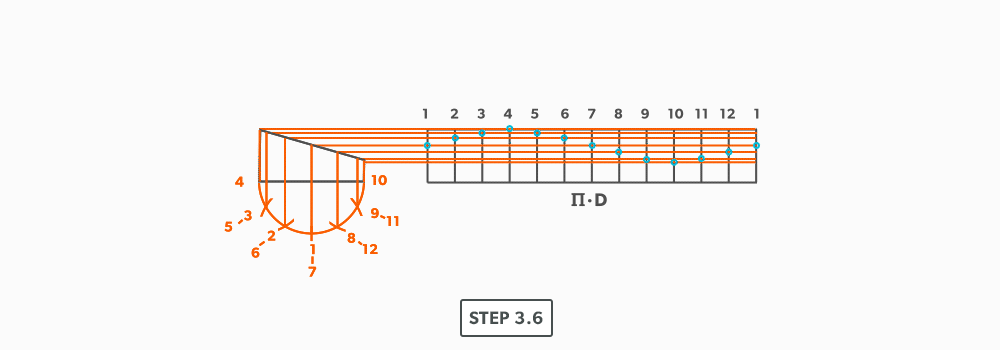
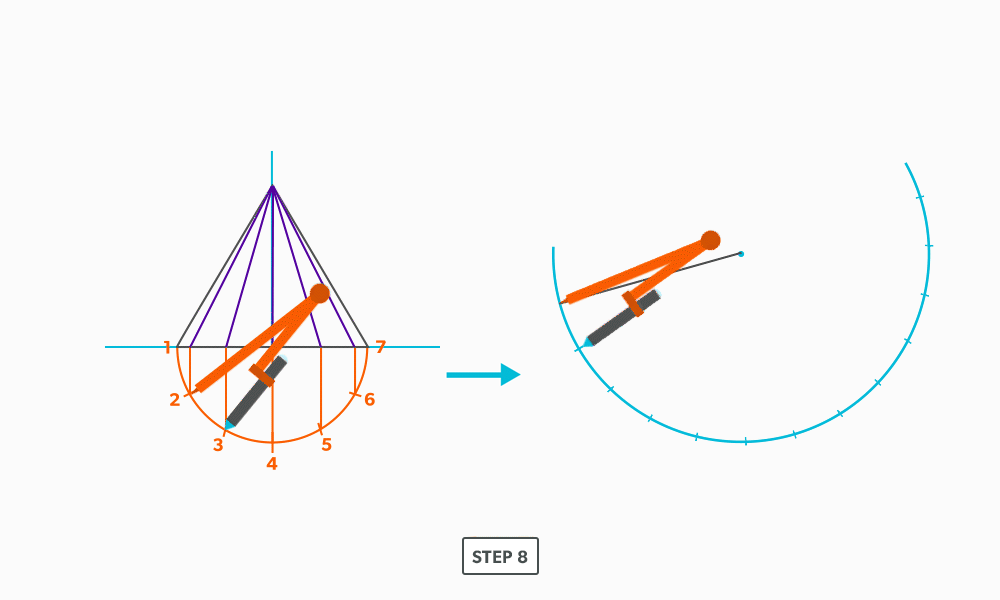
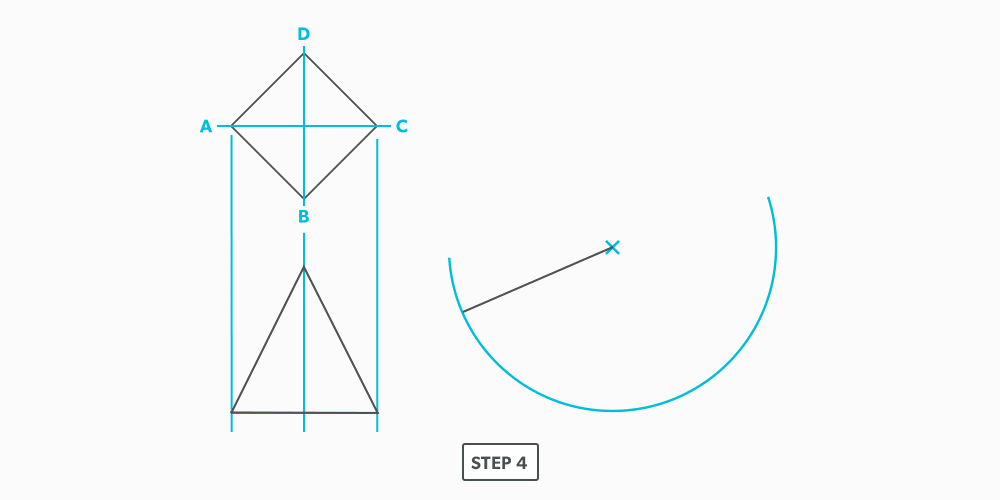
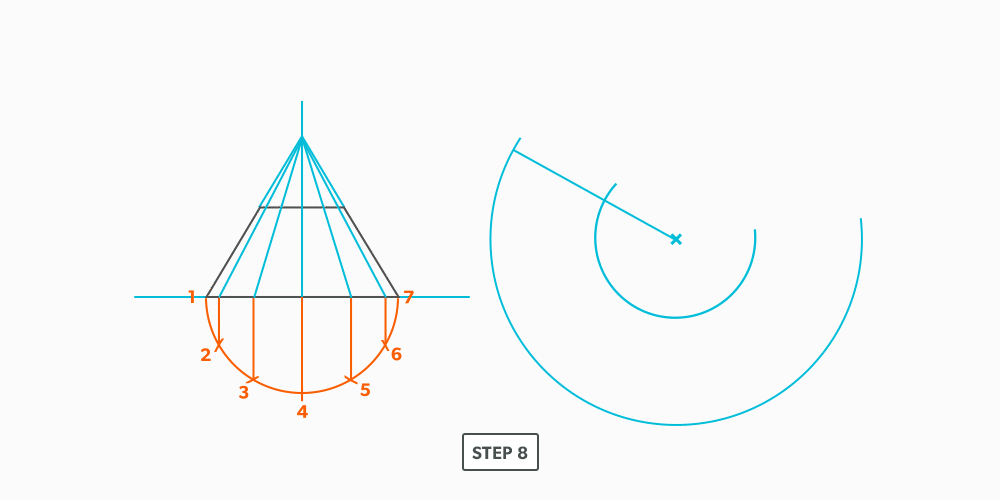
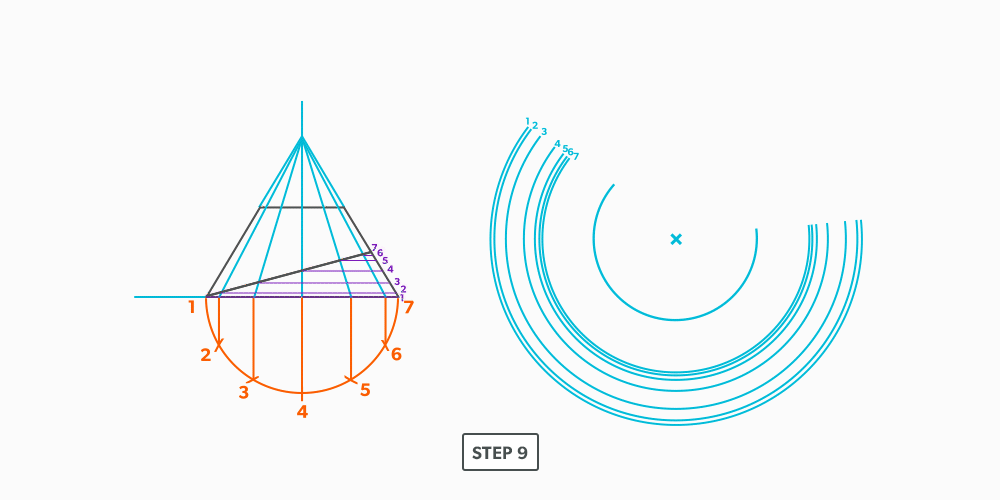
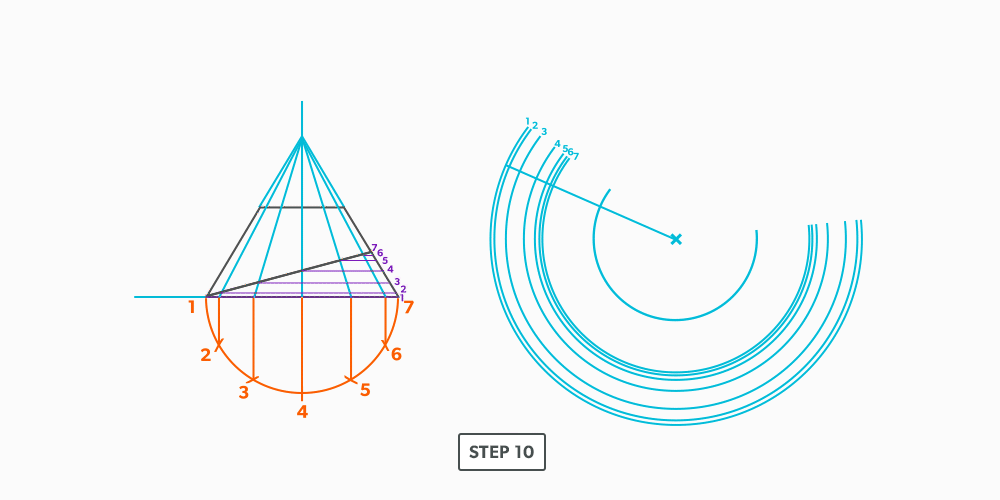
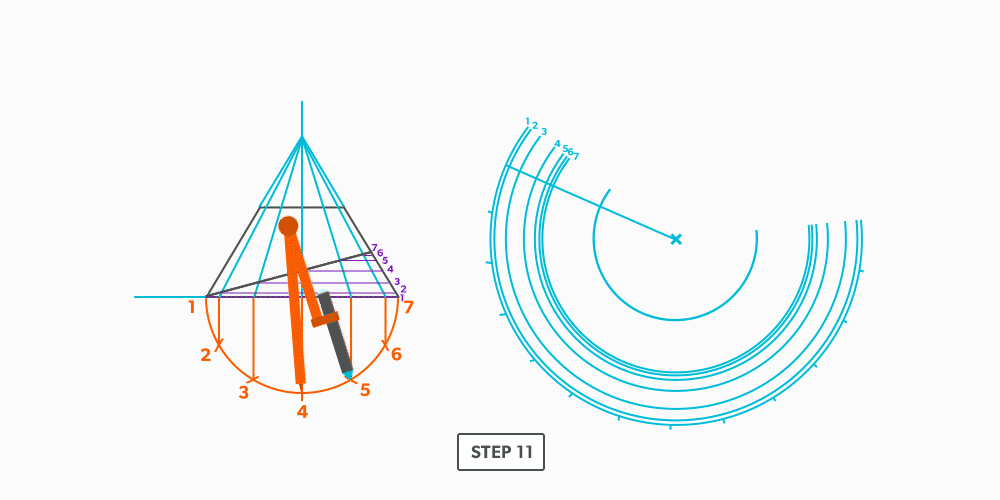
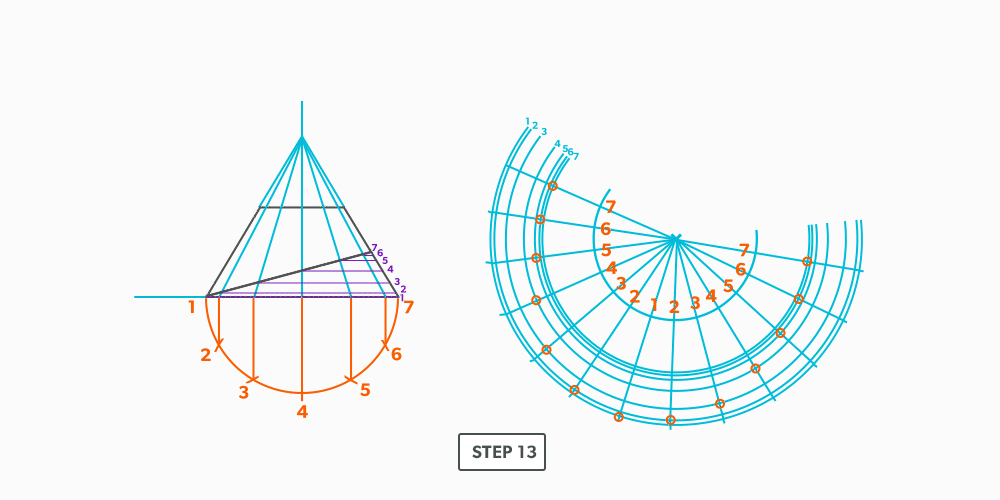
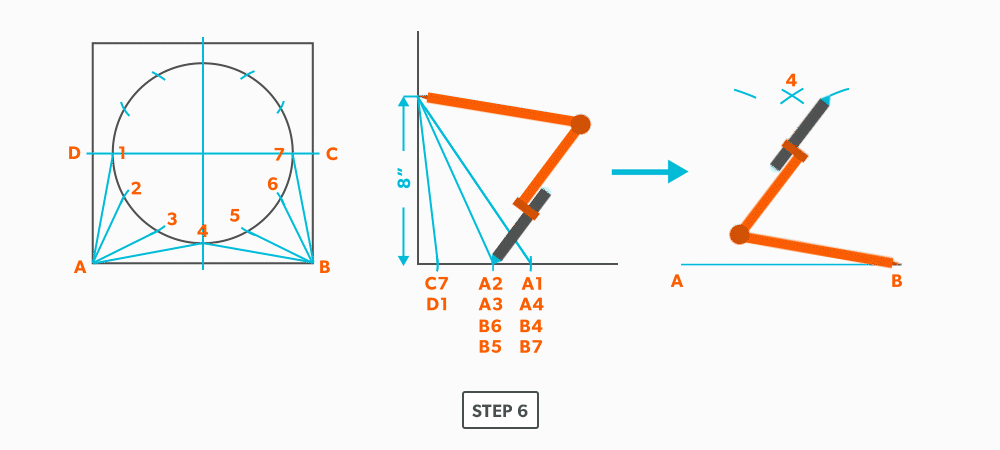
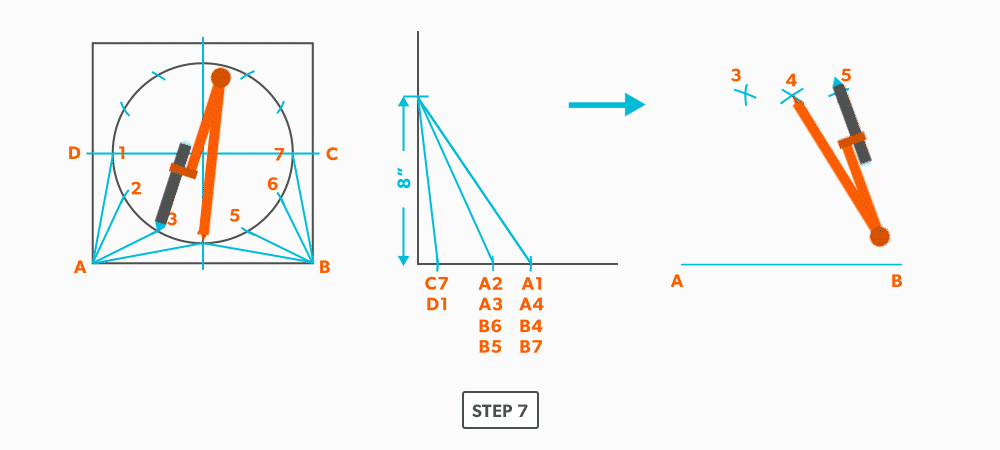
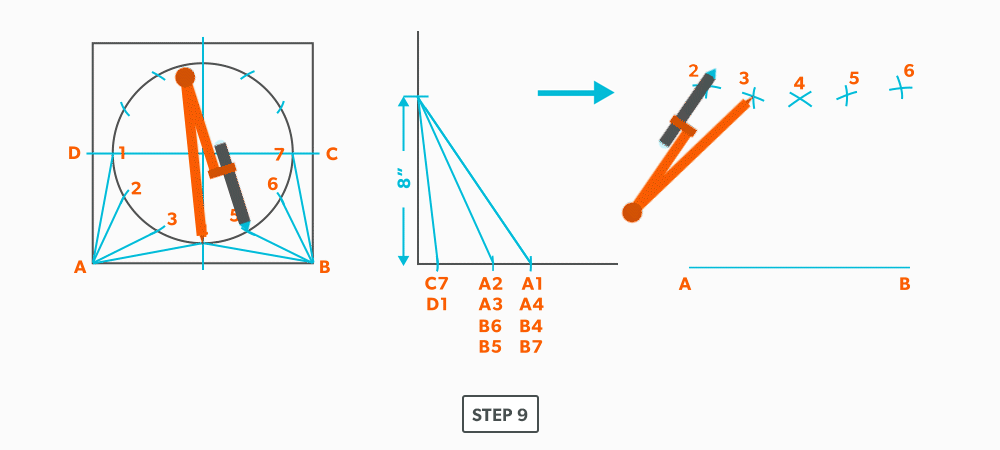
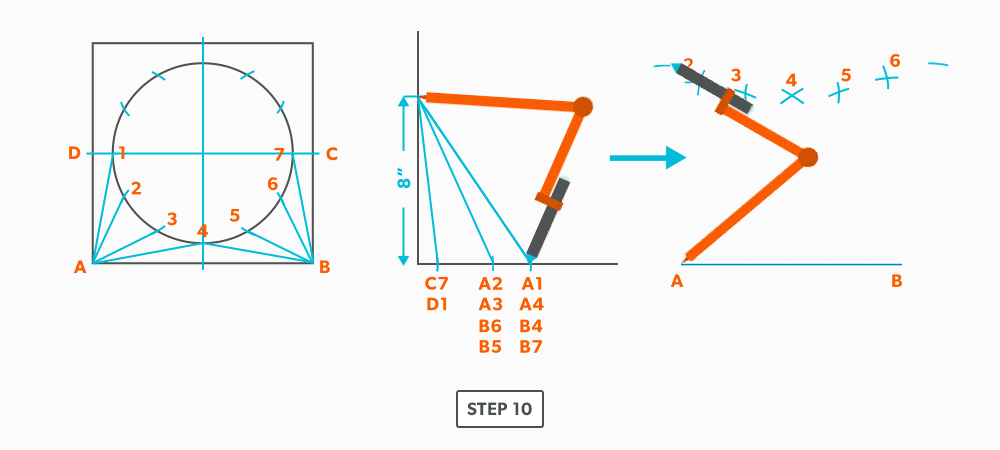
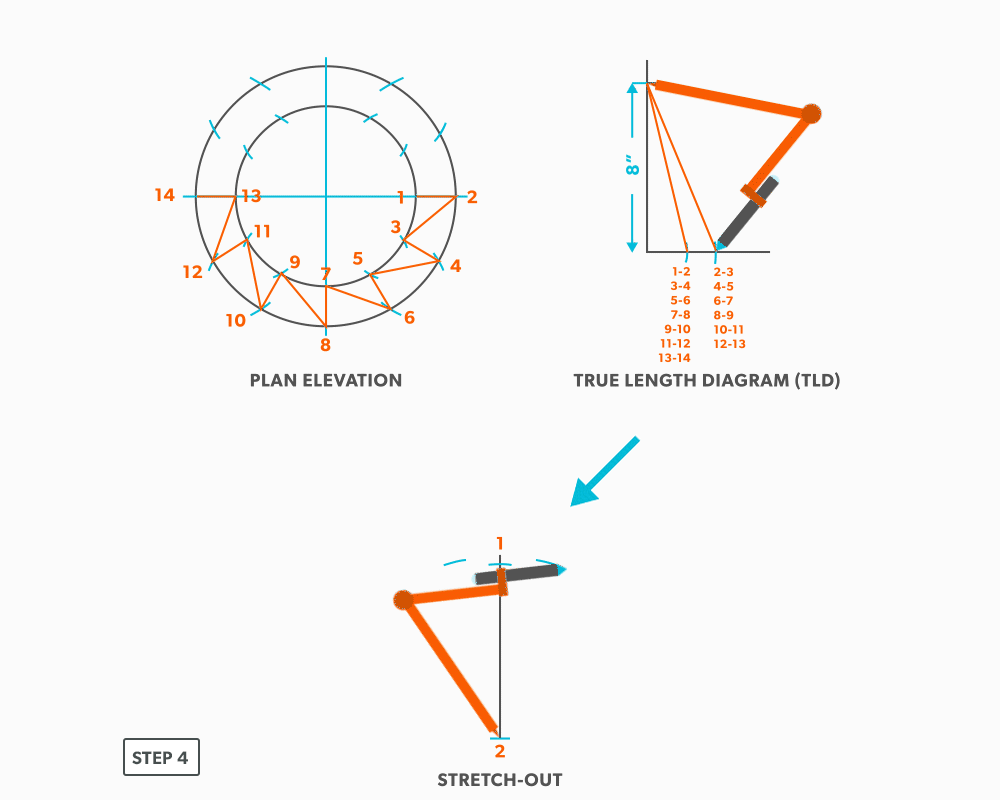
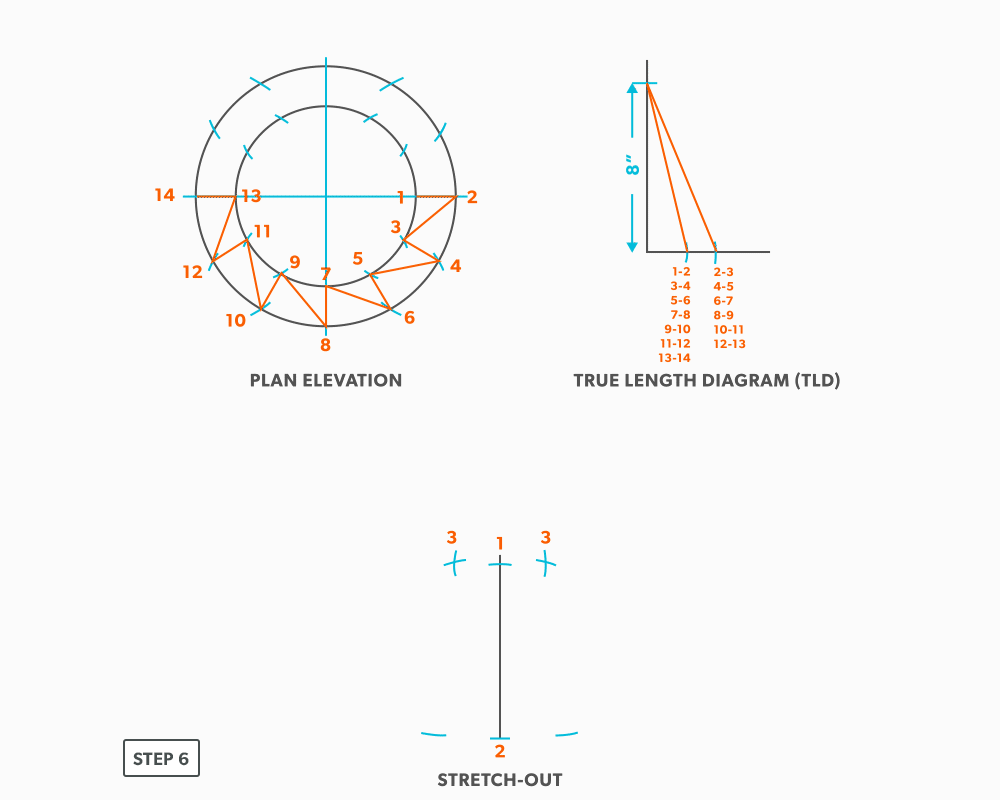
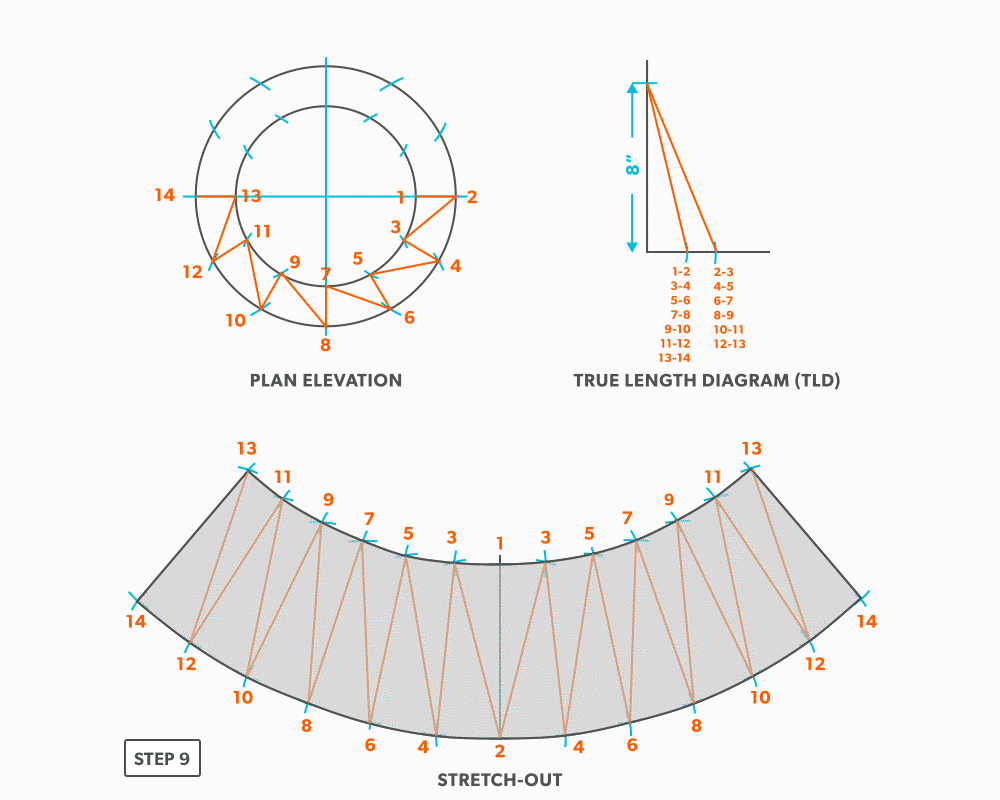
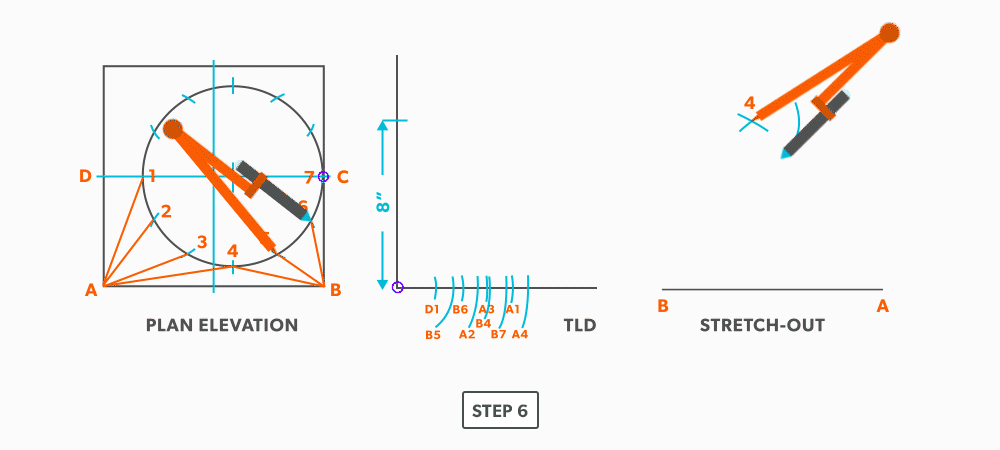
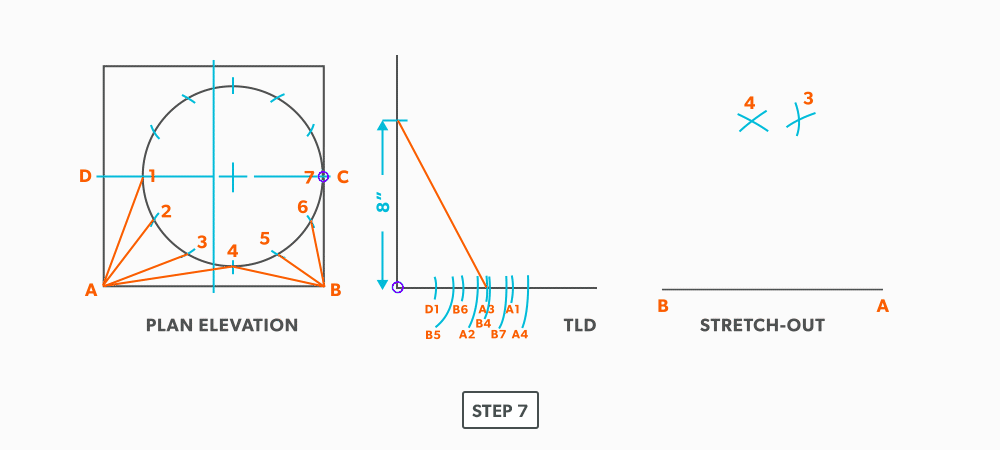
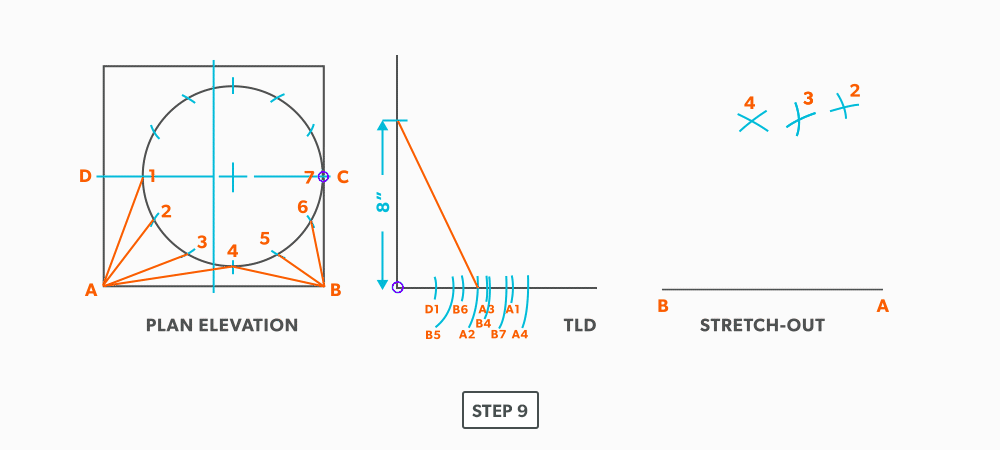
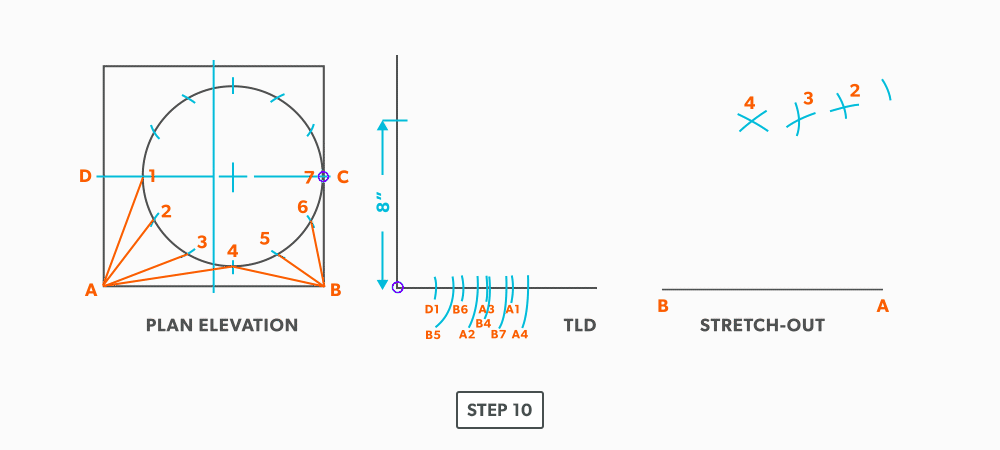
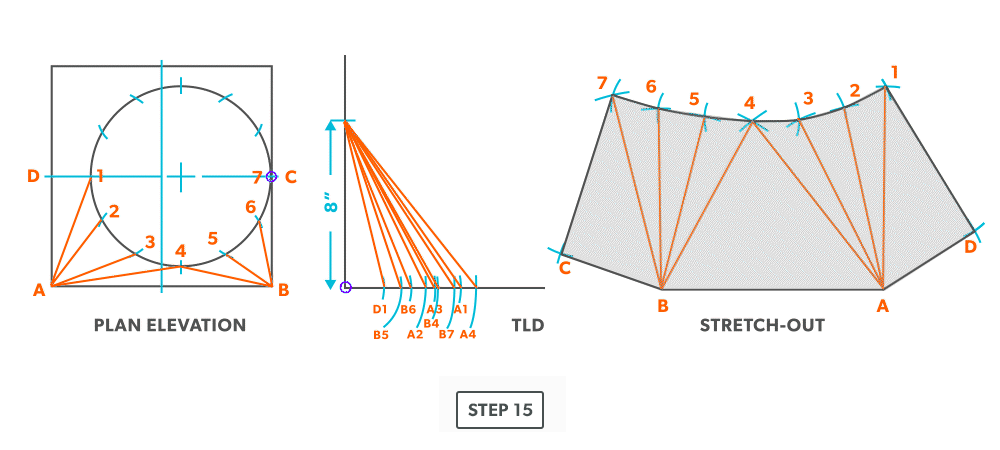
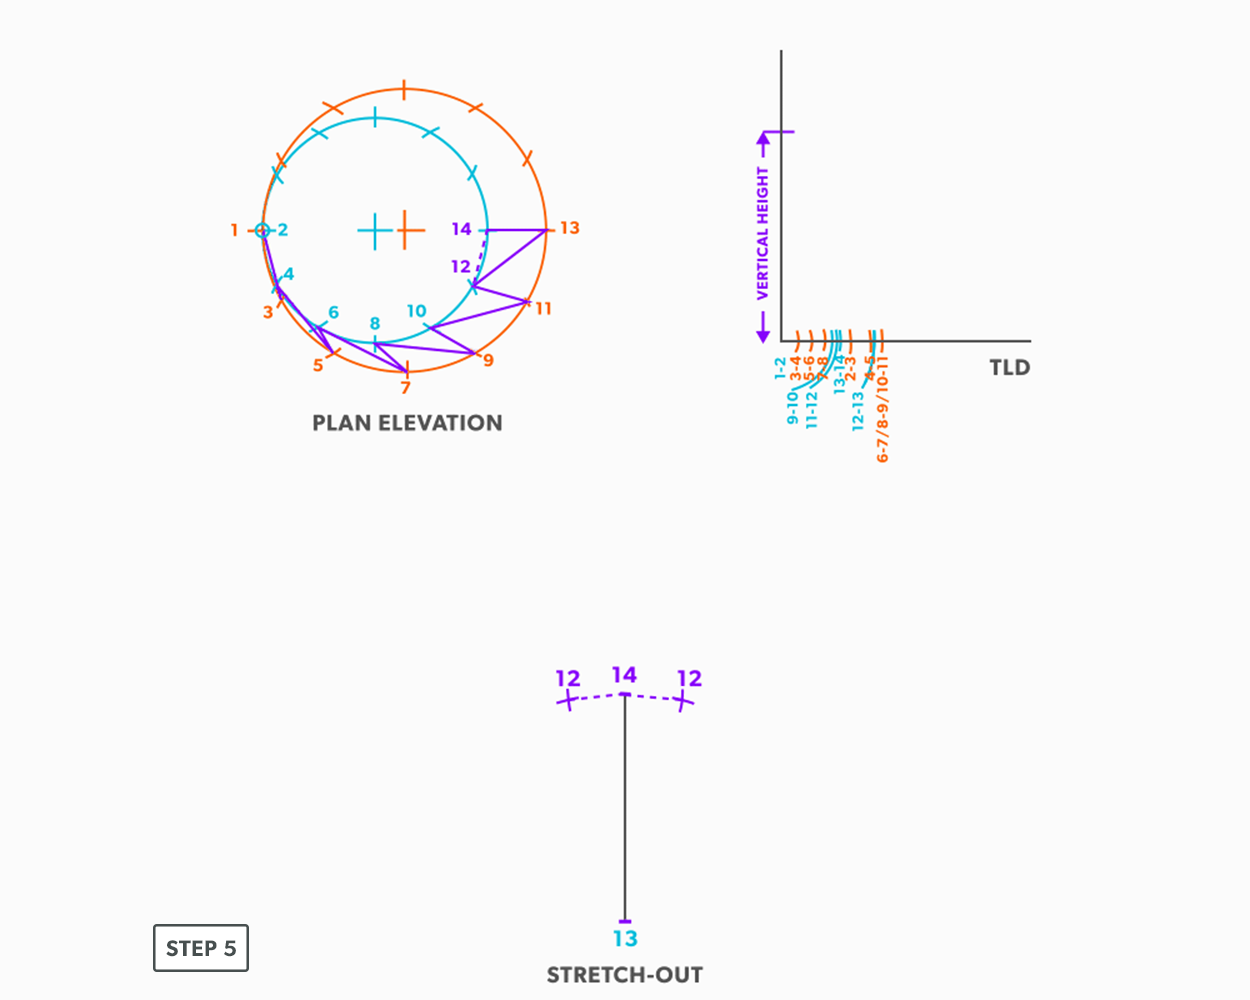
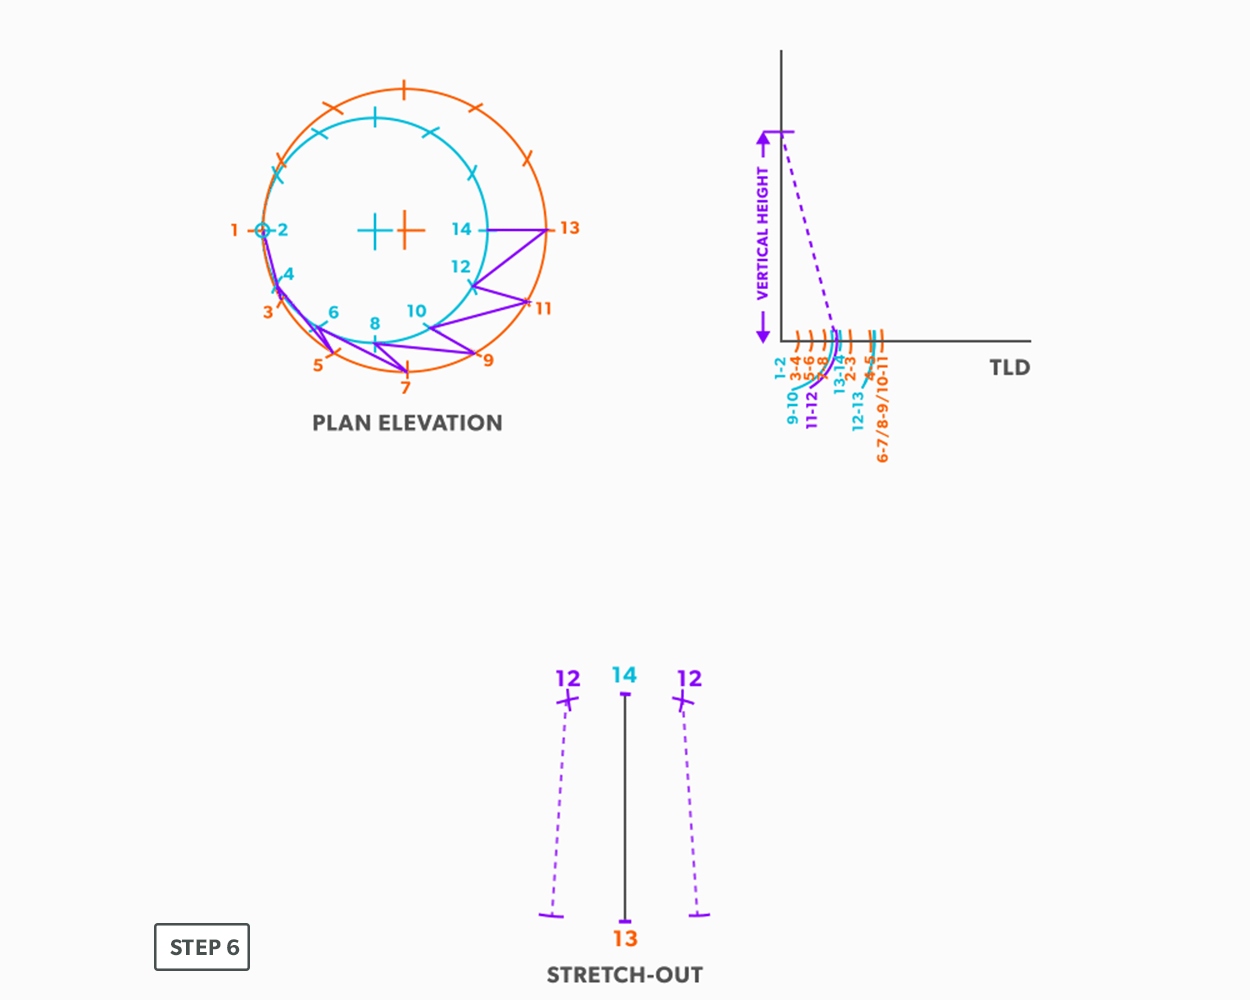
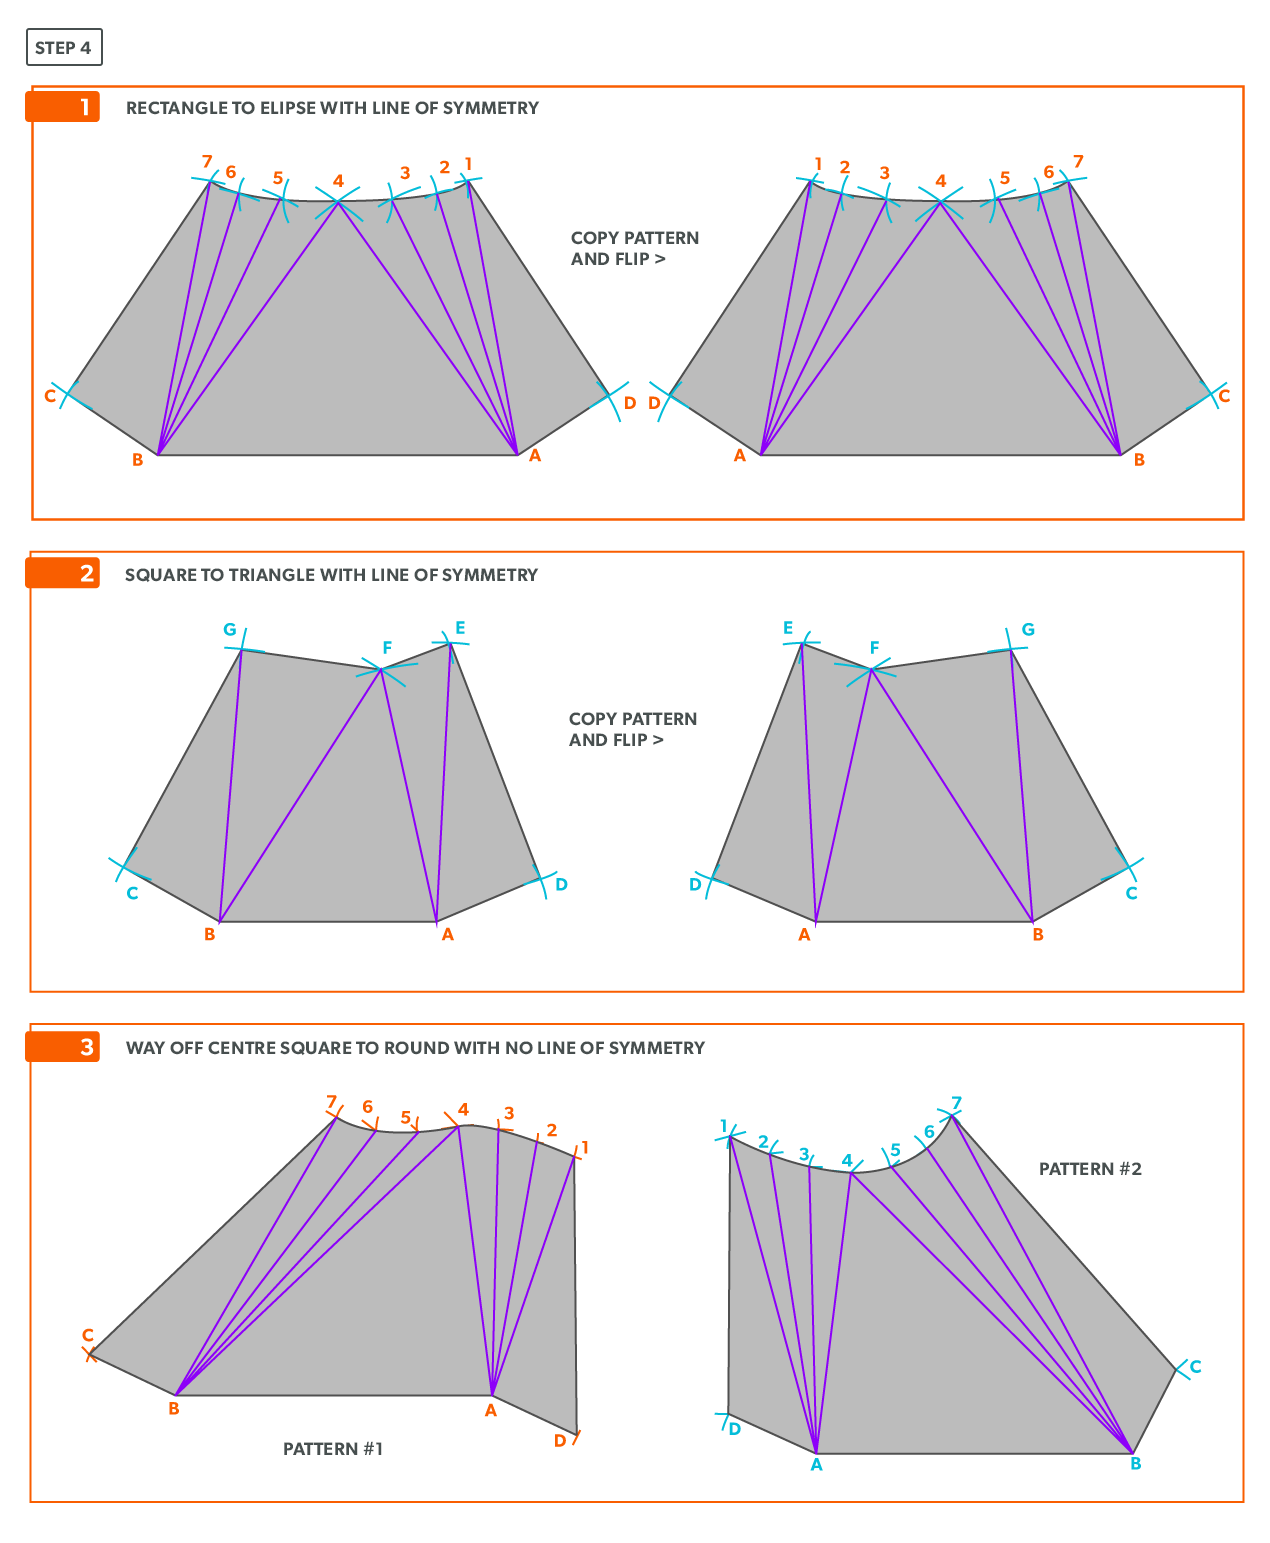
- Using triangulation (see Construct Triangles – “Triangulation”), create the third point.
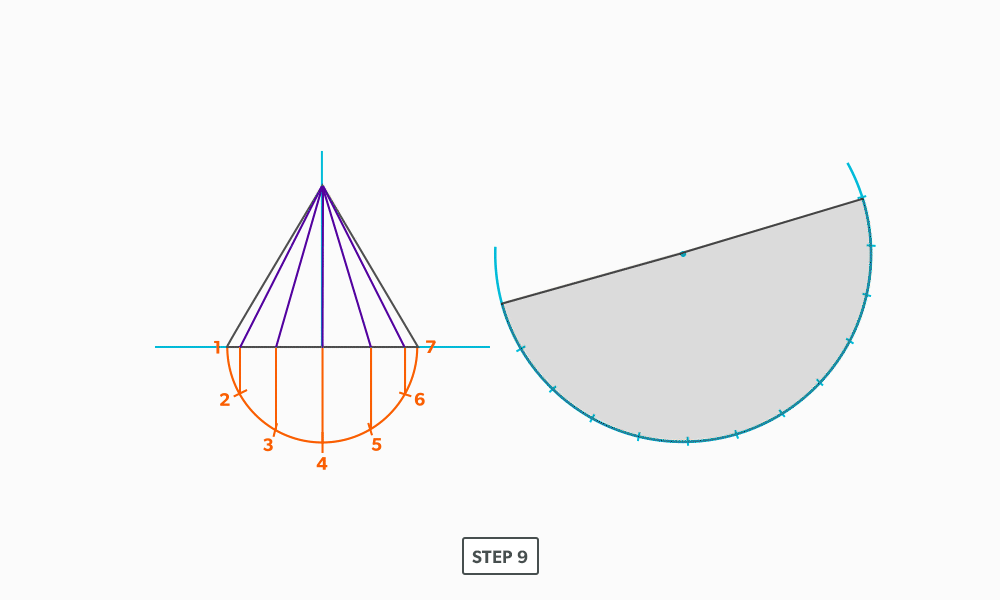
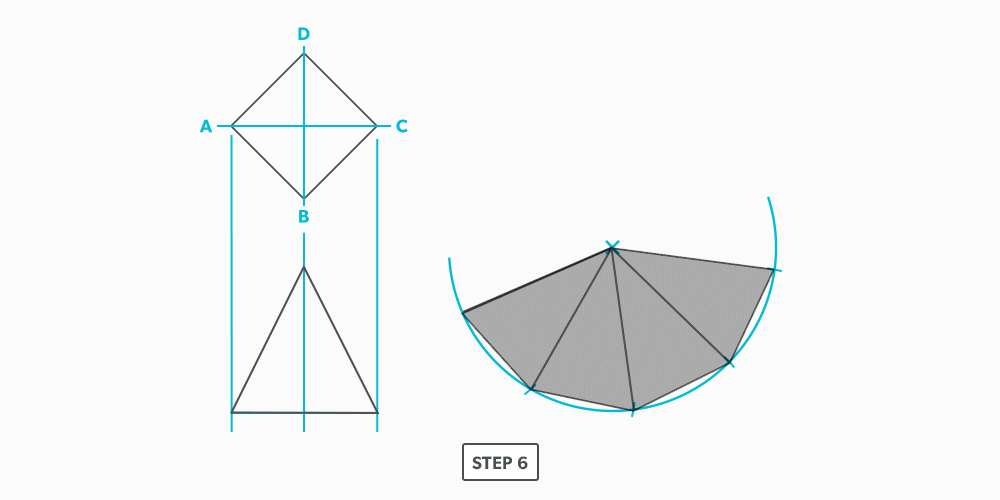
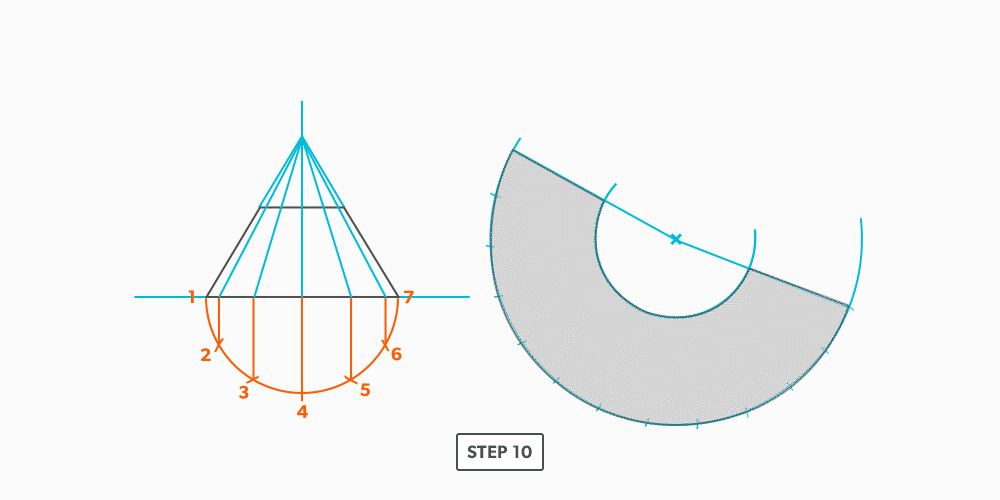
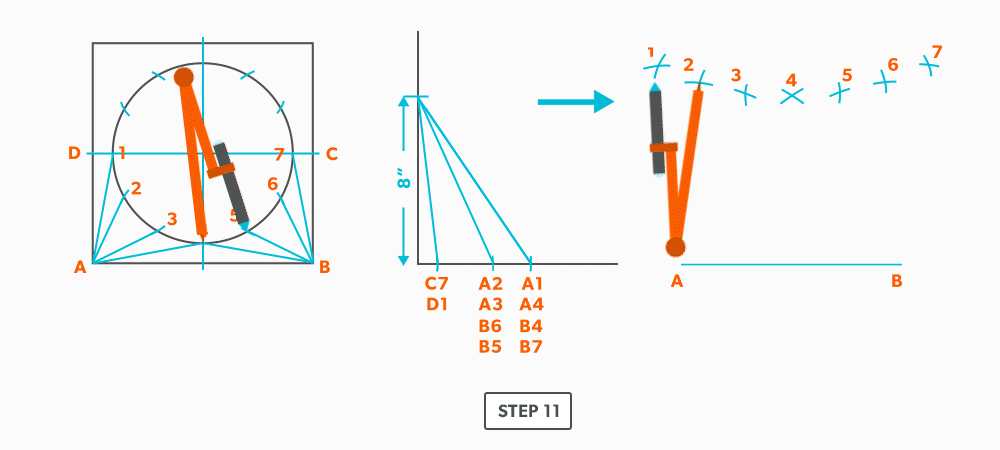
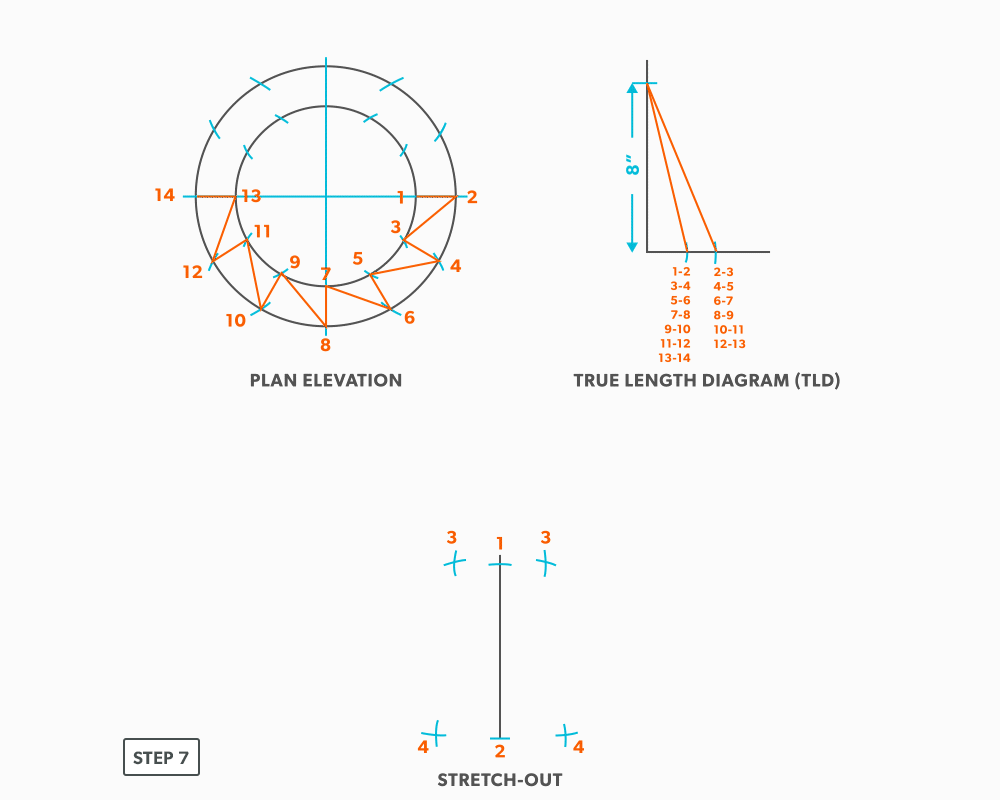
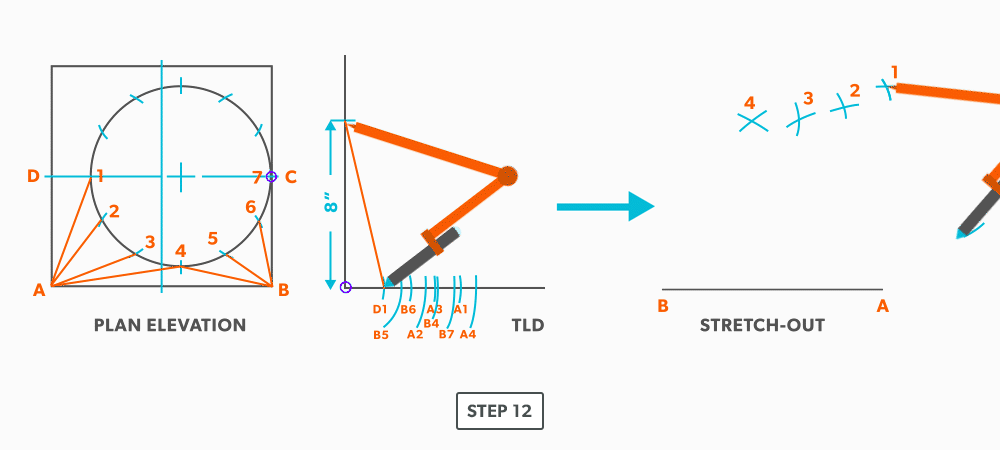
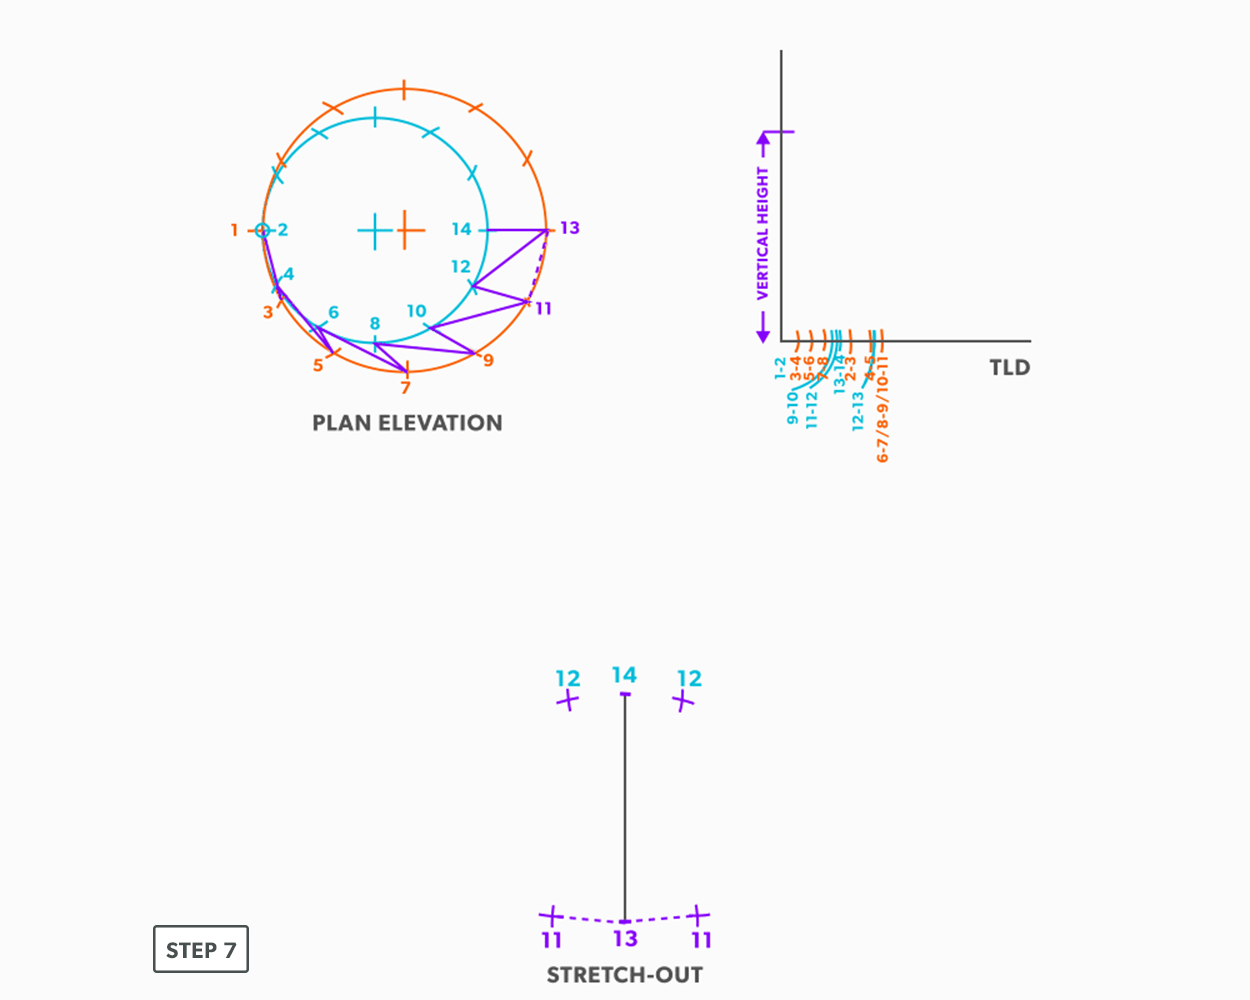
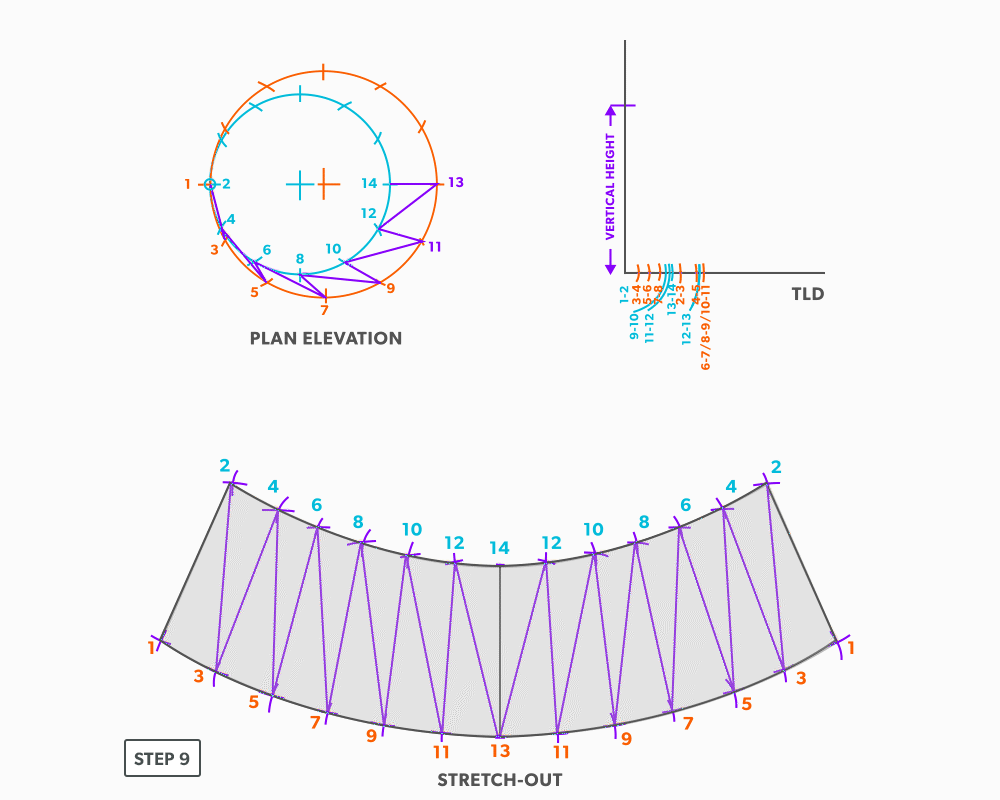
- Repeat until all the element lines have been used.
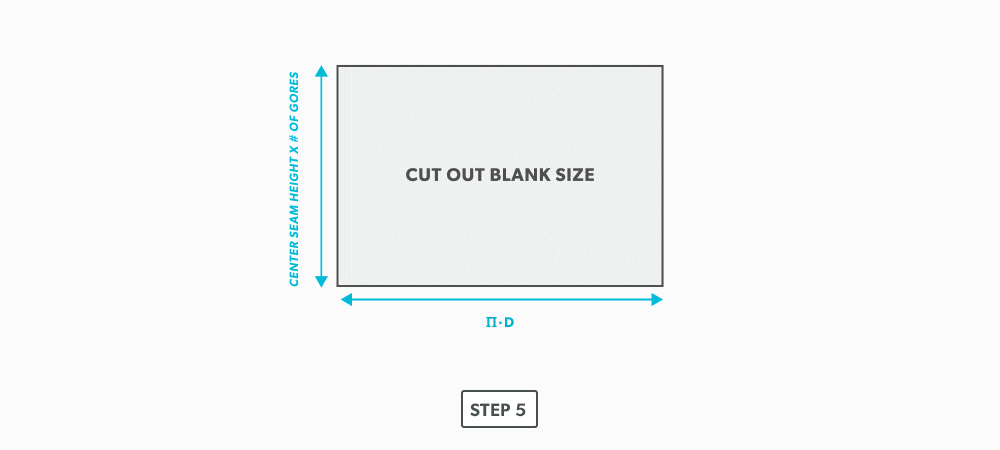
- Draw in all the element lines and outside edges to complete the pattern.