Chapter 3 – Reduce or Reshape Facial and Nape Hair
3.1 Facial Hair Reduction Methods
A facial hair reduction is suited for the client who wants to maintain their current facial hair style, whereas a reshaping service is for the client that desires a new style altogether.
Reshaping and reduction services can be achieved by performing one, or a combination of, the following methods:
- Clipper-over-comb
- Shear-over-comb
- Clipper/trimmer with guard attachment.
- Free-hand shaping with clippers, trimmer, or scissors
Depending on the length and density of the hair to be removed, it is not uncommon to use all of these bulk removal techniques within your design process.
Methods of Facial Hair Reduction
Clipper-Over-Comb
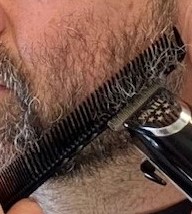 The clipper/trimmer-over-comb technique is ideal when working on a client who’s beard has equal texture and density throughout. Whereas, in a circumstances where the texture and density of the beard vary throughout, scissor-over-comb may be a better option.
In general, the clipper is used throughout the fuller areas of the beard, and the smaller trimmer/outliner is used in combination with a comb for shaping the moustache and around the ears.
To perform clipper-over-comb:
- Use a cutting comb to elevate the hair to the desired projection angle.
- Comb elevation will determine the finished result. For example, a 90-degree projection angle will produce equal lengths throughout the section, whereas a 45-degree angle will produce a length increase for a graduated result.
- Move the clipper/trimmer across the surface of the comb to remove the excess length.
- It is important to keep both the comb and clipper moving simultaneously in harmony with each other so as to avoid creating lines and imperfections in the final design.
Shear-Over-Comb
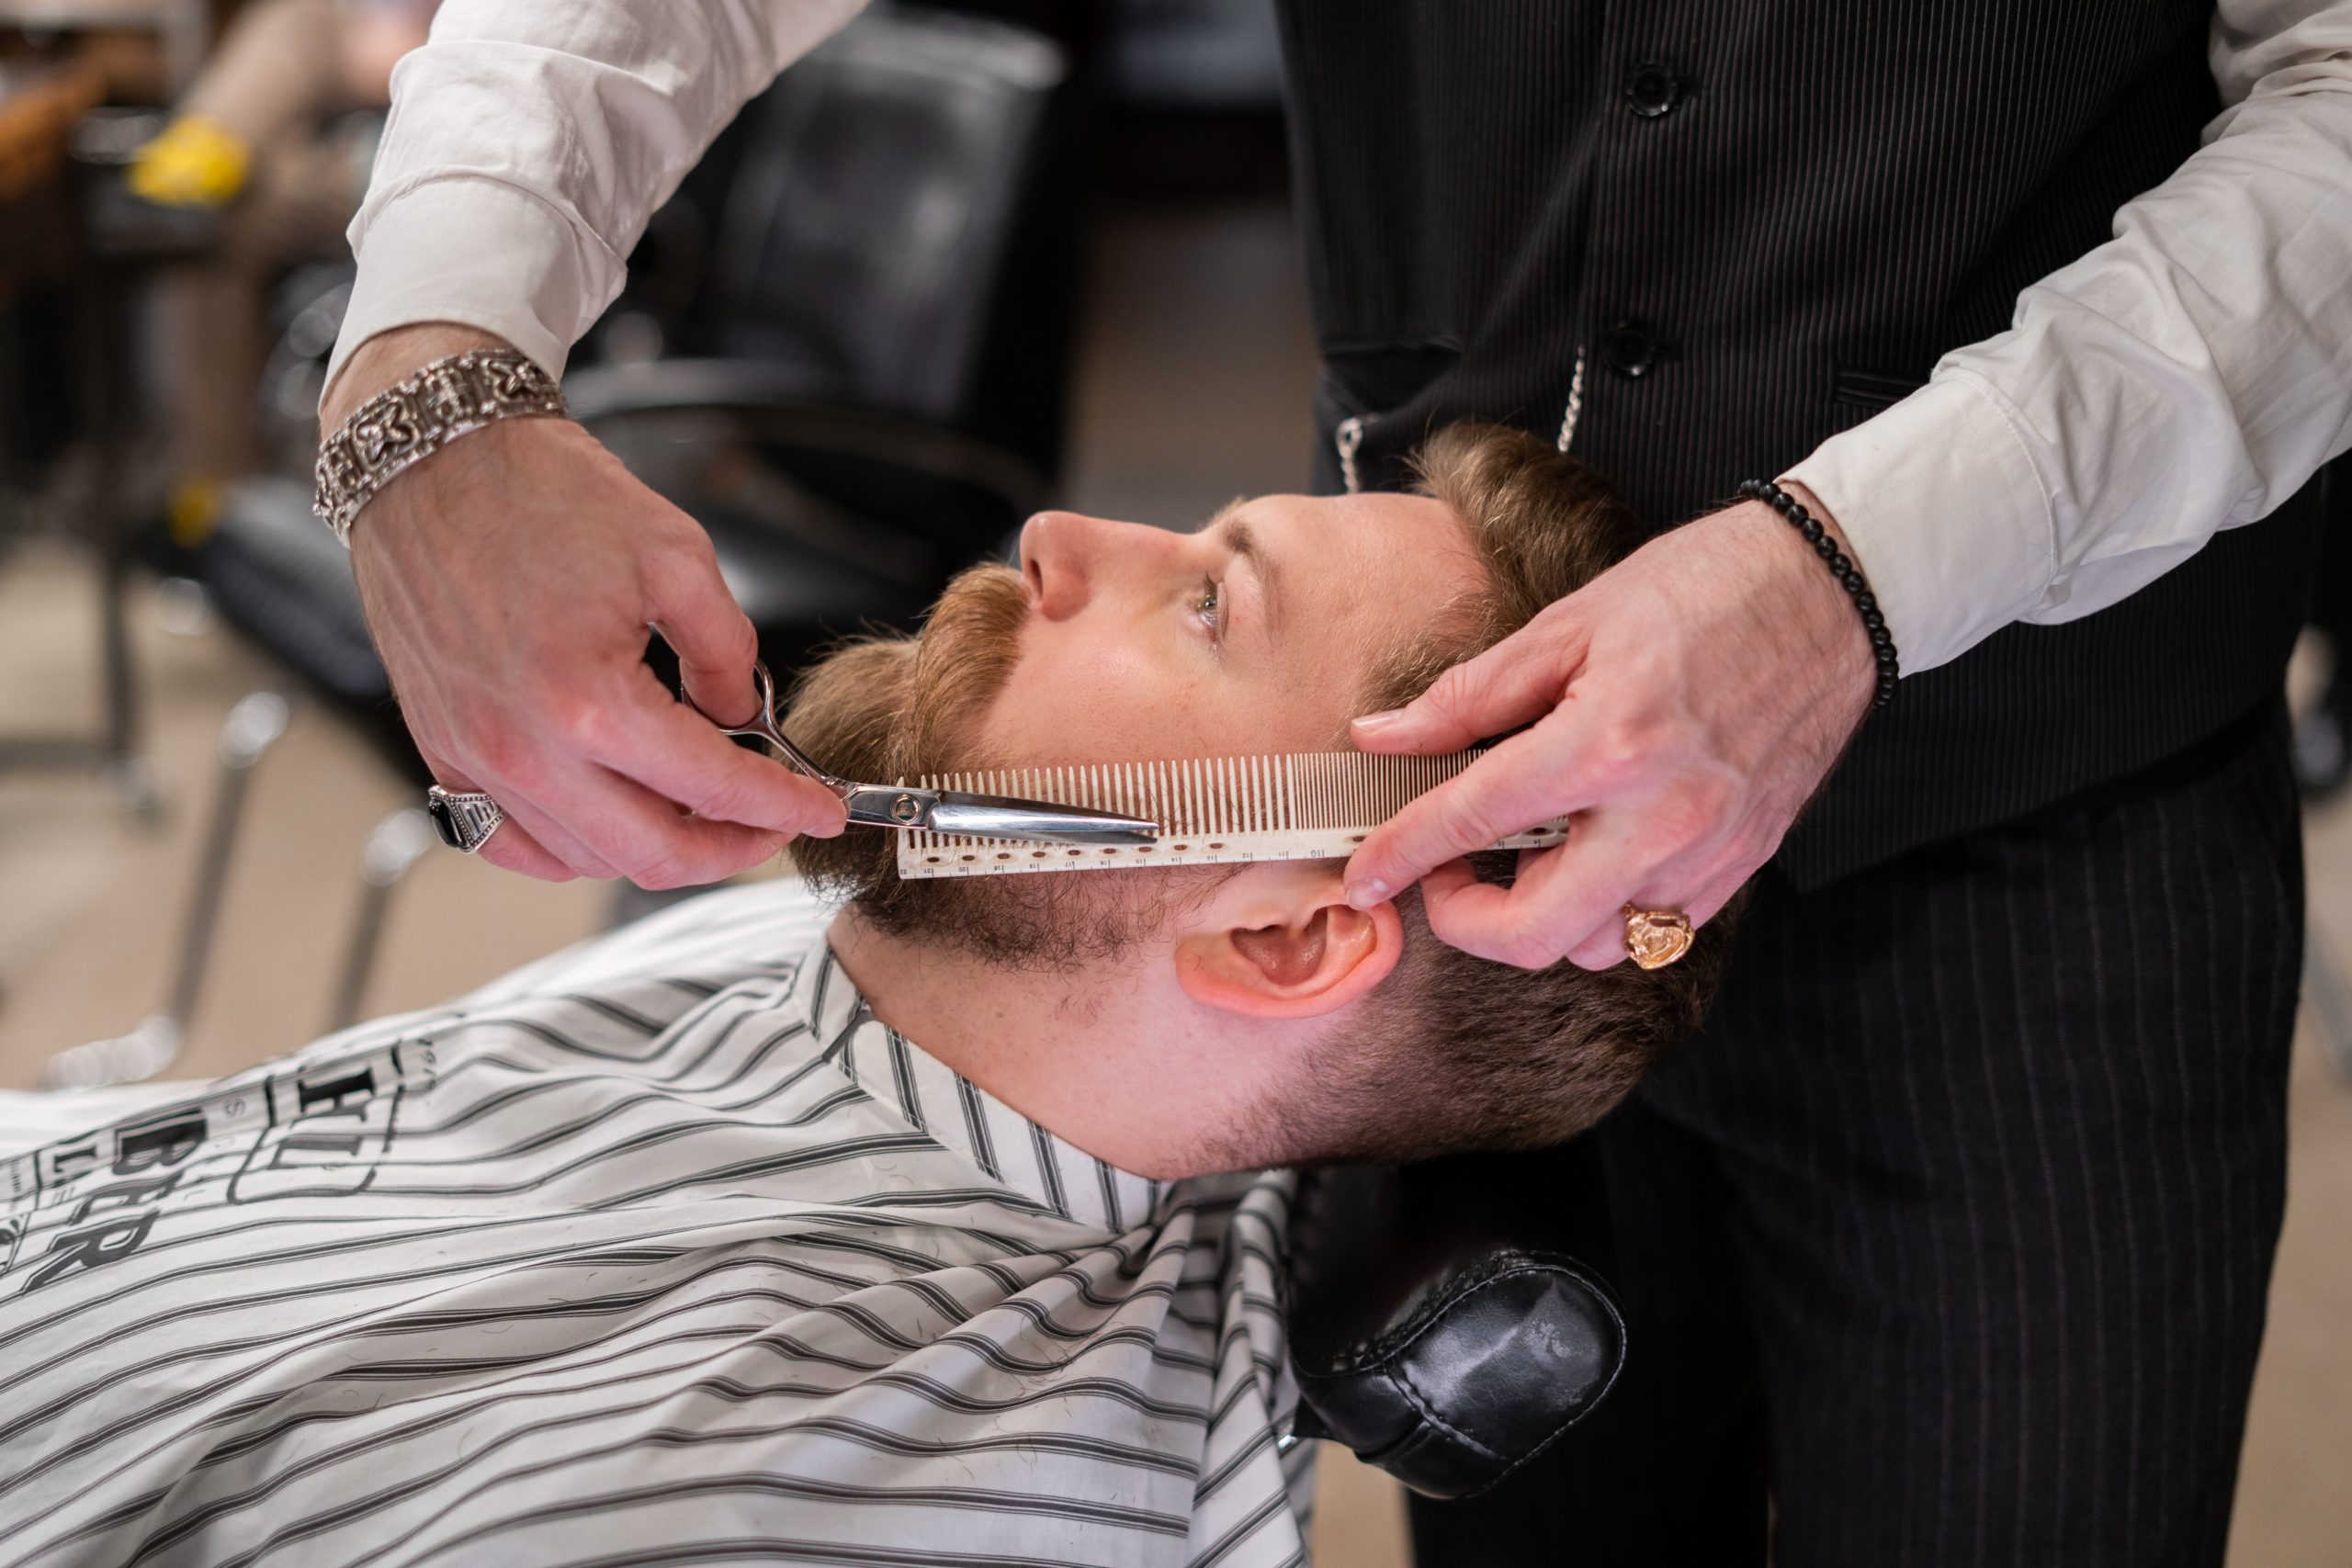
The shear-over-comb requires more practice and skill than clipper-over-comb. Yet it is a necessary skill for the barber/stylist to perfect in order to provide a full range of services. Keep in mind, the client is sure to appreciate the craftsmanship that goes into performing this technique.
To perform shear-over-comb:
- Use a cutting comb to elevate the hair to the desired projection angle.
- Comb elevation will determine the finished result. For example, a 90-degree projection angle will produce equal lengths throughout the section, whereas a 45-degree angle will produce a length increase for a graduated result.
-
- Open and close the scissor blades swiftly to cut the hair on top of the comb, while simultaneously moving the comb upwards throughout the section.
- It is important to keep both the comb and shears moving in a consistent, fluid fashion to avoid creating lines and imperfections in the final design. Use the first ⅓ of the blade surface to cut the hair. Work on a small panel of hair at a time, using the previous panel as your guideline. Maintaining slow movement of the comb ensures that the segments of hair being cut remain small and manageable.
Cutting nape and/or beard hair while the client is seated upright requires the barber/stylist to maintain an upright posture while leaning slightly away from their scissor/shear hand. The elbow of the barber/stylist should be tilted slightly upright, with the shears extended in front of the stylist. This position enables the barber/stylist to open and close the shears rhythmically with the thumb.
In the video below, you will see the shear-over-comb technique being used to trim the sideburn area. In smaller sections, such as the sideburns or eyebrows, the comb remains stationary and is used to simply project the hair away from the face so that the excess hair can be cut using shears.
Note: This video has no sound.
Clipper/Trimmer with Guard Attachment
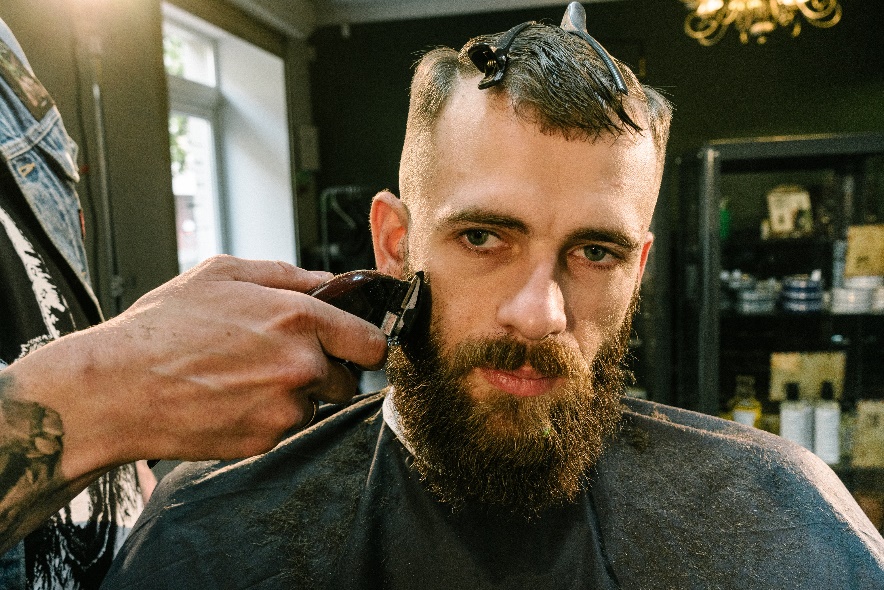
Of all the barber/stylist techniques, the use of a clipper with guard attachment is perhaps the easiest, and often the first technique barber/stylists learn. This is because the guard attachment ensures all hair is cut consistently to the same length throughout, making it an ideal first step when eliminating unwanted hair quickly. To guarantee an all-over even result, the clipper must be carefully guided across the skin as it is moved around the curves and contours of the face.
Because the clipper/trimmer with guard attachment method produces a uniform length throughout, it is recommended that you complete the service by using one of the over-comb techniques so as to customize the nape and facial hair design.
Free-Hand Shaping
Free-hand shaping, with clippers, trimmers, or shears, is used to trim away strays and fly-aways, and to refine the overall shape. The beard must first be brushed or combed into natural fall, before the excess hair is removed to fit the visual guideline of the overall form.
In this video you will see:
- Length removal of beard and moustache using a guarded clipper
- Use of trimmer-over-comb to blend sideburns
- Use of free-hand trimmer to remove strays and refine the final shape
Media Attributions
- “Clipper-over-comb” by Gary Franceschini is licensed under a CC BY 4.0 Licence.
- Sheer-Over-Comb Method by cottonbro is licensed under a Pexels Licence.
- Scissor-over-comb video by cottonbro is licensed under a Pexels Licence.
- Clipper with guard in use by Anthony Shkraba is licensed under a Pexels Licence.
- Free-hand shaping by cottonbro is licensed under a Pexels Licence.
- How To Trim a Beard: Mountain Man to Businessman Beard by Sam Villa Hair Tutorials is licensed under a Standard YouTube License.
Refers to the width of the hair strand. Facial hair tends to be of medium to coarse texture.
The amount of hair. Density is described as thin, average, or thick.
The nape area sits at the back of the head, between the occipital bone and the hairline.
Equal.
