Chapter 4 – Remove Facial and Nape Hair
4.2 The Straight Razor Shave Service
The wet shave has been a practical, everyday ritual for people with facial hair dating back thousands of years. Today, the straight razor shave is seen as a relaxing, almost spa-like experience, complete with warm towels and curated skin care products. Nothing compares to the straight razor in its ability to create a smooth, close shave.
The wet shave procedures covered in this chapter include:
- Pre-shave preparation of the client and skin
- The facial shave
- The neck/nape shave
- After-care of the skin
Tools and Equipment
- Hair/barber chair with headrest and cover
- Barber paper towels
- Neck strips
- Cutting cape
- Comb
- Brush
- Tissues or cotton/gauze pads
- Moisturizer
- Receptacle or container with a cover to store soiled towels
- Garbage can with a cover
- Straight razor handle and blades
- Sharps container for razors that have been used
- Shaving lather (cream or gel)
- Lather dispenser (electric)
- Sink
- Towels (terry cloth)
- Hot-towel warmer
- Antiseptic or witch hazel
Pre-Shave Preparation of the Client
 Seat your client in the barber chair and ensure that they are comfortable.
- Perform a thorough consultation to assess any skin issues, look for irregular growth patterns, and inquire about medications and allergies.
- Place a towel from the back of the neck over each shoulder to the front. If the client is wearing a button-up collared shirt, be sure to ask them to unfasten the top two buttons and roll the collar under for them so it is inside the shirt before placing the towels.
- From the front of the client, loosely drape the cape over the client’s shoulders
- Apply a fresh headrest cover and adjust the headrest to a comfortable height so as to ensure that the client’s head is supported.
- Establish a comfortable working angle by reclining the chair into an appropriate position. Ensure that the client can lay comfortably with a slight upward tilt of the head for ease of access to the chin and neck.
- Establish a comfortable height for the chair and lock it.
- Wash your hands thoroughly and be sure they are completely dry.
- Lay a freshly laundered, unfolded towel across the client’s chest diagonally.
- Use a finger to securely tuck one end of the towel into the inside of the client’s neck band on one side.
- Take the other end of the towel and cross it over to the other side of the client, again using a finger to securely tuck the end of the towel into the inside of the other side of the client’s neck band.
- Tuck a towel/barbering paper towel under the collar of the cutting cape, draping around the neck and over the shoulders so it can be used for wiping the razor of excess lather or hair shavings.
Pre-Shave Preparation of the Client’s Skin
 Remove a pre-heated towel from the hot-towel warmer.
- Use your wrist to determine if the towel is a comfortable temperature to be applied to the client’s face. If too hot, carefully sway the towel backwards and forwards while holding the top of the towel, then once again test the towel on your wrist to determine whether it is an acceptable temperature.
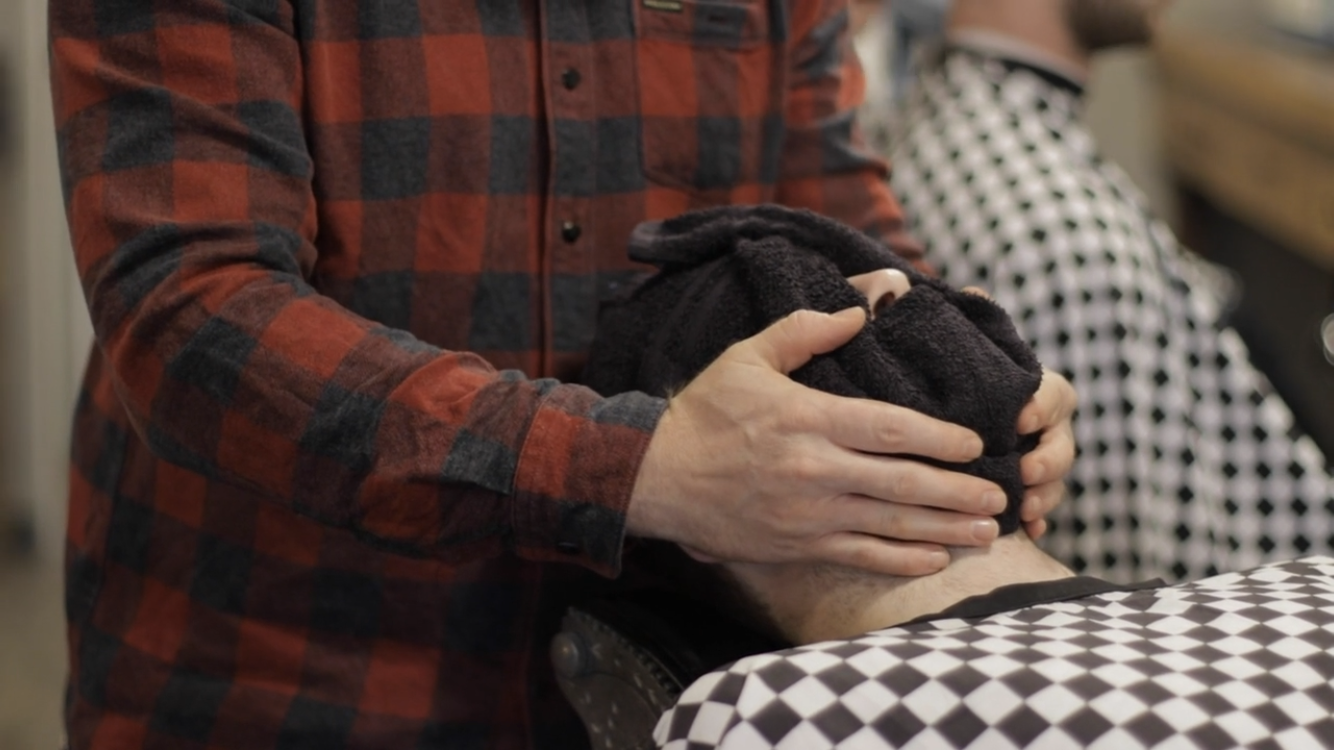
- Position yourself directly at the back of the chair, behind your client’s head. Place the hot towel under and over the client’s chin and fold upwards to client’s mouth and upper lip, leaving the towel to rest just under the nose.
- Place the right-hand side of the towel upwards across the temple and rest it across the forehead. Repeat the same towel placement with the left side. Leave a space for the nose, so that the client can breathe comfortably.
- With a gentle pressing motion, mold the towel to the client’s face, smoothing out the folds in the towel. The heat from the towel will open up the facial pores and begin the hair softening process.
- While the client is relaxing under the hot towel, take this time to prepare your lather product.
- Remove hot towel from your client’s face and apply a pre-shave lotion or gel. This step is optional and based on the barber’s preference.
- Apply and equally distribute the lather product throughout the face and neck areas that are to be shaved.
- Work the shaving cream into a lather using swift circular movements as you work upwards from the right side of the neck towards the face. The exact same movements should be repeated on the left side, starting at the neck and up into the face. Clients have varying degrees of beard density and coarseness of hair, therefore, the time required for this step can vary from 1-2 minutes.
- Remove a second towel from the towel warmer, and again use your wrist to determine if the towel is an acceptable temperature before applying it to the client. With the lather left intact on the beard, apply the towel with gentle pressing motions to mold the towel to the client’s face. Allow the hot towel to remain while you prepare the razor for the shave.
- If using a single-use razor, disinfect the straight razor and insert a new blade. If using a conventional (reusable) straight razor, strop the razor if required.
- Simultaneously remove the towel while using it to remove the lather from the face in one fluid movement.
- Now that the first lather has been removed, apply a second application of lather to the areas to be shaved.
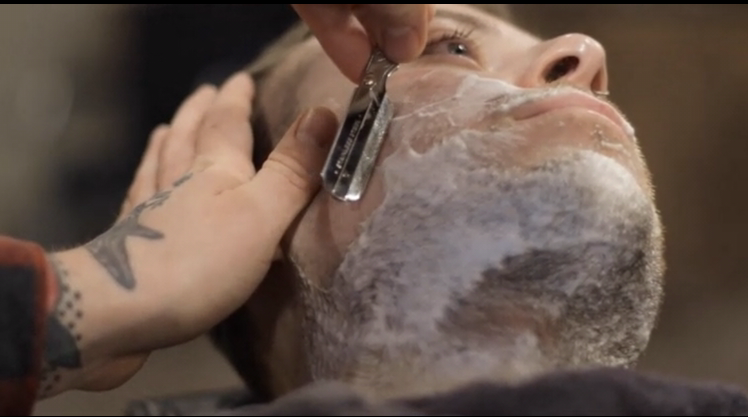
The Facial Shave Procedure
 A straight razor shave requires shaving of all fourteen shaving areas of the face in a systematic and sequential order, so as to provide a thorough shave service and to achieve the smoothest possible result.
Shaving in a sequence is important because it creates a pattern where dry skin will always be above the area you are shaving, which allows your off-hand to apply the appropriate tension and stretch the skin for each stroke.
The strokes utilized in the shave are:
- The freehand stroke
- The backhand stroke
- The reverse freehand stroke
- The reverse backhand stroke.
A right-handed barber will start the shave at the client’s right side. The left-handed barber will begin at the left side and progress through the steps from that side.
The strokes are performed in the order shown in the diagram below:
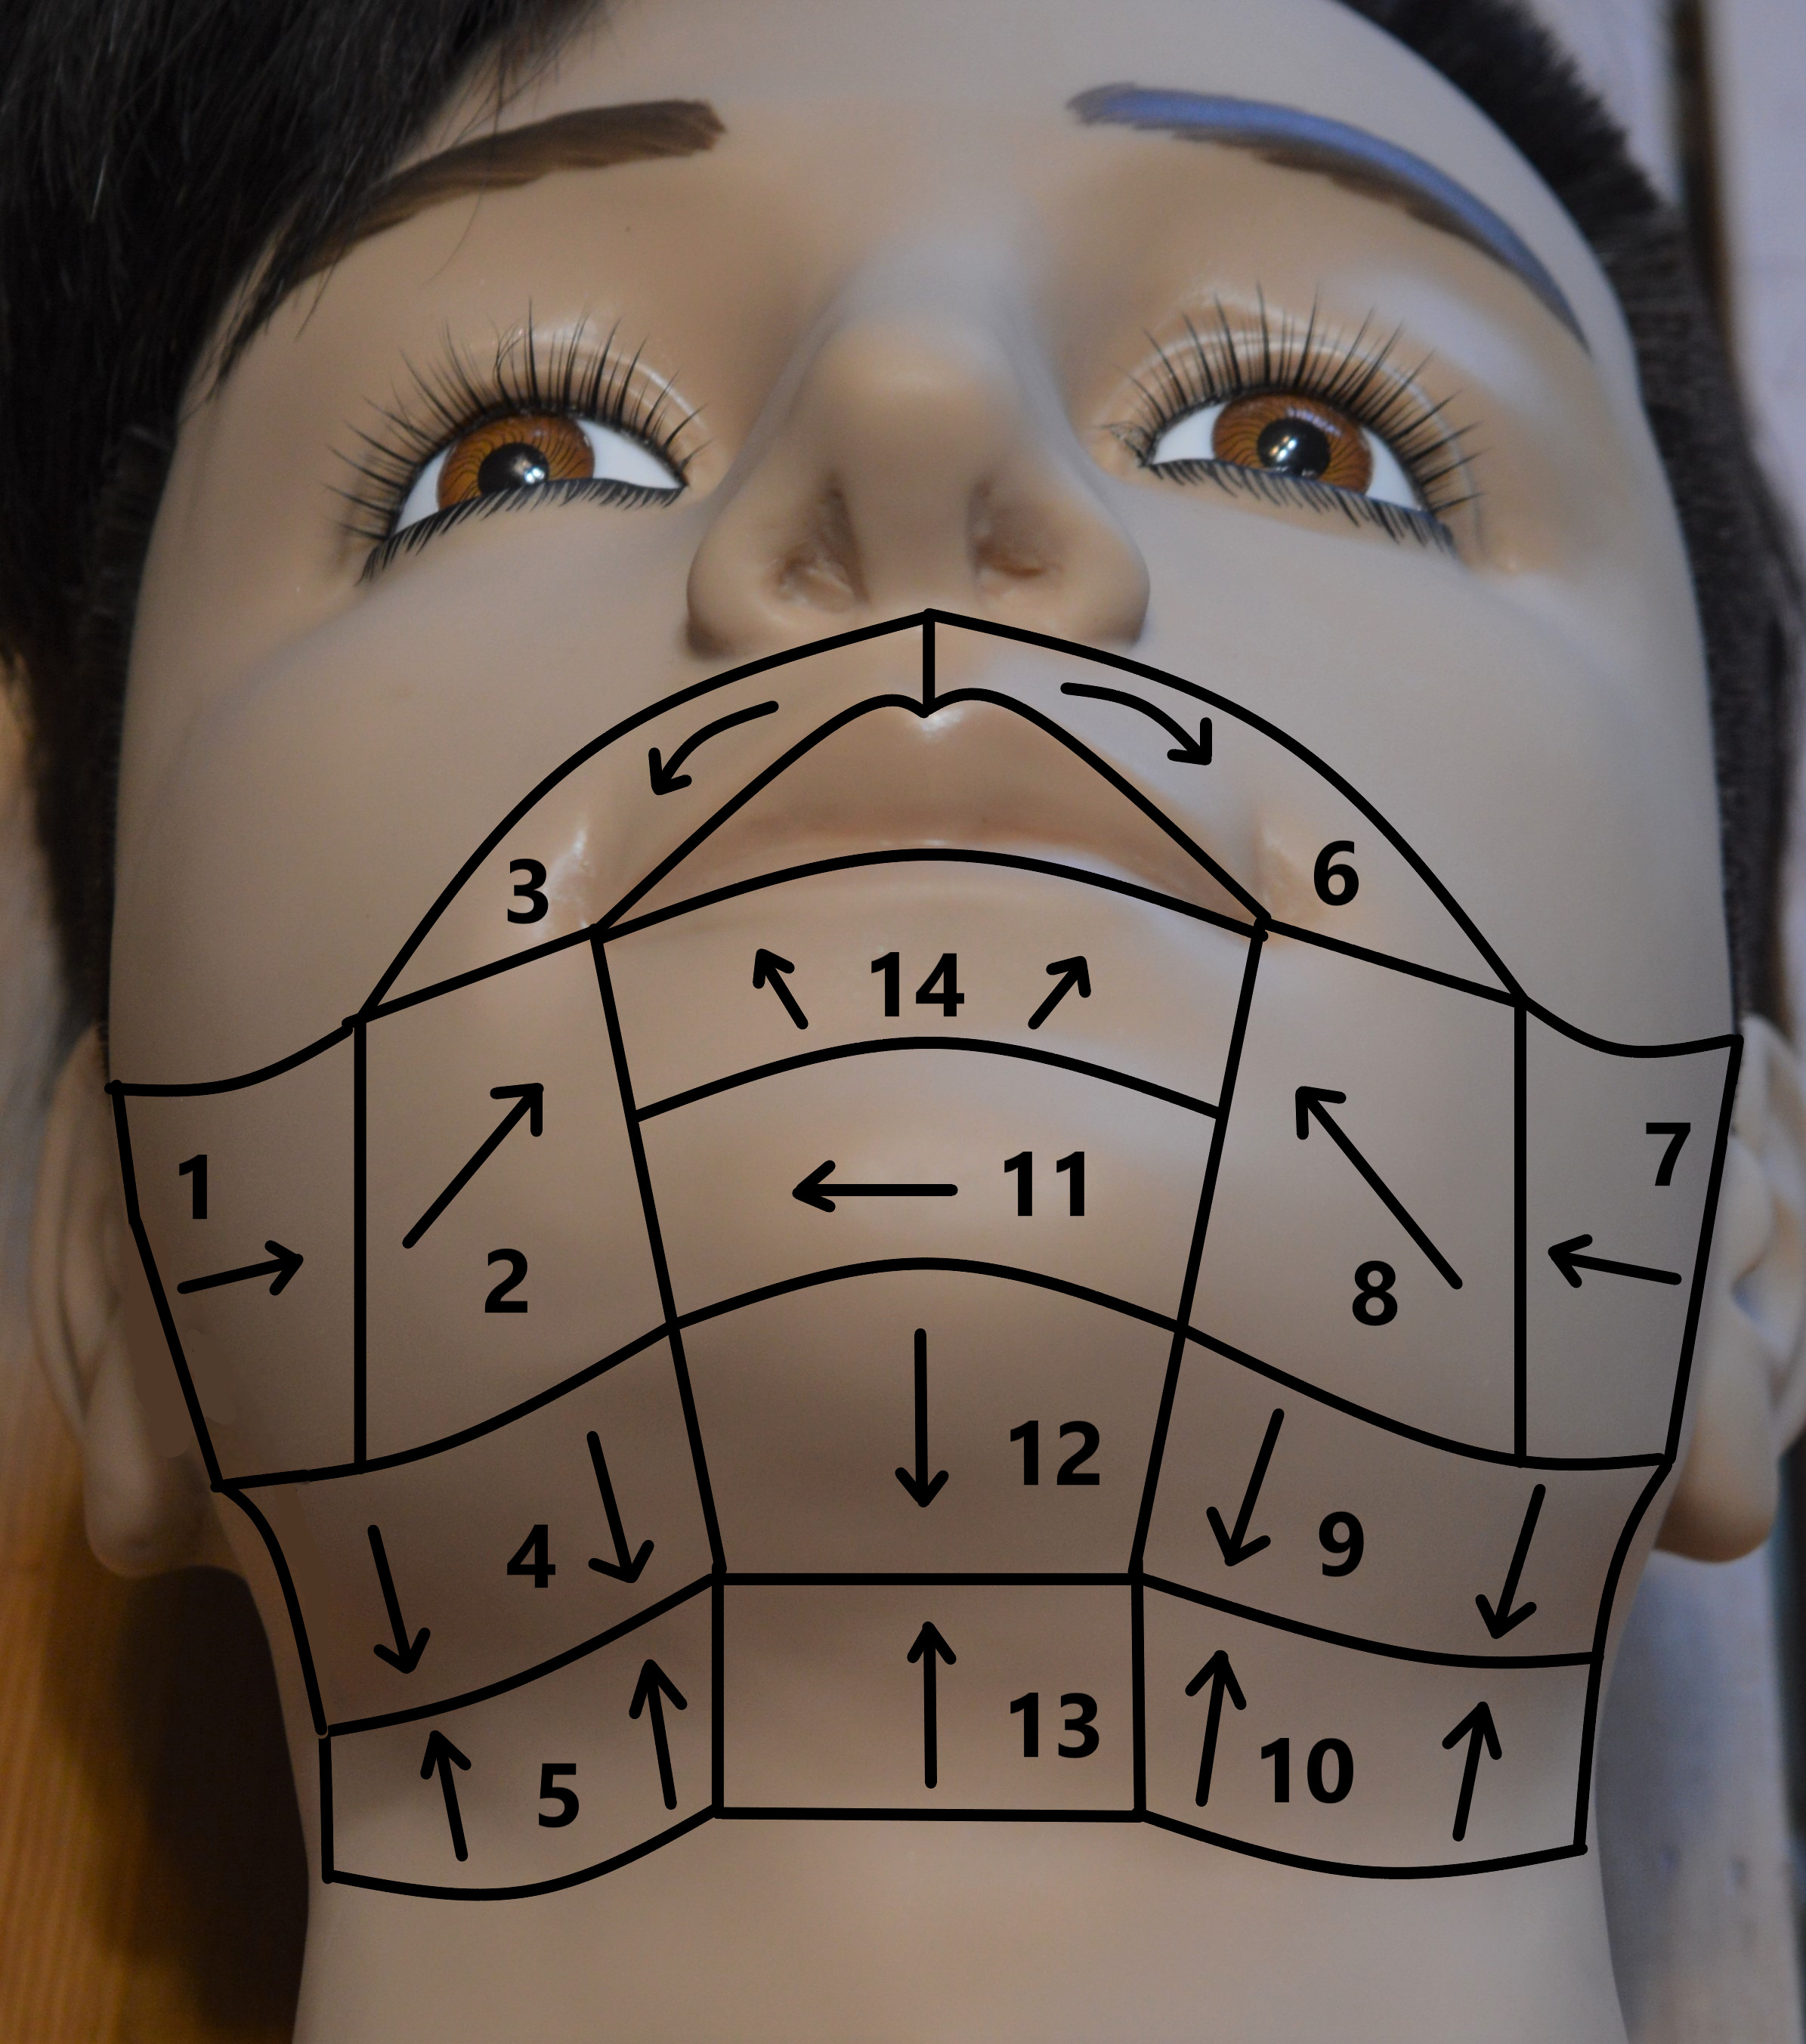
Throughout the following procedure, ensure that you stretch the skin with your opposite hand, while maintaining a gentle, consistent pressure on the blade. The blade should be held consistently at a 30-degree angle.
The First Time Over Shave
- Begin in area 1, using the freehand stroke to move from the sideburn towards the jawbone and angle of the mouth.
- Follow with the backhand stroke in area 2. It is essential that your strokes are kept short; use your fine motor skills rather than your gross motor skills.
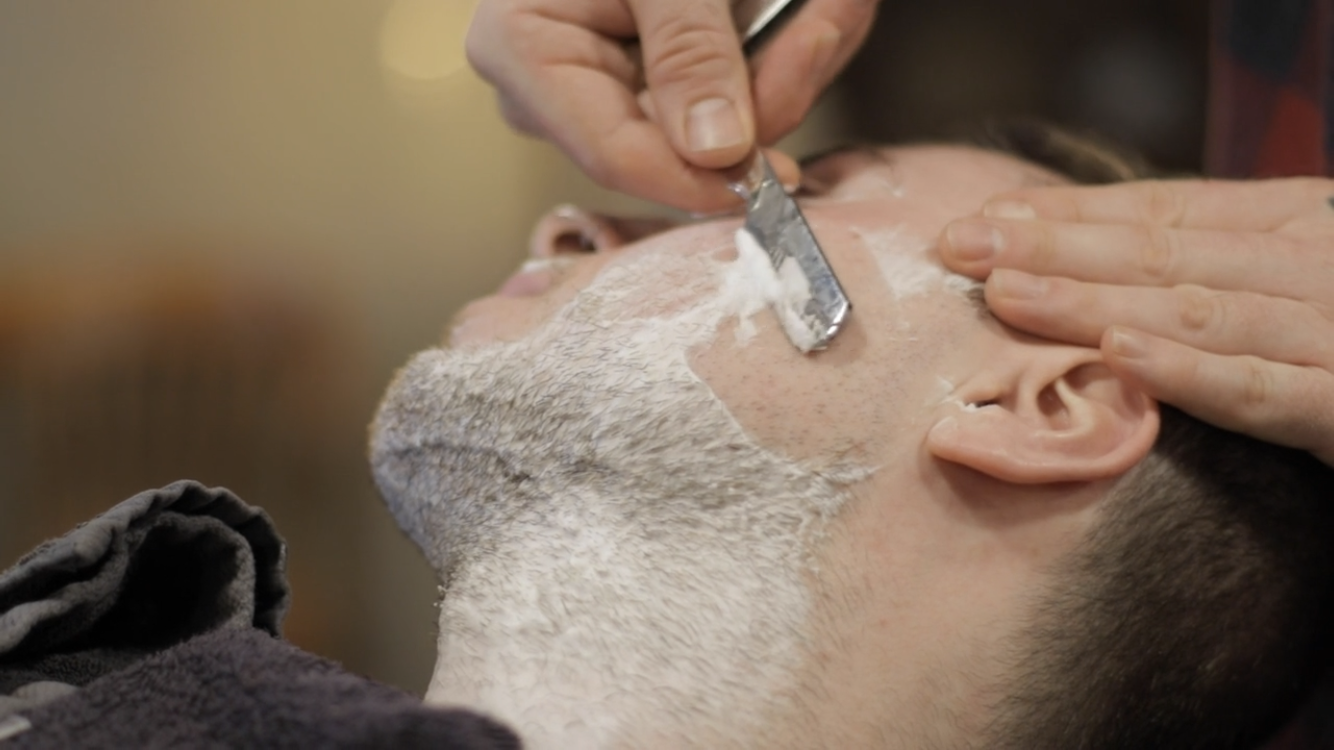
- From the upper lip, area 3, move towards the jawline with the freehand stroke.
- As you move toward the neck, area 4, use the reverse freehand technique.
NOTE: Pay attention to the hair growth pattern in the neck area; some clients may have swirls or irregular growth patterns. It is essential to ensure that you are shaving with the grain.
- Move to the opposite side of the client. Starting in the sideburn, use the backhand stroke, moving towards the jawbone and angle of the mouth.
- Make your way across the face areas while following the growth pattern; if the grain deviates, you may have to adjust the stroke direction.
- As you work across the chin, in area 11, it is crucial to stretch the skin using your opposite hand’s thumb and forefinger, as the skin in this area is typically thicker and tougher to shave.
- Move down the neck, areas 12 and 13, and continue to shave downwards and remain conscious of growth patterns. As you reach the Adam’s apple, you want to avoid shaving directly over top of it; stretch the skin to either side of the Adam’s apple before shaving the area.
- Move up to area 14, under the bottom lip. this area will be shaved entirely against the grain; the razor strokes move upwards towards the lip, to prevent the lip getting caught by the razor.
The Second Time Over
- Now that the first time over shave is complete, apply a warm (not hot) towel to the face to keep the skin warm.
- Remove the warm towel so the skin can be checked for rough spots or imperfections in the shave, use the towel to remove loose hairs or residual shaving lather.
- Apply a pre-shave oil or gel to the skin, continuing to check for spots that will require further shaving. Perform a second shave only in the areas that require it.
- Following the second time over shave, apply a cold towel to the face to soothe the skin, close the pores, and reduce irritation.
- Remove the towel, and use it to remove any loose hairs or excess pre-shave product that remains on the skin.
- Apply a small amount of aftershave to the freshly shaved skin. An aftershave with alcohol as an ingredient will act as an antiseptic and provide further encouragement for the pores to close.
When the service is complete, the client’s skin should feel smooth, tacky, and free of any redness or bumps. A skin moisturizer can be applied for extra soothing of the skin and added hydration.
Video: The Facial Shave Procedure
The Nape Shave
If the client is getting a haircut as well as a facial shave, they may require a nape shave to clean up their neckline for a complete finished look. This service can be performed alone as maintenance between haircuts, as part of an outline shave, or combined with the facial shave service.
- Prior to the neck/nape shave, ensure that all loose hairs from the haircut are removed. Perform a visual inspection of the area to check for any skin abnormalities or issues such as blemishes, moles or lesions of the skin.
- Replace the neck strip to ensure that the neck area is clean and free of loose hairs.
- With clean hands, apply shave product to the sides of the neck and across the nape just below the established outline.
- Use a downward razor stroke to remove any hair below the outline and down the sides of the neck.
- Remove the lather and gently cleanse the area. Follow with an antiseptic or witch hazel.
- To complete the service, style the client’s hair and/or beard/moustache to suit the client’s preference.
Cleaning and Disinfection Practices
Upon completion of all services, the following cleaning and disinfection practices must be completed. Always check with local authorities to make sure that these practices are in alignment with the requirements in your area.
- Clean and disinfect all tools and equipment following manufacturer recommendations and contact time.
- Thoroughly clean and disinfect your work area.
- Sweep and deposit hair into the covered garbage or recycling container.
- Carefully remove used blades and discard them in the sharps container.
- Deposit all single-use items in the covered garbage or recycling container.
- Deposit towels, capes, and linens into the laundry.
- Thoroughly wash your hands.
Media Attributions
- Pre-Shave Preparation video by Michael Kluthe is licensed under a CC BY 4.0 Licence.
- Shaving Areas diagram by A. Magtiza is licensed under a CC BY 4.0 Licence.
- The Facial Shave Procedure video by Michael Kluthe is licensed under a CC BY 4.0 Licence.
- All other images are by Michael Kluthe and are licensed under a CC BY 4.0 Licence.
