Chapter 5 – Foiling Placement and Technique
5.3 Additional Considerations
When applying foils, there are certain areas of the head that may require additional attention to detail. This includes the hairline, growth patterns, the nape, and the part.
Hairline
When foiling, the hairline around the face should in most cases be looked at as its own section, especially in cases where there is a distinct growth pattern present. You must also consider the texture of the hair around the face in relation to the rest of the hair. Generally the hair will be a finer texture and have less density, which may warrant using a gentler product. In cases where you are using bleach, earlier removal of the foils may be required.
Fine, Wispy Hairline
If your client has finer, less density hair around their face, you must take care to not create a blocky or stripy appearance around the hairline with your foils. If your client would like a lot of brightness around the face, it is best to do many baby fine weaves closer together, rather than trying to save time with less foils and a thicker weave.
Video: Diagonal Forward Hairline Placement
Note: Video has no sound.
Widow’s Peak or High Recession
When working around a widow’s peak or a higher recession area, here are some foil placements that work well to ensure that there are no resulting bare spots:
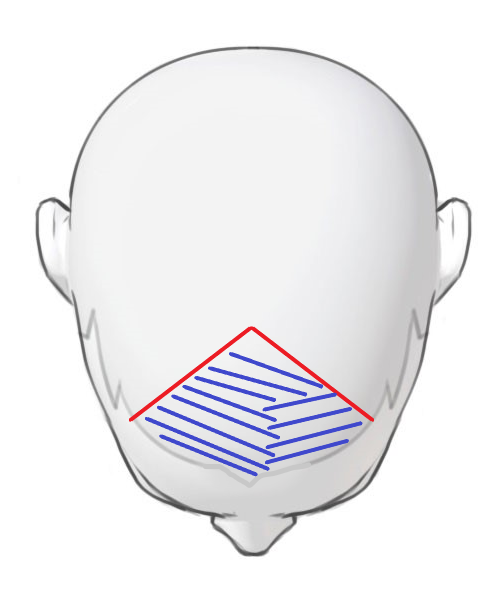
When working around a widow's peak, create a fringe section, and place your foils according to the direction of hair growth. By overlapping your weaves at the back, you create a blended result, no matter how the hair flips or settles into place.
Video: Widow’s Peak Application
Note: Video has no sound.
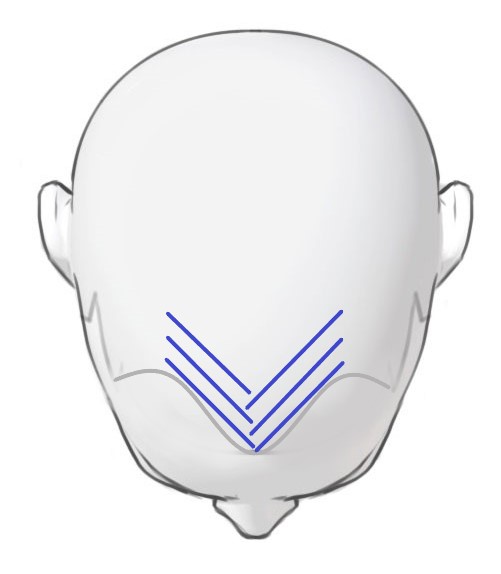
With a recession area, working along the line of the recession is important. If you were to place your foils horizontally, you would be left with an untouched section right in front, which would not be ideal if the client were to pull their hair back.
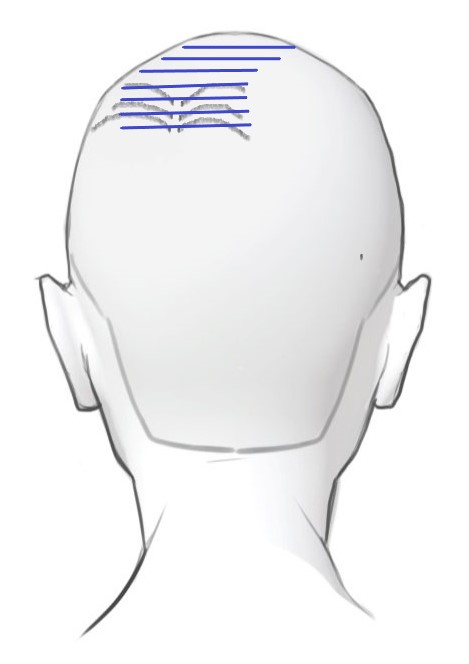
Split Crowns and Whorls
Split Crown
If your client has a strong growth pattern that causes the hair to split in the crown area, be sure to weave carefully across the split, which may take you slightly off course from your mohawk section.
Video: Split Crown Application
Note: Video has no sound.
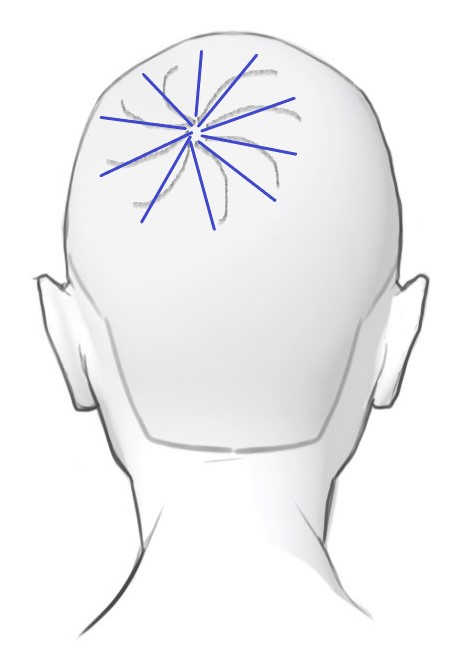
Whorl
If there is a strong whorl, you may choose to place your foils in a circular pattern so as to follow the direction of hair growth. This will also prevent over-directing of the hair, which may cause the foils to bleed.
Nape
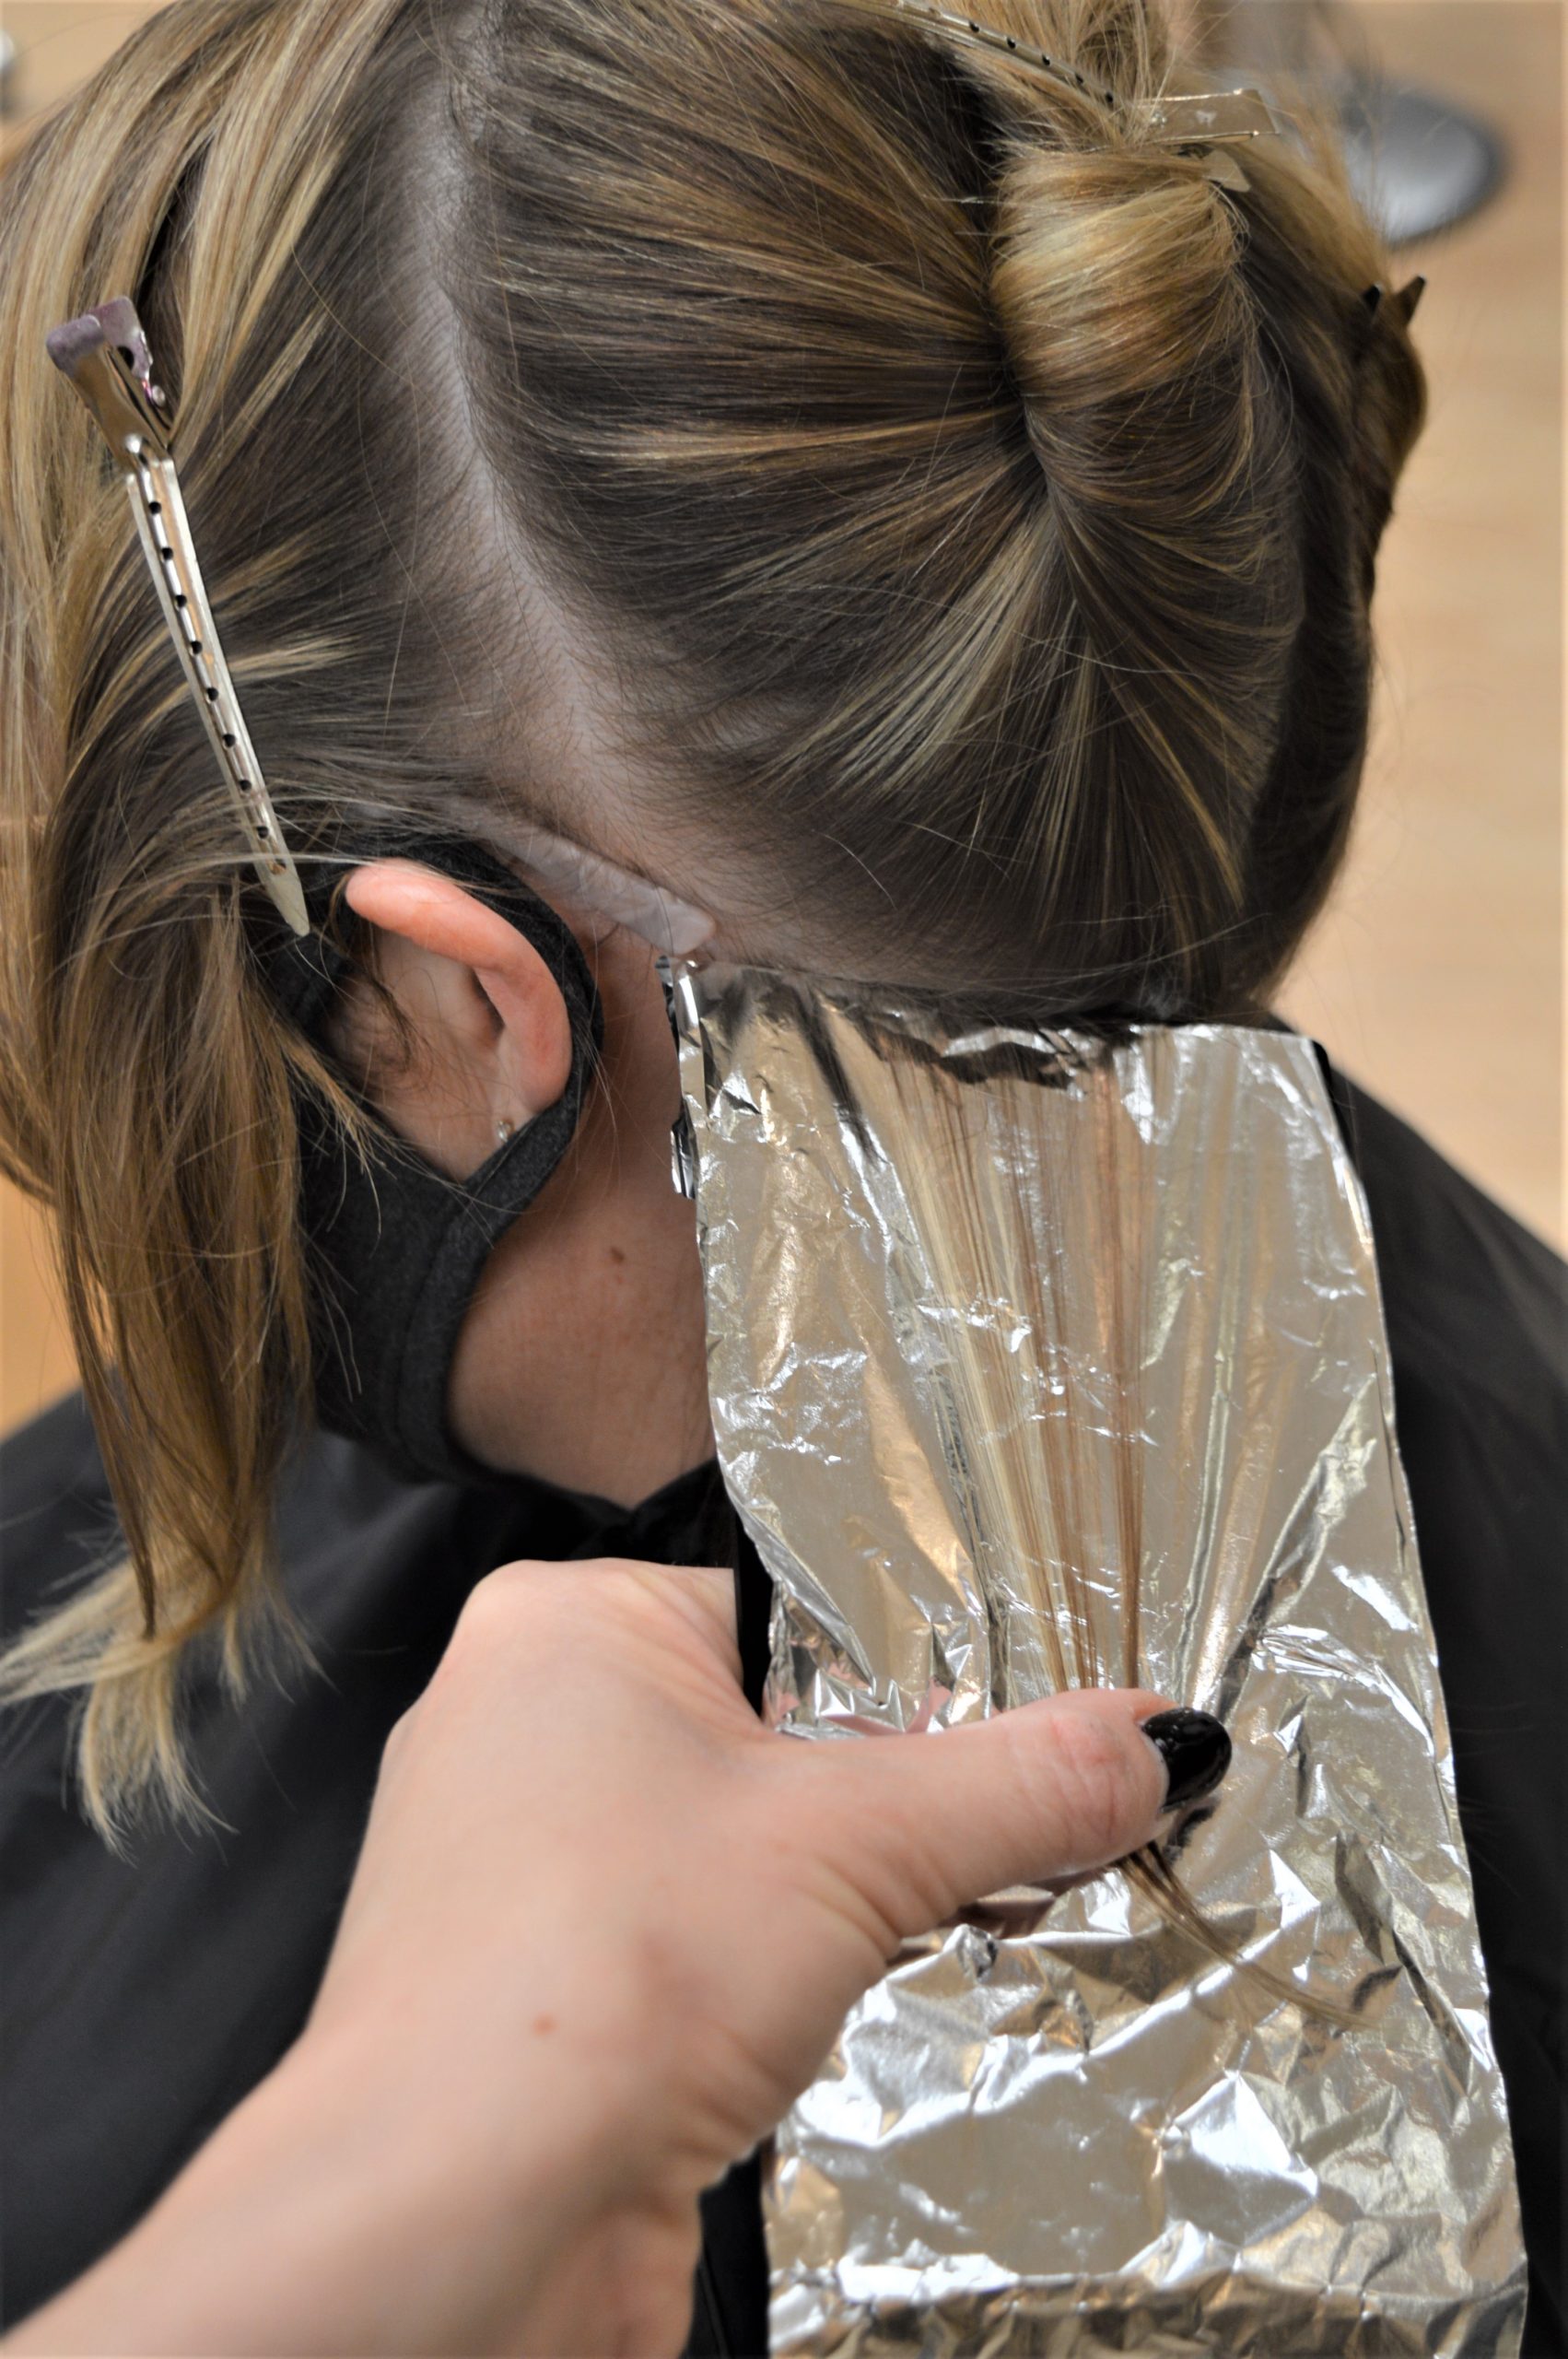
The nape, like the front hairline, has the tendency to have finer, wispy hair with less density. When fine, less density hair is combined with the strong curve of the head as it narrows into the nape, it can make it tricky to get your foils snug to the root. Using a foiling board to apply the first few foils in the nape is a great way to add stability until the stacked foils provide a stable enough base to support your foils as you move up the head.
Part
Your client’s part should also be taken into consideration. Whether they wear their hair down the middle or to one side, be sure that you are applying their colour equally to both sides of the part line. For example, if your client wears their hair parted to one side, using a centre mohawk section will place too much colour on the heavy side of the part, and not enough on the lighter side, as seen below:
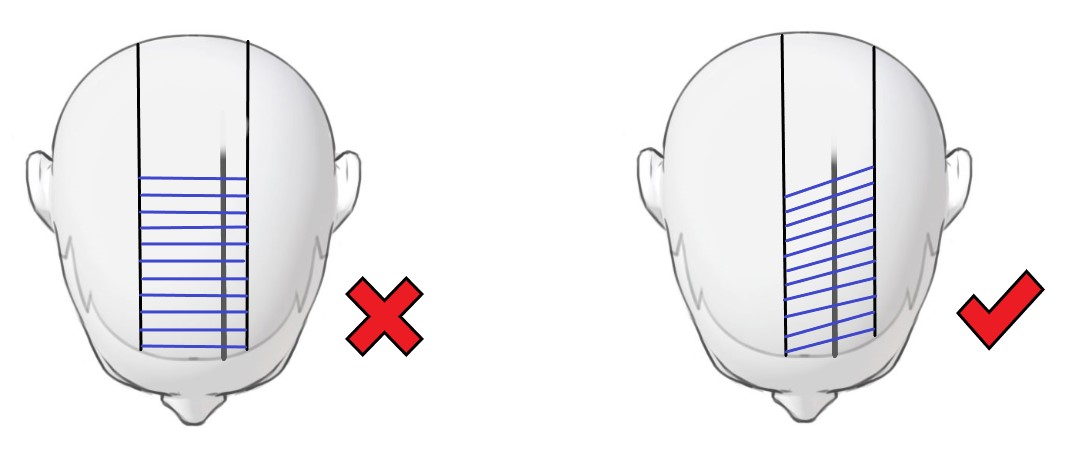
Moving your mohawk section to accommodate the part, and by placing the foils on an angle that follows the way the hair falls towards the heavy side, will give a much more balanced result.
What if your client likes to move their part around? A great option for this client is the herringbone foil placement:
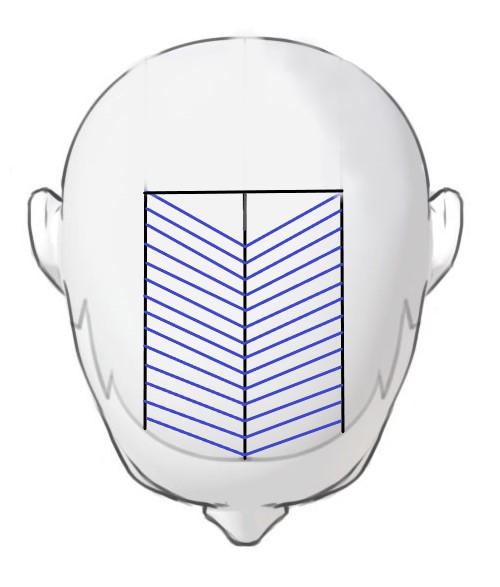
When the foils are placed diagonally on either side of a middle part line, this mimics the side part placement above, but allows the part to be on either side. When the hair is parted down the middle, you will get a balanced, blended appearance.
Remember that consultation and hair analysis are key to a successful foil application! Use what you’ve learned to create a customized foil placement for each of your clients, and you will have a very satisfied clientele!
Media Attributions
- All images in this chapter are by A. Magtiza and are under a CC BY 4.0 Licence.
- “Diagonal Forward Hairline Placement” video by A. Magtiza is under a CC BY 4.0 Licence.
- “Widow’s Peak Application” video by A. Magtiza is under a CC BY 4.0 Licence.
- “Split Crown Application” video by A. Magtiza is under a CC BY 4.0 Licence.
A growth pattern at the front hairline that results in a pointed hairline and a strong directional hair fall.
The area of the head located between the apex and the occipital bone.
A growth pattern that results in circular hair growth. Generally found in the crown.
