Chapter 4 – Lightening Virgin Hair and Regrowth
4.3 Application Process: Global Lightening Service – Oxidative Colour
Tools and Supplies Required
- Colour safe gloves
- Colour cape
- Towels
- Hair clips
- Brush and Comb
- Colour Key
- Colour Bowl
- Weigh Scale
- Tint Brushes-
- Standard 2 inch
- Wide standard 3–4 inch (optional)
- Cotton (optional)
- Foil/Balayage Board (optional)
Application
Prepare your client for their oxidative colour lightening service by performing the following procedure:
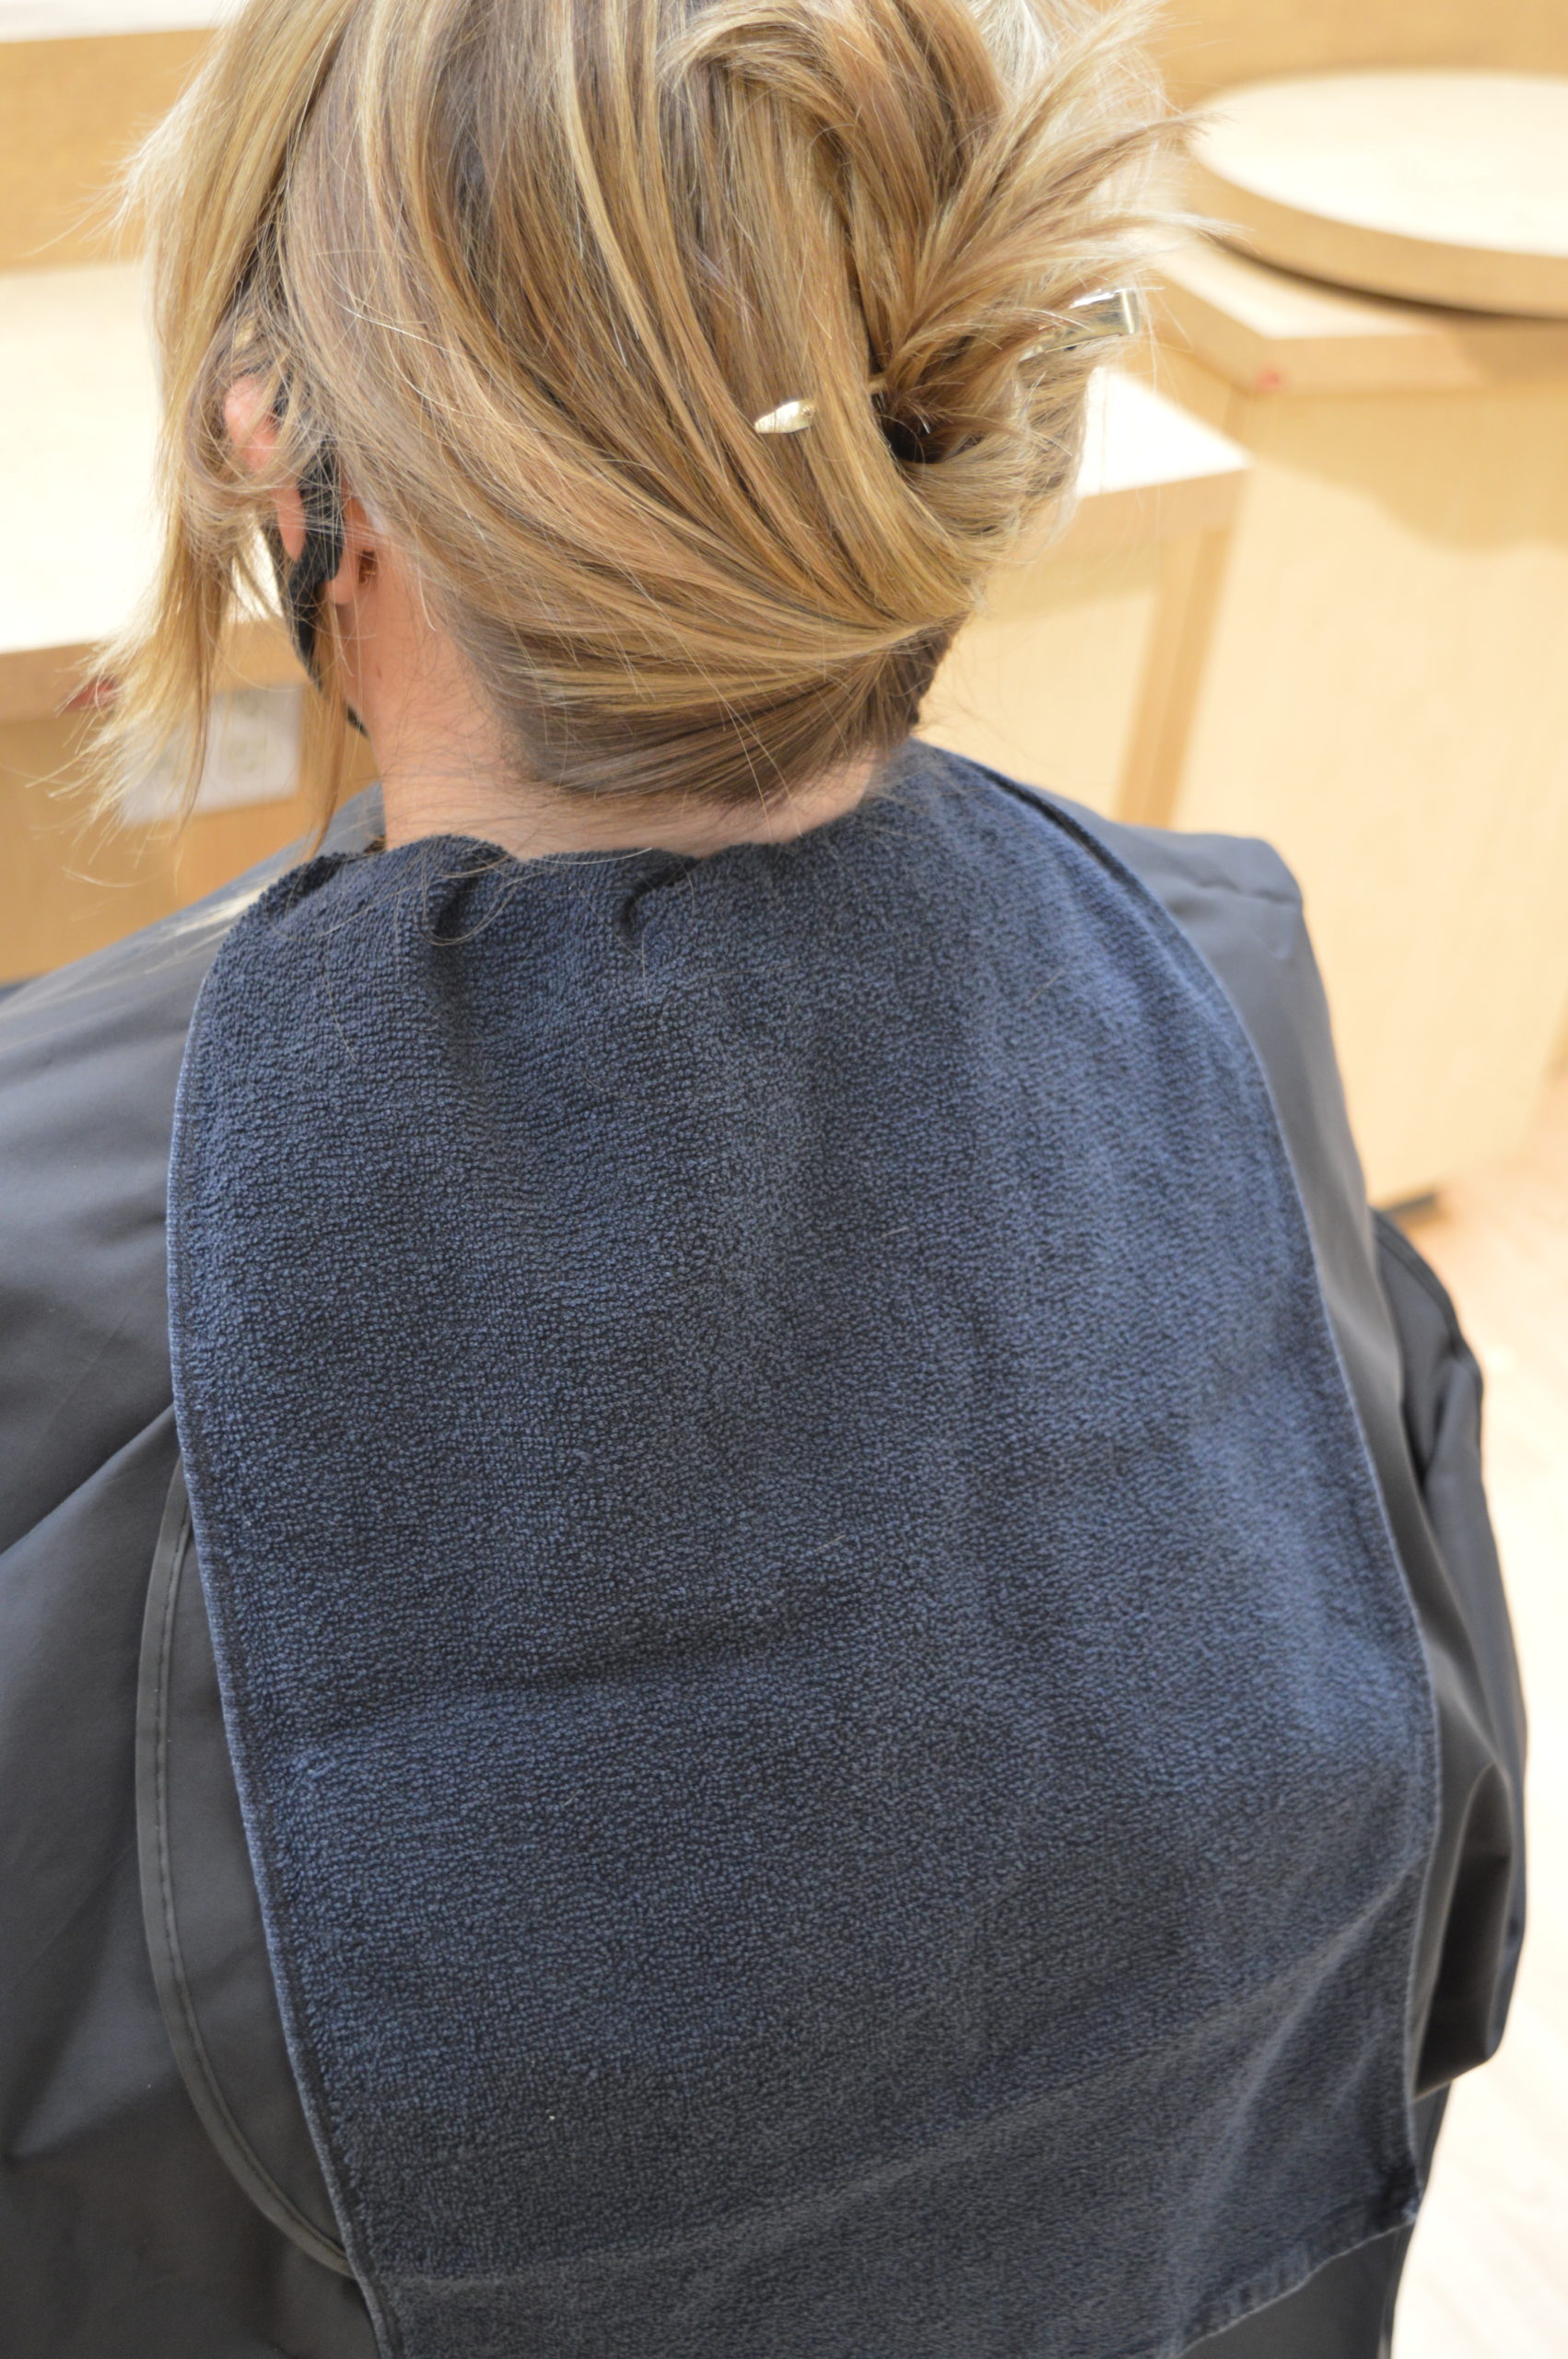
- Drape your client using towels and a colour cape. First, place a towel around the client’s shoulders. Then, fasten the colour cape loosely, allowing just enough room to tuck a towel into the outside of the cape. This provides a surface to lay the coloured hair on, which will keep the colour cape clean. If your client has very long hair, tuck the outside towel in so that it lays lengthwise (see following photo).
- Ensure that the hair is fully dry.
- Brush through the hair to remove tangles
- Section and divide the hair into 4 quadrants using your comb and clips. Section nose to nape, then ear to ear.
Before we get into the application of the oxidative colour, let’s pause for a moment to review the different areas, or zones, of the hair. Keep in mind that we are referring to virgin hair in this chapter, so the following does not account for any chemical influences.
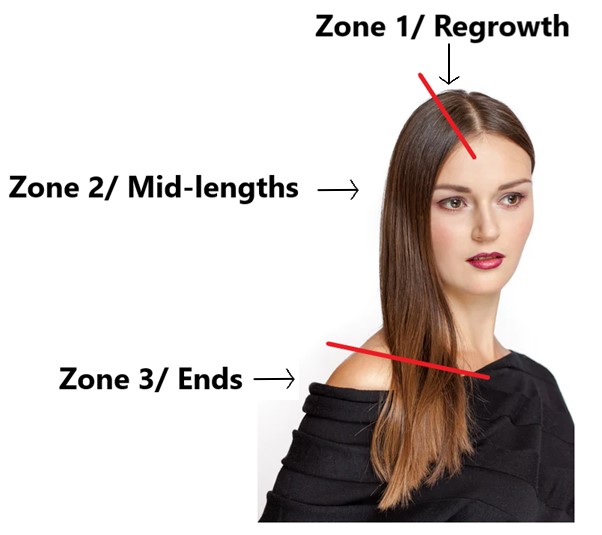
- Zone 1, or the regrowth area, is the area of the hair that sits within the first ½ to ¾ inches from the scalp. This zone is also referred to as the “Hot Zone” when colouring, as the heat from the scalp will encourage the hair to process more quickly.
- Zone 2, or the mid-lengths, contains the segment of hair that sits between Zone 1 and the more porous ends. Generally, this hair will have a healthier structure and will process the most predictably according to manufacturers guidelines.
- Zone 3, or the ends, generally contains the most porous hair on the head. Not everyone will have a Zone 3. This is the case with shorter hair or hair that has an even average porosity from roots to ends. In instances where the porosity is more extreme through the ends, this hair will process more quickly and is more likely to soak up any cool tones added to the colour formula.
Once you have prepared the client for their colour service, gathered your tools and supplies, and mixed up your oxidative colour formula:
- Don your gloves
- Begin your application in the darkest sections. Generally, this will be the back two quadrants, as the hair around the face tends to be lighter and easier to lift.
- Beginning at the bottom of the quadrant and working upwards, use ¼ inch subsections/partings and apply your colour only to Zone 2, ½ inch to ¾ inch away from the scalp, and through the mid-lengths. We begin in Zone 2 as this area is typically slower to process than Zones 1 and 3. You may choose to use your wider tint brush for this area for maximum efficiency and saturation. Be sure to saturate the hair fully on either side of the subsection/parting to ensure an even colour result. As mentioned above, not every client will have a Zone 3. If this is the case, apply the product through to the ends in this step.You may find it helpful to use a foil/balayage board to support the subsection that you are applying colour to. This provides a sturdy surface to allow ease of saturation, and keeps your hands free of product, preventing transfer onto Zones 1 or 3. If you prefer to use your hand to support the subsection, keep a towel nearby to wipe your hands periodically throughout the application.
- Drop the hair without pressing it into the previous section to ensure that the regrowth remains free of product. If necessary, you may place a length of cotton between each subsection/parting.Continue this application throughout your four quadrants.
- Once the colour had been fully applied to the mid-lengths, beginning in the same back quadrant as before, begin to apply your colour to the regrowth area, Zone 1, working in the same ¼ inch subsections/partings. Begin the application in the top of the quadrant, and work downwards towards the bottom. It is a good idea to switch to your standard 2 inch tint brush at this time for maximum neatness and control. Be sure to saturate the hair fully on either side of your subsections/partings.
- Lastly, using your wide tint brush, apply your colour formula through the more porous ends if a Zone 3 is present.
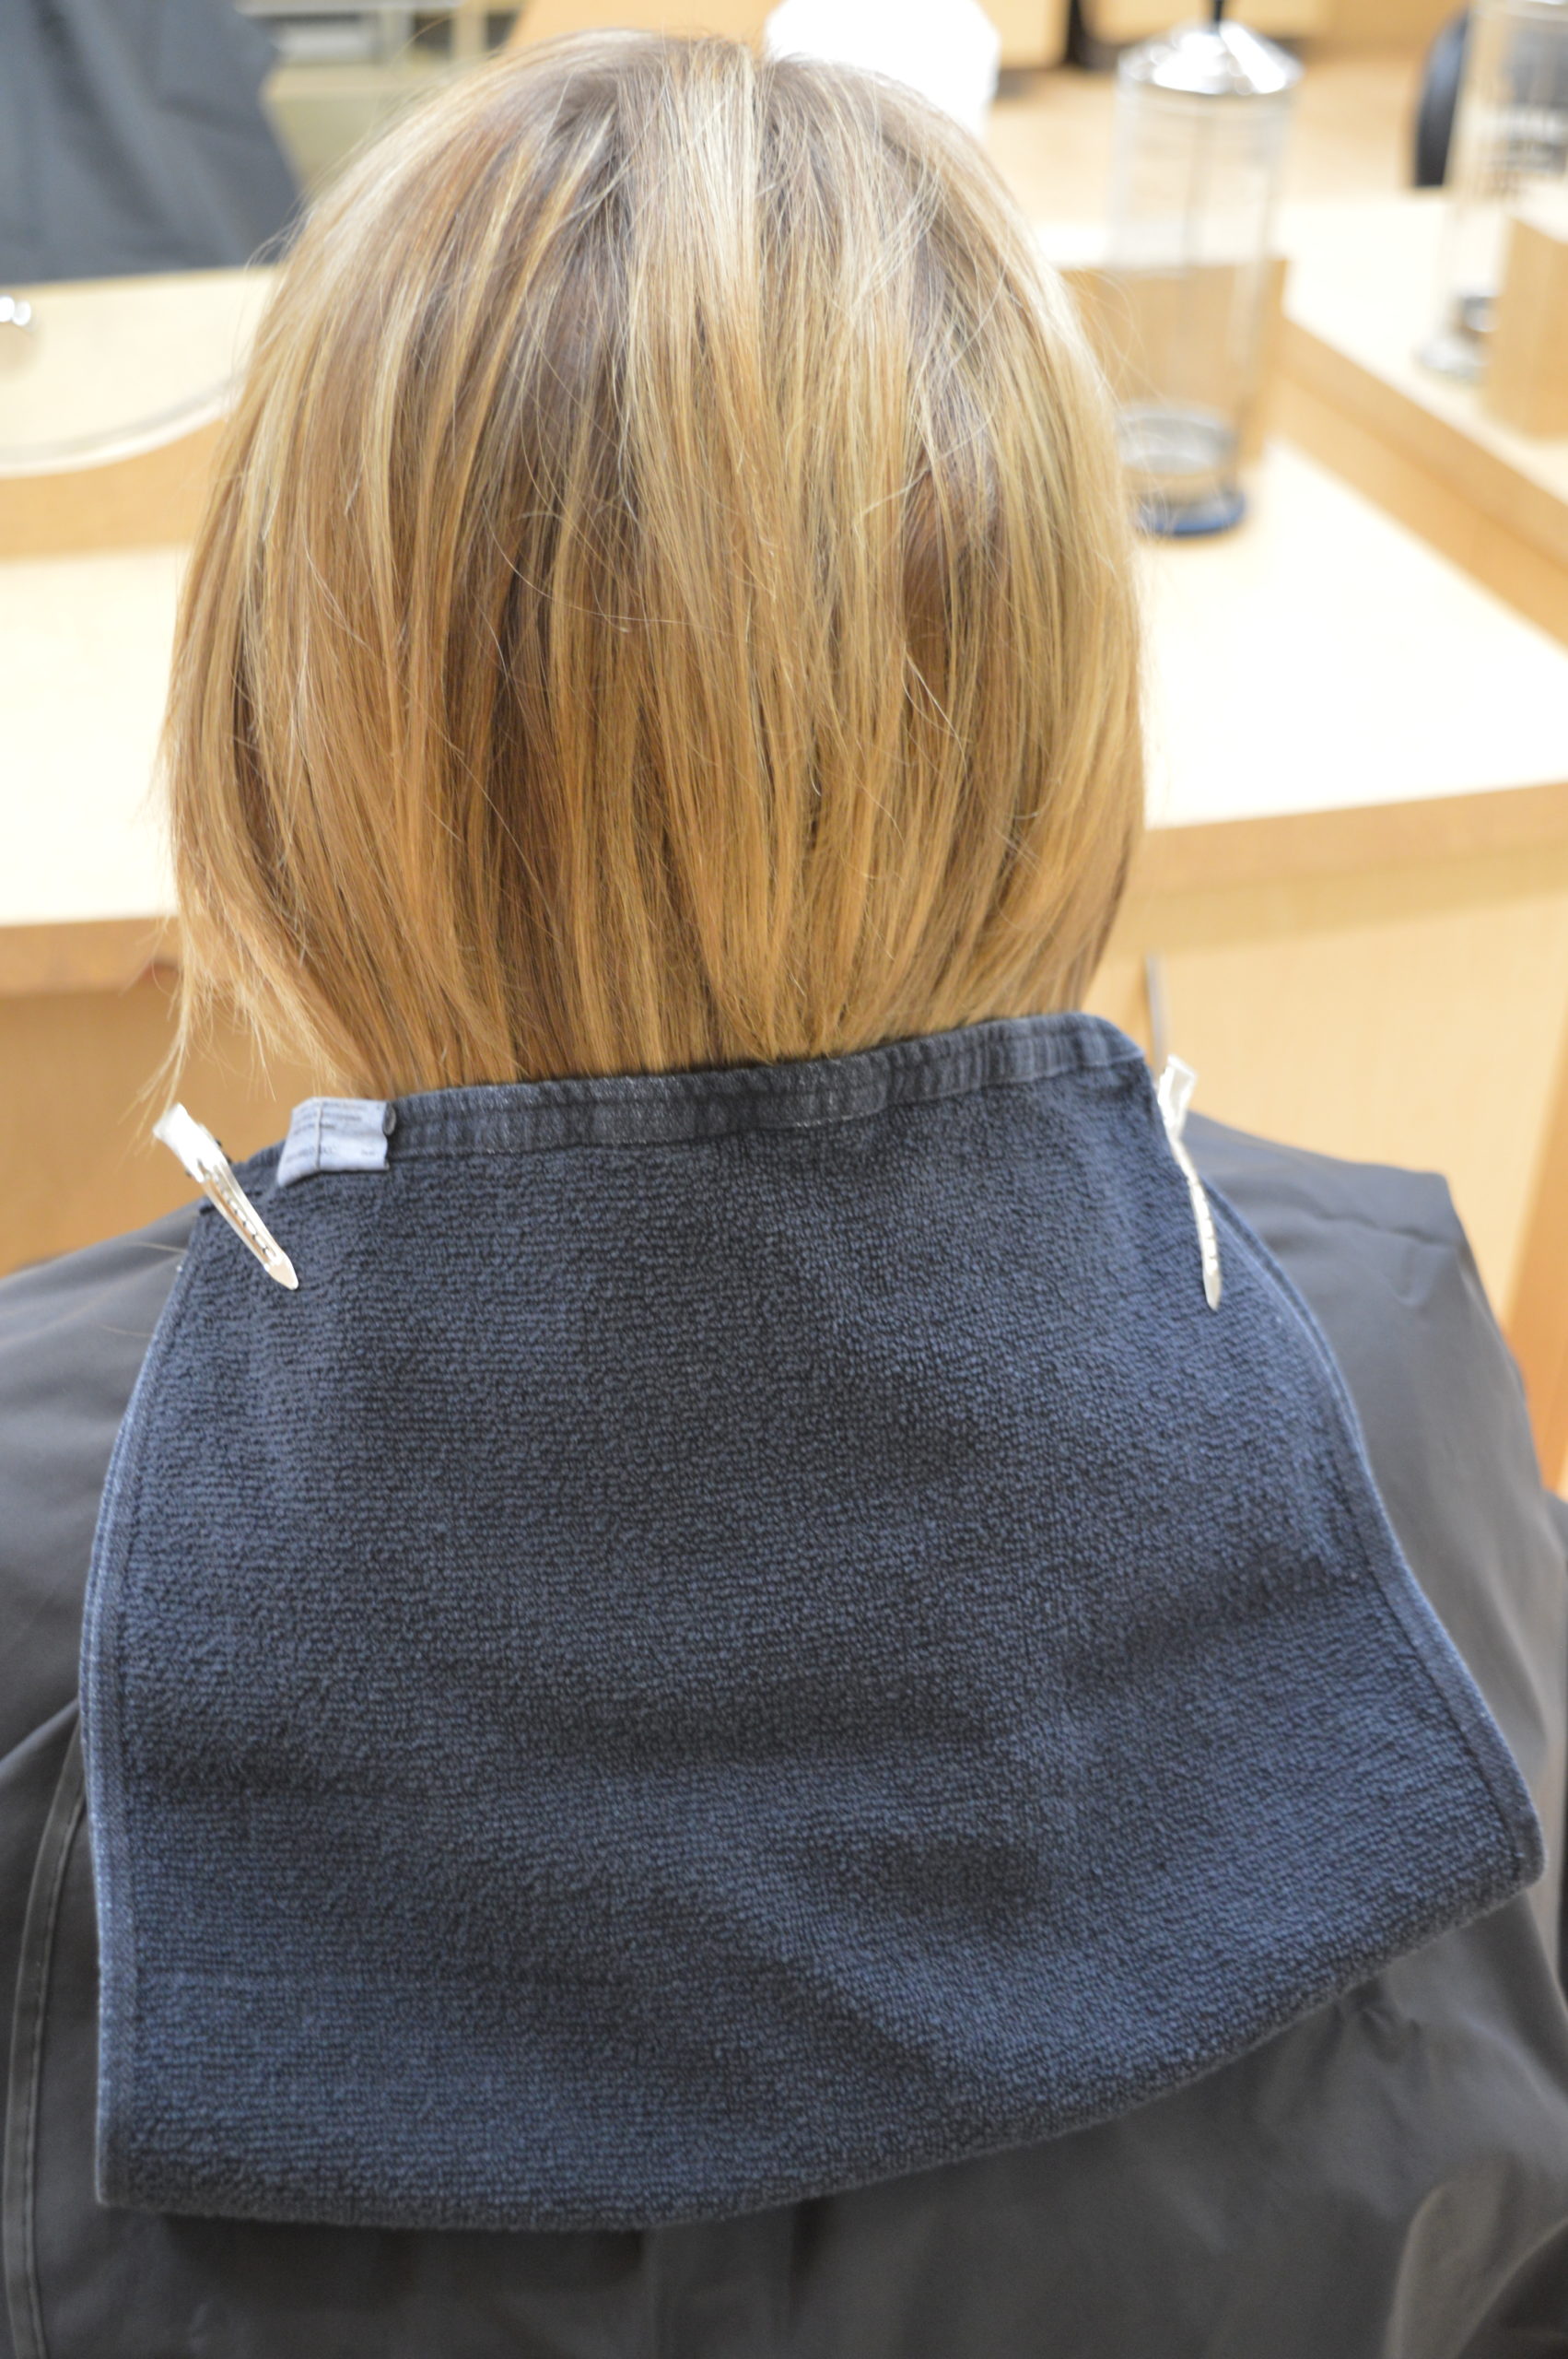
- Allow the hair to process at room temperature. A helpful tip to avoid colour transfer to clothing and to keep things neat: fold the bottom edge of the outer draping towel up and secure at the sides with clips to create a neat little package (see following photo).
By applying your colour procedurally, as in steps 1–7, you will achieve an even colour result from roots to ends. Remember, the roots will process faster than the mid-lengths. The ends, if porous, may process even more quickly and begin to look muddy if cool tones are present in the colour formula.
Video: Global Virgin Application – Oxidative Colour
Note: Video has no sound.
Processing
When processing an oxidative tint, the general timing is:
- Oxidative Permanent – 30–40 minutes
- Permanent High-Lift – 40–50 minutes
Be sure to process for the full recommended time in order to allow the colour to lift adequately and deposit the associated tone effectively. Rinsing too early may result in a brassy or warm result, as the tone will not deposit fully and the underlying pigment will be left somewhat exposed. (The exception to this is when applying to ends with extreme porosity.)
Oxidative colour is non-progressive, which means that it will stop processing on its own. For this reason there is no need to observe the decolorization process itself, but please be sure to check in with your client regarding scalp sensitivity or discomfort. A slight tingle may be felt as the colour oxidizes, but a burning sensation is not normal, and the colour should be removed immediately in such a case.
Colour Removal
Once the colour has processed fully, bring your client to the sink:
- Don your gloves.
- Prior to adding water to the hair, emulsify the hairline by massaging with your dry, gloved fingertips in a circular motion. This will begin to lift the colour off of the skin to avoid staining.
- Rinse the hair with warm water until the water runs clear. The hair must be fully rinsed to avoid scalp irritation. This is especially important in the nape and around the ears, which can be tougher to rinse effectively.
- Shampoo twice with a colour-safe shampoo and follow with a suitable conditioner.
- Style as desired, and don’t forget to educate your client on the best products to care for their coloured hair!
Retouch Schedule
As with any service, it is up to you to recommend an appointment schedule that will best maintain your client’s hair.
A global lightening service such as this one should have a retouch schedule anywhere from three to six weeks, depending on growth. Ideally, your client should not have more than ½ to ¾ inches of regrowth at their next appointment. Keep in mind that once the regrowth is over ¾ inches, you will no longer have the heat from the scalp to help the colour process, and will need to treat the retouch as a virgin application, which can be tricky on such a small amount of regrowth!
You also must ensure that you do not overlap onto the previously lightened hair. This can cause colour banding and breakage. Remember that once the hair has been subjected to an alkaline chemical, its structure is permanently altered and more susceptible to damage.
When performing a retouch service:
- Prepare the client and the hair as noted above.
- Starting in the back two quadrants, work in ¼ inch subsections/partings, from the top down, carefully applying colour to the regrowth only. Avoid overlapping onto the previously coloured hair and be sure to fully saturate both sides of your subsections/partings.
- Process per the manufacturer’s guidelines
- Follow the colour removal guidelines as noted above.
Refreshing the Ends
When your client returns for their retouch appointment, you may notice that their ends have faded and need refreshing. Assess the hair’s condition, considering porosity, texture, level, and tone. Formulate a semi-permanent colour product that will match the formula at the regrowth.
- Apply your root retouch application, then wait until the root has processed about halfway.
- Mix up your semi permanent colour formula, and apply it to the mid-lengths and ends, being careful to avoid the regrowth area.
- Ideally, the semi-permanent colour product should process for the last 10–20 minutes of your retouch process, depending on texture and porosity.
Media Attributions
- Towel Draping images by A. Magtiza are under a CC BY 4.0 Licence.
- Hair Zones image is by Yehor Milohrodskyi on Unsplash. Text labels added by A. Magtiza. Edited image released under a CC BY 4.0 Licence.
- “Virgin Application: Oxidative Colour” video by A. Magtiza is under a CC BY 4.0 Licence.
Colouring products that require a developing agent, such as hydrogen peroxide, to oxidize and introduce colour molecules into the hair strand.
Hair that has not been altered with a chemical product, such as colour or a perm.
Hair absorbs moisture and chemical products at a common rate. Cuticle scales are intact and slightly raised.
Colours that reflect blue, violet, or green.
