Chapter 6 – Hair Painting
6.2 Blending Techniques
Whichever hair-painting technique you choose to use on your client, chances are you are aiming to achieve a blended transition from the root to where the colour or lightener begins. Most clients who want this technique would like a low-maintenance colour that can last a few months or more before they must have it touched up.
So what can you do to make sure the result is as seamless as possible? Use any or a combination of:
- Angles
- Projection
- Saturation
- Backcombing
Angles
Think back to Chapter 5.2 where we discussed angle of foil placement. A vertical placement will be most defined, horizontal will be diffused, and diagonal will be somewhere in between. But also keep in mind how section size and saturation play a role.
With foils, it is best to use thin subsections to get maximum saturation of product in each foil, and you will generally be applying the product up to the regrowth.
With hair painting, the subsections and saturation can vary in size depending on what kind of result the client would like, and you will typically leave some natural hair in-between the lightened sections and at the root for depth and contrast.
So why is this distinction important? A horizontal placement will only be diffused if it is a thin layer with light saturation, such as surface balayage, and a vertical placement will only be defined if it is wide enough to provide contrast, such as a ribbon effect achieved with classic hair painting.
When painting hair, because section sizes vary throughout the head, a diagonal placement is your safest go-to for the best of both worlds. You can saturate with product for a defined pop of colour without a harsh line of demarcation.
Diagonal placement can be determined by the actual partings in the hair, or by the angle of application, as seen below:
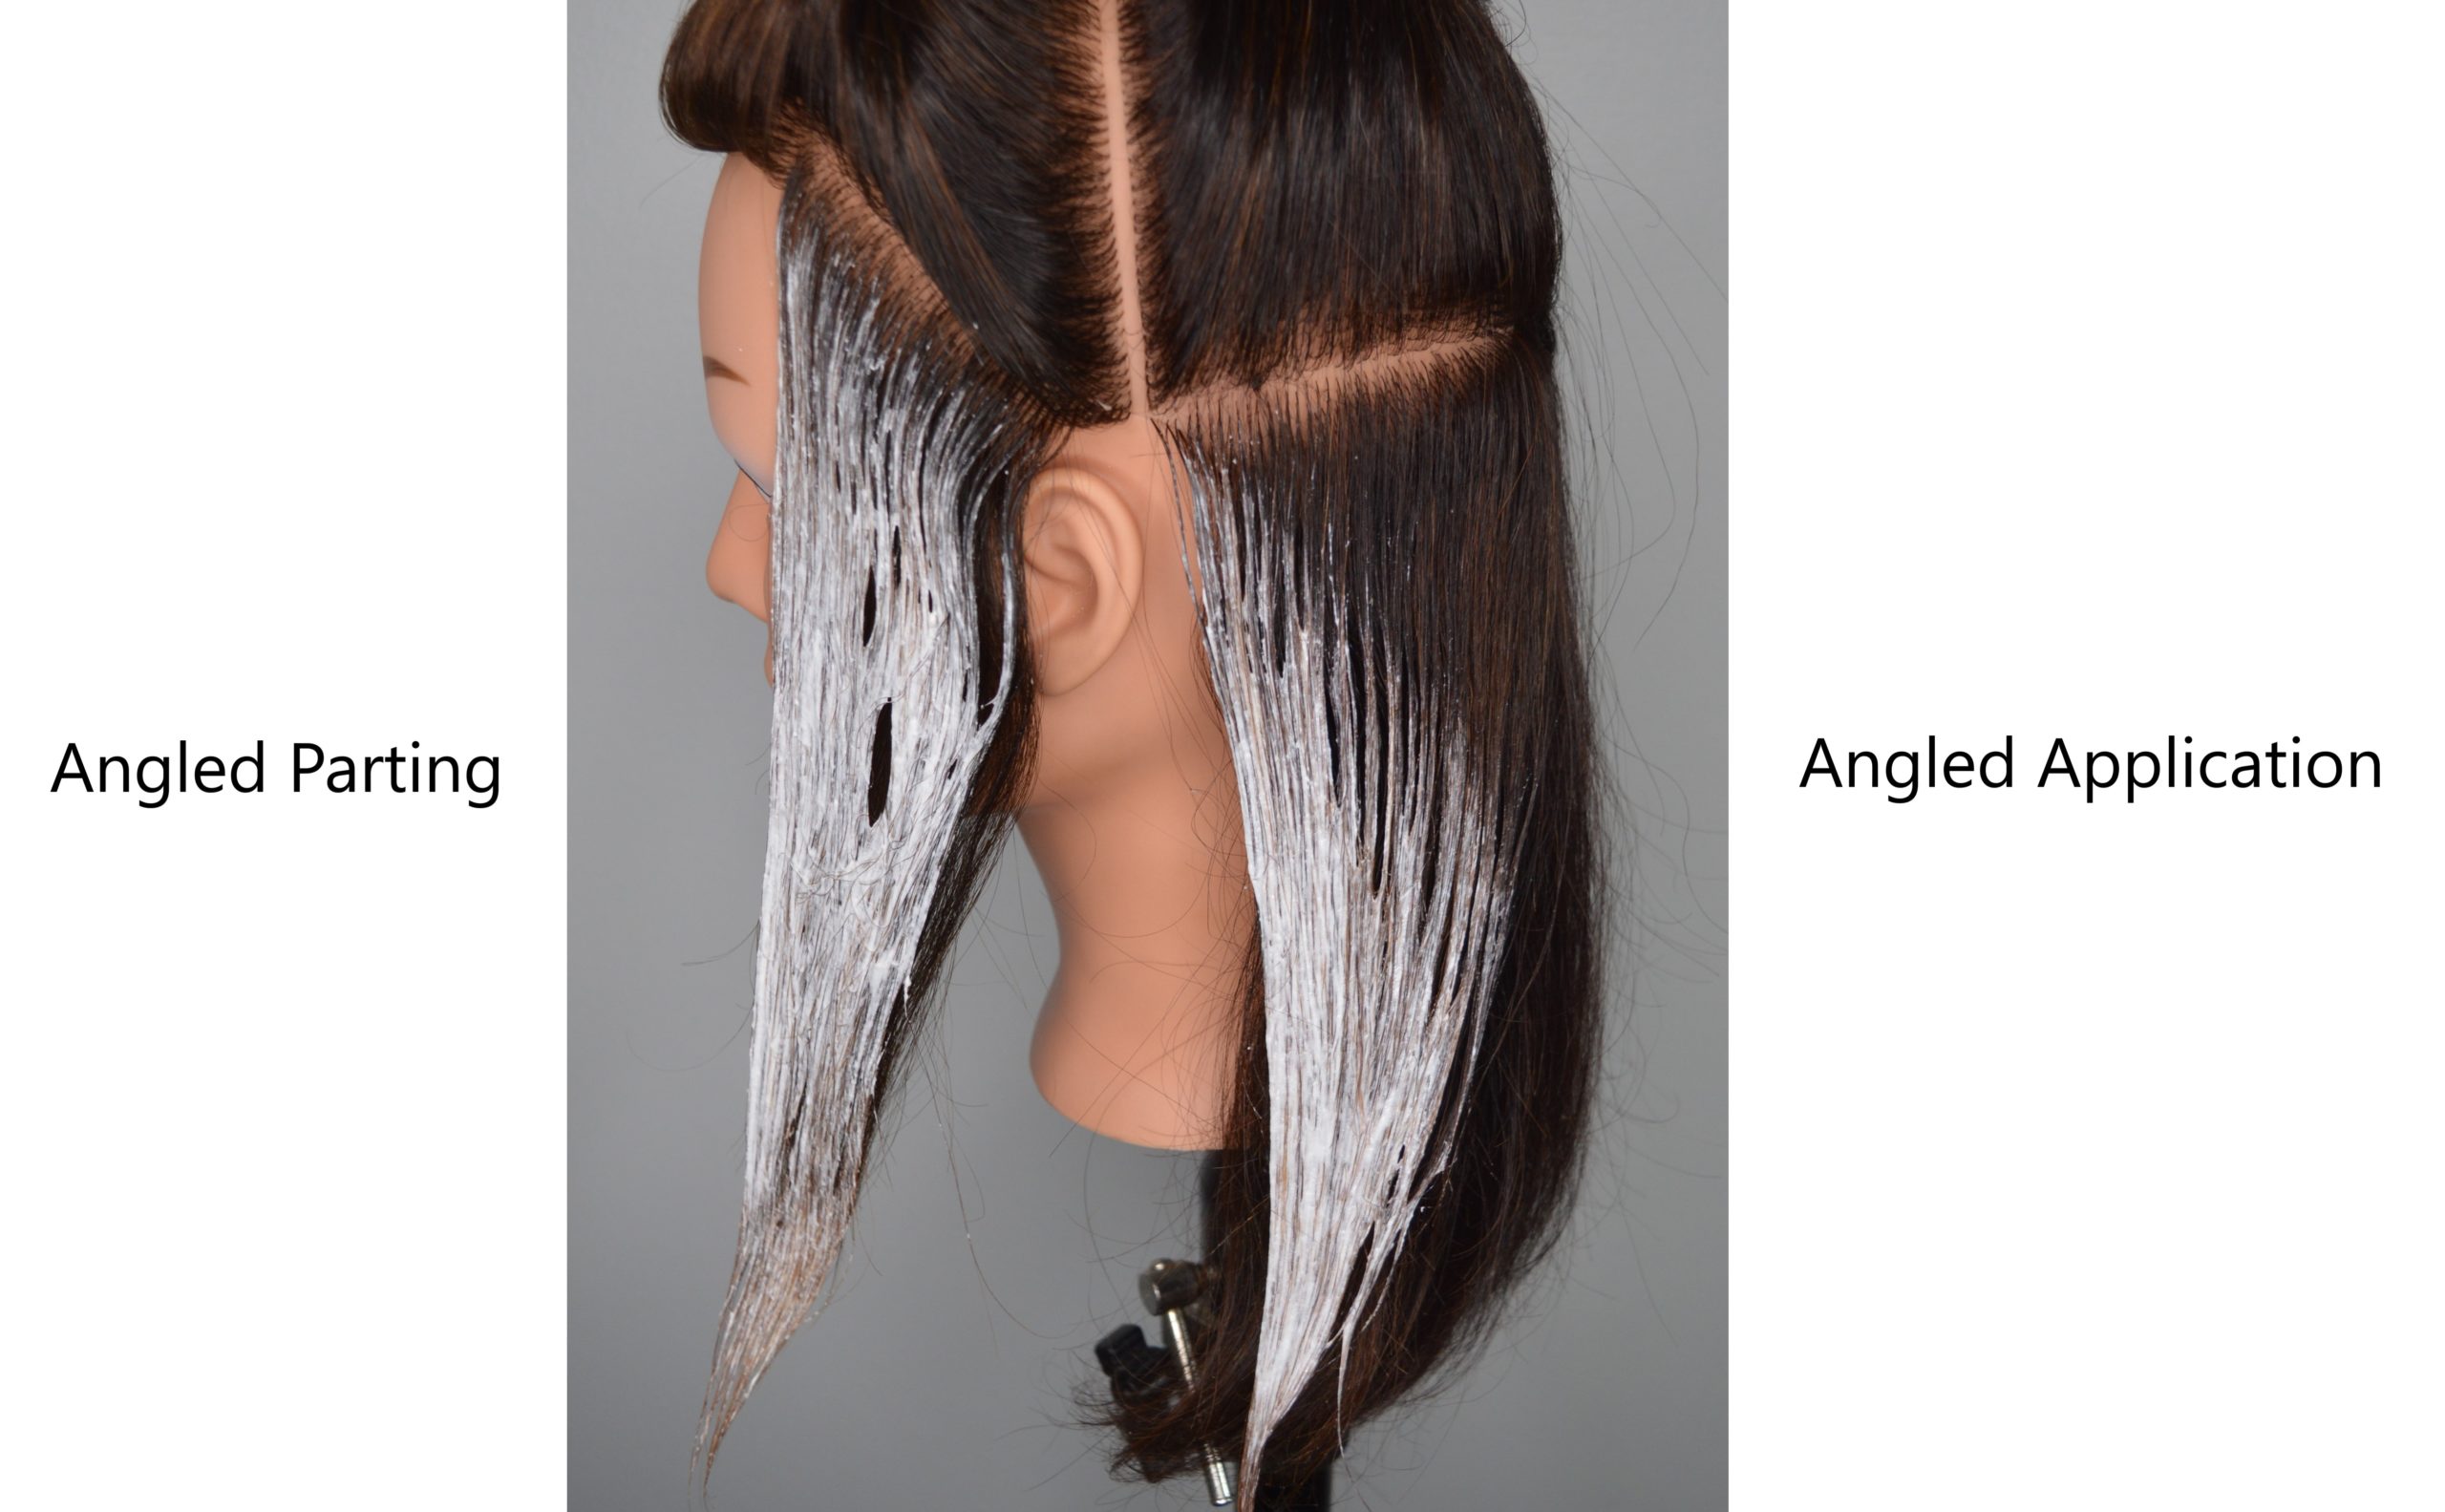
For optimal diffusion, you can combine the two by using a diagonal parting with a diagonal colour application.
Projection
Anytime that you move the hair out of its natural fall, you are creating projection. Just as projection can be used with hair cutting to create an increase in lengths or a soft layer, projection can be used in hair painting to create a soft colour line.
For example:
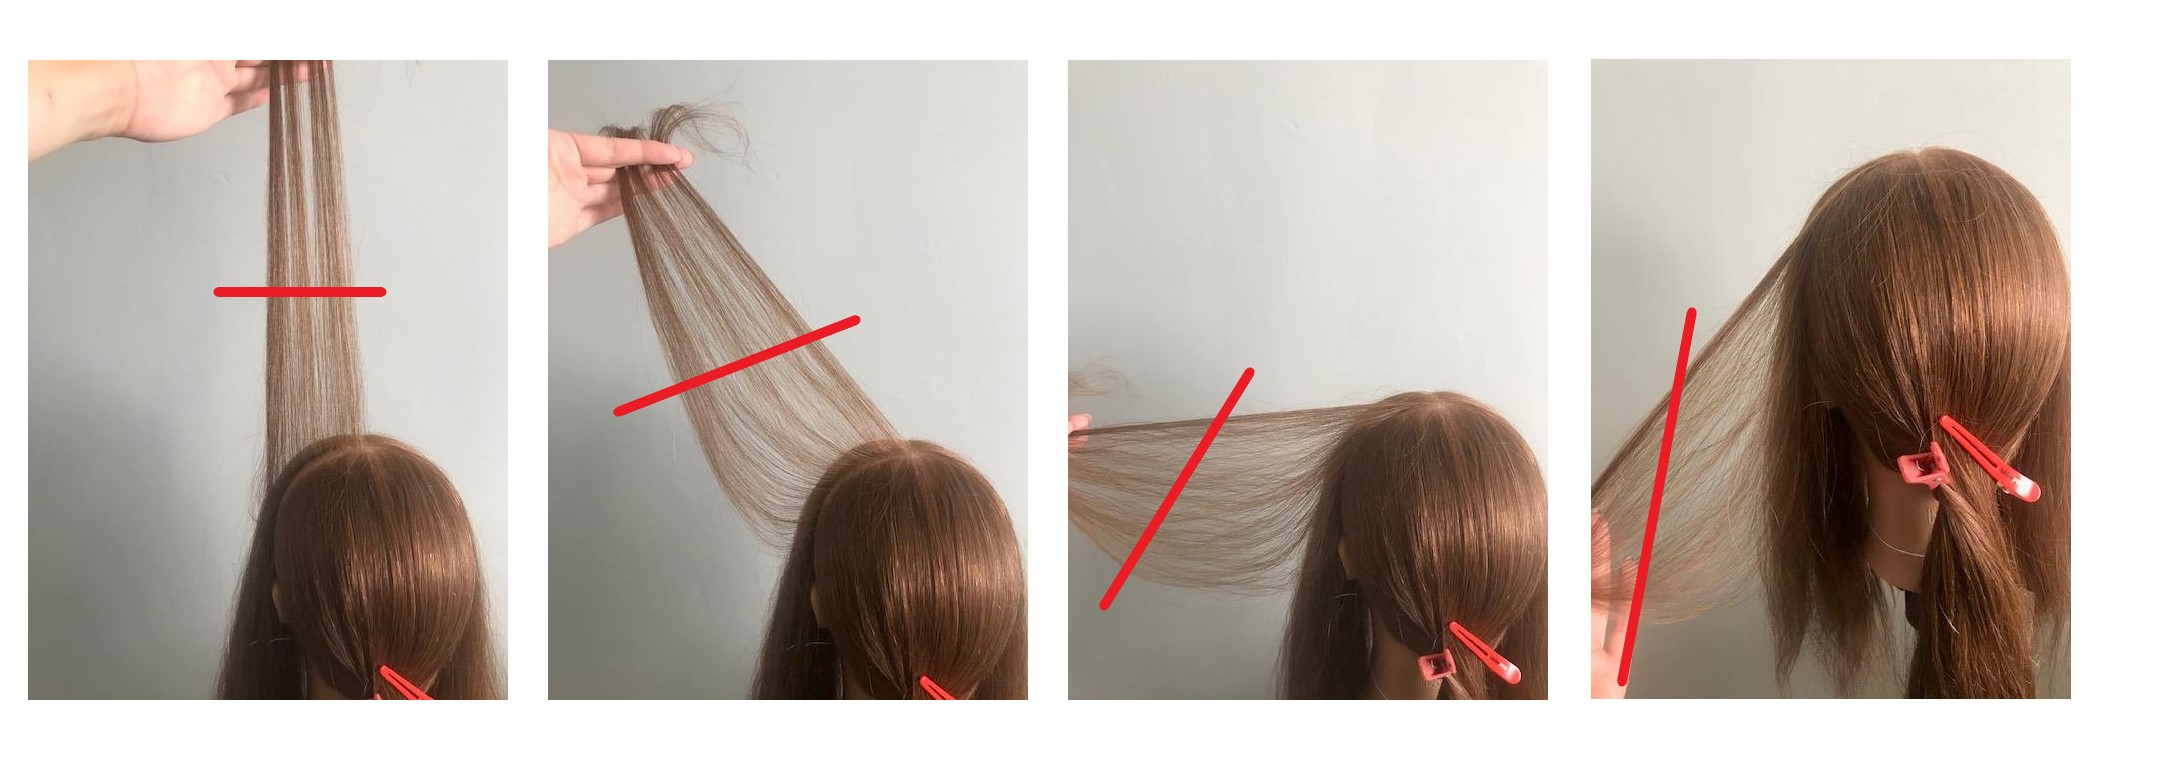
Note how if the hair were to be projected straight up and painted in a straight line, the angle of the line would change dramatically as the hair fell back into natural fall. This is diffusion from projection, and although you will likely not project the hair this dramatically while hair painting, the same principle can be applied at a lower angle of projection, combined with a diagonal application, as seen below.
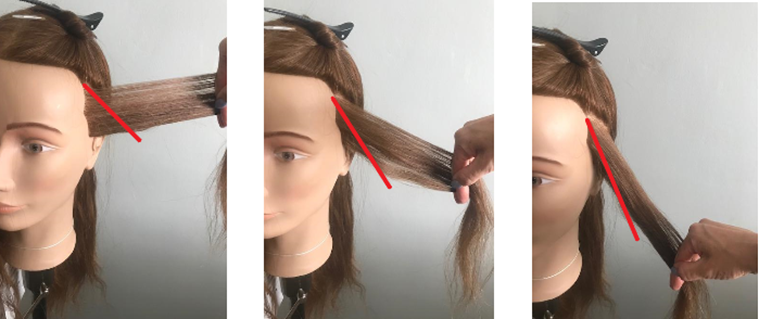

The hair that is not painted on the bottom of your section becomes the depth that makes the colour pop.
Saturation
If you are in a position where you cannot easily project the hair to create diffusion (if you want to put the hair in foils for maximum lift, for instance), you can also use brush pressure and saturation to create a seamless blend:
When you are lightening hair, more saturation = better lift.
So, how can that principle be applied to creating a diffused result in hair painting? Increasing brush pressure and saturation as you move down the hair strand will create more lift towards the ends!
Keep in mind that using this method may not be ideal if your goal is a neutral or cool result. The hair that is less saturated will not lift as far, which means the hair will have more underlying pigment and more warmth in those areas! This is also why you must make sure your saturation is even. A blotchy and uneven saturation will result in a blotchy and uneven lift!
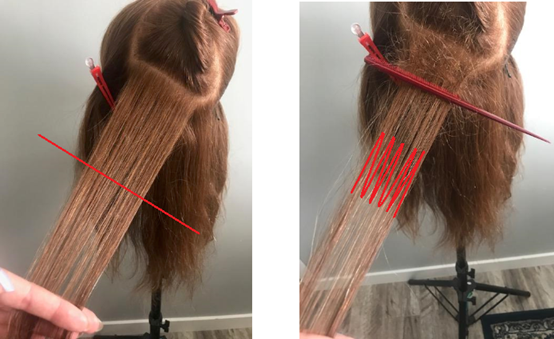
Backcombing
Backcombing, when done correctly, is a great method for creating a blended and diffused line of colour.
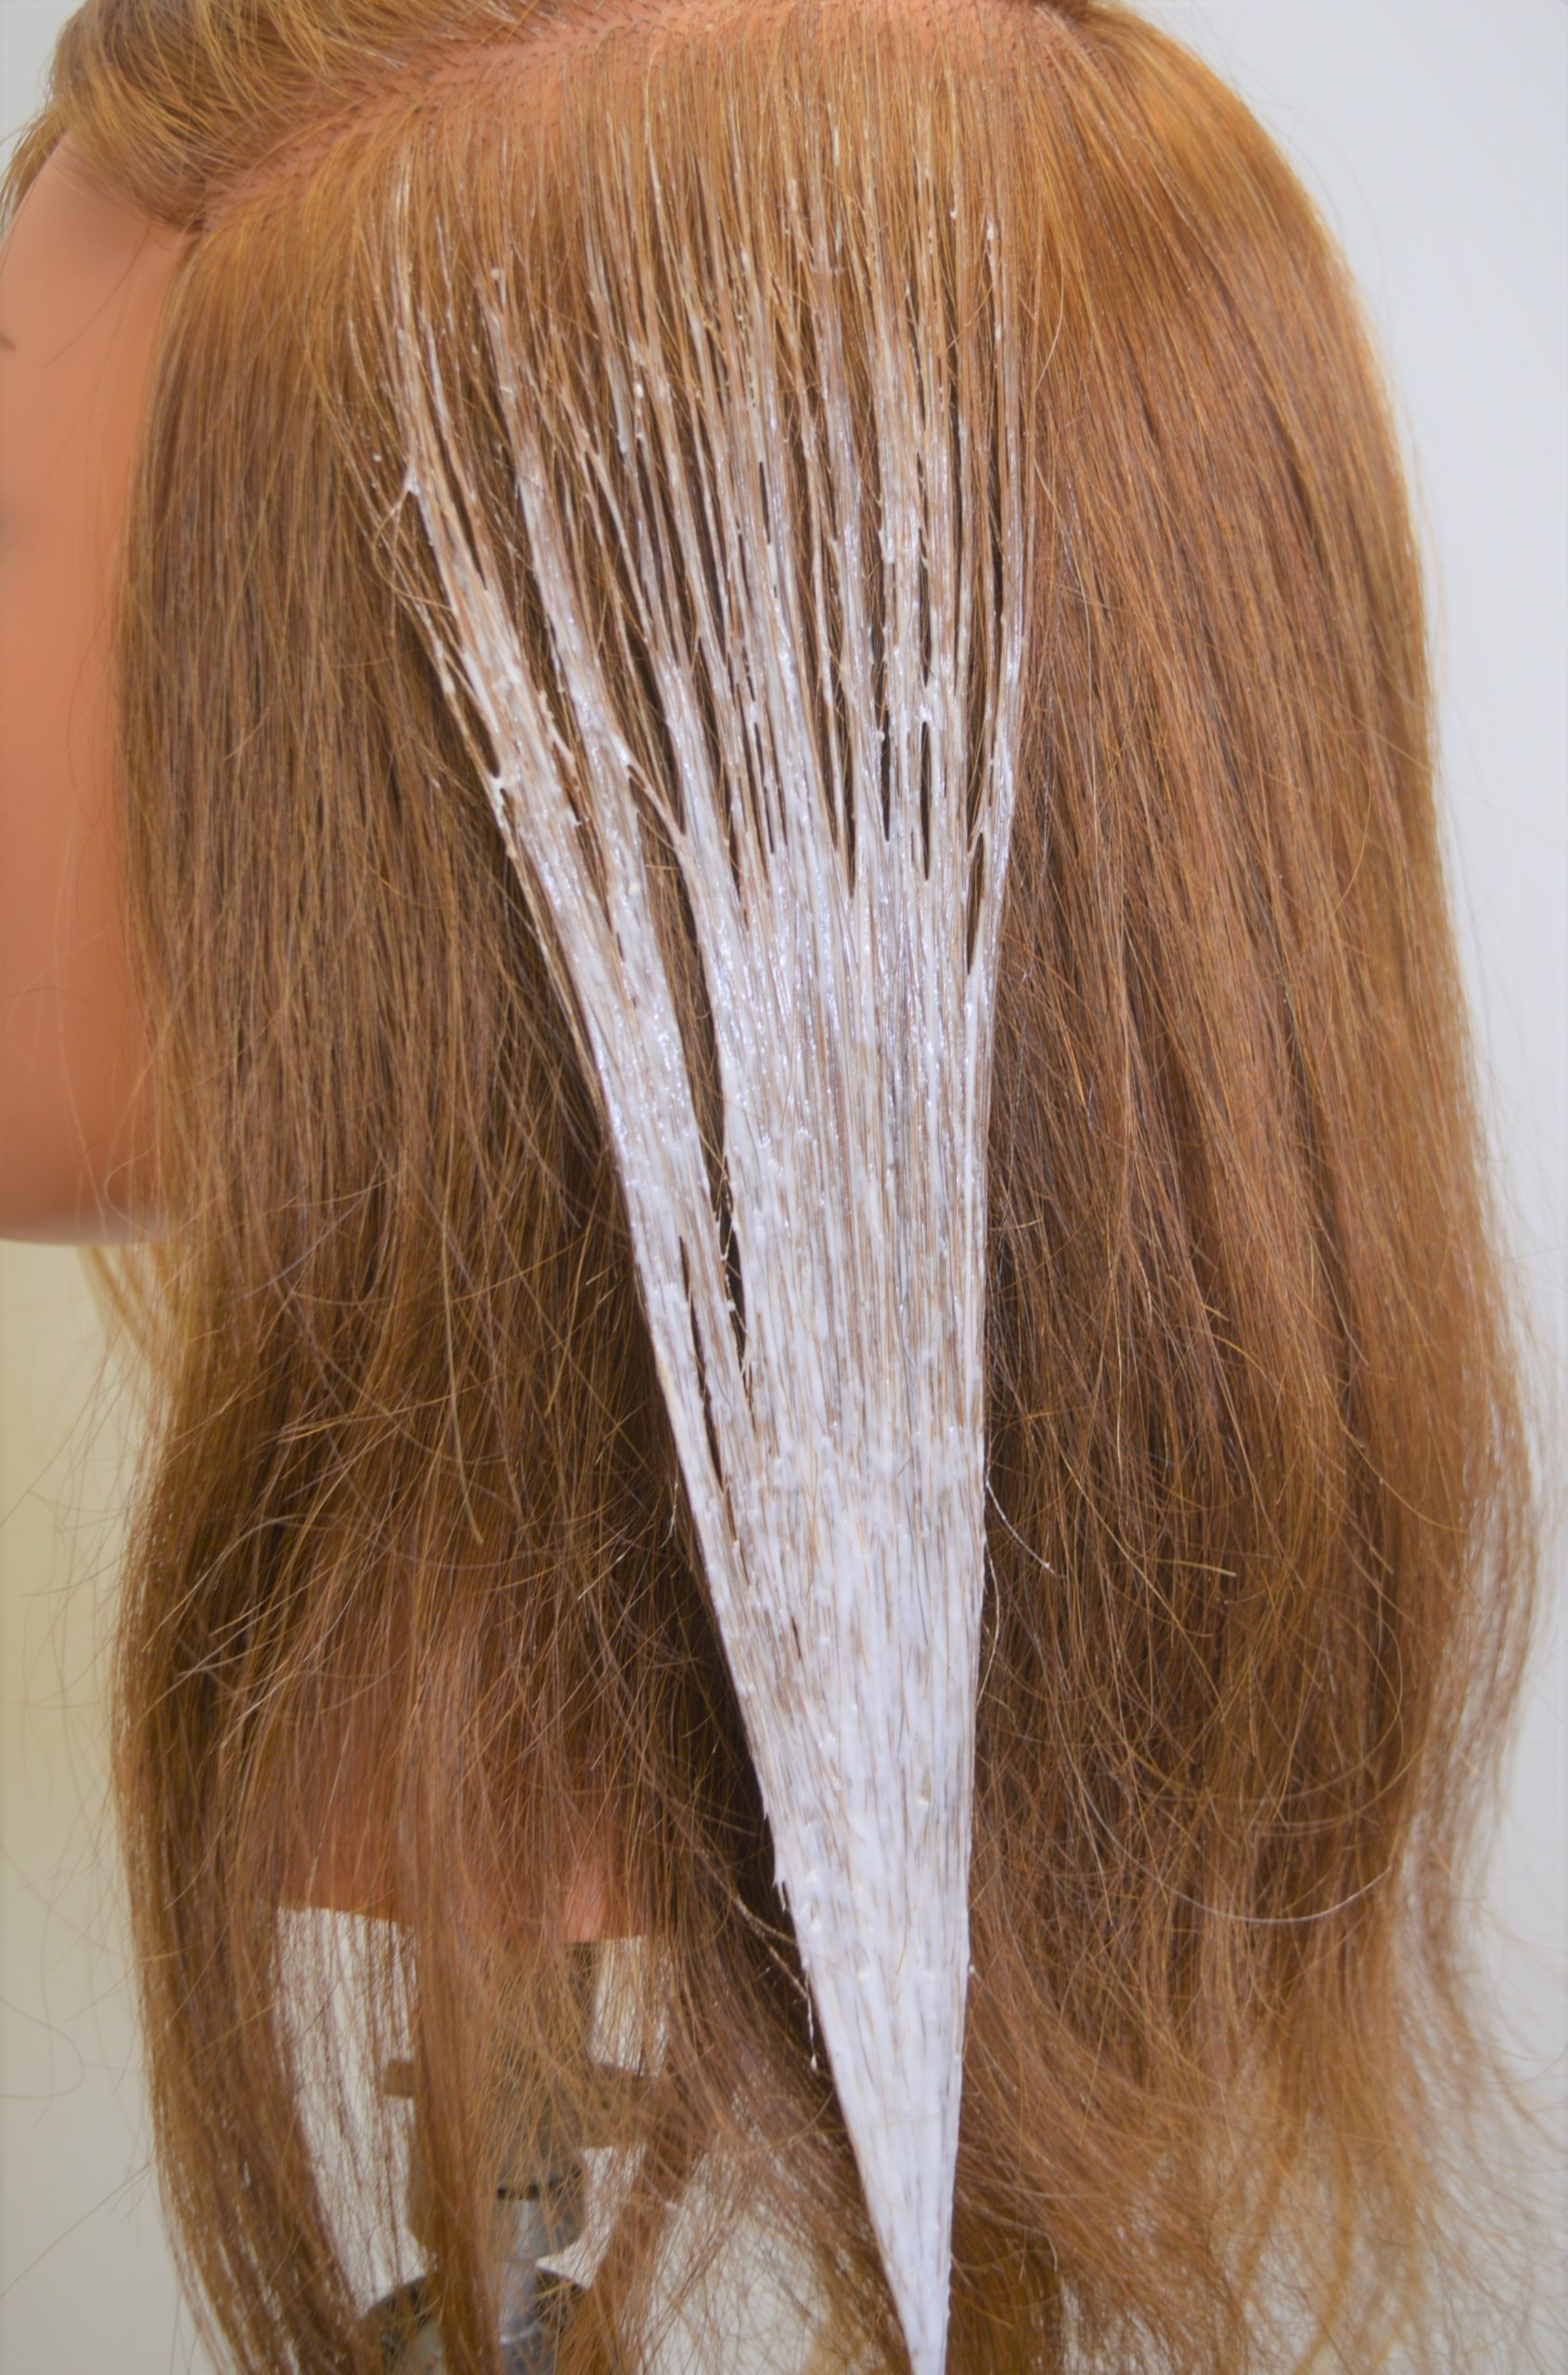
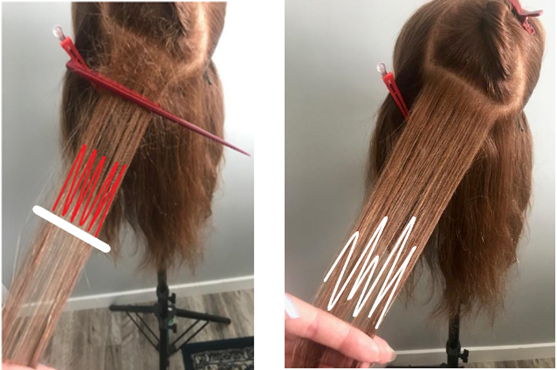
Backcombing should be done by holding the strands loosely between thumb and forefinger, while a comb is used to push the hair from midway down the hair up to the root in one sweeping motion. This gently moves the hair behind the teeth of the comb up towards the scalp, as portrayed in the image below:
You can see how the hair has been evenly moved by the reduction in density in the ends. Painting straight across the backcombed section would now result in a beautifully diffused colour line:
Your chosen method of hair painting, and method of diffusion will change from client to client (and sometimes section by section!) depending on the client’s hair and their desired result. Don’t be afraid to switch up your application methods, because with hair painting, as with anything else, practice and experience is what will make you a master at your craft!
Media Attributions
- All images in this chapter are by A. Magtiza and are under a CC BY 4.0 Licence.
The degree to which the hair is lifted off the curve of the head.
