Chapter 6 – Hair Painting
6.3 Application Process: Freehand Hair Painting Service
Tools and Supplies Required
- Gloves
- Colour bowl
- Whisk
- Weigh scale
- Colour cape
- Towels
- Comb
- Balayage board (optional)
- Hair clips
- Feather soft tint brush and/or balayage brush
- Meche strips or separators of your choice
- Lightening product*
Application
Prepare your client for their balayage service by performing the following procedure:
- Drape a towel around your clients shoulders, and secure the colour cape around their neck.
- Ensure that the hair is fully dry.
- Brush through the hair gently to remove tangles.
- Section the hair into four sections, using your clips to secure the hair. For this example, a middle part will be used. However, you should work along your client’s preferred part line, whether that is centred or off to one side. If the client likes to change their part day to day, work off of the centre.
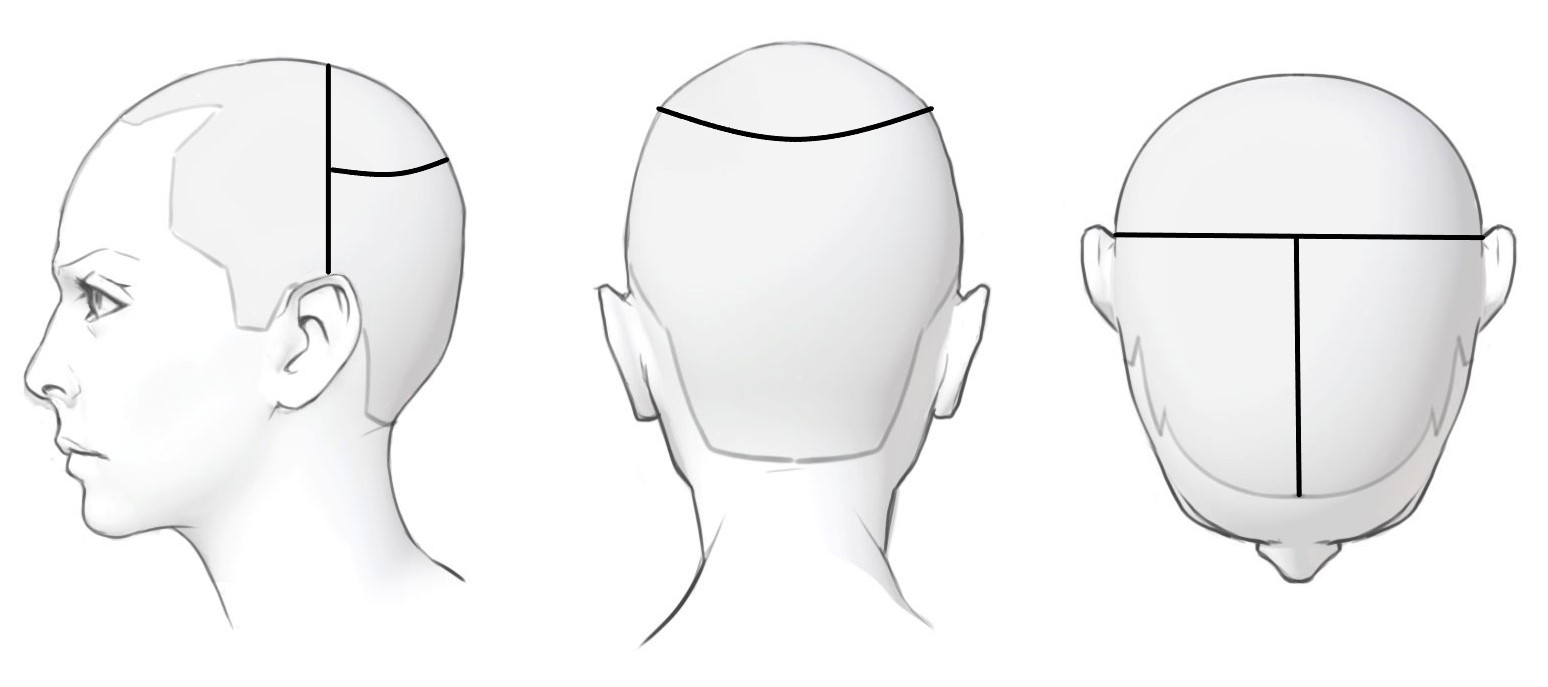
Once you have prepared your client for the hair painting service, gathered your tools and supplies, and mix up your bleaching product.
- Don your gloves
- Begin your application in the back section, starting at the nape and working up towards the crown section, using the following sectioning pattern and application:
- Sectioning: Triangles.
- Application: V-shaped application, with the product applied on the top side of the triangle section. The centre sections are an even V application, while the side sections have an uneven V, with a higher application/more brightness towards the sides.
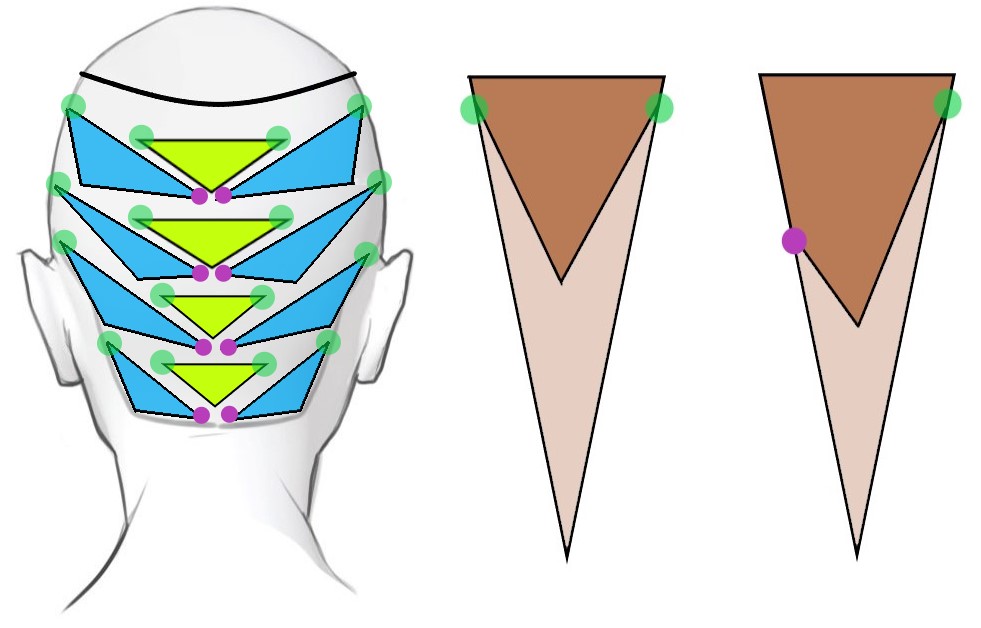
Video: Hair Painting Application – Back Section
Note: Video has no sound.
- Once the back is applied, move into the crown section, using the following sectioning pattern and application.
- Sectioning: Diagonal slices, approximately 1 inch apart.
- Application: ½ V-shaped application, with the product applied higher towards the top of the head on each slice.
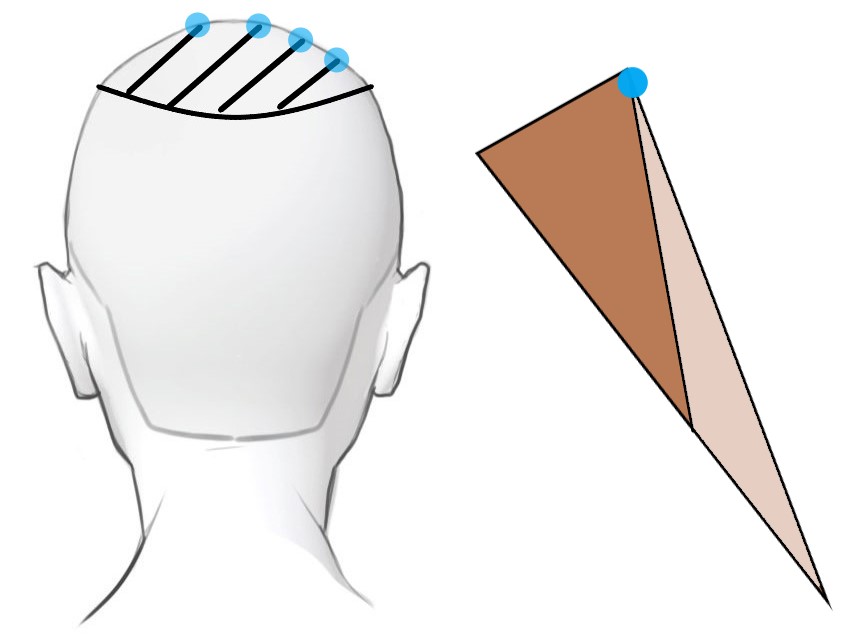
Video: Hair Painting Application – Crown
Note: Video has no sound.
- Once the crown section has been applied, move into the side sections, using the following sectioning pattern and application.
- Sectioning: Triangular sections from the ear to the crest. Diagonal back slices, approximately 1 inch apart, in the area from the crest up to the part line.
- Application: From the ear to the crest – alternate between:
- V shaped application on the top side of the triangle section
- Full application on the front side of the triangle section, closest to the face. When working on these face-framing front sections, use a feather light pressure to create a soft, blended highlight around the face when the hair is pulled back.
- Application: From the crest to the part line – ½ V-shaped application, with the product applied higher towards the face on each slice.
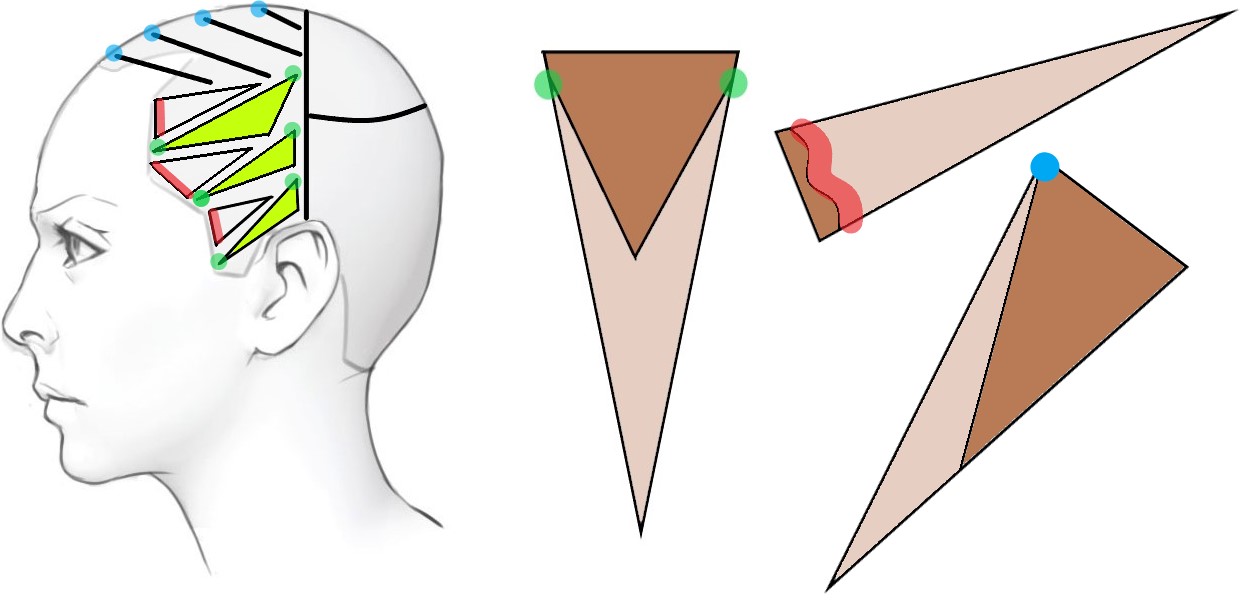
Video: Hair Painting Application – Side Section
Note: Video has no sound.
Final Results
Here are the final results of this application:
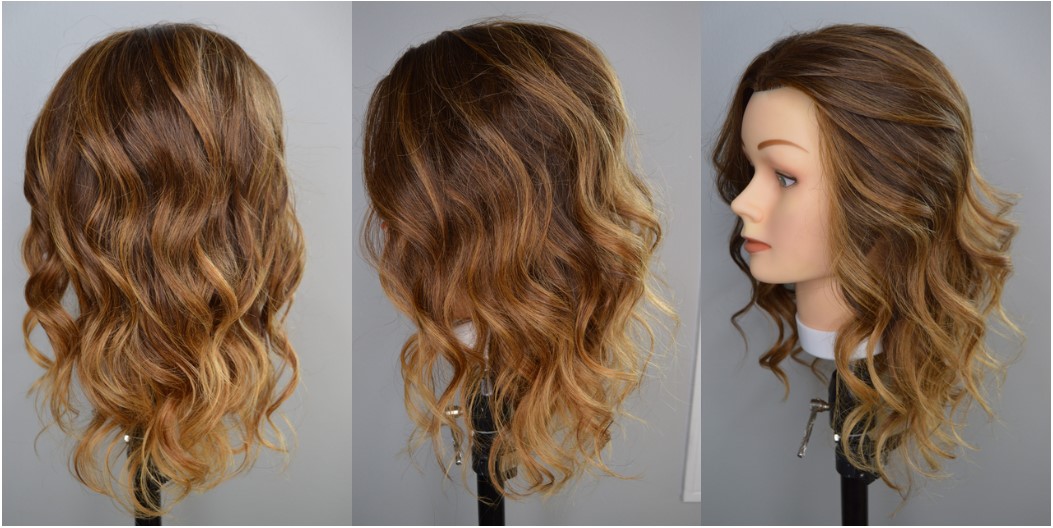
This hair-painting method is a basic one that allows you to practice three simple application techniques, and it is one that will work on most hair types and textures. There are many ways to paint and balayage hair, so be sure to seek out and practice different techniques in order to build your repertoire and become a master at creating beautiful, low-maintenance looks for your clients!
Media Attributions
- All images in this chapter are by A. Magtiza and are under a CC BY 4.0 Licence.
- “Hair Painting Application – Back Section” video by A. Magtiza is under a CC BY 4.0 Licence.
- “Hair Painting Application – Crown” video by A. Magtiza is under a CC BY 4.0 Licence.
- “Hair Painting Application – Side Section” video by A. Magtiza is under a CC BY 4.0 Licence.

