5.3 Bedmaking Procedures
Making an Unoccupied Bed
While making a bed may seem like a simple task, in health care settings there specific steps and reasoning for doing so. In this unit you will review these steps for making both an unoccupied and occupied bed.
| STEP | ACTION | REASON/CONSIDERATIONS |
|---|---|---|
| 1. |
|
Following routine practices prevents the spread of pathogens.
|
| 2. |
|
Promotes organization and efficiency. Carrying linens away from yourself prevents the bacteria on your clothes from getting on the clean linens. |
| 3. |
|
Promotes organization and efficiency. |
| 4. |
|
Follows principles of body mechanics and reduces the risk of musculoskeletal injury. Completing one side of the bed first promotes efficiency.
|
| 5. | Remove and fold any bedding to be reused (such as blankets, comforters, or quilts) and place them on a clean surface. | |
| 6. |
|
Decreases spread of pathogens. Do not shake linens, as this will release microorganisms into the air. |
| 7. | Discard gloves and wash your hands. | Follows routine practices. |
| 8. |
|
Ensures even placement of bottom sheet. |
| 9. | Unfold half of the sheet on the side you are working, and tuck the corners under the mattress. | Completing one side of the bed first promotes efficiency. |
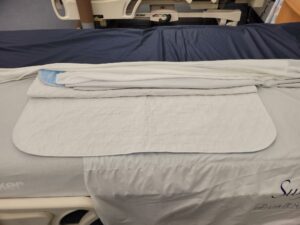
| 10. | Fanfold (accordion style) the other half of the sheet and leave in the centre of the bed. |
 |
| 11. |
|
|
| 12. |
|
|
| 13. |
|
|
| 14. | Go to the opposite side of the bed. | Completing one side of the bed first promotes efficiency. |
| 15. |
|
|
| 16. | Add blankets and bedspreads. | |
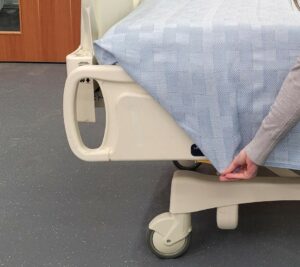
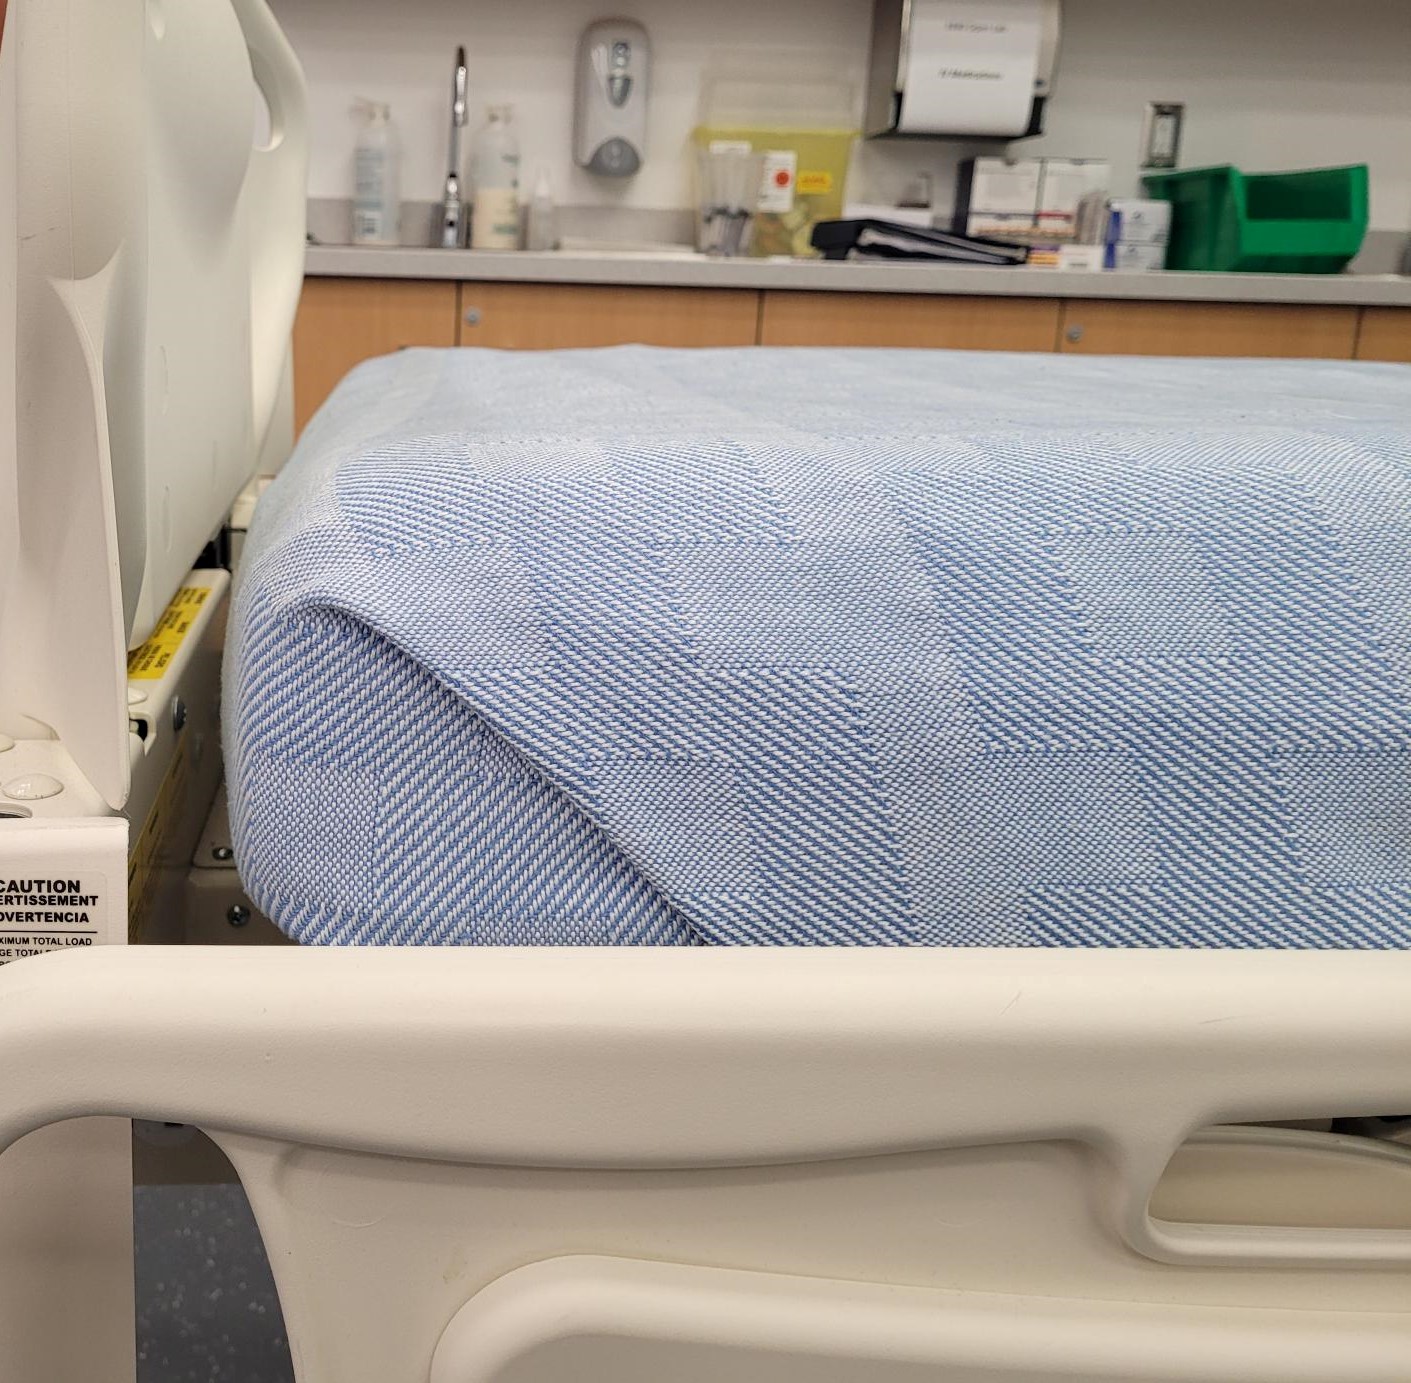
| 17. | Mitre corners of the bedding (See Table 5.3.2 procedure: How to Mitre a Corner, below.) |
|
| 18. |
|
|
| 19. | Remove the soiled pillowcase by turning it down and placing it inside out. | This step reduces spread of pathogens |
| 20. | Putting a Pillowcase on a Pillow
Method 1: Grasp the pillow in one hand and fold it in half so that it makes a V shape. Guide the pillow into the open end of the pillowcase, which is in your other hand. Smooth out the pillow inside the case. Method 2: Grasp the end of a pillowcase at the centre of bottom seams. With your other hand, gather up the pillowcase so it is covering your hand. Grasp the pillow with the hand that is covered by the pillowcase. Pull the pillowcase down and over the pillow. |
|
| 21. |
|
Reduces risk of injury to the client. |
| 22. |
|
Following routine practices reduces spread of pathogens. |
| 23. | Document completion of task if required. |
Watch this video for a more complete visual representation of how to make an unoccupied bed:
How To Make An Unoccupied Bed by Kim Morris, RN, BN, MN; Tracy Christianson, RN, BSN, MN, DHEd, CCNE; Lynnette Fleury, RN, BSN, MSN; and Leon Racicot is licensed under a CC BY 4.0 licence.
Mitre the Corners
| STEP | ACTION | EXAMPLE |
|---|---|---|
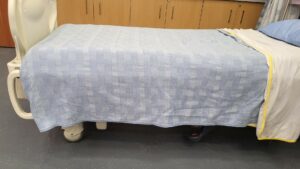
| 1. | Begin with the bedspread and sheet tucked at the end of the bed, and the remainder hanging over the side of the bed. |
 |
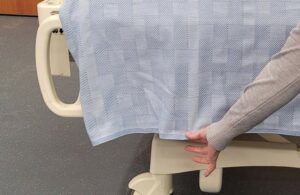
| 2. | Grasp the edge of the bedding about 45 cm (18 inches) away from the end of the bed. |
 |
| 3. |
|
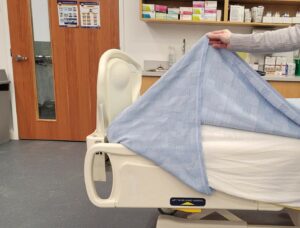 |
| 4. | Lay the triangular shape against the side of the mattress. |
 |
| 5. |
|
 |
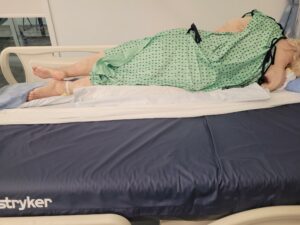
Making an Occupied Bed
| STEP | ACTION | REASON/CONSIDERATIONS |
|---|---|---|
| 1. | Identify your client and explain the procedure. | Promotes safety. Communicating with the client promotes co-operation. |
| 2. |
|
Following routine practices prevents the spread of pathogens. |
| 3. |
|
Promotes organization and efficiency.
Carrying linens away from your body prevents the bacteria on your clothes from getting on the clean linens. |
| 4. |
|
Follows principles of body mechanics and reduces the risk of musculoskeletal injuries. Completing one side of the bed first promotes efficiency. |
| 5. | Remove and fold any bedding to be reused (such as blankets, comforters or quilts) and place them on a clean surface. | Do not shake linens as this will release microorganisms the air. |
| 6. |
|
Leaving the client covered provides warmth and privacy. |
| 7. |
|
Follows principles of body mechanics and reduces risk of musculoskeletal injuries. |
| 8. | Leave the pillow under client’s head for comfort. | |
| 9. |
|
|
| 10. |
|
 Prevents spread of pathogens. |
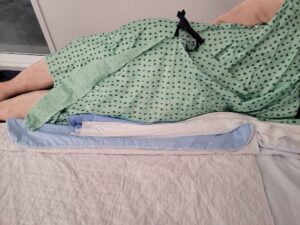
| 11. | Gently tuck the soiled sheets under the client. | |
| 12. |
|
This will ensure the new sheet stays clean, and that it will be easy to move to the other side after you turn the client onto their opposite side. Smoothing out wrinkles reduces skin irritation. |
| 13. |
|
 |
| 14. |
|
Promotes safety and comfort. |
| 15. | Go to the opposite side of the bed. | |
| 16. |
|
Reduces the spread of pathogens. |
| 17. |
|
Following routine practices reduces spread of pathogens. A raised bed rail promotes safety. |
| 18. |
|
Smoothing out wrinkles reduces skin irritation. |
| 19. | Re-position the client back to the centre of the bed. | |
| 20. |
|
|
| 21. | Bring the top sheet and blanket down over the top bedding to form a cuff. | |
| 22. | Remove soiled pillowcases and replace with clean pillowcases, as outlined in the Making an Unoccupied Bed procedure (Table 5.3.1). | |
| 23. | At the foot of the bed, make a toe pleat by lifting all linens with pinched fingers. | This allows the client to have room to move their feet and prevents deformities of the feet from pressure made by tight linens. |
| 24. | Position the client for comfort. | |
| 25. |
|
Ensures safety of client. |
| 26. | Remove gloves, and wash and dry your hands. | Following routine practices reduces spread of pathogens. |
| 27. | Observe, record, and report any changes in condition or behaviour. | Communication with the health care team is an important aspect of the HCA role. |
Watch the video for a more complete visual representation of how to make an occupied bed:
Video coming soon.
Summary
The simple task of making a well-made bed contributes to a client’s well-being. A comfortable and tidy made bed can also prevent future health issues.
- A well made bed contributes to the client’s comfort and safety.
- True
- False
- Standard precautions are not required for bedmaking procedures.
- True
- False
- The Fowler’s position
- has the head of the bed higher than the feet
- has the feet higher than the client’s head
- is used for sleeping only
- is used when the client is eating
Chapter 5 Attributions and References
Unit 5.2 Image Attributions
- 5.2.1 Fowler’s Position by Doyle and McCutcheon (2015), via Wikimedia Commons, is used under a CC BY SA-4.0 licence.
- 5.2.2 Semi-Fowler’s Position by Doyle and McCutcheon (2015), via Wikimedia Commons, is used under a CC BY SA-4.0 licence.
- 5.2.3 Trendelenberg Position by Doyle and McCutcheon (2015), via BCcampus, is used under a CC BY SA-4.0 licence.
- 5.2.3 Reverse Trendelenberg by Saltanat ebli, via Wikimedia Commons, is used under a CC0 1.0 Public Domain licence.
Unit 5.3 Image Attributions
- 5.3.1 Fanfolded sheets by Kim Morris, HCA Program/ Thompson Rivers University, is used under a CC BY 2.0 licence.
- 5.3.2 Step 1 by Kim Morris, HCA Program/ Thompson Rivers University, is used under a CC BY 2.0 licence.
- 5.3.3 Step 2 by Kim Morris, HCA Program/ Thompson Rivers University, is used under a CC BY 2.0 licence.
- 5.3.4 Step 3 by Kim Morris, HCA Program/ Thompson Rivers University, is used under a CC BY 2.0 licence.
- 5.3.5 Step 4 by Kim Morris, HCA Program/ Thompson Rivers University, is used under a CC BY 2.0 licence.
- 5.3.6 Step 5 by Kim Morris, HCA Program/ Thompson Rivers University, is used under a CC BY 2.0 licence.
- 5.3.7 Roll soiled sheets toward the client by Kim Morris, HCA Program/ Thompson Rivers University, is used under a CC BY licence.
- 5.3.8 Fanfolded clean sheets by Kim Morris, HCA Program/ Thompson Rivers University, is used under a CC BY 2.0 licence.
Videos
- B 301 Unoccupied Bed by Skills Lab (2017) is licensed under a Standard YouTube License.
- B 302 Occupied Care video by Skills Lab (2017) is licensed under a Standard YouTube License.
References
Doyle, G. R. & McCutcheon, J. A. (2015, November 23). 3.5 Positioning patients in bed [Digital Images]. In Clinical procedures for safer patient care. British Columbia Institute of Technology (BCIT)/ BCcampus. https://opentextbc.ca/clinicalskills/chapter/3-4-positioning-a-patient-in-bed/
Sheet with elasticized corners that allow for the sheet to fit snugly on the bed; it is generally used as a bottom sheet.
Special linens placed underneath clients to help lift them in bed. Also be called a bed pad.
Quilted, absorbent squares of fabric placed on client’s beds to keep linens dry from incontinence.
Sheet without elasticized corners; it is generally used as a top sheet.
A method of folding the sheet in the manner of a fan or accordion so that the sheet is stacked upon itself.
A tight-fitting triangular fold of a sheet on a bed so that it is anchored to the mattress.
