4.2 Oral Hygiene
An essential, but often overlooked part of daily personal care is oral hygiene. It involves cleaning of the client’s mouth, and teeth or dentures. Oral hygiene removes debris (which can harbour microorganisms), stimulates circulation, reduces unpleasant odours, and improves the tastes of foods.
Depending upon your client, you may only need to assist them with oral hygiene, or you may need to provide total oral hygiene care. Performing or assisting with oral hygiene is an important task of the HCA. Oral hygiene should be performed at least twice per day, with morning and evening care. Oral hygiene may also be performed after eating meals and any time the client requests. Regular, daily flossing helps remove plaque and food debris, which promotes bacteria, from the client’s mouth. Unclean mouths harbour bacteria, which can cause additional health problems for the client. Having a clean mouth promotes a sense of comfort and self-esteem for the client, and improves the overall taste of food.
Providing oral care also gives HCAs an opportunity to observe the health of the client’s teeth, gums, and tongue. HCAs should encourage their clients to independently perform as much of their oral care as possible. For clients who are unable to grasp the handle of a toothbrush, special toothbrushes may be available for them. A split rubber ball or tape can be used to build up the handle of the toothbrush to make it easier for the client to hold. An electric toothbrush may also be used. Avoid using hydrogen peroxide or alcohol-based products, because they promote mouth irritation and mucosal membrane breakdown. For some clients, using a toothbrush may be unsafe, such as those who are unable to spit or who are unconscious. For these patients, special mouth swabs are available for use. Oral care should be provided every 2 hours for clients who are unconscious or unable to drink. Apply a moisturizing ointment, such as a lip balm, to the client’s lips to prevent skin breakdown, chapping, and drying of the lips.
Assisting Clients with Oral Hygiene
| STEP | ACTION | REASON/CONSIDERATIONS |
|---|---|---|
| 1. | Explain the procedure to the client. Provide privacy. | |
| 2. | Wash and dry hands. Always wear gloves when providing oral care. | |
| 3. | Assemble equipment. You will need:
|
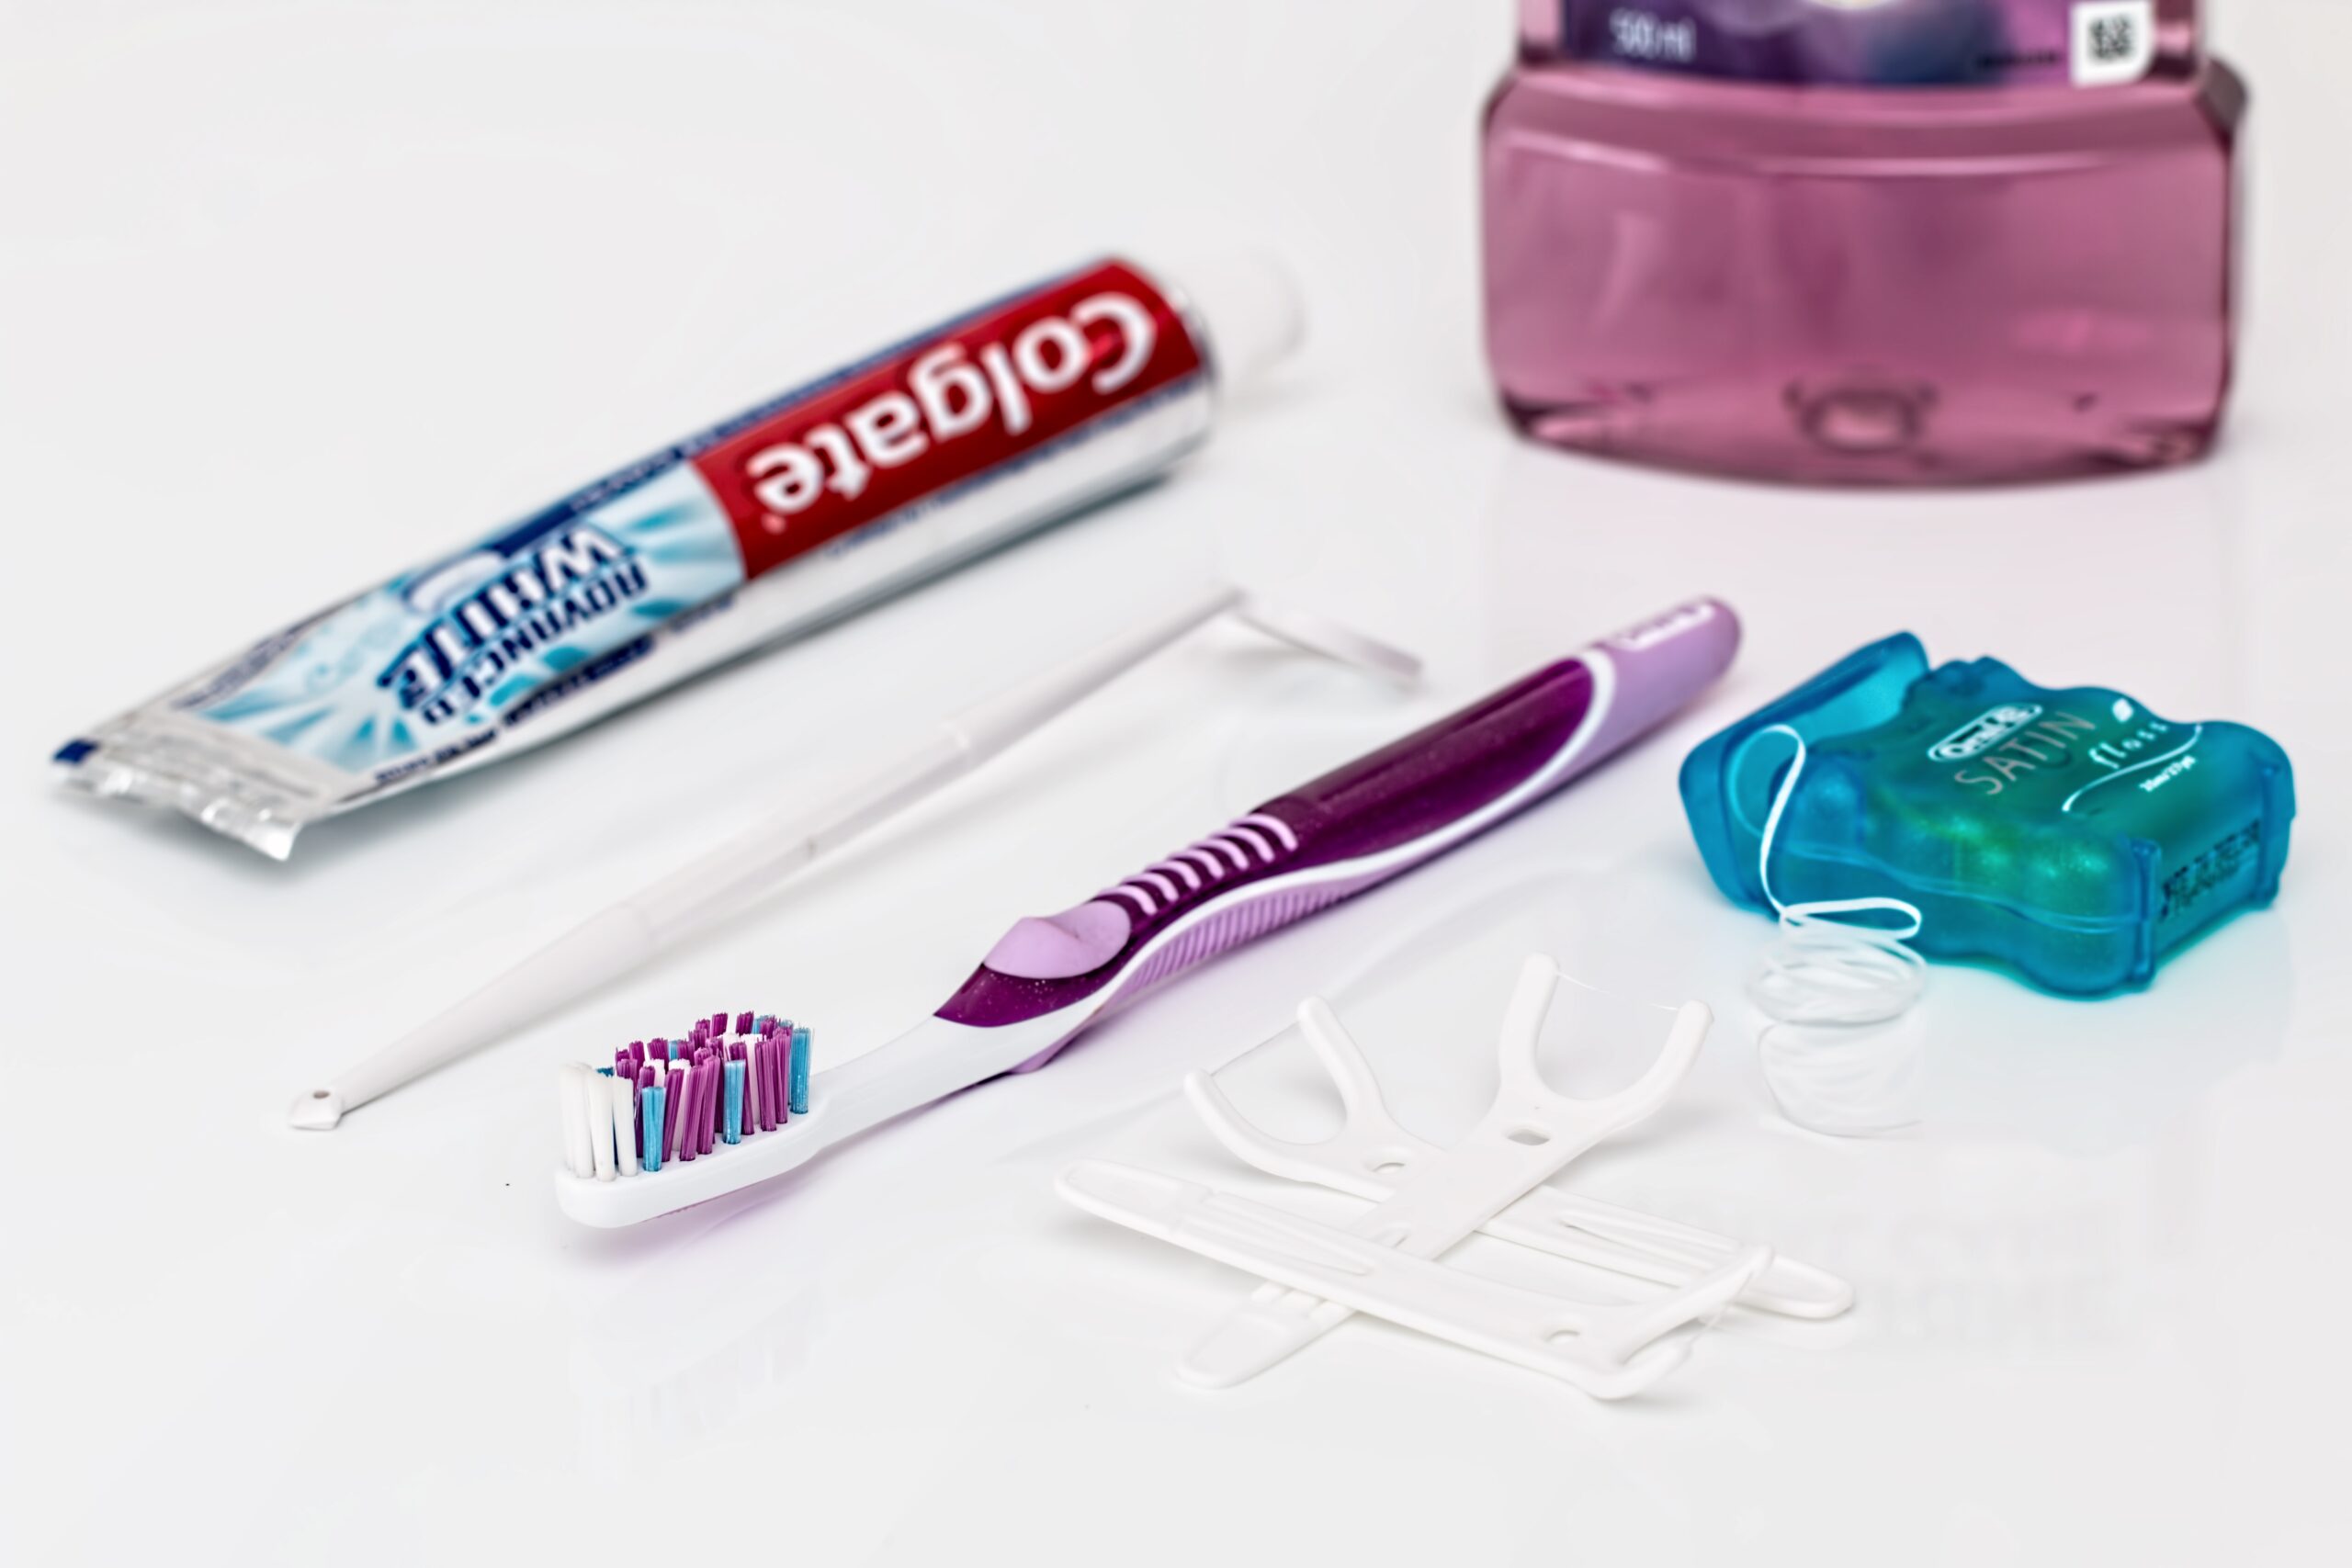 |
| 4. | Ensure the client is in an upright position for safety. If the client is able to brush their own teeth, provide equipment and assist as needed. | A high sitting position prevents choking or aspiration. |
| 5. | Wet the toothbrush and apply a small amount of toothpaste to the bristles on the brush. | |
| 6. | Hold the toothbrush at a 45-degree angle to the gum line. Brush one tooth at a time in an up-and-down motion. Start from the top of the gum line and work down the tooth. | |
| 7. | Start at the upper teeth and then complete the lower teeth. | |
| 8. | To clean biting surfaces of teeth and the tongue, use a back-and-forth motion. | |
| 9. | Be sure to brush all surfaces of the teeth, gums, tongue, and mouth. | |
| 10 | Ensure the client adequately rinses their mouth with clean water and dries their lips and face. | |
| 11. | Offer lip and/or mouth moisturizer as needed, and according to the client’s preferences. |
Watch the following video
How to help with tooth brushing, by CareChannel (2019) on YouTube. CareChannel was developed by the Saint Elizabeth Foundation. Presented by Elizz. Funded by The Ontario Ministry Of Health Long Term Care.
Patients Who Are Unable to Perform Mouth Hygiene Independently
| STEP | ACTION | REASON/CONSIDERATIONS |
|---|---|---|
| 1. | Explain the procedure to the client. Provide privacy. | |
| 2. | Complete hand hygiene and assemble needed equipment. Always wear gloves when providing oral care. | |
| 3. | Assemble equipment. You will need:
|
|
| 4. | Put the client in a side-lying position. Turn their head to the side. | To prevent possible choking or aspiration. |
| 5. | Place a towel or waterproof pad under their cheek and chin to prevent the client or bed linens from getting wet. | |
| 6. | Place an emesis or kidney basin against the side of their mouth and cheek. | To catch liquid and secretions. |
| 7. | Open the client’s mouth by placing gentle pressure on their chin and upper mouth. Use a second toothbrush, such as the type in Figure 4.2.1, or place a padded tongue depressor to help keep the client’s mouth open and prevent them from biting down. To make a padded tongue blade, place two wooden tongue blades together. Wrap gauze over the top half and tape it into place. | Never put your fingers inside a client’s mouth because the client may bite down, even if they do not mean to.
 |
| 8. | Brush teeth gently, using a dry toothbrush or a mouth swab. Dip the swab in water and squeeze the excess solution from the swab. Swab all surfaces of their teeth, gums, inside their cheeks, the roof of their mouth, and their tongue. Use clean swabs as necessary. | Suction excess secretions as directed in the care plan. |
| 9. | Rinse the client’s entire mouth with a clean swab. Ensure there are no pooled secretions. | |
| 10. | Ensure the client’s mouth, face, and neck are dry. | |
| 11. | Apply moisturizer to lips and/or mouth. | |
| 12. | Return the client to a comfortable position. Lower the bed to its lowest height and raise the side rails. | |
| 13. | Put away your equipment and supplies. | |
| 14. | Remove your gloves and wash and dry your hands. | |
| 15. | Document the completion of the task and record any changes in condition or behaviour. Report any tooth or mouth conditions observed, such as sores, open areas, or bleeding from gums, tongue, or broken teeth. |
Denture Care
| STEP | ACTION | REASON/CONSIDERATIONS |
|---|---|---|
| 1. | Explain the procedure to the client. Provide privacy. | |
| 2. | Complete hand hygiene. Always wear gloves when providing oral care. | |
| 3. | Assemble needed equipment:
|
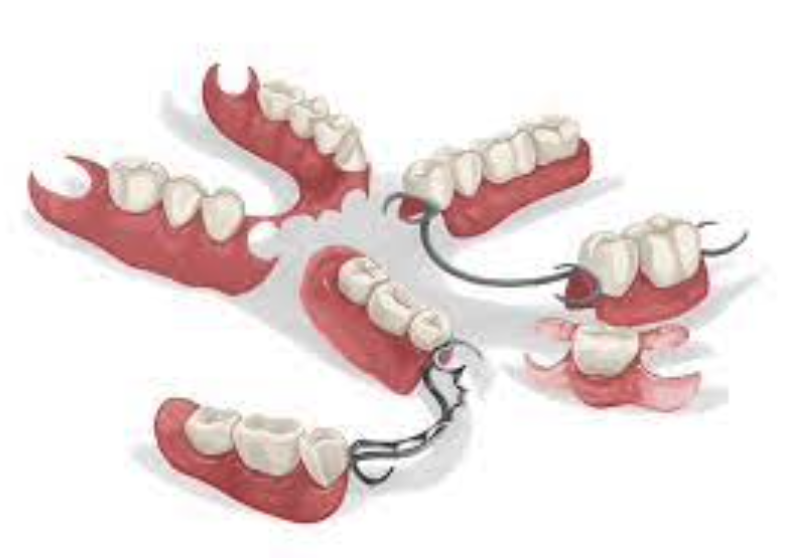 |
| 4. | Assist the client to remove dentures, if needed, by placing a tissue, gauze pad, or washcloth underneath the client’s denture line and gently pulling forward to break the suction. You may need to gently rock the dentures from side to side or forward to break the suction. | |
| 5. | Carefully place dentures in a water filled cup or container. |
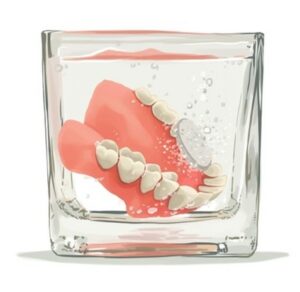 |
| 6. | Carry the dentures to the sink using a denture cup to prevent accidental breakage. | |
| 7. | Place a towel in the sink while you are washing them. Hold them firmly. | This will prevent you from accidentally breaking dentures on the hard surface of the sink. |
| 8. | Clean dentures as you would teeth. Use denture cleaning products. Use warm, but not hot, water. Rinse dentures completely. | Hot water can cause dentures to warp and no longer fit the client correctly.
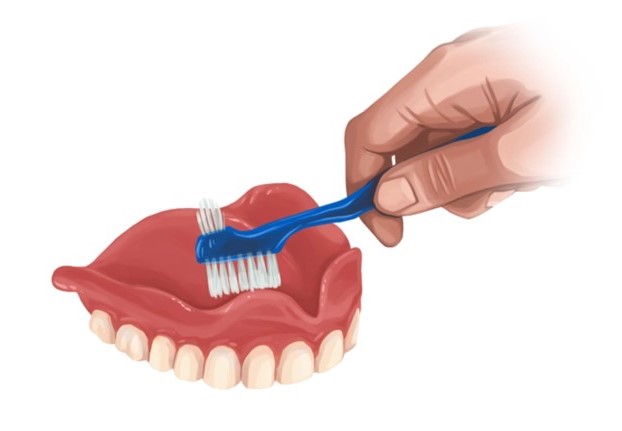 |
| 9. | Provide or assist with mouth care prior to replacing dentures. Assist the client to brush their gums and tongue with toothpaste and a toothbrush. Ensure they rinse their mouth completely. Offer alcohol-free mouthwash. | |
| 10. | If returning dentures to the client’s mouth, apply denture cream or adhesive, as needed. | |
| 11. | Assist the client to place the dentures back in their mouth. To reinsert dentures, insert at an angle, pressing firmly onto the gum line. | |
| 12. | If storing dentures, store them in clean, cool water in a container with a closed top. | To prevent accidental breaking or misplacement. If in a facility, ensure the client’s name is on the denture cup to prevent loss or confusion. |
| 13. | Remove your gloves. Wash and dry your hands. | |
| 14. | Document the completion of the task and record any changes in the client’s condition or behaviour. Report any tooth or mouth conditions you’ve observed, or if dentures are broken or missing. |
Watch this video:
Denture Care (How to Care for Someone’s Dentures) by CareChannel (2019)
Flossing Your Client’s Teeth
| STEP | ACTION | REASON/CONSIDERATIONS |
|---|---|---|
| 1. | Explain the procedure to the client. Provide privacy. | |
| 2. | Complete hand hygiene. Always wear gloves when providing oral care. | |
| 3. |
|
 |
| 4. | Hold the floss tightly between your thumb and forefingers. Starting at the top and back of the mouth, guide the floss between two teeth. Use a gentle rubbing motion to guide the floss between the teeth. | Do not quickly snap the floss between the teeth, or you can cause pain or injury. |
| 5. |
|
|
| 6. | Repeat for each tooth, using a clean section of floss for every one to two teeth. | |
| 7. | Allow the client to rinse and dry their mouth. Dispose of floss. Do not reuse floss. | |
| 8. | Remove your gloves. Wash and dry your hands. |
