Chapter 5: FLO Design
FLO Design
Synopsis / abstract
Title: Facilitating Learning Online (FLO) Design
Purpose: This course is intended to help participants develop knowledge and skills in designing effective online learning spaces and activities.
Mode: A facilitated online course that involves asynchronous and synchronous learning.
Length: Four consecutive weeks.
Expectations – Facilitators: FLO facilitators provide ongoing guidance and support throughout the course, to broaden awareness and understanding of design theories and pedagogical practices, and to develop the online learning design capabilities of each participant.
Time Requirements for Facilitators: Time to prepare the course before the start date will vary depending on the facilitators’ skills with navigating and editing the course learning management system. During the course, facilitators can expect to spend approximately 15 hours per week, potentially more in the first week and in the fourth week (due to organizing and hosting the showcase sessions). First-time hosts may require more time. Facilitators should expect to be available to the course on a daily basis.
Expectations – Participants: Participants are expected to participate actively and collaboratively throughout each week, exploring design ideas, developing their online unit designs, and participating in weekly Studio sessions to give and receive constructive feedback.
Assessment: Participants are encouraged to use a self-assessment FLO Design rubric, augmented by a selected quality framework, to monitor their developing skills and their design project. Weekly Studio sessions provide opportunities for the FLO Facilitator (and peers) to provide constructive feedback on the evolving designs.
Estimated Time Required for Participants: Participants should expect to spend approximately 6-8 hours for course activities during each of the four weeks. Those with no prior online teaching and learning experiences can expect to invest more time. Additional time may be needed to prepare for the final showcase sessions.
Primary Resource for Facilitators: All materials for the FLO Design course are included in an Open Educational Resource (OER) from BCcampus, available for viewing or download. This guide is based on the 2019 version of the course.
What is FLO Design?
Facilitating Learning Online Design (FLO Design) is a four-week course that offers participants opportunities to explore different approaches to developing effective online courses and/or learning experiences. Participants are introduced to a wide range of ideas about how people learn, best practices and recommended pedagogies to engage and support online learners, and several respected quality and accessibility frameworks to guide their design efforts.
The course is practical and developmental; participants are asked to identify a specific design project and can work alone or with others to design a short unit of learning (unit = 2-3 weeks of an online course or equivalent) and a sample online learning activity to demonstrate how they will engage learners online.
More details
Although all FLO courses emphasize reflective practices and participatory, often collaborative, learning with a practical focus, FLO Design goes a step further by building in weekly Studio design forums. FLO Facilitators offer expert advice and suggestions, but also acknowledge the diverse range of skills and experiences that learners bring and invite them to help each other clarify and develop their design projects.
Learning outcomes
After participating in, and contributing to, learning activities throughout FLO Design, you should be able to:
- Discuss important elements of online learning design, including quality, accessibility and design guidelines.
- Create a plan for a short unit of online learning that includes a prototype learning activity.
- Critically reflect on your learning and progress in developing online learning design skills and knowledge.
- Explain design choices and pedagogical perspectives applied to a specific learning design project.
Participants
Participants who take FLO Design are typically new online course designers/instructors and/or experienced instructional/learning designers, as well as instructors and program/course planners. The course offers participants an opportunity to review the theory and practice of online learning and teaching, to explore different design approaches and quality frameworks, and to practice important planning and design skills.
Technology
General recommendations for technology can be found in in Chapter 3: Tools to Support FLO.
Some additional tools to consider for this course:
- Provide suggestions for drawing or charting tools that participants can use to create a visual of their design to share with others.
- Provide access to a shared collaborative space such as Google Docs for both facilitator and participant use.
- An annotation tool can be helpful to allow specific comments to be linked to the relevant portion of the design plan (e.g., Marginalia within Moodle forums).
The course content and layout
The FLO Design Open Learning Resource (OER) from BCcampus is a complete four-week course with a comprehensive collection of design readings and resources and learning activities. Within the OER course on the SCoPE site, resources are organized into tabbed pages. The core structure includes tabbed pages for:
- the Hub
- Pre-Course Orientation (optional)
- Week 1: Getting Started
- Week 2: Sparks to Design
- Week 3: Projects Under Construction
- Week 4: Showcase Designs
The Hub
The Hub contains content/activities that are referred to throughout the course, such as:
- Acknowledgements. You may choose to embed acknowledgements of funders or contributors, or recognize traditional territories (increasingly done in BC, Yukon and other parts of Canada).[1]
- Course handbook. Similar to a course syllabus, the handbook explains how the course is designed and the kind of teaching and learning to expect. In addition, the Handbook includes a rubric to guide self-assessment, tips to help participants track progress and an explanation of course licensing and access.

Before offering FLO courses, you may find it helpful to refer to your institution’s policies on privacy and confidentiality in terms of online courses and participant privacy.
FLO courses are built on a model that relies on collaboration and honest, constructive exchanges to help all participants learn and develop. Facilitators and participants should discuss the expectation and importance of privacy.
Some privacy and confidentiality rules you may wish to adopt:
- Always seek permission to share content posted by participants.
- When using social media and other online services to complete activities, ensure you are familiar with the levels of privacy available and how the information will be stored and shared. Communicate this information to the participants.
- Let participants know who else has access to this course (e.g. participants, facilitators, assistants, website administrators, etc.).
- You may wish to establish Vegas rules, i.e., what happens in the course, stays in the course.
- Course schedule. A detailed, week-by-week explanation of learning events and tasks to help participants stay on track.
- Announcements and open forums. The Announcements forum is a place for facilitators to share important course notices, while the Open forum is an informal space where participants are encouraged to post questions or ideas.
- Weekly Reflections forum. Participants are asked to respond to a reflective question each week and their posts are gathered in the Hub.
- FAQs – Tech Tips and Tools. A searchable collection of help items and tutorials.
- Visuals Gallery. Visuals that explain some core learning activities and demonstrate mapping learning designs.
- HIDDEN resources. These are for Facilitators only. They may include a private discussion forum, a folder to store documents and presentations to customize for weekly synchronous sessions, etc. It can be useful to embed a page listing the changes being made to the course content prior to (and sometimes during) the course delivery.
Weekly tabbed pages
Each week’s pages include at least the following:
- A detailed, editable checklist,
- A topic-focused overview book of readings and resources,
- A studio forum to support collaborative design work, and
- A link to the Weekly Reflections forum (contained in the Hub).
Note: If you decide to offer a pre-course orientation, you’ll add a tabbed page that contains resources and activities to help participants navigate the online course and complete essential tasks.
A studio-based design approach
A unique aspect of the FLO Design course is the use of weekly collaborative Studio forums to encourage participants to share their emerging designs and to review constructive feedback provided by the FLO Facilitators (and contributed by other participants).
Participants contribute questions, thoughts, emerging designs, examples, and provide feedback to the work of their colleagues in the course. Each week’s Studio forum provides a quick reminder of design tasks.
Example: Week 2 studio forum


The weekly studio forums are a place where you can share your progress, your questions, your challenges with others.
For this second week of FLO-Design, we ask that you post a topic thread indicating:
- your chosen instructional (learning) design approach (see the Week 2: Overview book),
- any elements from Instruction (Learning) Design stories shared in the synchronous Blackboard Collaborate session that you plan to integrate
- an update on your progress in developing your Design Project Plan
- the drawing tool you’ve selected to illustrate parts of your plan (or an alternative visual method to share your emerging design)
- any questions you have about how to move forward?!
Please take the time to review and respond to at least two other posts in the Studio Forum.
Assessment of learning
FLO Design offers a developmental learning opportunity; there are no marks or grading for design projects and participation.
Participants monitor their own progress in relation to the FLO Design Learning Outcomes using the self-assessment rubric (included in the Course Handbook) AND by reviewing the detailed feedback from FLO Facilitators on their emerging learning design each week in the Studio forums.
The rubric uses five criteria and a three-stage developmental structure: Level 1: Beginning; Level 2: Developing; Level 3: Accomplished. You can review the detailed elements for each criterion in the example shared at the end of this chapter (see FLO Design Self-Assessment Rubric).
FLO Facilitators provide constructive feedback based on each participants’ stated design goals, and they are also guided by a course quality framework (see Week 3 Overview, Elements of Quality).
A final self-assessment activity in Week 4 encourages participants to reflect on and share their progress and to look forward to how they will apply what they’ve learned.
Facilitator task list: What you need to do before, during, and after the course
The successful hosting of FLO Design requires an organized approach to planning and facilitation. A detailed facilitator task list has been developed for co-facilitators to support a successful delivery of the course.
See the FLO Design Task List to review the detailed facilitator tasks alongside the following explanations.
Before the course begins
Review the FLO Design Handbook and Schedule (in the Hub page): The Handbook and Schedule will help you understand the curriculum and intended flow of learning in the course. Spend some time and reflect on your facilitation approach and how you will manage the weekly Studio forums described in the Handbook.
Review each week’s Overview book to ensure that the content reflects your institution’s guidelines and parameters related to online course design. For example, if you have specific accessibility checklists, design standards, or policies related to inclusive design or Indigenization, these should be added to the course.
Design Choices
Do you want to offer a pre-course orientation week?
- Consider your participants, particularly their previous experience with your chosen online learning environment and tools. Would they benefit from a Pre-course Orientation Week?
Do you want to offer challenge activities and a digital badge?
- Offering specific tasks for participants who are new or inexperienced with your chosen learning environment can help them get started with learning new skills. You will find challenge activities in the OER that you can customize.
Do you want to try the interview activity in Week 1 instead of asking participants to post a personal introduction and briefly describe their design project ideas?
- The interview activity (see the Facilitator Resources folder) helps participants clarify and extend their design project ideas, develops connections among participants and can reveal special knowledge / experiences / skills that each participant could contribute.
- If you decide on the Interview activity, make sure to send out information to participants before the course starts so they have time to think through what they might ask or answer.
- The risks of using this activity are the amount of time it can take for each pair of learners as they need to interview each other and post the results to the Studio before the end of the week.
Encouraging reflective practices: Do you want to pose a specific reflective question each week or ask participants to share nuggets from their personal learning journals to the Weekly Reflections forum?
- Posting a new question mid-week allows you to direct the attention of participants to emerging design or related issues.
- Encouraging participants to share nuggets from their personal learning journals can introduce new perspectives and unexpected ideas that stimulate creative thinking.
- Make sure that the description field of the Weekly Reflections forum describes the approach you have chosen.
Encouraging critical thinking through reflection
Evidence has shown that learning is improved when participants become more aware (metacognition) of how and what they are learning. FLO courses integrate structures to promote both individual and collaborative reflective practice.
We ask participants to keep a personal learning journal to track their understanding, their “aha” moments, and their ongoing questions and responses to theories and ideas presented during the course. We also ask them to share nuggets or a brief synopsis each week in a collaborative forum so they can learn from each other and engage in further exploration and critical thinking.
The OER of FLO Design uses a different approach to try to deepen the level of reflection and to encourage more meaningful discussions. Each week, a facilitator would pose a “thought” question to direct each participant’s attention to a core concept or important theory/practice. Then they ask participants to NOT question or comment on each other’s reflective posts; instead, they asked participants to pursue relevant reflections within the Studio forums so the discussions could directly inform/improve the emerging designs.
Each approach has potential benefits; choose what you believe will be of most benefit to your participants.
Do you need to offer starter ideas for design projects or do you want to rely on the design challenges presented by your participants?
- Review the topics and resources offered in the Week 1 Design Project book. You can customize the topics and resources or omit the book and rely on your participants.
Do you have a back-pocket full of stories of instructional or learning design strategies you can share or do you have colleagues who are interested in sharing? How will you “spark” new ideas or inspire participants to reflect on their projects and intended approach?
- Look ahead to the Week 2 Sparks to Design Forum and plan how you will find/share stories of instructional/learning designs to inspire participants.

In one version of FLO Design we invited several instructional/learning designers to share a story of an interesting design project. The facilitators (we called them “explainers”) participated in the Week 2 Sparks synchronous session and shared some slides as they described their design and pointed out what they learned about designing from the experience.The explainers also agreed to participate asynchronously by responding to questions about their stories in the Sparks forum. Some of the explainers were able to share their story for the OER; others couldn’t due to confidentiality considerations.
Feedback: “The Collaborate sessions, especially the Explainers with the attached forum, was very useful. They made “Design” real and applicable, and they were available after in the forum to further answer or explain their presentations” Jan.2017
How can you help new participants to navigate the learning space and find the resources they need quickly? Review the links and dates in the materials for the start of the course (pre-course orientation page, the Hub, Week 1).

Add hyperlinks to your first weeks in the detailed Course Schedule page (in the Hub) and in your facilitator posts in various forums. As the participants become more comfortable with the location of activities and resources, don’t do this as often. Provide ‘scaffolding’ that encourages participants to become more self-directed and active in their learning.
During the course
- Provide frequent opportunities for participants to express how they’re feeling about their learning and progress in the course. Be as accessible and responsive as you can to address frustrations before they become problems.
- Monitor the progress of each design project and provide feedback relevant to the development focus of each week. Assist participants by asking questions, providing suggestions and guidance.
Week 1: Getting started

Focus: Use your posts to begin developing a sense of community and instructor presence this week. Make sure your Welcome post sets the tone for the week (and the course!)
Participants will need more support and guidance during the first week. Respond quickly but take time to develop their independence by including brief tips, pointing out helpful resources, or connecting them with other participants.
Reinforce the essential tasks throughout the week (i.e., deciding on a design project, whether to work alone or with another participant, and to end the week with an understanding of what’s ahead.)
Interview activity (optional): If you’re using the Interview activity, make sure that participants are connecting with their assigned interviewee. Encourage them to post the results of their interview in the Studio forum in time to allow others to review and comment (and for the interviewee to clarify any misunderstandings).
First synchronous session: The purpose of this session is to launch the course, make sure participants understand the flow of activities and the expectations, and engage them in developing mutual agreements to guide their collaborative learning. Allow time for questions and highlight the ways they can monitor their progress or ask for assistance.
Try to connect directly with each participant as early in the week as possible, including some personal information or humour during your exchanges, so they get a sense of who you are as a person.
Create a tracking system or map the connections you make with participants during the first week so you don’t leave anyone out.
Provide structures to guide collaborative learning: Make sure all participants have reviewed and agree with the course Agreements posted in the Week 1 page (reviewed during synchronous session). Make sure participants have had an opportunity to refine or propose new agreements. These are important in setting the tone and minimizing misunderstandings as the group works together.[2]
Support participants’ successes: Use the monitoring tools of your online environment to ensure that all participants have visited the essential places and resources. Follow up immediately with any latecomers by offering support and encouragement. Emphasize the importance of getting the essentials accomplished in the first week (see Week 1 checklist).
Posting a detailed summary of design projects at the end of the first week can help participants get a sense of the breadth of experience and ideas within the learning community. Making this visible can reduce the stress many participants feel when they are asked to choose a project and can help develop a stronger sense of community. Here is a simple example:
| Name | Topic-Type | Intended Learners | Willing to Collaborate? |
|---|---|---|---|
| Albert | Re-useable module that focuses on group problem-solving and self-assessment of solutions | Physics students | Yes |
| Barbara | 2 options: Orientation to English Language Studies or Intercultural Competency | 1st year students of English Language Studies | – |
| Brenda | Improve online portion of an existing Intro to Chemistry course | Chemistry students | Yes |
| Catherine | Blended report writing for Justice | Students in Justice (all have undergrad) | – |
| Frank | Module for PIDP curriculum development course – accessibility to online learning | Adult learners, some instructors | Yes |
| Gary | 2 options: Research Ethics or English (Close Reading) | Diverse learners | Yes |
Week 2: Sparks to design
Focus: Step back a little this week and encourage participants to connect and continue building a sense of community and shared purpose.
Use your forum posts to draw attention to important learning theories or approaches to learning design that are relevant to emerging design choices that participants share in the weekly Studio forum.
By the end of Week 2, participants should have selected a specific design approach (three approaches are offered in the Week 2 Overview).
Provide options for learning more (or reviewing) important concepts in online learning design.
Add comments to forum discussions to draw attention to relevant theories or add links to more information.
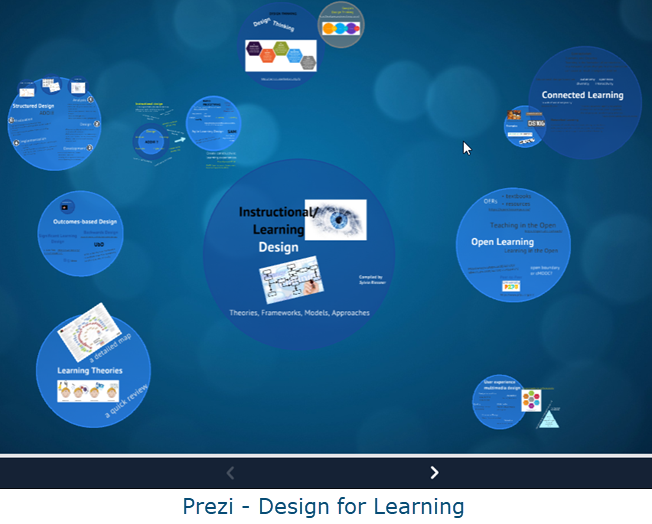
Provide complex ideas in structured ways or use digital tools to allow participants to explore easily. The Week 2 Prezi overview is an example of this – Design for Learning
Second synchronous session: The purpose of this session is to spark new ideas and encourage participants to think beyond their previous approaches to learning design. Be prepared with interesting examples (and guest presenters, if possible) to broaden the discussions.
Two key discussion forums: Make sure participants notice the purpose of both the weekly Studio forum (for posting on their specific projects) AND the Sparks forum (to host a discussion about the learning design examples provided by the explainers).
The stories and examples shared during the Week 2 synchronous session should be summarized in the Sparks forum so participants can ask further questions during the week. These examples can encourage participants to try new approaches, and to think about their own design choices and how they may affect the learners.
Monitor progress carefully and encourage participants to use the checklists and/or other methods to stay on track. Use nudge posts near the end of the week if participants haven’t identified an approach from the three shared in the Week 2 Overview book.
Make explicit links from emerging designs to theories and approaches: Focus on conversations in the Studio forum. Make sure you provide each participant with detailed, constructive feedback on their emerging design plan. Remember to draw in relevant theories and brief explanations of underlying values and beliefs about how people learn.
Week 3: Projects under construction
Focus: Your facilitation this week will be both broad and deep! Connect with any participants who seem to be struggling while celebrating the “aha” design moments and accomplishments occurring in the weekly Studio. Take your feedback to deeper levels, making specific links between your comments and the FLO Design rubric, relevant learning or design theories or quality guidelines. Always keep the discussions learner-focused by asking questions from this perspective, based on each participant’s original context and learner descriptions.
Maintain your emphasis on participatory and connected learning. Highlight thoughtful comments or questions posed by participants. Encourage any participants who haven’t provided feedback to their peers to do so.
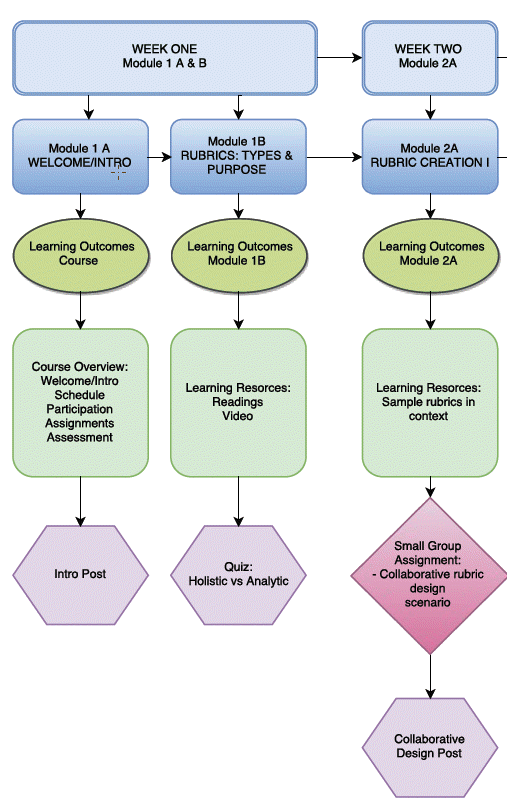
Encourage participants to develop a visual representation of design projects to help make the flow of each unit easier for reviewers to understand. Highlight any examples that participants have shared in the weekly Studio forum.
Third synchronous session: The purpose this session is to help participants overcome any significant challenges in the construction of their unit of learning. Allow time to discuss the purpose of developing a prototype online learning activity. Make sure participants understand that the prototype should reflect their beliefs about how people learn, and help them try out a particular approach or topic while they have a supportive audience who can provide valuable feedback.
Stay calm and carry on: Find ways to lessen the anxiety that some of your participants may be feeling this week. The pace of Week 3 can be hectic as participants are asked to sign up for a Showcase synchronous presentation in Week 4, to continue developing their units of learning, and to develop a prototype learning activity.
Be open to modifying your approach/expectations to adapt to the needs of your cohort. The purpose is to help them develop, NOT to create a “do-or-die” atmosphere.
Why should I draw or map my design?
The power of images or drawings to make difficult concepts easier to understand has been researched and demonstrated for many years in education. For a short online learning experience like FLO Design where participants are asked to share their ideas and provide constructive feedback, some form of visual or illustration of the core activities and learning approach for each design project becomes important.
The design of each project is changing each week. In addition, the underlying reasons for particular activities, assessment, and approaches are explained in lengthy paragraphs in Studio topic threads. A simple drawing or flowchart can allow participants and facilitators to quickly grasp the overall design and ask cogent questions or provide useful suggestions.
Managing the clarity of Studio design posts: Not all participants will recognize the importance of linking back to a core design document and using each week’s Studio forum to post new design thinking or responses to constructive feedback. You can scaffold the process by creating links or inserting explanatory posts that encourage each participant to explain their thinking and highlight changes in their designs from week-to-week.
Post separate summaries that highlight significant changes you observe in the group’s emerging designs. Identify themes and interesting streams of conversations within the week’s Studio.
Encourage peer-to-peer feedback: Find ways to elicit more meaningful posts; don’t accept “that’s great” superficial responses.
Promote the value of the Showcase sessions: As you encourage participants to sign up for Week 4 showcase session(s), mention the value of concise sharing of design ideas. In general, each participant will have a maximum of 10-15 minutes.
Point out examples from elevator pitches or three-minute thesis presentations to show how this skill applies in business and academic fields.
Point participants to the Week 4 Overview for tips on how to plan their presentations.
Week 4: Showcase designs
Focus: Your facilitation this week may involve all your managerial, coordination and inspirational skills. You need to support participants to pull together a final presentation of their design, while asking them to take time to reflect on their experiences and share some of their intended future applications of what they’ve learned. And you want them to participate in a final closing activity and complete a course evaluation survey.
Take time to collect examples, quotes, vignettes from participants to share during a final closing session – whether that be synchronous or a final open bulletin board or video, or simply a final forum posting.
Showcase session(s): Depending on the size of your group, you may schedule more than one Showcase synchronous session. We recommend keeping them to the standard one hour format and allowing only 4-5 presentations per session (to allow time for brief questions and feedback). Remind participants to post their slides, diagrams or visuals of their design and prototype learning activity in the final Studio forum. They can add further explanations or ideas there. Emphasize the importance of having other participants take on the role of the audience to support their peers.
Provide an example and a simple process to encourage those who can’t attend to create and share a screencast or audio recording that explains the final design they are asked to share in the Week 4 Studio forum.
Facilitator(s) and peer feedback: Facilitator(s) will have provided detailed formative feedback and suggestions/questions throughout each week. The final week’s feedback should include a summary and any final observations from the Showcase sessions. Acknowledge the progress each participant has made in designing and explaining their unit of learning to identify areas for growth and to encourage participants to reflect on their initial and future goals for developing and applying their learning design skills.
Encourage participants to take time to review as many final designs as they can and to provide constructive feedback.
You may choose to provide both open and private feedback to your participants for the end of the course. Make sure you refer to the criterion identified in the FLO Design rubric – the relevant learning outcomes and the quality guidelines.
Final reflective activity: Encourage participants to complete the final Looking Back/Looking Forward activity. Draw attention to the previous week’s reflections forum in the Hub and remind them of thought-provoking comments or ideas that were shared during Studio sessions.
Closing the course: An important facilitator role is to draw the course to a close and celebrate learning, connections and accomplishments. If possible, a synchronous celebration provides many opportunities for final discussions and acknowledgements. However, an asynchronous bulletin board or other online space to share final goodbyes can work as well.
During the final week, FLO facilitators will often draw the course to a close with an activity that encourages participants to take a deep breath and reflect on their learning and to think ahead to how they might use what they’ve learned in the future.
This example shows how the activity is structured and shows the use of annotated, opened licensed images and a cloud-based tool to provide an alternate way of presenting the activity.
Example of a learning activity

Looking back
For your final week’s reflections, we’re asking you to review your experiences throughout the workshop. As you flip through your learning journal or review your weekly Reflections-forum postings, what still resonates?
Did you notice a pattern in the way you participated? What engaged you? What confused you?
Looking forward
And add a forward perspective – looking ahead, how do you see yourself applying what you’ve learned? Can you identify new challenges in online design you’d like to explore?
Describe at least one specific objective for your future instructional (learning) design work.
What steps do you plan to take to ensure that you “make it so”?
We call this activity “Looking Back, Looking Forward” (borrowed from the FLO foundation workshop) and encourage you to try different ways of sharing your final reflections.
Try to post as early as you can so that you can read and enjoy others’ posts.
Here’s an example of a different way to provide the instruction for this final activity – build in Microsoft Sawy.
Navigate to the following link to launch then scroll down to follow the story.
The final challenge is to try and host a synchronous celebration of learning to close the course. Although valuable for cementing relationships and potential future connections for learning, you may have to consider an asynchronous, digital goodbye.
Post-course
Participants often feel let down at the end of such intense learning. Consider some options to continue the connection, if possible. Leave part of the course space open so participants can report back on their success or further improvements to their design.
- Within an institution, it might be possible to schedule regular check-ins with the Facilitator and interested participants.
- See the 2018 OER Pulling Together: Foundations Guide's chapter on Acknowledging Traditional Territories for an example of how to write an acknowledgement. ↵
- Group agreements are commonly used by facilitators of community and cooperative projects - see Seeds for Change. ↵
