Part 2
Module 11 Competency Test No. 2 Open Book
Learning Outcomes
When you have completed this module, you will be able to:
- Within a one hour time limit, complete a written exam and the lab exercise.
If you are Completing this book:
- Without the aid of an instructor, complete the written test and the lab exercise.
- In a classroom with an instructor, the instructor will give instructions on what to do after you have completed this module.
Multiple Choice Questions
Select the BEST answer.
- What view of the model is the XZ plane in Inventor?
- Left Side
- Right Side
- Top
- Bottom
- Front
- Which one of Inventor’s menus shows if a sketch is consumed or unconsumed?
- Status bar
- Standard menu
- Browser bar
- Panel bar
- 2D Sketch panel
- What command is used to draw a 2D Sketch on the existing solid model?
- NEW
- LOOK AT
- 2D SKETCH
- EXTRUDE
- LINE
- Which plane is the default plane used in the templates supplied with the Inventor book?
- ZY
- XZ
- XY
- YX
- YZ
- Which of the following best describes a consumed 2D sketch?
- It is blank.
- It has been extruded or revolved to create a 3D feature.
- It has been deleted.
- It cannot be edited.
- It has been dimensioned.
- In Figure 11-1, what is the purpose of the middle icon in the EXTRUDE dialogue box?
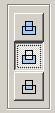
Figure 11-1 - Cut
- Subtract
- Add
- Join
- Intersect
- What kind of dimension does a linear dimension insert?
- Line
- Object
- Horizontal only
- Vertical only
- Delta X or Delta Y
- What view of the model is the XY plane in Inventor?
- Left Side
- Right Side
- Top
- Bottom
- Front
- On the colour scheme High Contrast, what colour will the sketch appear when it is fully constrained?
- Black
- White
- Purple
- Blue
- Green
- What view of the model is the YZ plane in Inventor?
- Rotated
- Right Side
- Top
- Bottom
- Front
Lab Exercise 11-1 Part B
Time allowed: 60 minutes.
| Part Name | Project | Units | Template | Color | Material |
| Inventor Lab Lab 11-1 | Inventor Course | Millimeters | Metric-Modules Part (mm).ipt | Orange | N/A |
Step 1
Project the Center Point onto the Base sketch.
Step 2
Note the location of X0Y0Z0. Draw the necessary sketches and extrude them to produced the solid model. Apply all of the necessary geometrical and dimensional constraints to fully constrain all sketches. Ensure that all lines on all sketches display purple on a black background. (Figure Step 2A and 2B)

Dimensioned Drawing [Click to see image full size]
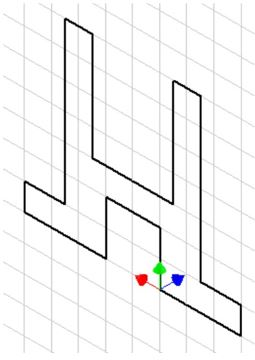
Suggested Base View –
Front – XZ Plane
Step 3
Apply the colour shown above. (Figure Step 3A, 3B, and 3C)
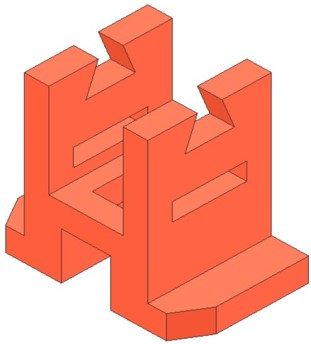
Completed Solid Model –
Home View

Solid Model – Rotated View

Solid Model – Rotated View
