Introduction
Learning Outcomes
When you have completed this module, you will be able to:
- List the software and template files required to complete the Autodesk Inventor book.
- Describe the Autodesk Inventor book’s philosophy and explain how to use the book to learn how to apply the Inventor commands and features to create Inventor parts, assemblies, and drawings.
Autodesk Inventor Software Required
Introduction to Drafting and Autodesk Inventor was written to be used with Autodesk Inventor Version 2020 and 2021. You must have access to one of these software packages to complete the lab exercises in this book. It can also be used with Inventor 2015 through to 2019, but the interface structure was different and will take a little more poking around to find things.
About the Book
Philosophy of the Inventor book
This book contains self-paced learning modules that were written as a tool to guide and teach you to master Inventor. No two students learn at the same pace, therefore, the modules were written as competency-based bite-size pieces to allow you to work at your own pace. They can be used in correspondence courses, online courses, instructor-lead classes or by individuals teaching themselves to use Inventor in their own home or office.
Scope of the Inventor books
The Inventor books were written in two parts, Autodesk Inventor and Autodesk Inventor Advanced.
Suggested Prerequisites
To get the most from this book, it is suggested that you have a working knowledge of the Windows operating system that is installed on the computer you are using to learn Inventor. You must be able to send and receive e-mails, complete with attachments. You must also be able to create folders, save files, move files, copy files, rename files, and delete files.
Book Structure and Components
The Autodesk Inventor book modules were written in a very logical step-by-step order. To get the most from this book:
Do not skim through them.
You must read and understand everything in each module.
Do not jump around inside the module or from module to module. Work your way methodically through each module, page by page.
The Modules
The modules were written in a precise order and contain the information you require to learn Inventor. Using Inventor is a never ending learning process and you will continue learning long after you complete these modules.
As you work your way through each module, learn and try to understand all of the material. To ensure that you understand it, complete the lab exercise(s) to prove it. Only when you understand everything in the module and can complete the lab exercise(s) in the specified time limit, should you go to the next module.
Each module may contain Must Know’s, User Tips, Workalongs, Drafting Lessons, Geometry Lessons, and Lab Exercises.
Must Knows
A Must Know is a an important Inventor principle or fact. You must understand and retain each one of these principles as you work your way through the modules. If you cannot understand any one of them, get some help or read back through the module. Do not go on until you fully understand it. See the example below:
(Do not attempt to understand this Must Know now, it is here for an example only.)
User Tips
User Tips are used in the modules to help you complete models faster and more efficiently. They contain tips, tricks, and ways to use commands that will help you draw faster and increase your productivity. Study them and try to use the tips while doing your labs exercises. Do not memorize them as you will not be tested on them. You can re-read them anytime you wish. They are there to help you work smarter, not harder. For example:
(Do not attempt to understand this User Tip now, it is here for an example only.)
WORK ALONG
Workalongs are there to help you to understand how to use a command or a series of commands to complete models and drawings using Autodesk Inventor. Complete all the steps in each workalong to complete the model or assembly to practice using the command(s) taught in that module. Try to understand how each command works and use those principles to complete the lab exercise on your own.
(Do not attempt to understand this Workalong now, it is here for an example only.)
WORK ALONG Drawing Sketches with Circles
Step 1
Check the default project and if necessary, set it to Inventor Course.
Step 2
Enter the NEW command to start a new part file using the template: English-Modules Part (in).ipt.
Step 3
Save the file with the name: Inventor Workalong 12-1.
Step 4
Draw the base sketch on the top view. Since this is the XY plane (default plane), use Sketch1.
Geometry and Drafting Lessons
Some modules contain Drafting Lessons and/or Geometry Lessons. They are there to teach you students who do not have any previous drafting/design knowledge or experience. They may also be handy for drafters or designers who need a refresher lesson.
If you already know the theory in the lesson, skip it and go on to the next item in the module. If you don’t know it, study it. This theory is not part of the course and you will not be tested on it. You should ensure you read them before you attempt to complete the lab exercises. For example:
(Do not attempt to understand this Geometry Lesson now, it is here for an example only.)
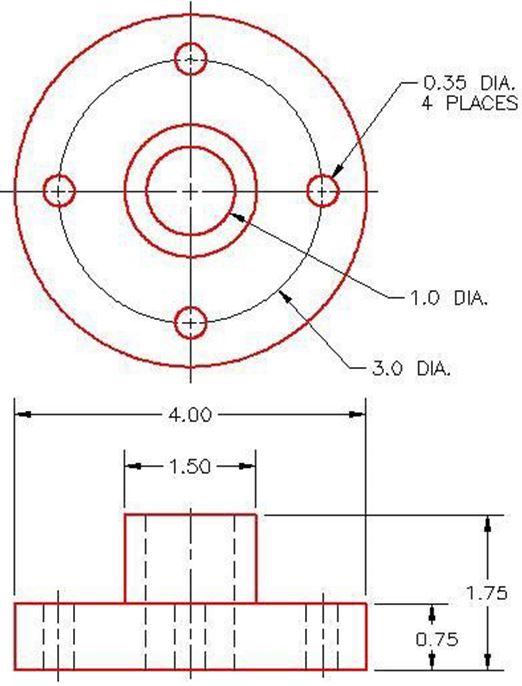
Geometry Lesson: Circles
A circle is defined as a closed curve in which all points on the circle are the same distance from its centre point. The center point is a single XY coordinate. Study Figure 12-1 for a detailed description of the geometry of a circle.
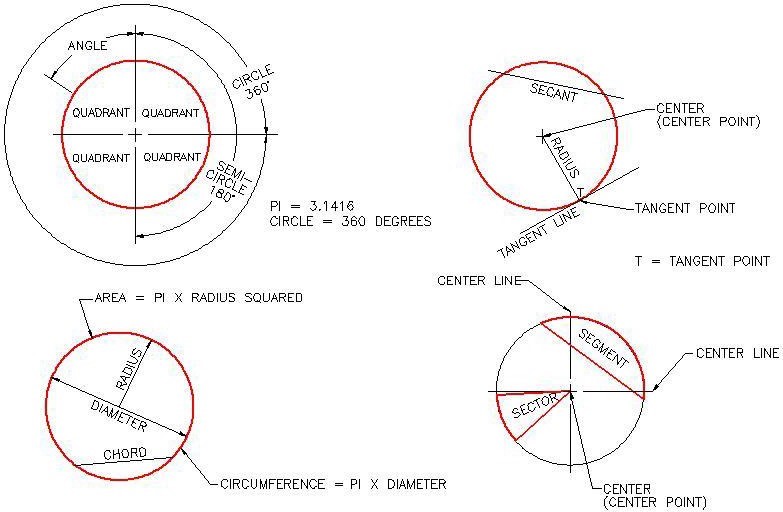
Geometry of a Circle
Key Principles
Each module contains a list of key principles. The key principles are principles that you should have learned and understand in that module. It is important that you understand each one of these principles as you will be required to use them in future Inventor work. For example:
(Do not attempt to learn the Key Principles now, it is here for an example only.)
Key Principles in Module 4
- The @ symbol means “The last absolute coordinate location”.
- To close the last line of a series of lines, use either C (Close) or the absolute coordinate of the first point.
- To delete existing objects on a drawing, you can either use the ERASE command or the Delete key on the keyboard.
- Objects can either be selected before or after the command is entered.
Lab Exercises
All lab exercises have a time limit allocated to them. To complete the lab exercise in the specified time limit, you must be able to complete the model or assembly and make any corrections. If you cannot do this in the time allowed, redo the entire lab exercise. It is your way of proving that you have mastered the module.
Almost all modules contain at least two lab exercises. It is strongly suggested that you complete all lab exercises, in all modules.
Competency Tests
Every fifth module is a timed competency test module. A competency test module has multiple choice questions and a comprehensive lab exercise to test your mastery of the last four modules that you just completed. If there are any parts of this module that you have trouble completing or you cannot complete in the time allowed, you should go back and reread the module or modules containing the information that you are having trouble with. If necessary, redo any lab exercises to help you learn the material.
Book Conventions and Symbols
The following conventions and symbols are used in the modules to help you understand the material.
Words in Red Italics
Words in red italics are new terms being introduced in that module. They will only appear in italics the first time they are mentioned and will be defined. For example:
Construction objects are objects that are drawn in the sketch to assist the operator in completing the sketch but will be ignored by Inventor when the sketch is extruded or revolved.
Command Names
Command names are always in uppercase. For example:
To construct a fillet, use the FILLET command. The rule of thumb to follow is “If the arc you are drawing is tangent to both objects it is connecting to, use the FILLET command to insert it”.
Author’s Comments
There are author comment’s throughout the modules. For example:
Key Principles in Module Introduction 1
- To complete the lab exercises in this book, you must have the template files that accompany it, on your hard disk drive.
- Do not skim through the modules. You must read and understand everything in each module. Do not jump around inside the module or from module to module. Work your way methodically through each module, page by page.
- The Inventor Self-paced book’s modules were written as competency-based bite-size pieces to allow you to work at your own pace and learn to use Inventor. Do not go onto the next module until you understand the module you are working on and have completed the lab exercise(s).
- All lab exercises have a time limit allocated to them. To complete the lab exercise in the specified time limit, you must be able to complete the model or assembly and make any corrections. If you cannot do this in the time allowed, redo the entire lab exercise. It is your way of proving that you have mastered the module.
Do not memorize Inventor – UNDERSTAND it.
Have fun on your journey into the fascinating, never-ending world of learning and mastering Inventor.
