Configuring Your Inventor Software
Learning Outcomes
When you have completed this module, you will be able to:
- Configure your Inventor software for the Inventor book.
WORK ALONG: Configuring your Inventor Software for the Inventor book
Complete all of the following steps:
Step 1
Start Inventor. Your screen should appear similar to the figure. Your colors may not be the same, but the basic configuration should be. If any additional dialogue boxes or windows open, close them. (Figure Step 1)

Step 2
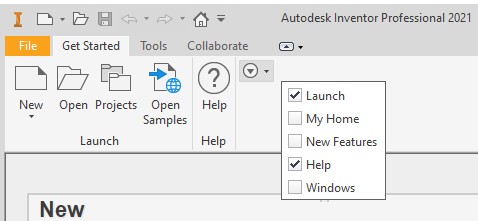
Click the arrow icon at the end of the Ribbon menu (beside the Help ? icon). Set the pull- down menu by enabling or disabling features to match the figure. (Figure Step 2)Step 2 Click the arrow icon at the end of the Ribbon menu (beside the Help ? icon). Set the pull- down menu by enabling or disabling features to match the figure. (Figure Step 2)
Step 3
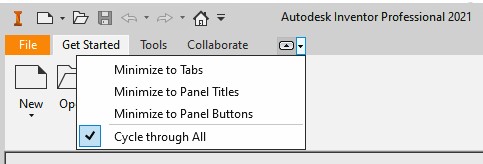
Click the small down-arrow icon on the right side of the Pull-down menu. Enable Cycle through All. (Figure Step 3) The arrow with the box around it will now cycle you through three variants of interface display configurations.
Step 4
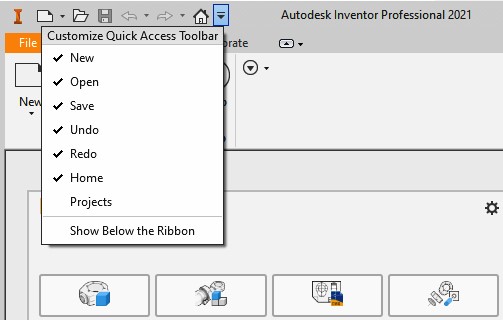
Click the arrow icon at the end of the quick-access toolbar (by the little house icon). Make sure the enabled and disabled features match the figure. (Figure Step 4)
Step 5
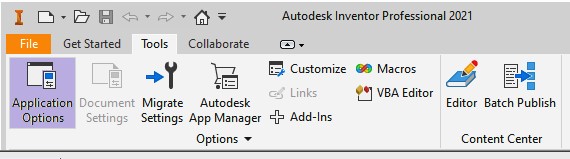
Click Tools on the menu at the top of the window. Click the Application Options icon as shown in Figure Step 5. This will open the Application Options dialogue box (Figure Step 6).
Step 6
Click on the General tab. Compare the settings of your inventor with the figure. If the settings do not match, change yours to match. (Figure Step 6)

Step 7
Enable the Sketch tab. Compare the settings of your inventor with the figure. If the settings do not match, change yours to match. (Figure Step 7)

Step 8
Enable the Part tab. Compare the settings of your inventor with the figure. If the settings do not match, change yours to match. (Figure Step 8)

Step 9
Enable the Display tab. Compare the settings of your inventor with the figure. If the settings do not match, change yours to match. (Figure Step 9)

Step 10
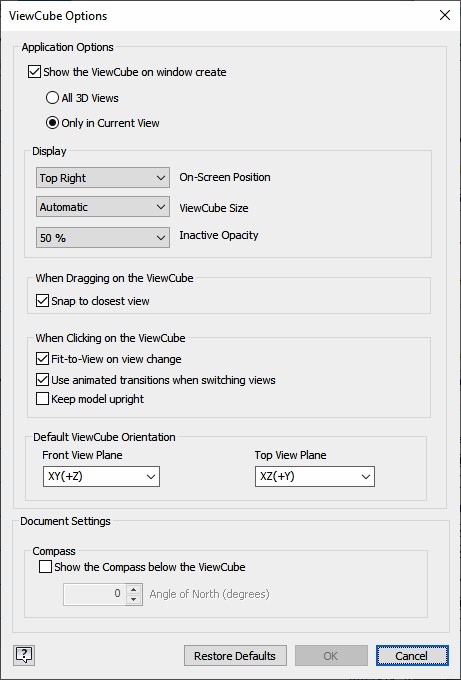
In the Display tab, click the ViewCube box to open the ViewCube Options dialogue box. Compare the settings of your inventor with the figure. If the settings do not match, change yours to match. (Figure Step 10)
Step 11
Enable the Colors tab. Check that the settings of your Inventor match the figure.

Step 12
Click Close button to close the Application Options dialogue box.
Step 13
Click Tools and then the Customize icon. Click the Marking Menu tab and compare the settings to your copy of Inventor.

Step 14
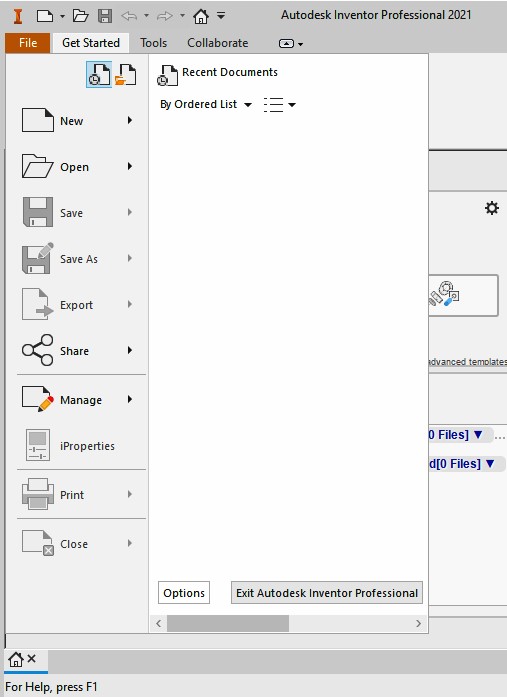
Click the Inventor icon located in the top left corner and then Close to exit Inventor, OR click the File tab and then exit Inventor by clicking the Exit Autodesk Inventor Professional button in the bottom right corner. (Figure Step 14)