Unit 10. More on word processing
Topic C: Tables, columns, and breaks
Click play on the following audio player to listen along as you read this section.
Insert a Table
Table – information arranged in a condensed form of columns and rows. It is a more effective way to present information.
Insert a table in a document (Word 2016)
Method 1
- Click where you wish to insert the table in your document.
- Click the Insert tab and the Table button.
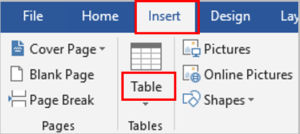
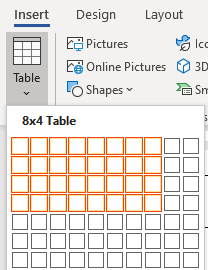
- Drag through to select the desired number of rows and columns (a table will appear).
Method 2
- Click where you wish to create the table in your document.
 Click the Insert tab.
- Click the Table button.
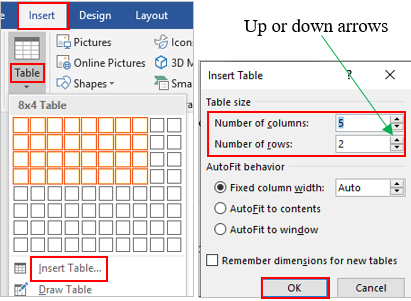
- Click Insert Table.
- Click the up or down arrows (in the Table drop-down menu) to select the desired number of columns.
- Click the up or down arrows to select the desired number of rows.
- Click OK to insert the table.
Create and Remove Columns
Add columns to a document
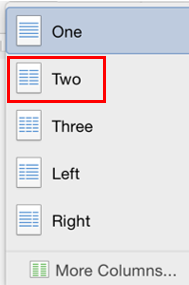
- Select the paragraphs you wish to lay out in columns.
- Click the Layout tab and click the Columns button.
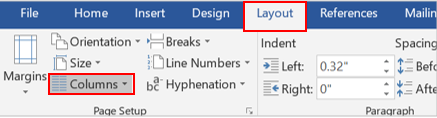
- Click to select the number of columns you wish to create (such as “Two,” in the drop-down menu).
- The text will lay out in columns.
Remove columns
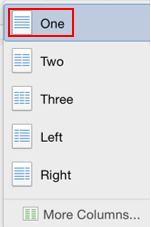 Click anywhere in the columns.
- Click the Layout tab.
- Click the Columns button.
- Click One to change the document as one column.
Insert Page Breaks
Page break – a page break marks the end of a page that indicates where the printer will start a new page.

Insert a page break
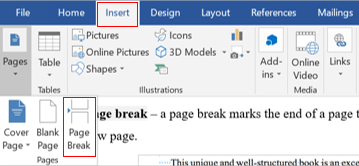
- Click where you wish a new page to begin.
- Click the Insert tab.
- Click the Page Break button. A page break is inserted in the document.
- Click on the Home tab and then Show/Hide symbol (¶) will show hidden page beaks (click the Show/Hide symbol again will remove ¶).

Insert Section Breaks
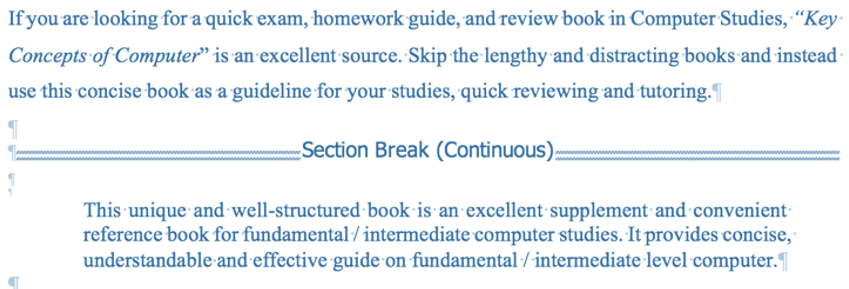
Section break – a section break splits a page into sections that can have a different format or layout within the same page in the document.
 Insert a section break
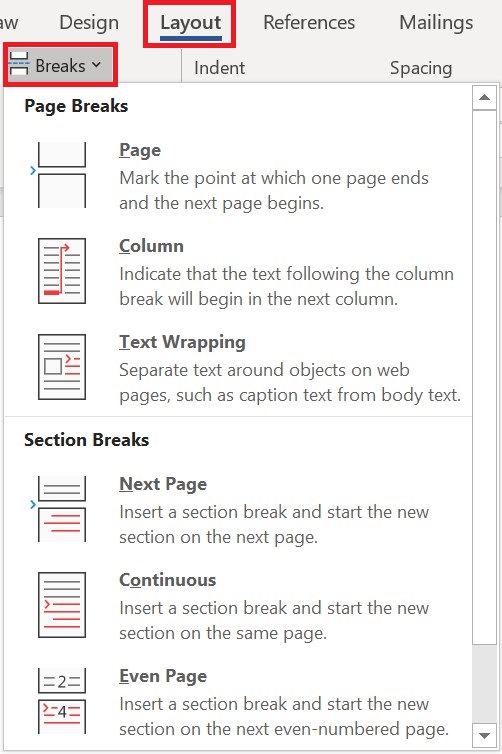
- Click where you wish a new section to begin.
- Click the Layout tab.
- Click the Breaks button.
- Click to select the type of section break you wish to use.
- Click on the Home tab and then Show/Hide symbol (¶) will show hidden section beaks.
Remove a page or section break
- Click the Home tab.
- Click the Show/Hide symbol ¶ (to display the section break).
- Double-click the page or section break to select it.
- Press the Delete key (on the keyboard).

information arranged in a condensed form of columns and rows. It is a more effective way to present information.
a page break marks the end of a page that indicates where the printer will start a new page.
a section break splits a page into sections that can have a different format or layout within the same page in the document.
