Unit 3 Using Outline View and Clip Art to Create a Slide Show
14 Insert Objects
bpayne
 Insert Objects
Topics include:
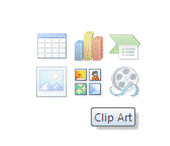
Clip Art
PowerPoint provides many ways to insert clip art or graphic into a slide. (Note: It is important to be certain that you have the legal right to use clip art, photographs, sounds, and movies in your slide show). You can import files saved in several different formats or add your own graphic or PowerPoint has its own gallery of Microsoft clip art images. To insert a clip art image choose a slide layout that has a content placeholder. Click the Insert Clip Art button in the placeholder.
The Clip Art Task pane displays on the right side of the screen.
Enter a word that describes the clip art that you want in the text box labeled “Search for,” and click Go. Graphics that are similar to the word that you entered in the search box will appear in the task pane. Use the scrollbar to browse through available clip art.
Click once on the clip art you would like to insert. Your clip art will appear on the current slide, with sizing handles visible and the Picture Tools Format tab will open.

The Picture Tools Format tab allows for color adjustment, cropping a picture, adding lines around the picture and compressing a picture. By hovering over each command in the available groups, the quick tip screen will appear identifying the command that the icon represents.
Around the image, are sizing handles. They allow you to move and resize the image on the slide.
Adjust Clip Art
To change the shape of a picture:
Step 1:
Move your cursor over the picture and click once to select it. You will see a number of small circles appear along the edge of the picture. These circles are called “sizing handles.” There is also one green circle, which is used to rotate the image.
Step 2:
Click on one of the sizing handles that appears on a side of the picture, hold the mouse button down, and drag the handle to change the shape of the picture. Your pointer will be a double-sided arrow when you are directly over a sizing handle. You are distorting the picture by stretching or squishing it.
Step 3:
Release the mouse button when you have achieved the desired shape.
To change the size of a picture :
Step 1:
Move your cursor over the picture and click once. You will see the sizing handles described above.
Step 2:
Click your cursor on one of the sizing handles that appear on the corner of the picture. Hold the mouse button down and drag the picture to make it smaller or larger. Using these corner handles maintains the original proportions of the image (it does not stretch or squish).
Step 3:
Release the mouse button when you have achieved the desired size.
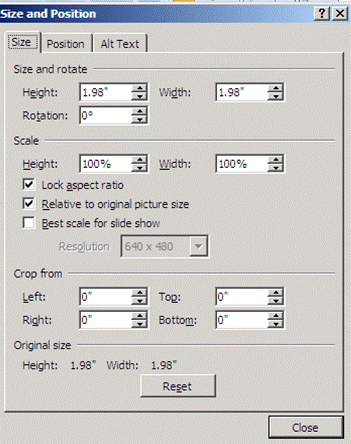
The size of a picture can also be changed by adjusting the aspect ratio which is the relationship between the height and width of an object. To change the aspect ratio of an object right click on the object and select Size and Position. The Size and Position dialogue box will appear. Click on the size tab. Check that the Lock aspect ratio box is selected.
To move a picture:
Step 1: Move your cursor over the picture.
Step 2: Click the mouse button, hold the button down, and drag the picture to change its location.
Step 3: Release the mouse button when you are satisfied with the location of the image.
Adding Shapes
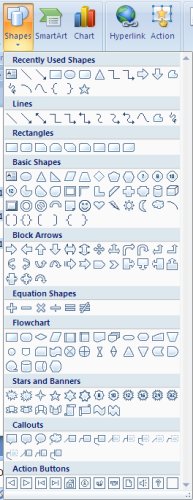
By clicking on the Insert tab and then Shapes in the Illustrations group you can draw a variety of shapes, straight lines, free-form lines, or pre-designed shapes and lines.
Once you have inserted Shapes on a slide you can then enhance the shape by adding color to the shape, an outline, an effect, or any of the preset styles available in the Shape Styles group located in the Illustrations section of the Insert Ribbon.
Adding SmartArt
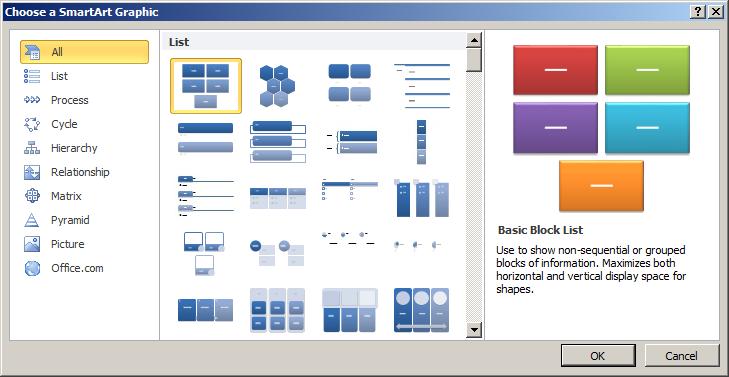
Sometimes when you are working with text the normal text attributes of bold, italics, underline and colour are just not enough to capture the audience’s attention. SmartArt allows you to create really dynamic illustrated text! There are 7 basic types of SmartArt to choose from.
When you choose to add a SmartArt object you will work in two panes. As you add text on the left side pane, the text is transferred into SmartArt design. You can add or remove bulleted points to suit your own needs.
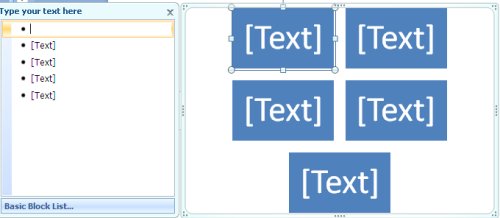
Use the features on the SmartArt Design ribbon to customize the colours and appearance to suit your presentation. The SmartArt design can be moved, adjusted and resized in the same fashion that a graphic can be adjusted.
Create a Text Box
When building presentations in PowerPoint, you will most often insert text in a slide’s placeholders. However, when you want a label, an object, or have control over where text is positioned you may want to use Text Boxes.
Click the Text Box button ![]() in the Text group of the Insert tab. Then click and drag on the slide to create a text box. Enter the text then apply formatting.
in the Text group of the Insert tab. Then click and drag on the slide to create a text box. Enter the text then apply formatting.
WordArt
WordArt creates decorative text that can be used to add interest to a document. When WordArt is inserted in a presentation, it becomes an object that you can move and rotate in any direction. To add WordArt to your presentation click on the WordArt button located in the Text group of the Insert tab. Click on the style of your choice from the WordArt Gallery window which appears.
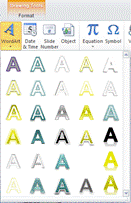
Type the text you want in the “Type your Text Here box” that displays on the slide. Notice the Drawing Tools Format tab becomes available. Use the commands in the Format tab to further enhance your WordArt.
Once formatted drag the WordArt to a location on the slide that is suitable for your presentation.
