Unit 1 Use a Theme Template and Slide Layouts to Create a Presentation
5 Practice Activities
bpayne
 Unit One: Practice Activities
- Start PowerPoint and View the PowerPoint Window
- Create a New Slide
- Access the Help Feature
- Multi-Level Bulleted Lists
- Choose or Download a Theme Template
- Format using the Slide Master
- Save a Presentation
- View a Presentation
- Create Slide Content
- Print a Presentation
Start PowerPoint and View the PowerPoint Window
Identify as many elements of the PowerPoint window as you can without referring to the material in Unit 1.
Access the Help feature
- Click on the Help icon located on the top right side of screen. In the search text box type “How to Save a Presentation”, and press enter.
- Scroll Down the list of available hyperlinks located in the task pane.
- Click on “Name and save your presentation”.
- A new screen will appear with information specific to your question.
- View all methods to saving a document, once you have finished exploring the topics, close the help window.
Choose or Download a Theme Template
Choose a Theme Template
- To choose a theme template, click on the File tab, then click on New. From the Sample Templates select the Introducing PowerPoint 2010 template, click Create located at the bottom of the New Presentation screen.
- A template will appear with text and graphics. This text and graphics can be deleted, edited, moved and manipulated.
- Close the file by clicking on the File tab, then click on Close.
Download a Theme Template
- To download a template from Microsoft Office Online, click on the File tab, then click on New. In the Office.com Templates section select Presentations, select Training Presentations. Various training templates will appear, choose Training presentation (2nd row). Then click Download, located on the right side of the New Presentation screen.
- A Microsoft Office Genuine Advantage dialogue box may appear, click Continue.
- The Training presentation template will appear in the Normal view, it contains text that will guide you through the process of creating a training presentation.
Save a Presentation
- Click on the File tab.
- Open the Save As dialogue box.
- Map to the drive and folder where your Presentation Software files will reside.
- Name your presentation as ABT Training. (Keep the ABT Training presentation open)
Create Slide Content
- In the title slide, select the title text placeholder and type “Applied Business Technologies”. In the sub-title text placeholder type your name.
- The first slide should look as shown below:

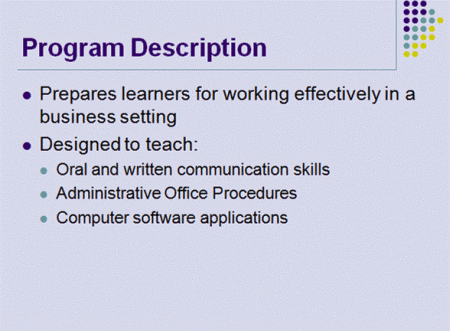
- Navigate to the second slide labeled “Introduction”. Select the title placeholder in the slide pane by using the mouse and replace “Introduction” with “Program Description”.
- Move to the first bullet, select “Introduce the subject of the presentation” and type “Prepares learners for working effectively in a business setting.”
- Highlight the second bullet and text and type “Designed to teach:”
- Select the third bullet and text, click the tab key to move the indent in one space.
- With the text still selected type: Oral and written communication skills.
- Press [Enter] and type “Administrative Office Procedures.
- Press [Enter] and type “Computer software applications.
- Delete the final bullet.
- Click Save on the Quick Launch toolbar, compare your slide to the following:
Multi-Level Bulleted Lists
- Select the third slide in the Outline/Slide pane.
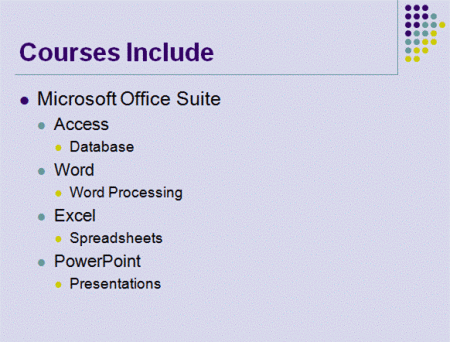
- In the slide pane highlight “Training Outline” and type “Courses Include”.
- Click in the text placeholder and select the first bullet “Lesson 1: Name” and type “Microsoft Office Suite”.
- Type text as shown below: (Note: use the [shift+tab] to go back a level).
Create a New Slide
- To continue with the previous slide named “Courses Include” insert a new slide.
- Click on the third slide in the Outline/Slide pane.
- Select New Slide from the Slides group located on the Home tab.
- A new slide will be inserted between slide three and slide four.
- Select the slide layout that will be suitable for the slide content. In this case select Title and Content layout located in the Layout section of the Slides group.
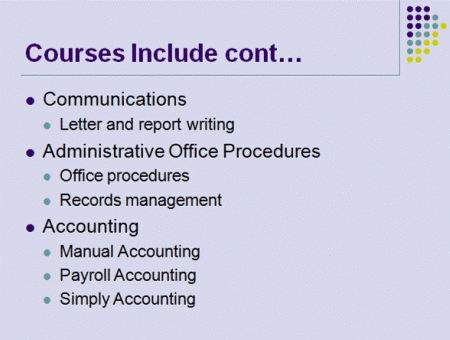
- Click in the Title Placeholder and type “Courses Include cont…”
- In the text place holder type “Communications”.
- Continue as follows:
- Save your presentation.
Use a Theme template
- With ABT Training.pptx still open, click the Design tab.
- Select a theme from the Themes group. Notice the presentation previews the selected theme.
- Choose Metro (2nd row-10th theme), click on the slide sorter view, notice the theme of the template has changed on all slides.
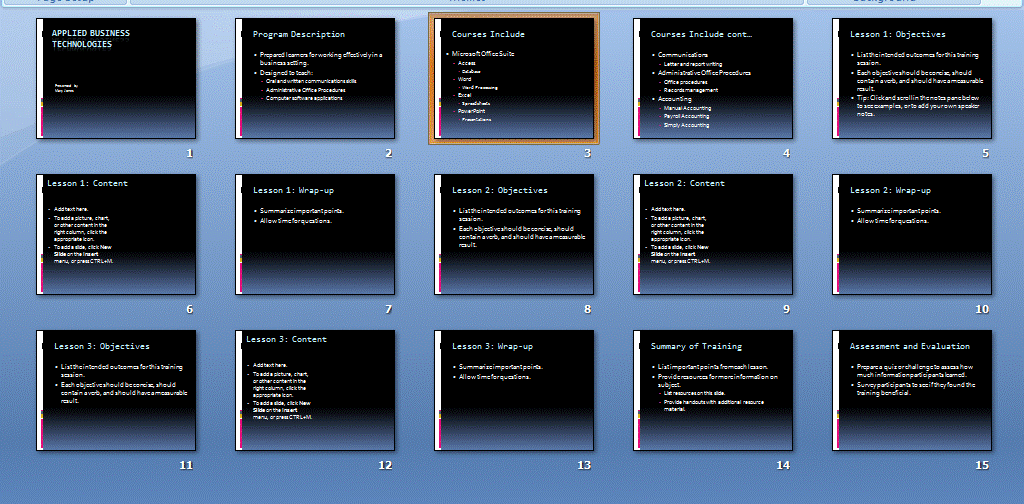
Format using the Slide Master
- Click on slide 1 in the normal view.
- Click View tab and select SlideMaster located in the Master Views group.
- Format the slide master by selecting slide 1 located in the Slide/Outline pane and complete the following steps:
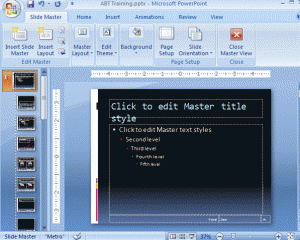
- Click anywhere in the Click to edit Master title style (this selects the text in the placeholder.)
- Click the Home tab.
- Change the font style in the master slide by clicking in the Font group, then click the arrow key next to the font style box, select Bookman Old Style in the Font list box. (You will need to scroll down the list of typefaces, if this typeface is not available, choose a similar font.)
- Change the font color to pink by clicking the down-pointing arrow on the color option box.
- Center align the title by clicking the center alignment button located in the Paragraph group.
- To change the second level bullet style used in this template,make sure the Second level is still selected and then click the arrow next to the bullet icon located in the Paragaphgroup in the Home tab. This will display various bullet styles, choose the Checkmark or another bullet style.Once you have completed these steps you Master Slide should appear as follows:
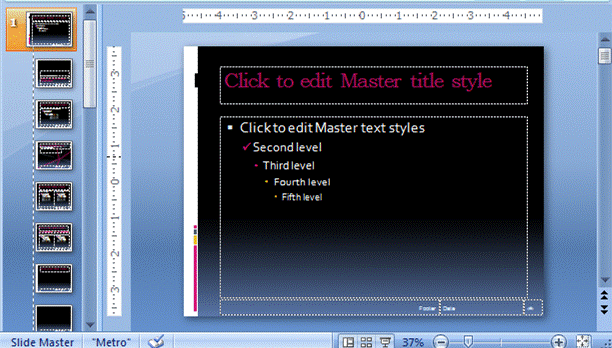
- Click Normal view button.
- Move through the slide show to view the changes. (Note: the title attributes and level two bullets have changed in every slide.)
- Save your presentation.
View a Presentation
- By default the slide show is in normal view, use the arrow keys on your keyboard and navigate from slide to slide, until you have reached the final slide. While viewing the slides check for correct spelling and grammar.
- Use the view buttons to view the presentation in slide sorter view.
- Use the slide show view to view the whole show. Be sure that the first slide is selected in the slide sorter view or normal view before selecting the slide show view. The slide that is selected in the normal view or the slide sorter view will be the first to be displayed in the slide show view.
- To see how the presentation looks in black and white, click the dropdown button beside Colors in the Themes group on the Design tab, select Grayscale, then view the show.
Print a Presentation
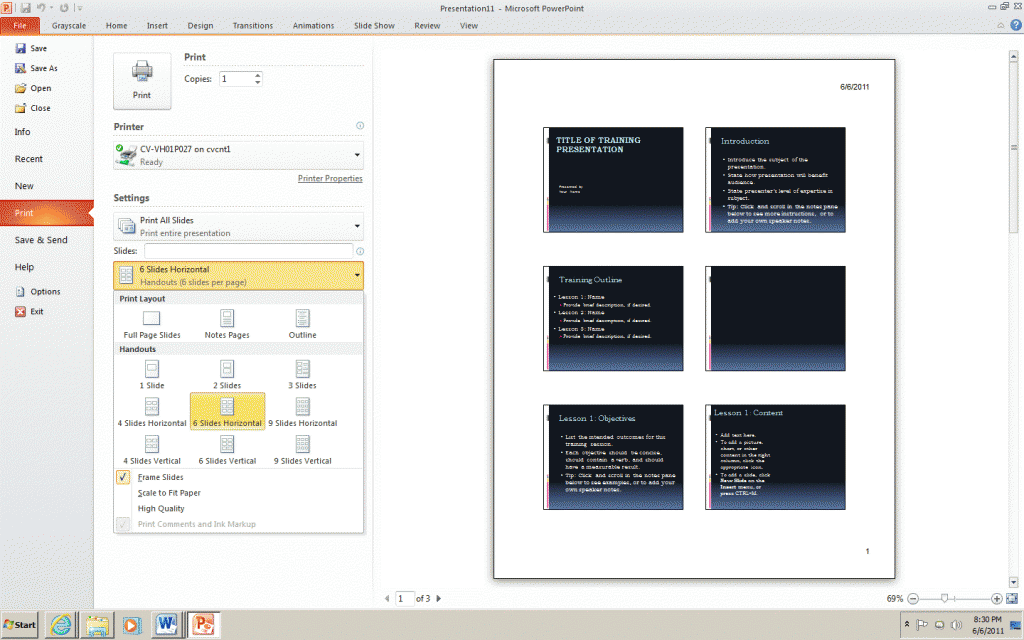
- Click on the File tab, then select Print.
- At the Full Page Slides drop list, select 6 Slides Horizontal
- Click Print. Two pages of slides will then print.
