Radial Line Pattern Development
23 Cone on a Pitch/Miter
- Draw an elevation view, including the apex point.

- Profile the base of the elevation view and divide it into six equal parts.

- Label the profile from 1 to 7 and project the divisions vertically into the base of the cone.

- Project the element lines from the base to the apex of the cone.

- Draw in the miter line.

- Where the element lines cross the miter line, project them horizontally to the outside edge. This now creates seven different slant heights.

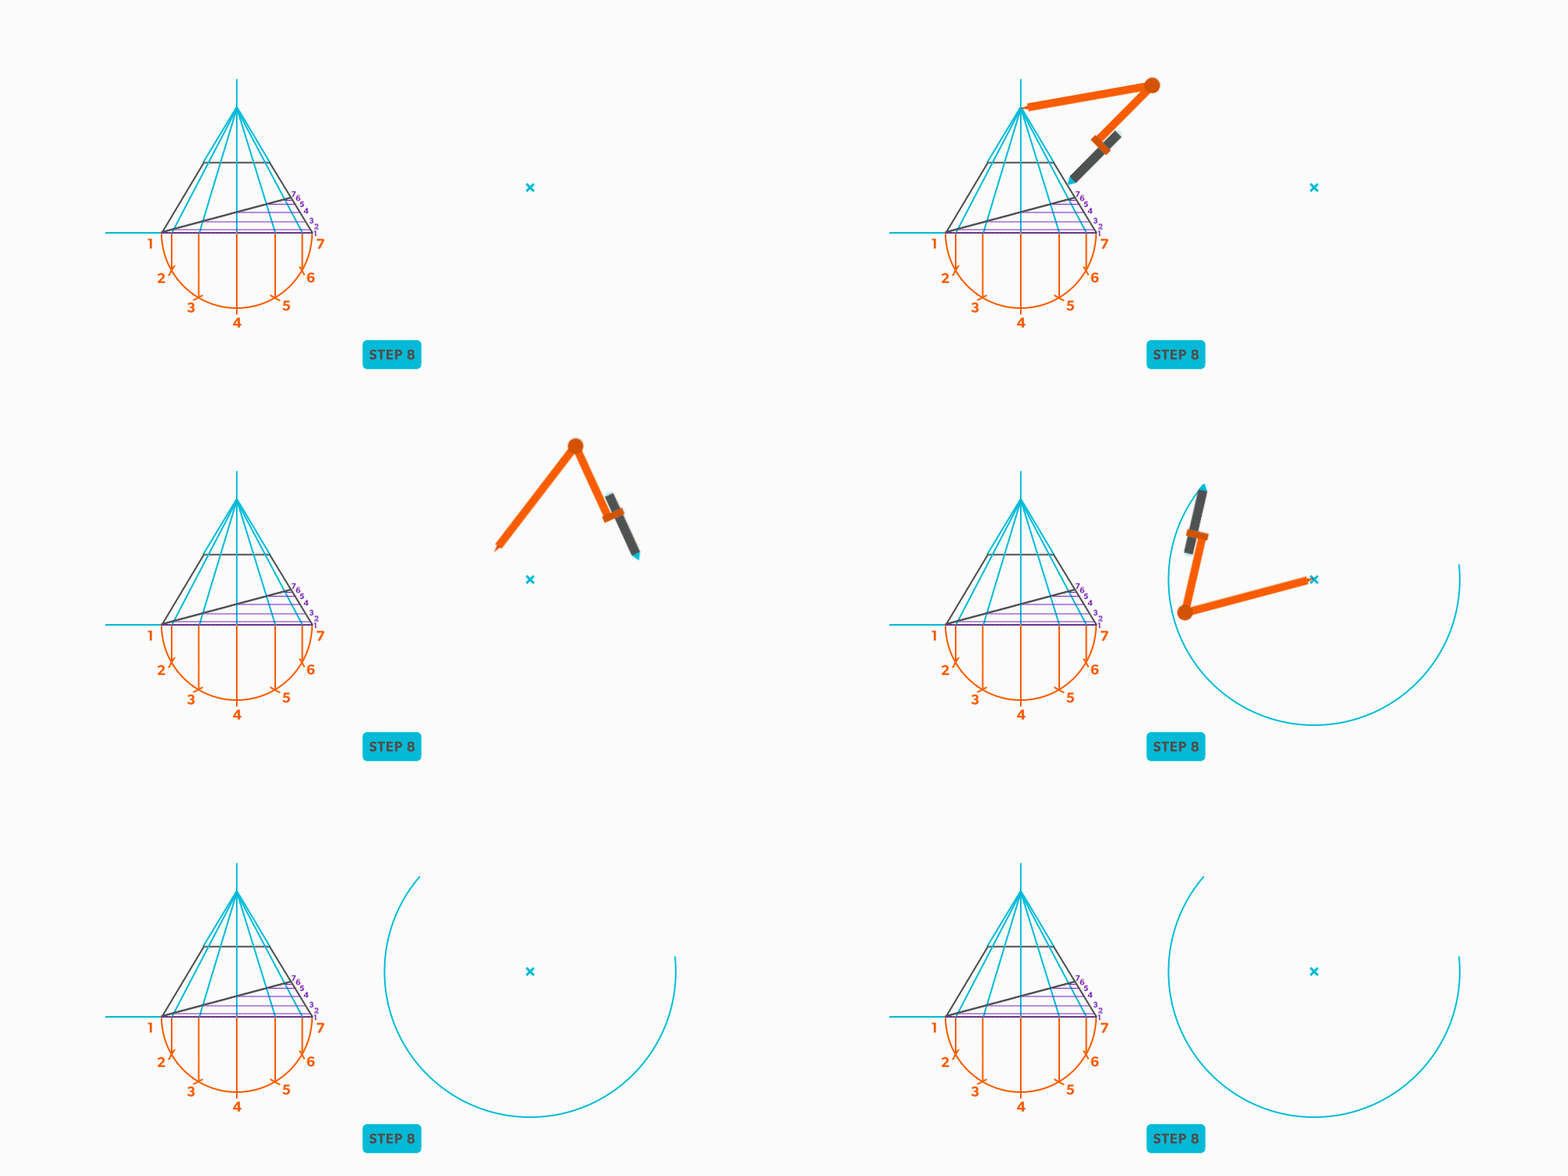
- Locate a radius point where you want to develop the pattern.
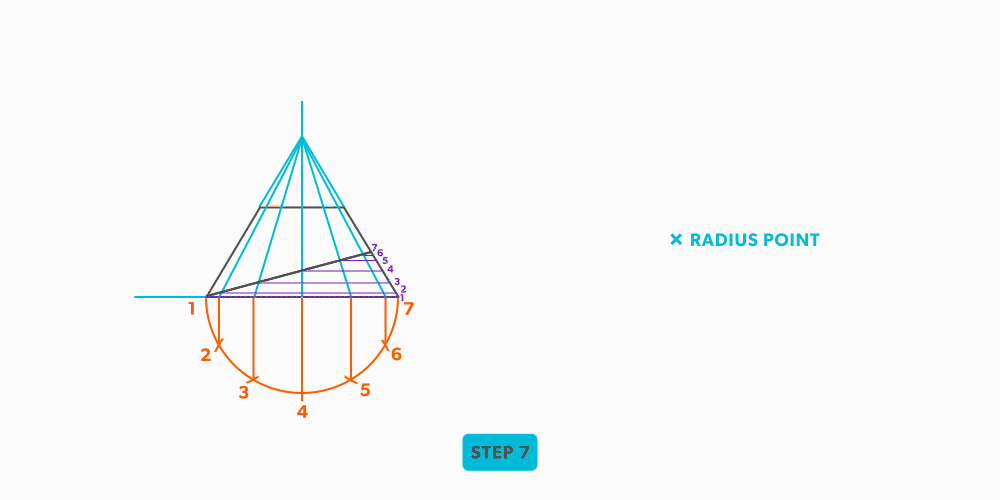
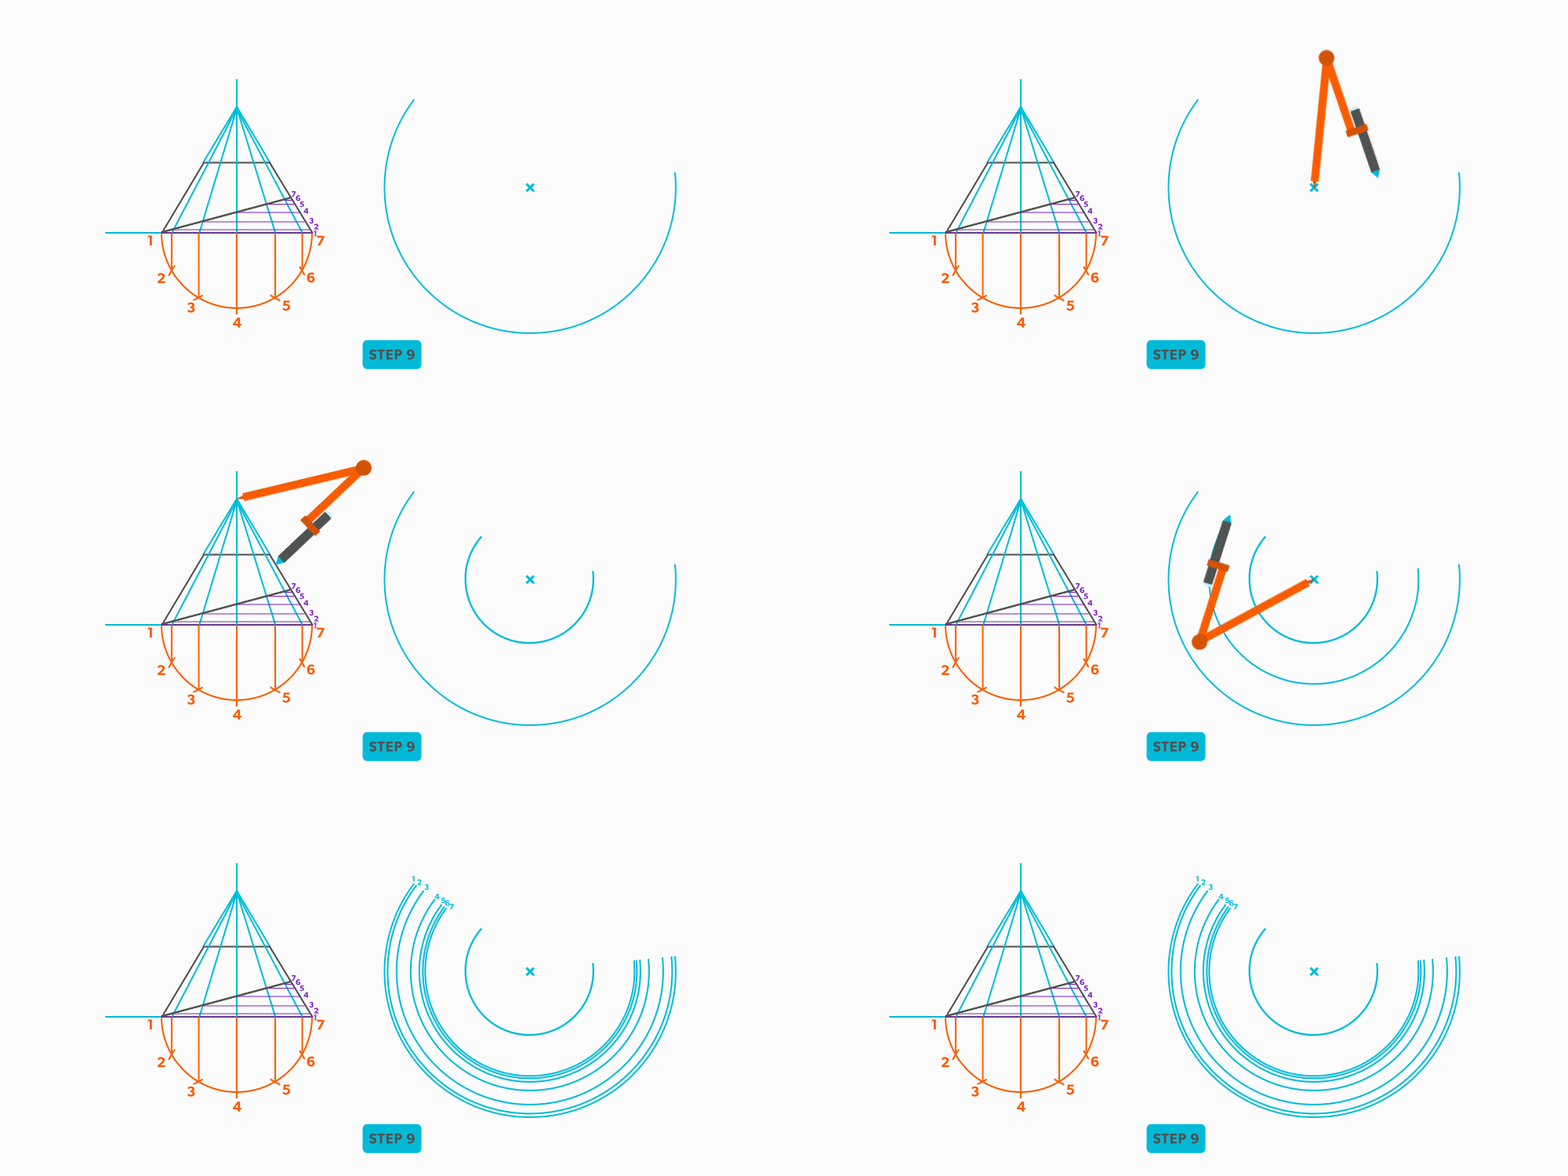
- With your compass, take the large slant height and swing an arc.
- Set your compass to all of the remaining slant heights and swing them from the radius point.
- Establish a starting point for the pattern and draw a line back to the radius point.
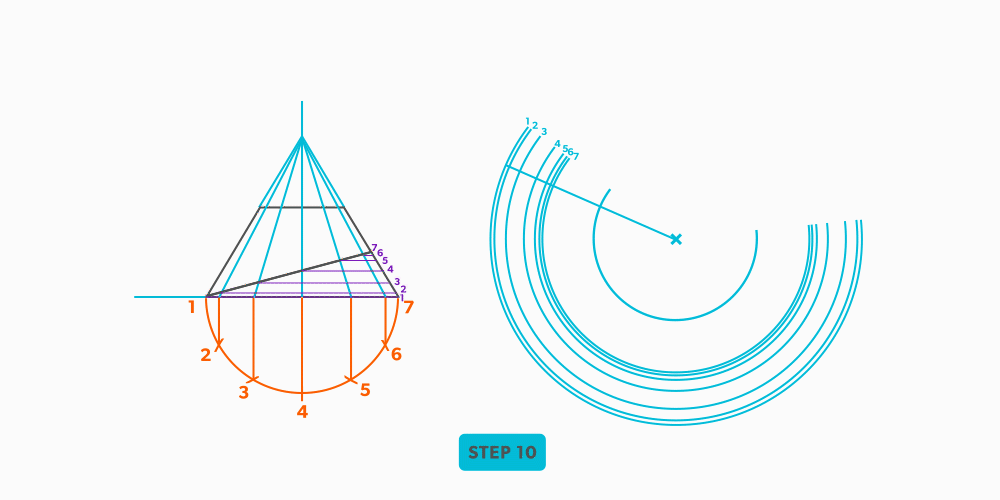
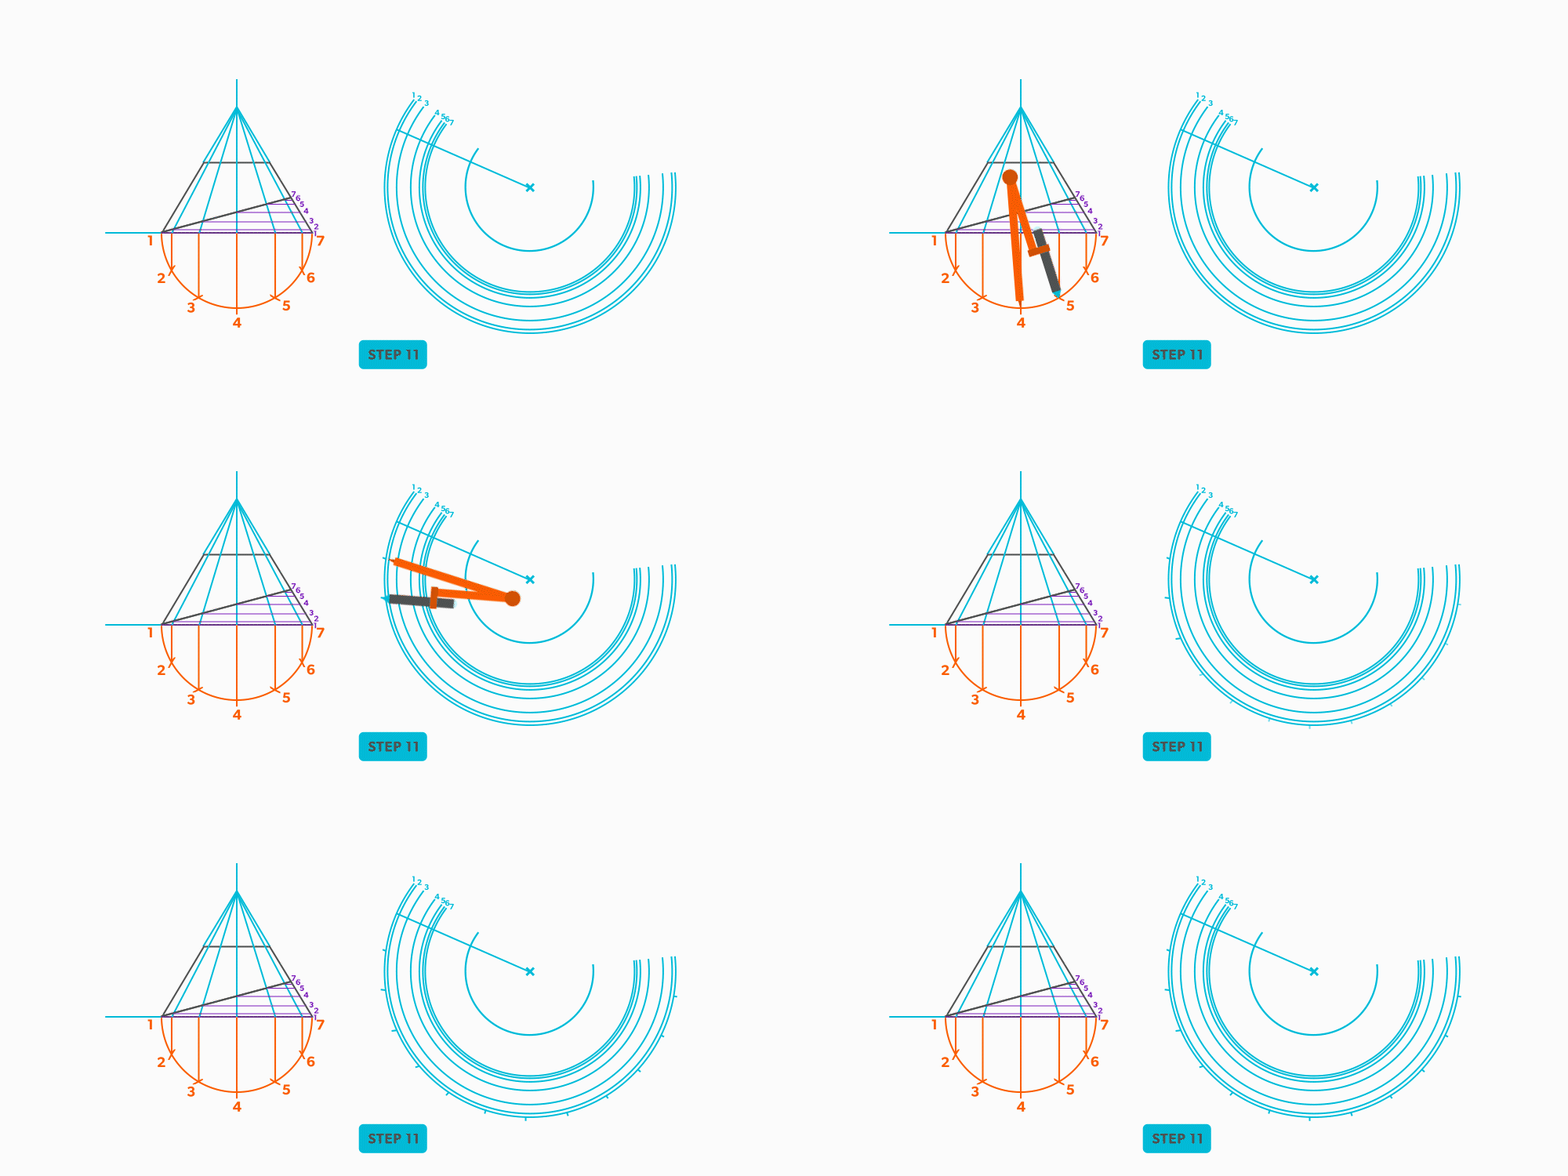
- Set your compass to a step-off. From your starting point, swing it 12 times along the stretch-out arc and label each point to match the elevation view. Start your numbering where you want the seam, commonly put on the short side of the cone.
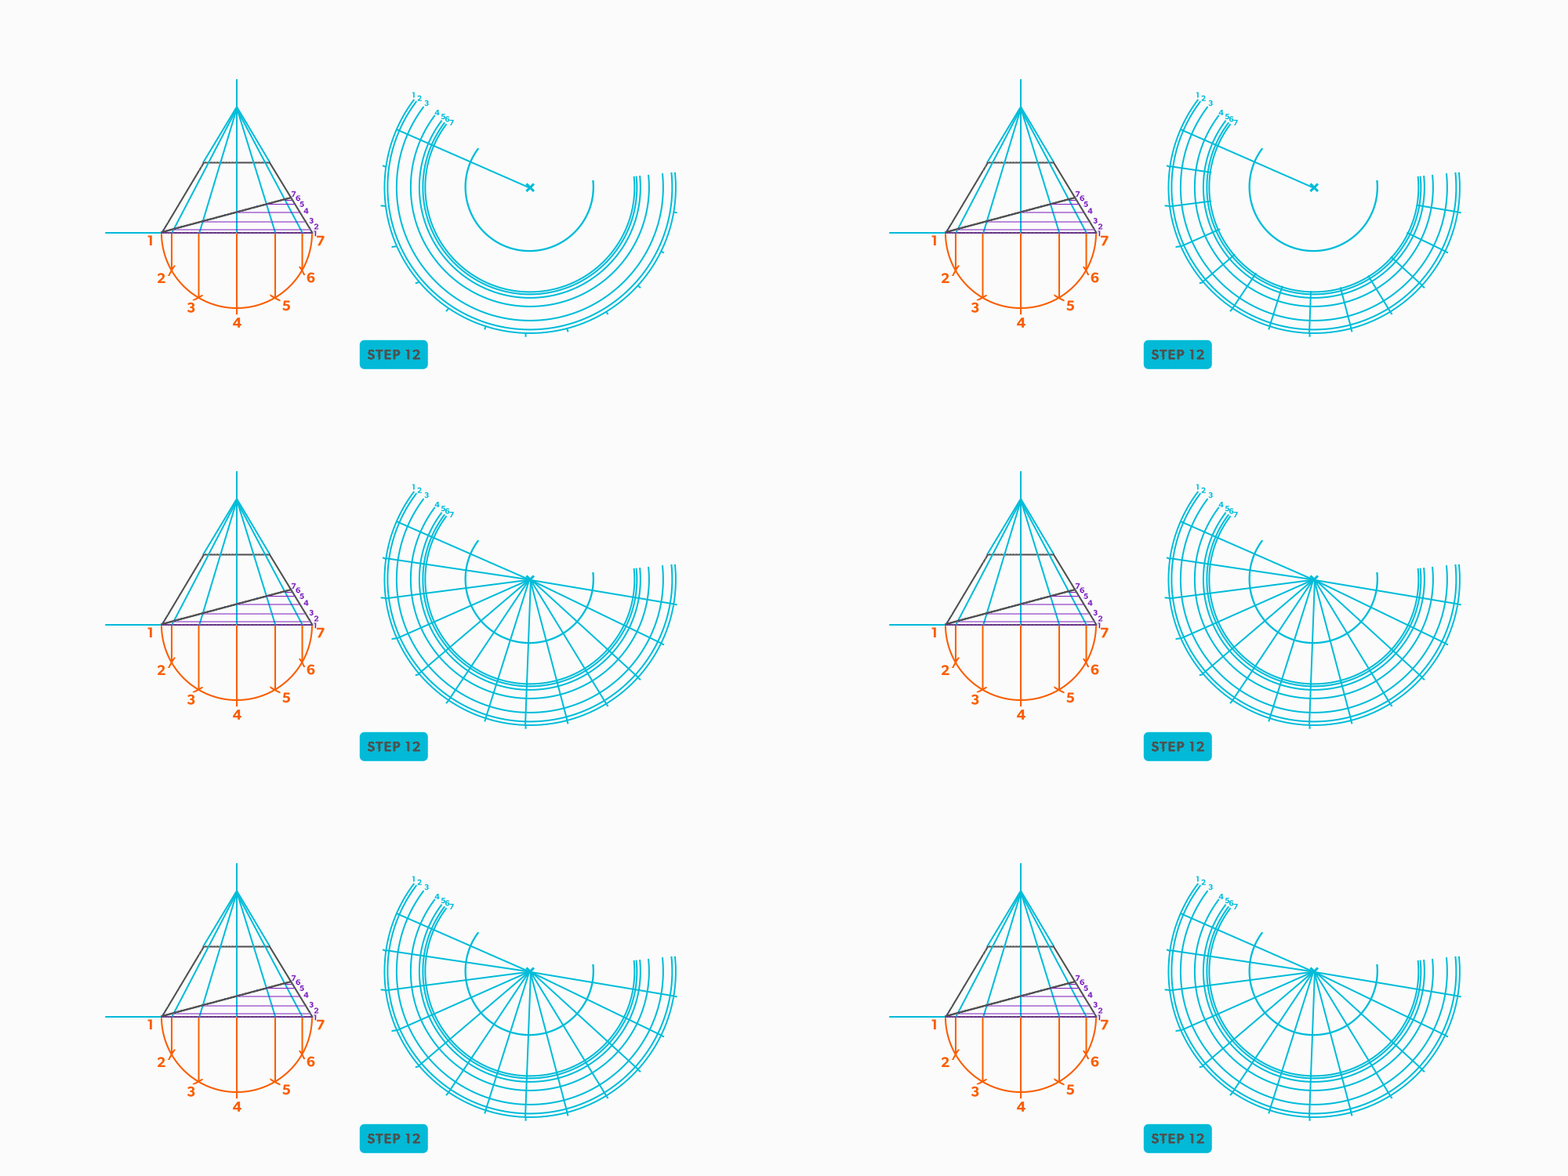
- Connect the all of the points back to the radius point.
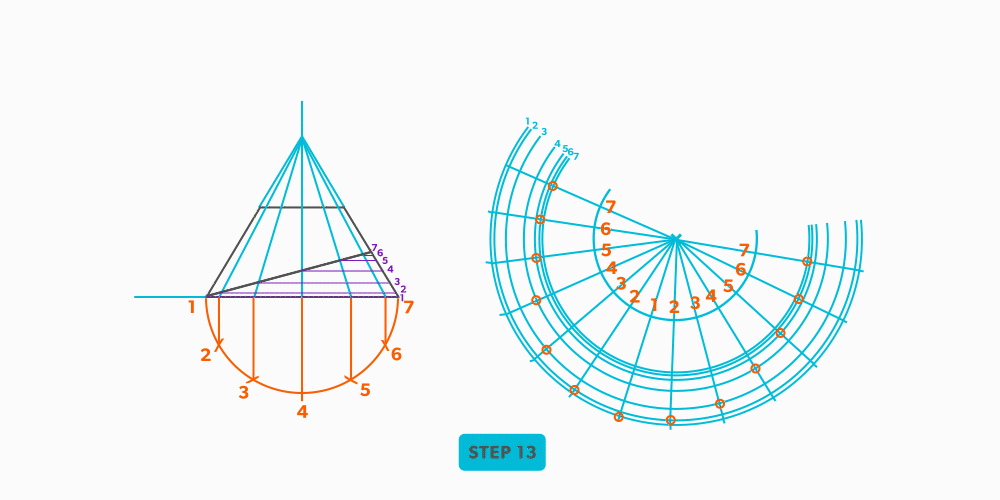
- Following your numbering, circle each intersection point. This will create the pattern of over 1, down 1.
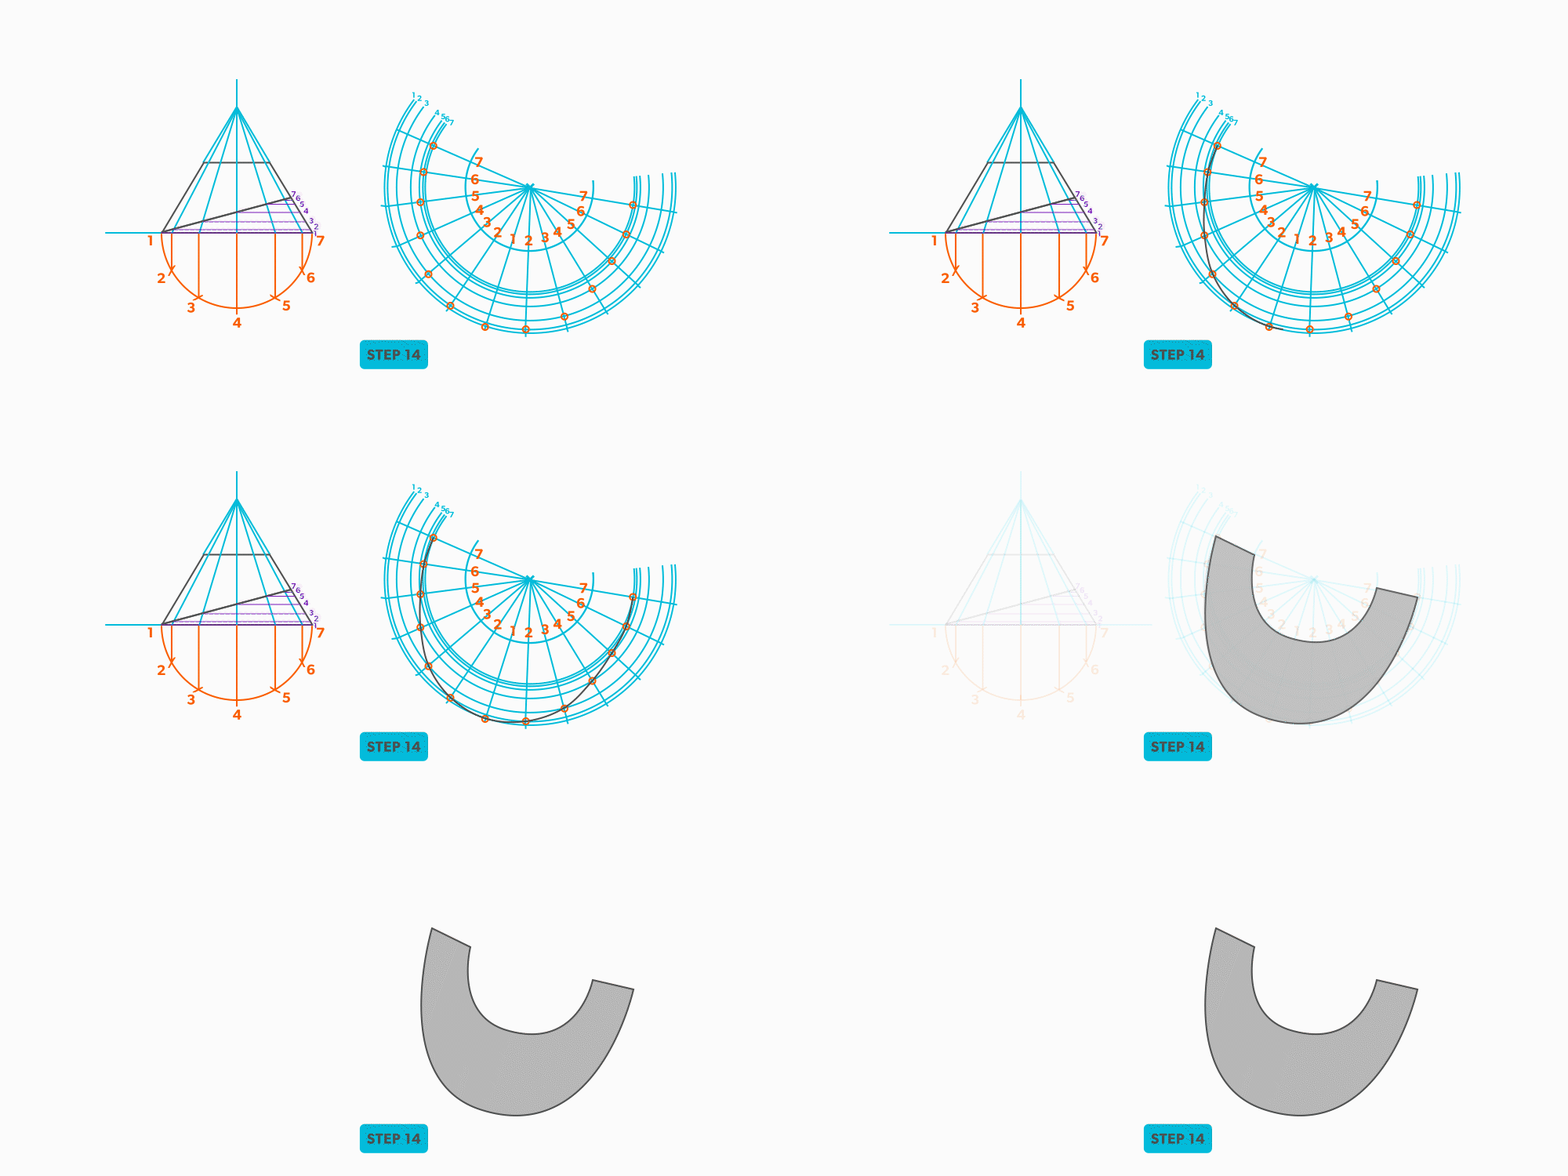
- Use a flexible curve to connect the points and create the pattern.
looking at the front or side of something, to have elevation (height), 2D
the intersection point of a cone, as seen in the elevation view
a half of a plan view, drawn on the outside of an object
a line representing an edge or bend
an intersection of 2 pieces- an irregular cut on the end of something
the hypotenuse of a cone, outside edge. The slant height is always a true length in the elevation view
the angle or arc which encompasses a radial line pattern

