Parallel Line Pattern Development
18 Oblique Tee
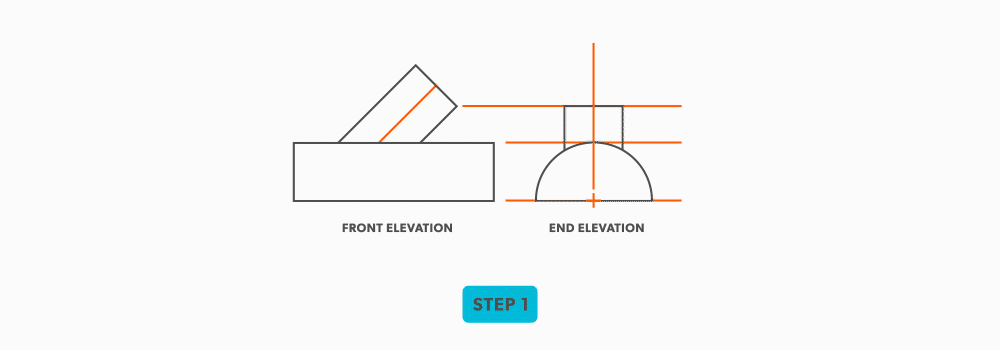
Note: This is the only tee which requires a full front elevation view.
- Draw a full front and end elevation view.
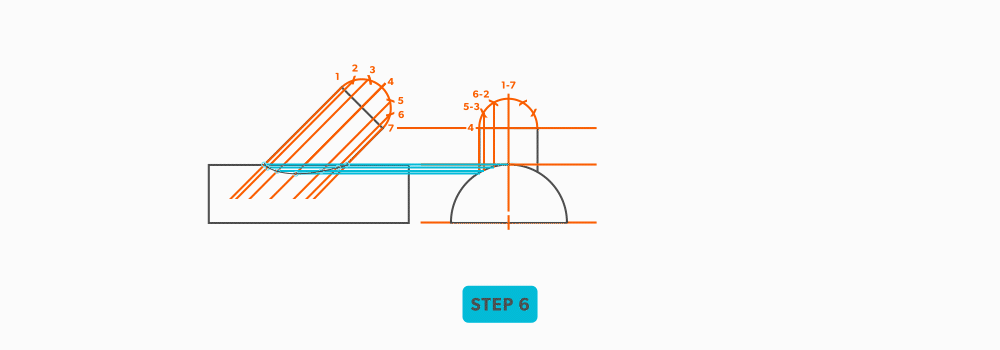
- Draw profiles on the tee in both views and divide into 6 equal parts (see Divide a Circle Into 12 Equal Parts). Include all labeling.

- Draw in the element lines from the profile divisions.

- Where the element lines hit the pipe in the end view, project them horizontally into the front view.

- Following the labeling, draw in the miter line in the front view.

- Draw the tee stretch-out to the right and divide it into 12 equal parts (see Divide a Line Using a Ruler on an Angle). Label to match the elevation views.
- Using your compass, transfer the corresponding points from the front elevation view to the stretch-out. Note: The element lines cannot be projected in this case because the stretch-out is not perpendicular to the tee. In the case of a 90° tee, it is at a right angle to the stretch-out. To be able to project an oblique tee, the stretch-out must be draw at an angle equal to the tee angle. This usually takes too much room to justify doing so.
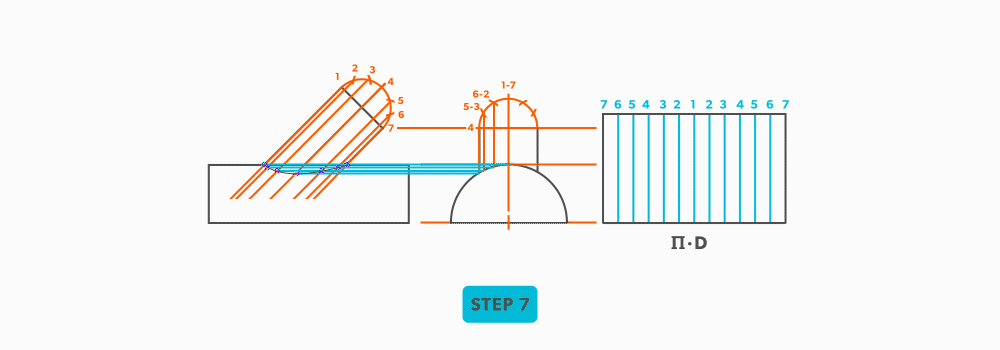
- Use a flexible curve to join the points and complete the pattern

definition
looking at the front or side of something, to have elevation (height), 2D
a half of a plan view, drawn on the outside of an object
a line representing an edge or bend
a line/plane level with the horizon. Flat, level
an intersection of 2 pieces- an irregular cut on the end of something
a shape which has been “stretched out”, to take a perimeter and make it straight
