Triangulation
24 On-Centre Square to Round
A square to round can only be formed in halves, so we always develop a half pattern.
- Draw a full plan view complete with all element lines and labeling. Label one half of the plan view, the round end with numbers and the square end with letters. Notice the lines of symmetry in the plan view. Parts of the drawing can be deleted because of this symmetry. In this case, it is on centre in both directions, so a quarter plan view is the minimum required to avoid duplication. But, sometimes it is easier to draw at least a half plan, there is no harm in drawing more than the minimum required.

- Create a true length diagram (TLD) with the vertical height of the fitting and a horizontal length long enough to fit any of the element lines.
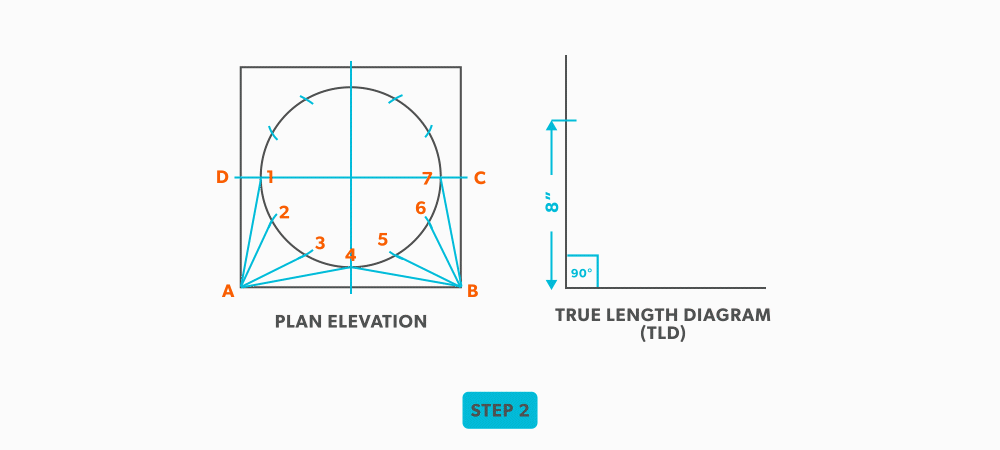
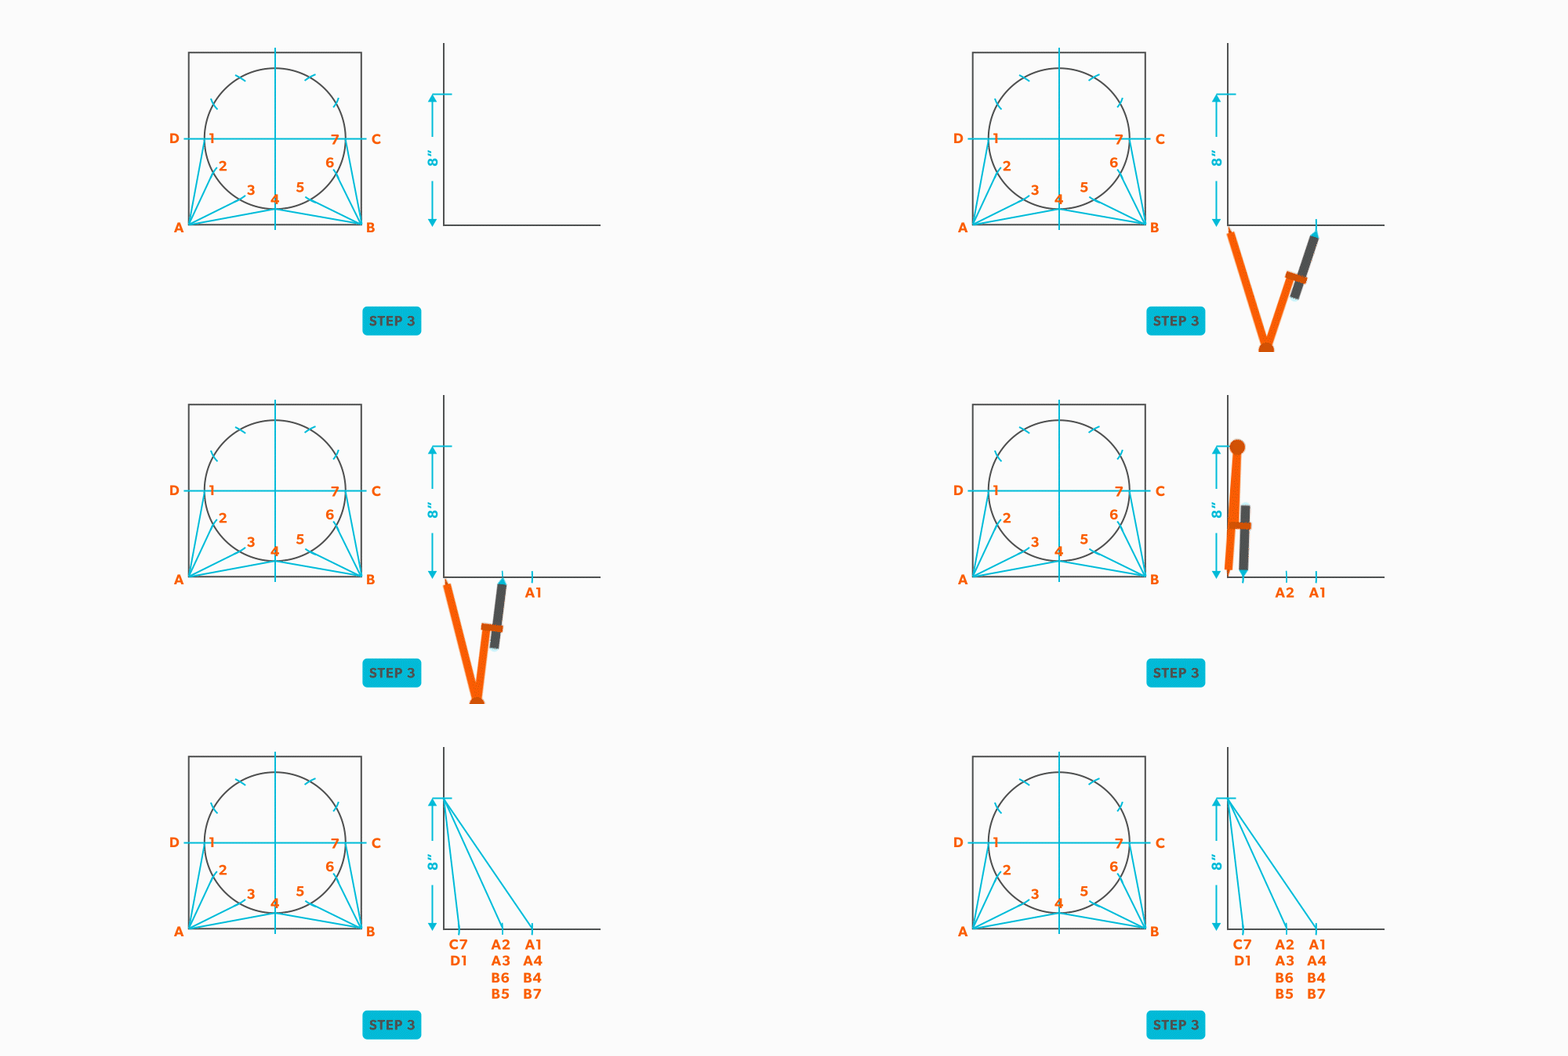
- Take the element lines A-1, A-2 and C-7 from the plan view and place them in the horizontal of the TLD. In this case, all other lines will be a duplicates of these 3 lines. Still, label the TLD with ALL of the element lines so you don’t make a mistake!!!
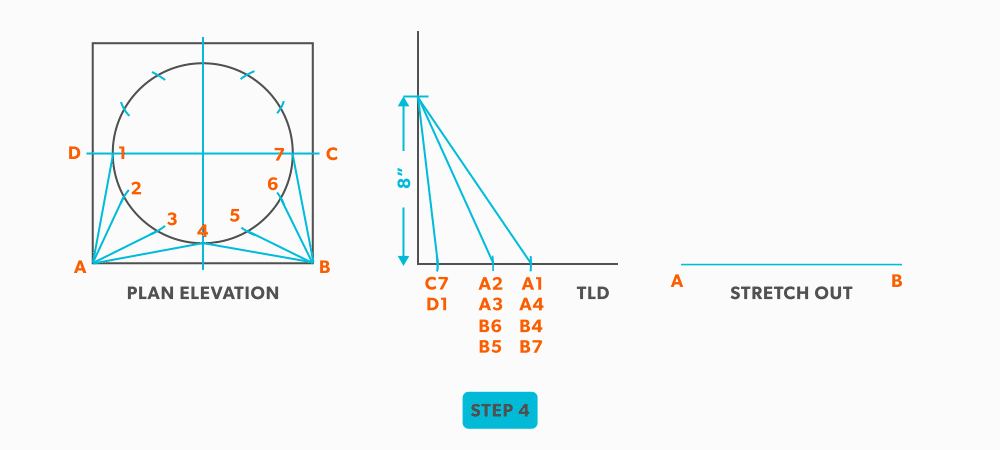
- Draw a baseline equal to line A-B. We are now ready to triangulate
- From the TLD, pick up the true length of line A-4 and swing it upwards from point A towards the centre. Then swing it from point B. Where these arcs cross is point 4. We now have our first triangle, A-B-4. This is our first step of triangulating. Remember that triangulation means using two known points to create a third. In this case, the known points are A and B and the unknown is 4.
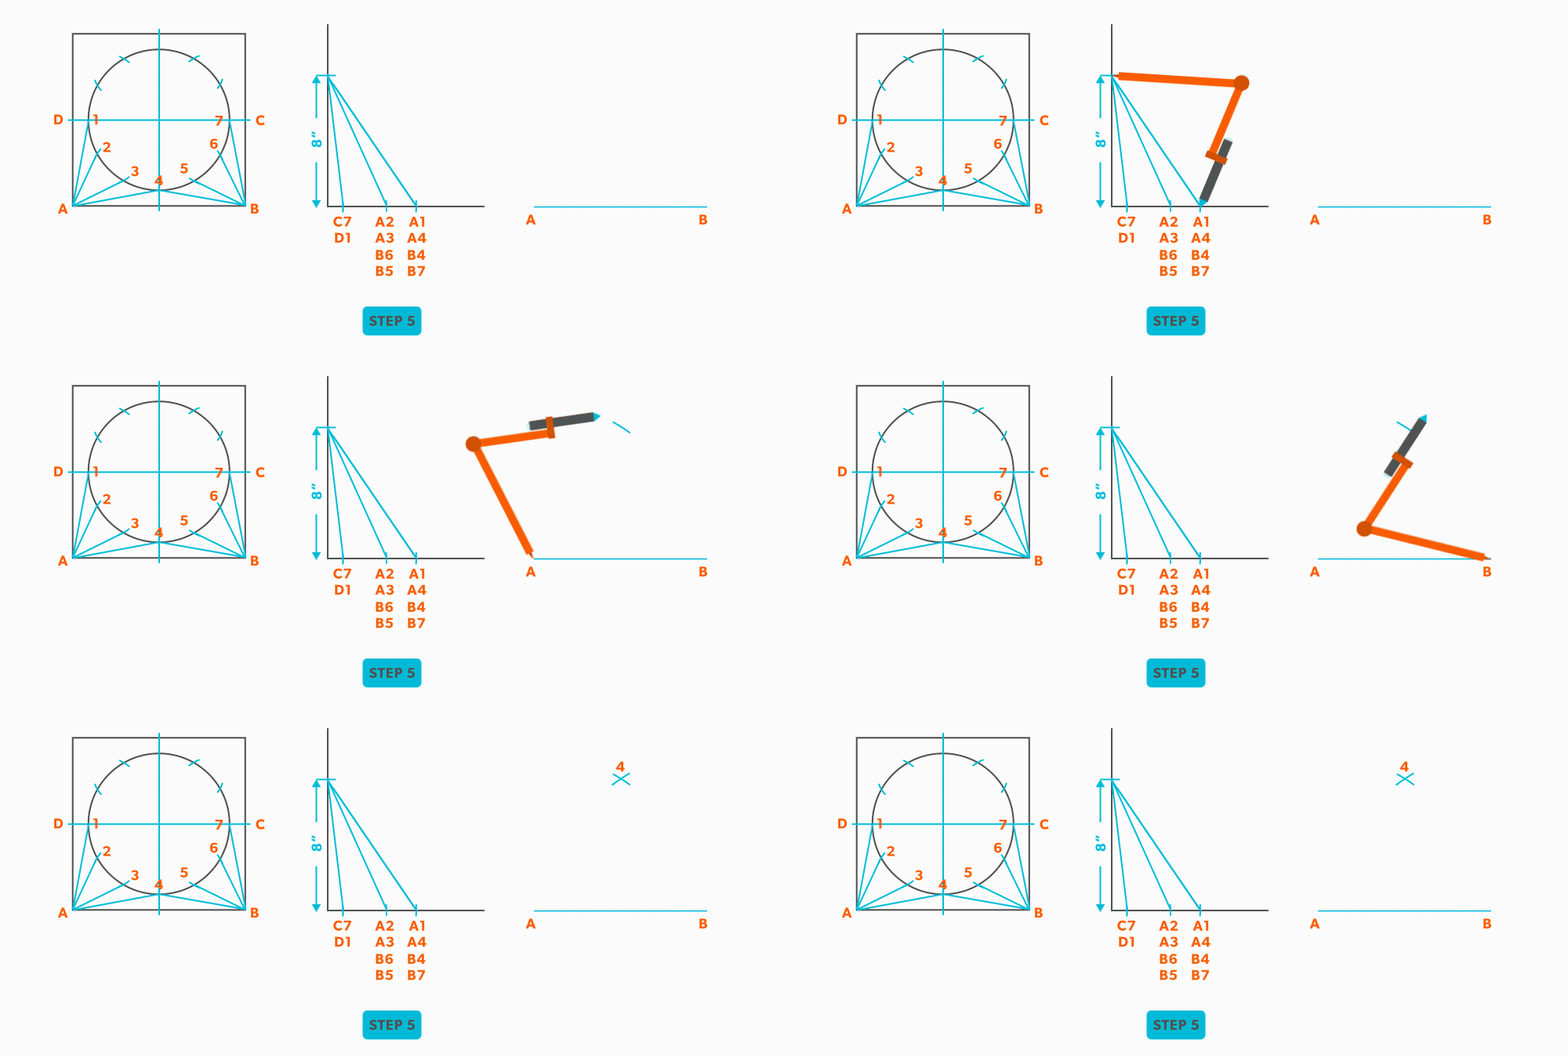
- Next, pick up true length of line A-3 and swing it from point A. In this step our two known points are now points A and 4 (or B and 4) and the unknown is 3. In each step, we will use the last point created as one of our new known points. Because the fitting is symmetrical, continue to work both sides at the same time. We will only discuss one side here, but the steps repeat on the other side.
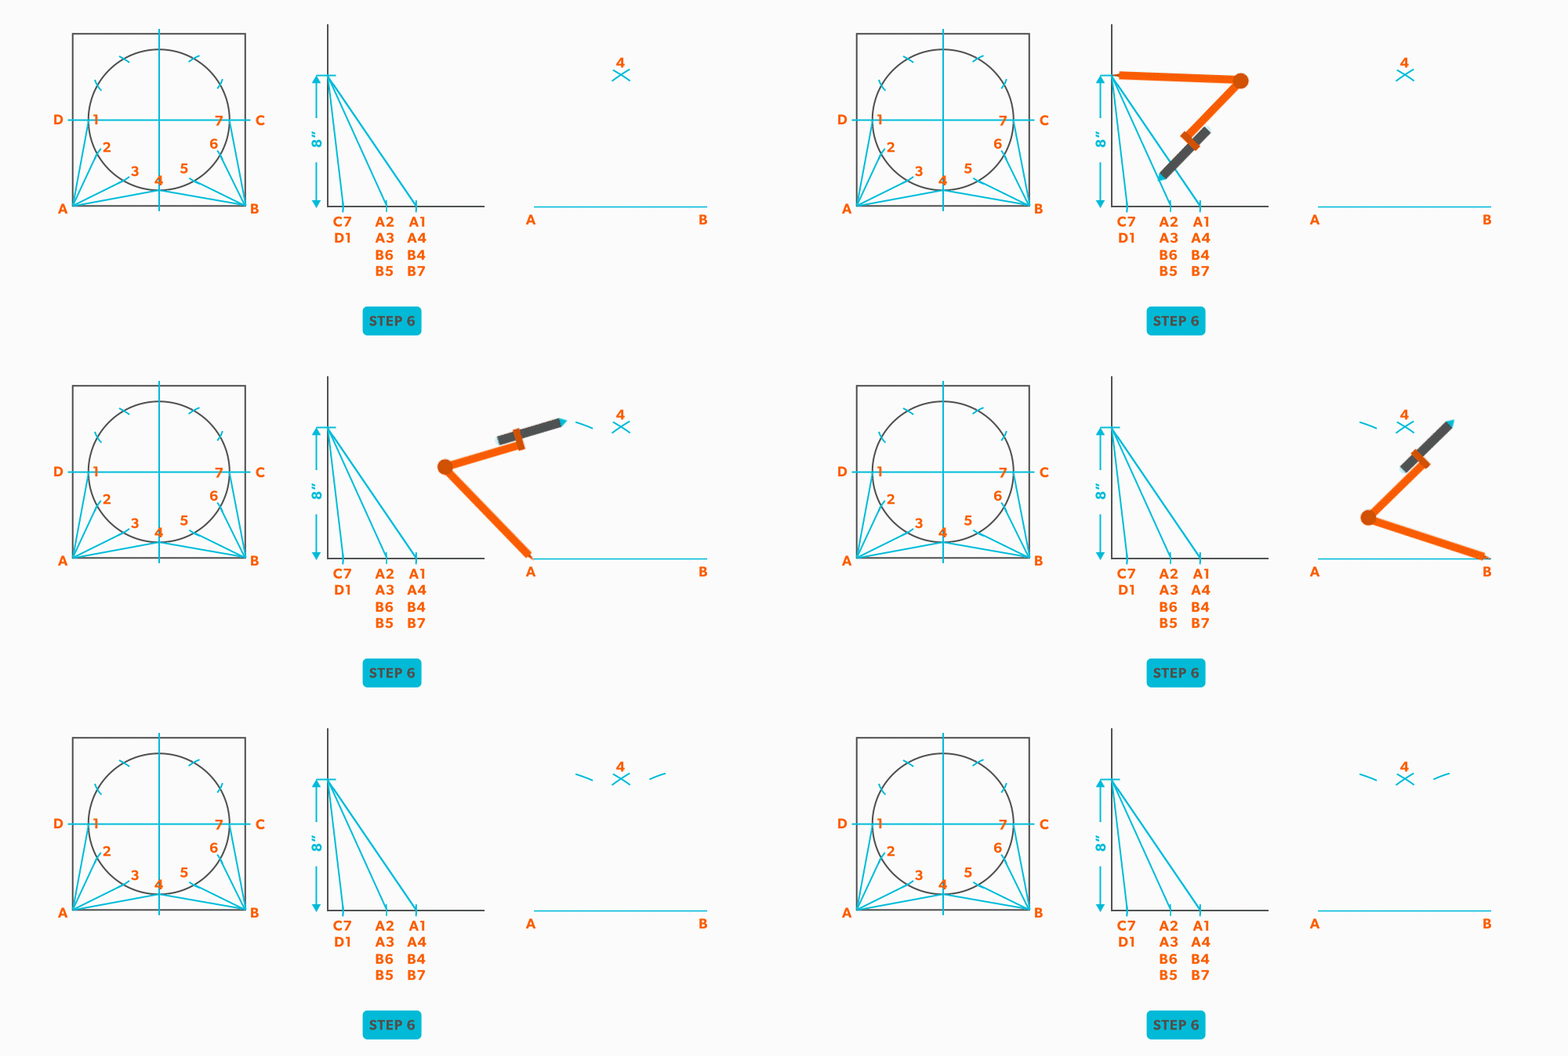
- Pick up line 3-4, a step-off, from the plan view and swing it from point 4, to create point 3. When we look at our plan view, we have labeled it in a way that numbers are at one end and letters on the other. So, when we go from one end to the other (number to letter), we need to find the true length, but when we go from number to number (or letter to letter) we don’t have any elevation change involved. We are just going horizontally along the end, which means it is a true length in the plan view.
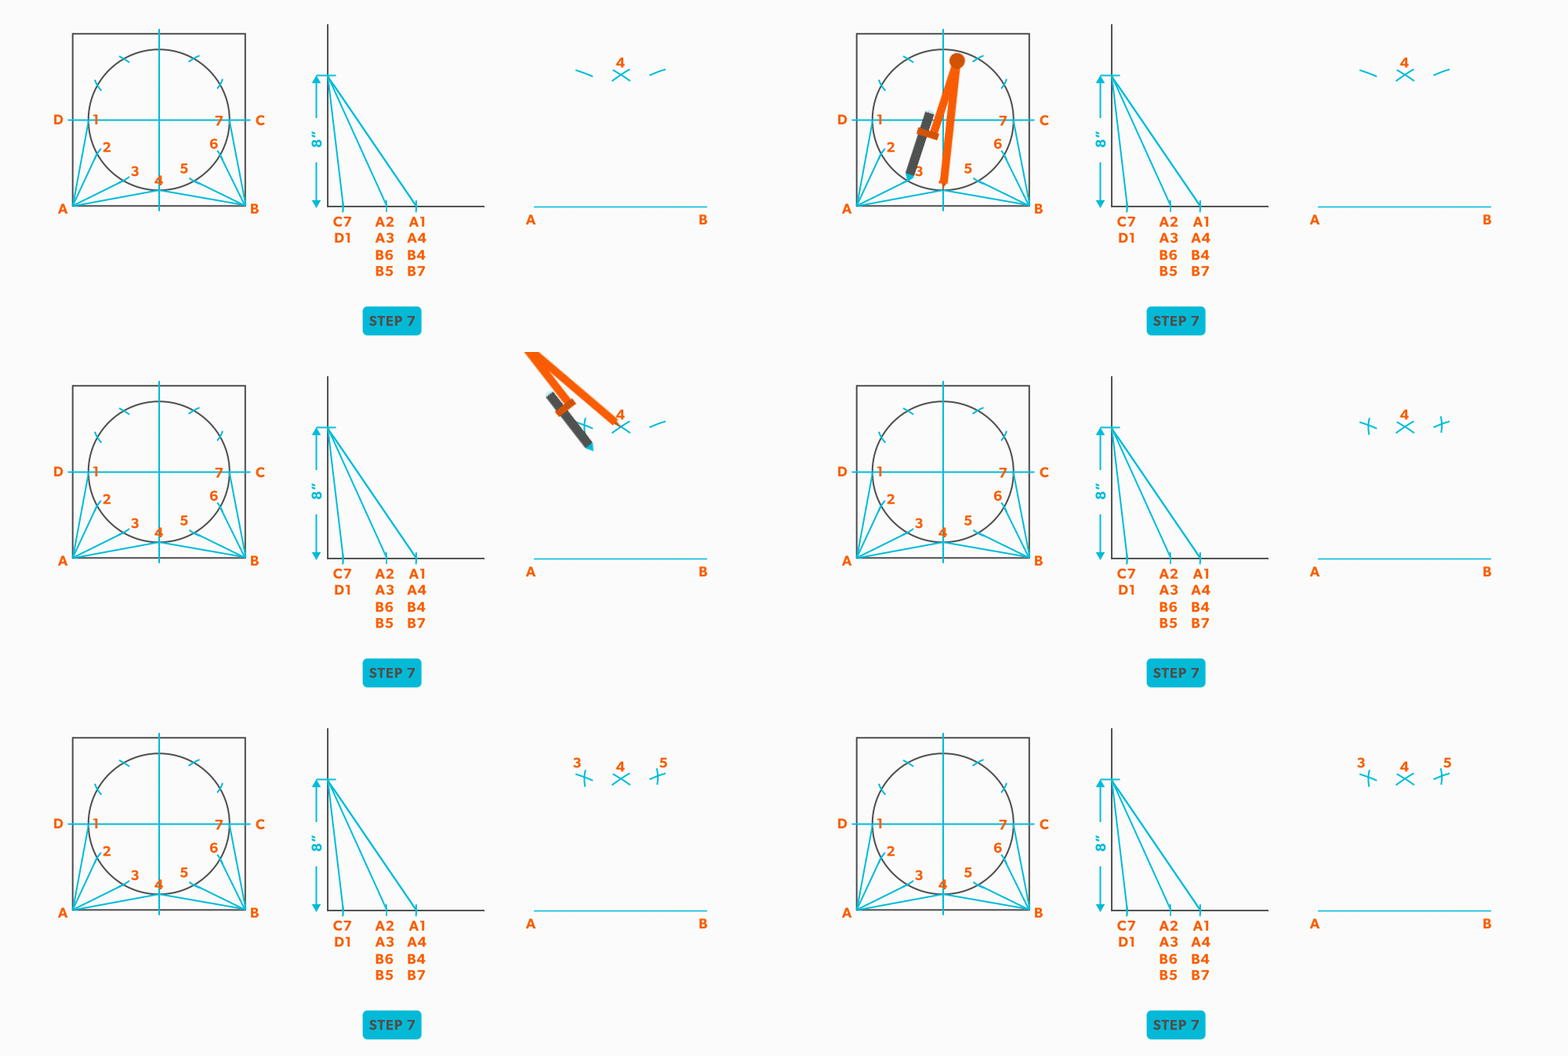
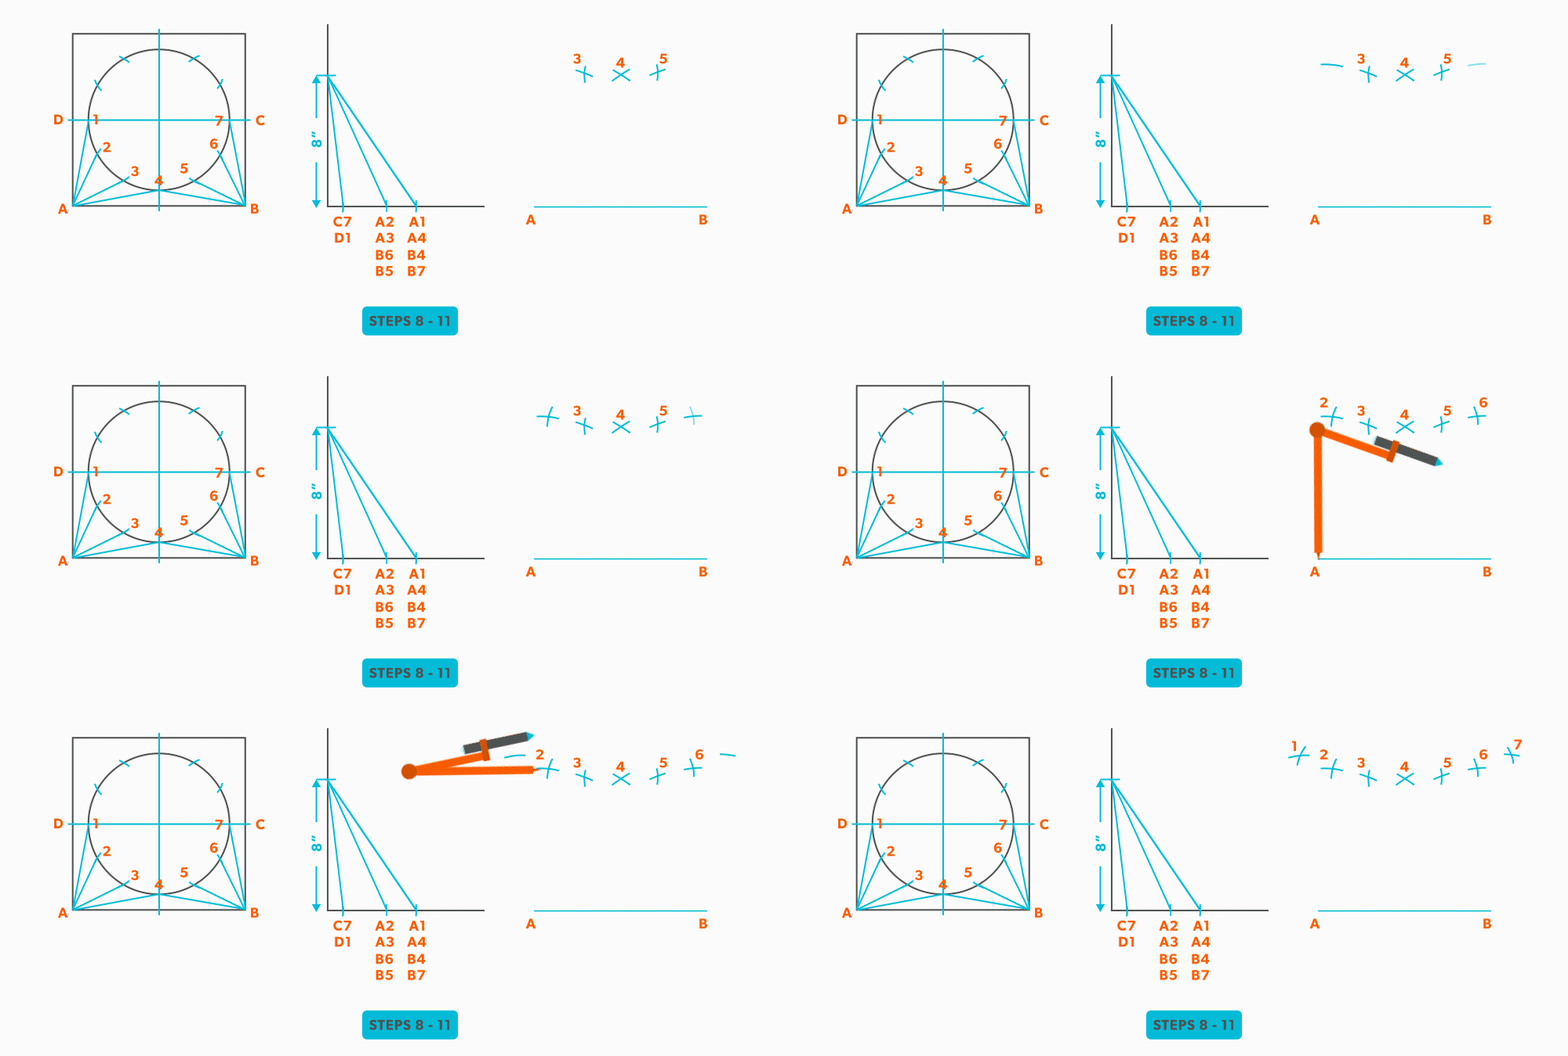
- Pick up line A-2 and swing it from point A.
- Pick up a step-off and swing it from point 3, to create point 2.
- Pick up line A-1 and swing it from point A.
- Pick up a step-off and swing it from 2, to create point 1.
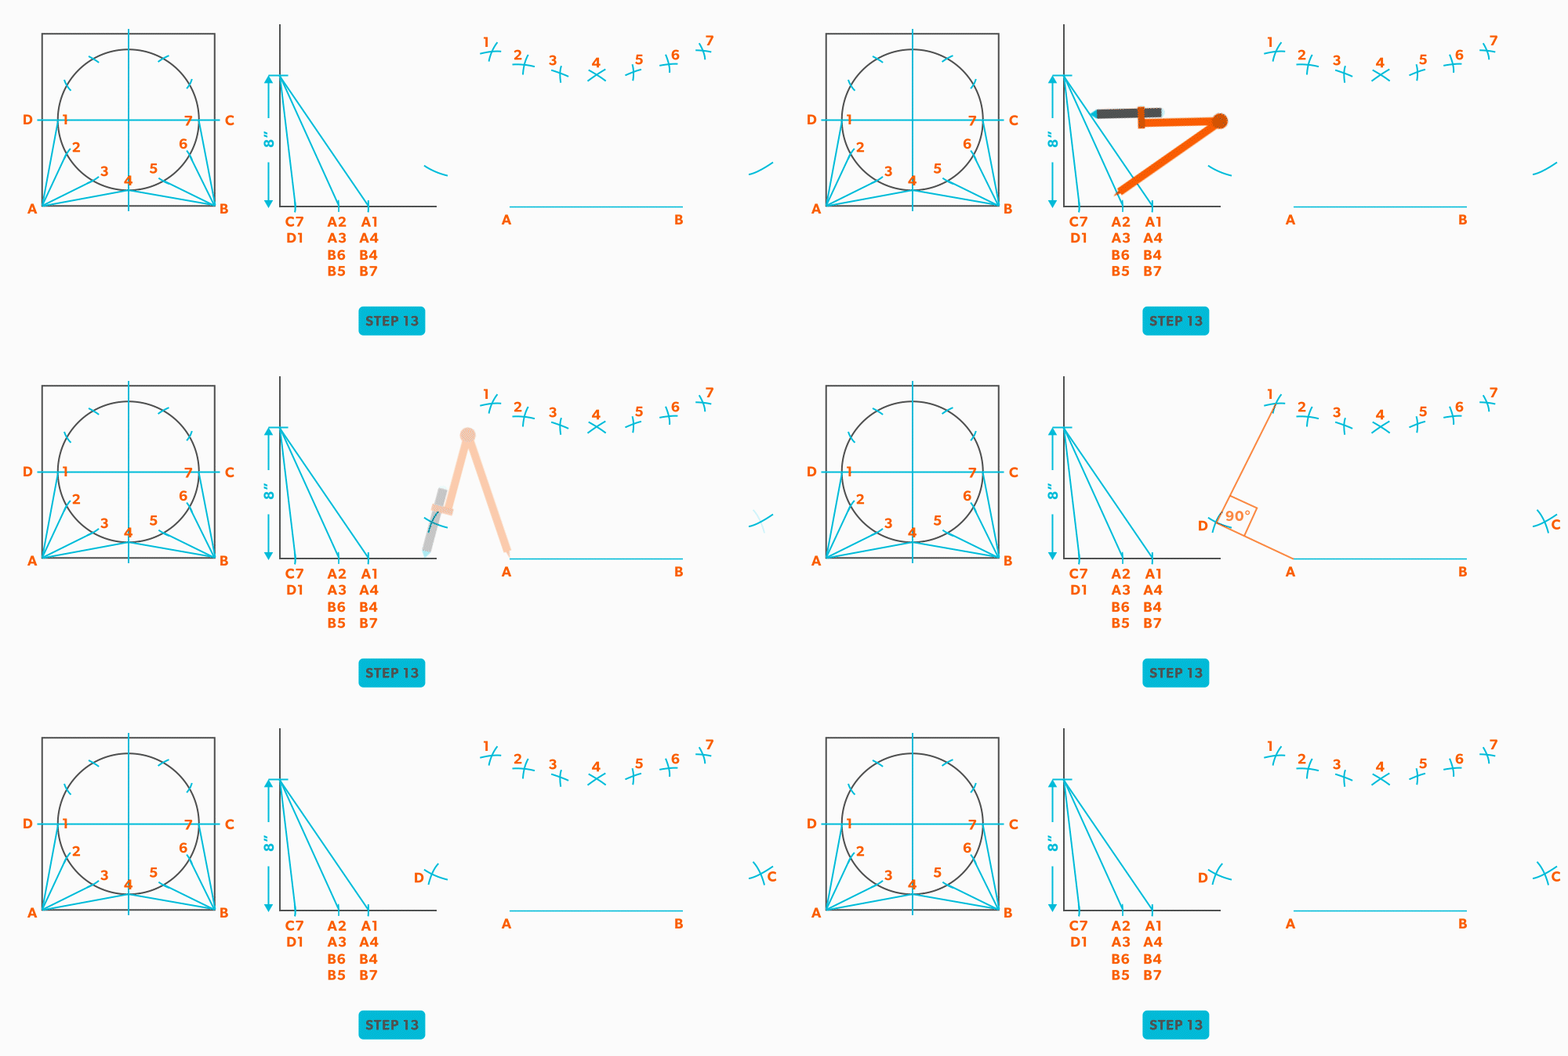
- Pick up line C-1 and swing it from 1. This is our first step where we are not swinging from A; we now must swing from 1. Always be thinking of the known points and the unknown. We must always swing an arc from a known point. For this triangle, the known points are A and 1 and the unknown is C. So, line C-1 has to be swung from 1 since we don’t know where C is yet.
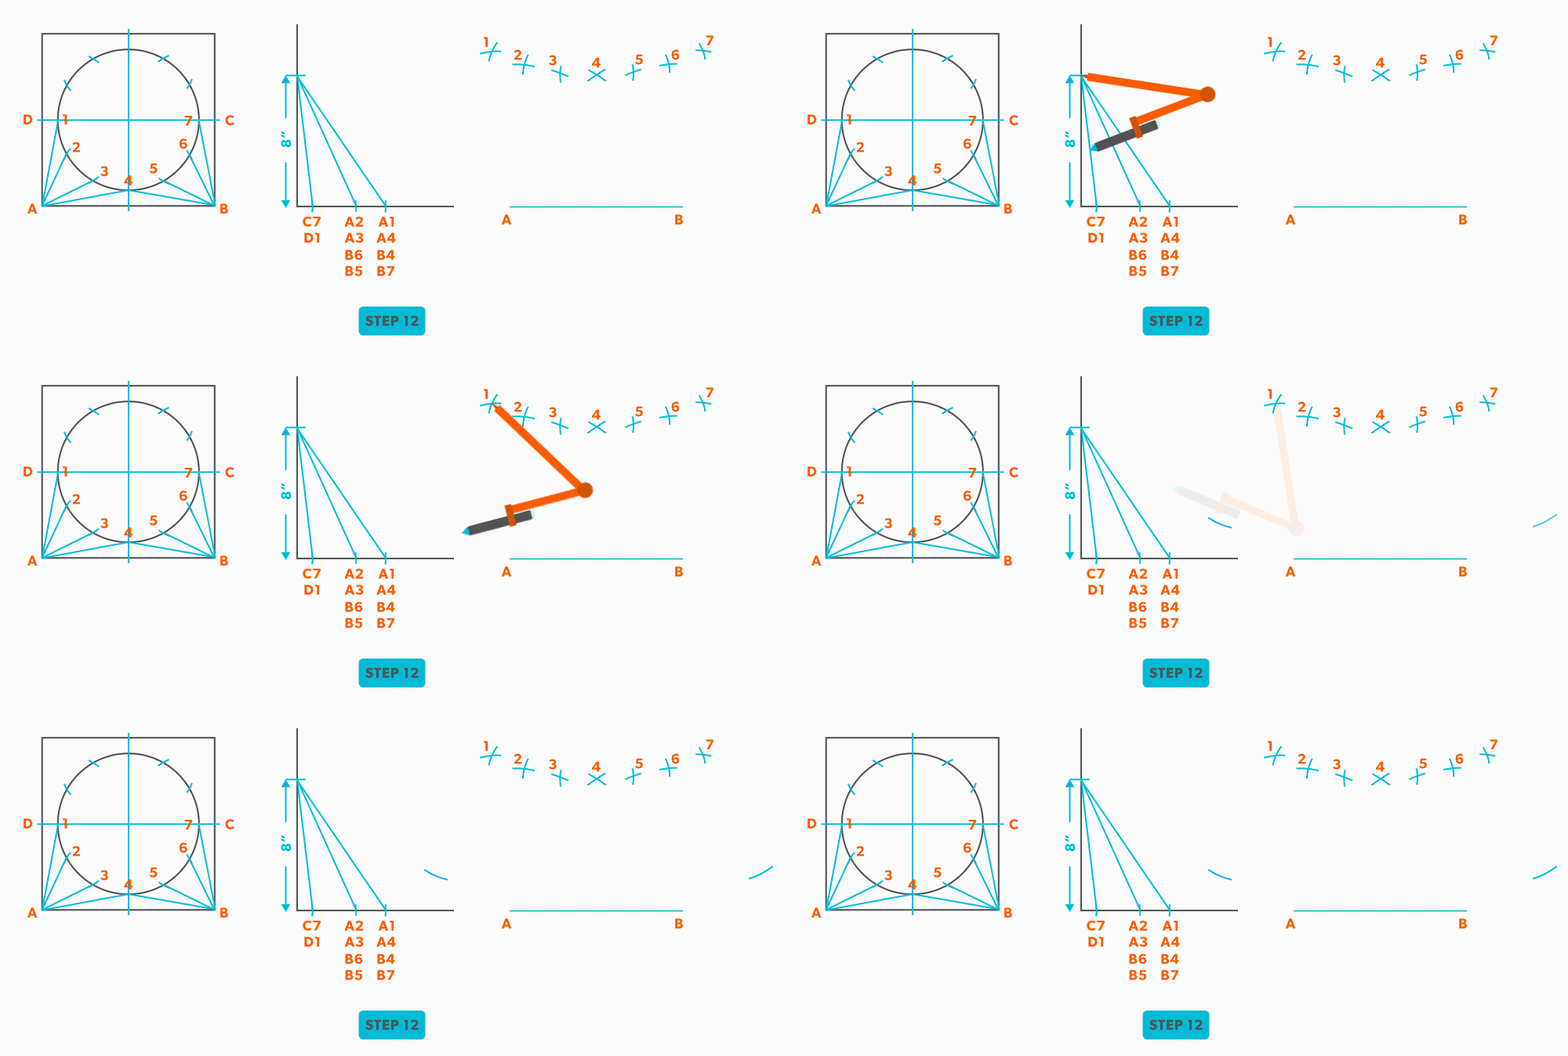
- Pick up line A-C from the plan view (remember that letter to letter is true length) and swing it from point A, to create point C. The way to check our work is this last triangle should be a right triangle. Point C should be 90°, if it’s not, go back and check your work.
- Draw in the all the element lines and outside edges, using a flexible curve for the round end.
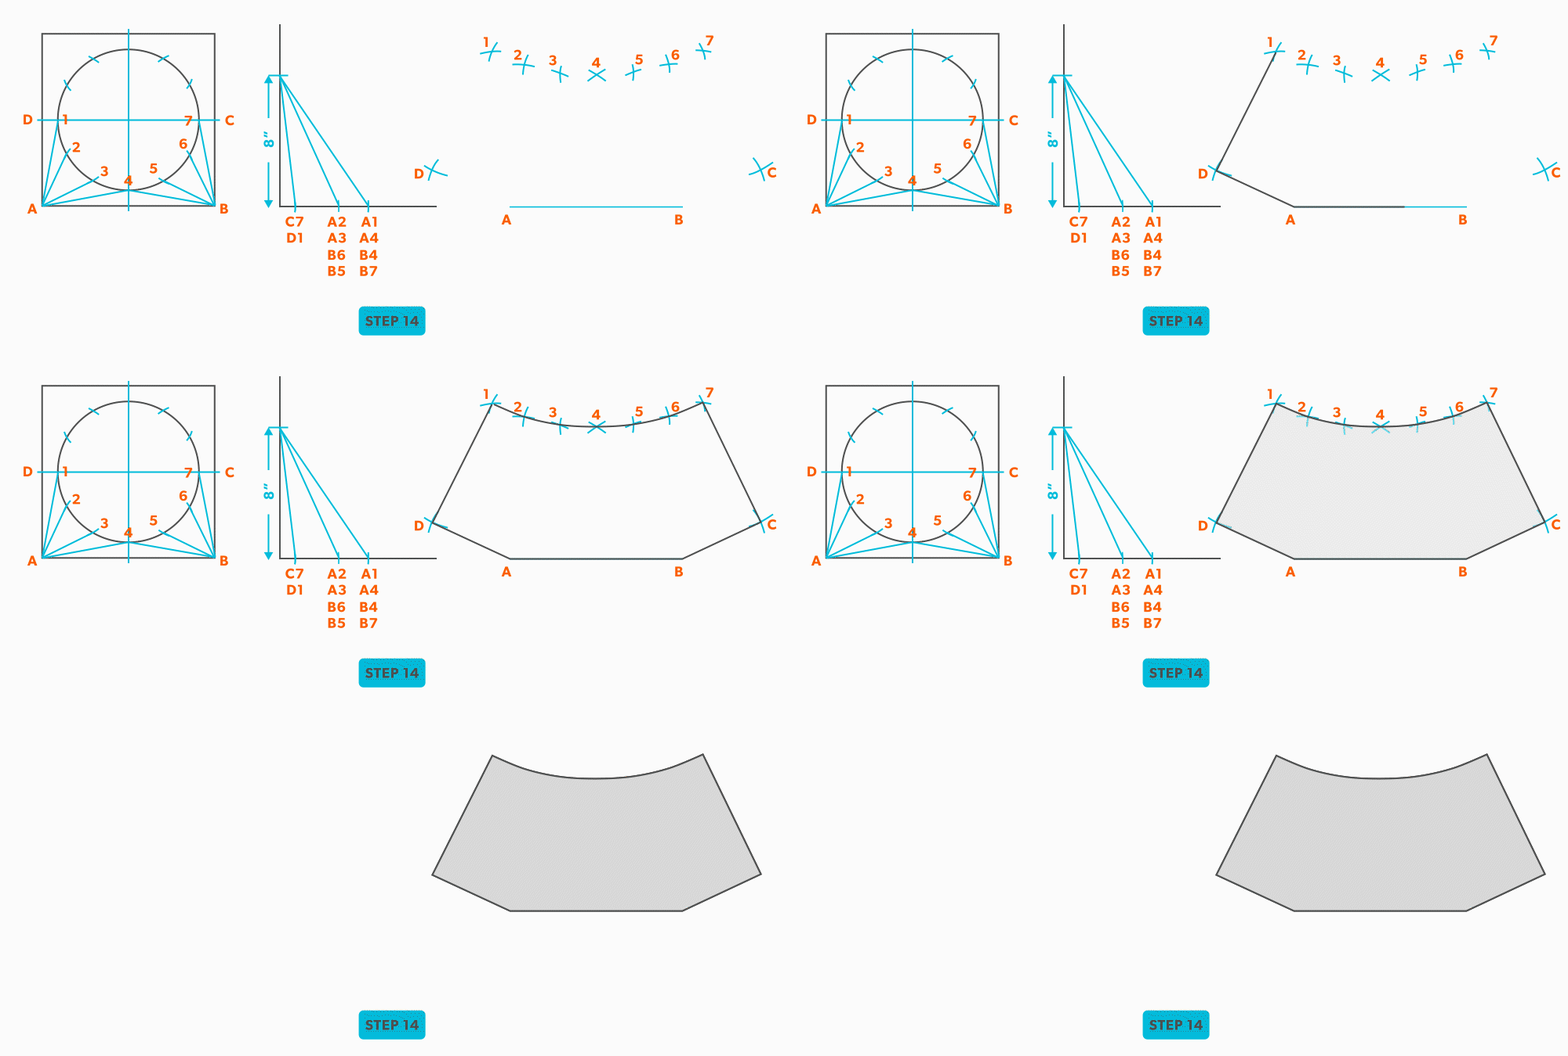
- Cut out and trace the pattern for the other half.
definition
looking down at something, a “birds eye view”, “floor plan” (2D)
a line representing an edge or bend
a 90° corner in that we use to find the actual length of a line
a dimension or line that is not distorted by the view

