Parallel Line Pattern Development
15 Equal Diameter 90 Degree Tee
We can start to take some short-cuts in our drawing. Instead of drawing a full plan view, we will use profiles. You can always go back to drawing the full plan view!
- Draw a full front elevation view and end elevation view (right side). Notice that the tee does not go passed centre of the pipe, it never will. Because of that, we can delete that portion of the drawing.

- Draw profiles on the tee in both views and divide into 6 equal parts (see Divide a Circle Into 12 Equal Parts). Include all labeling. Keep in mind that the labeling will rotate 90° with the view.
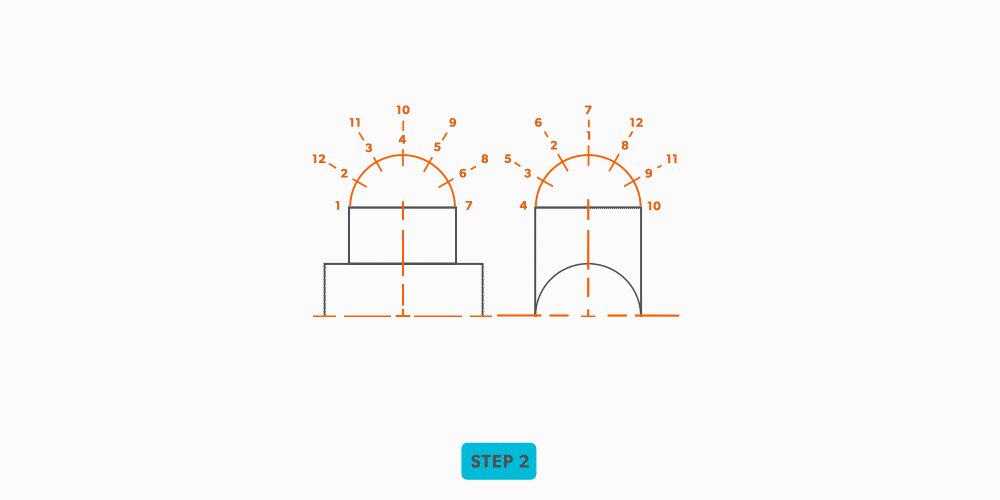
- Draw in the element lines from the profile divisions.
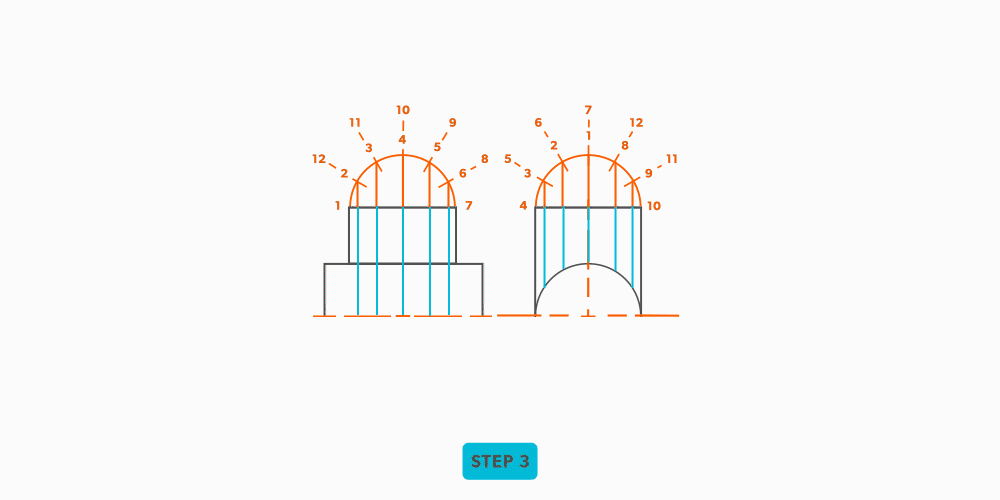
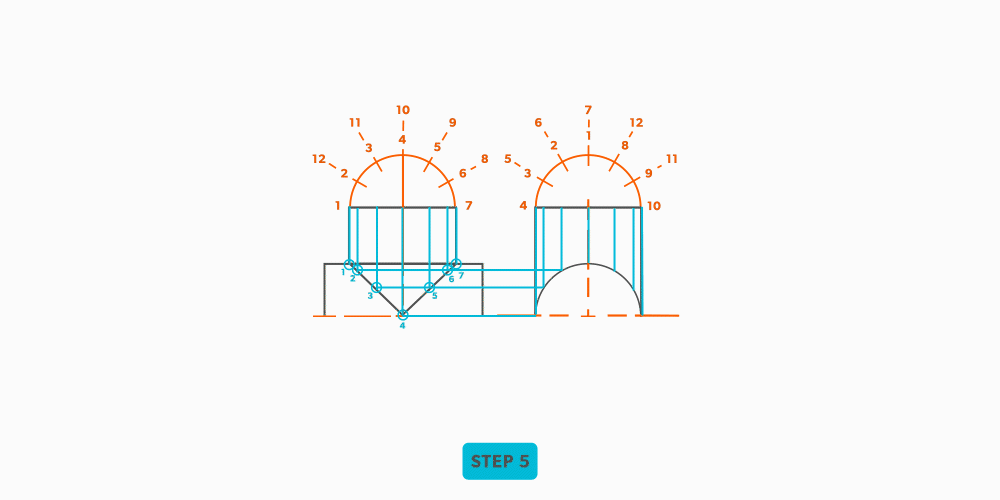
- Where the element lines hit the pipe in the end elevation view, project them horizontally into the front view.

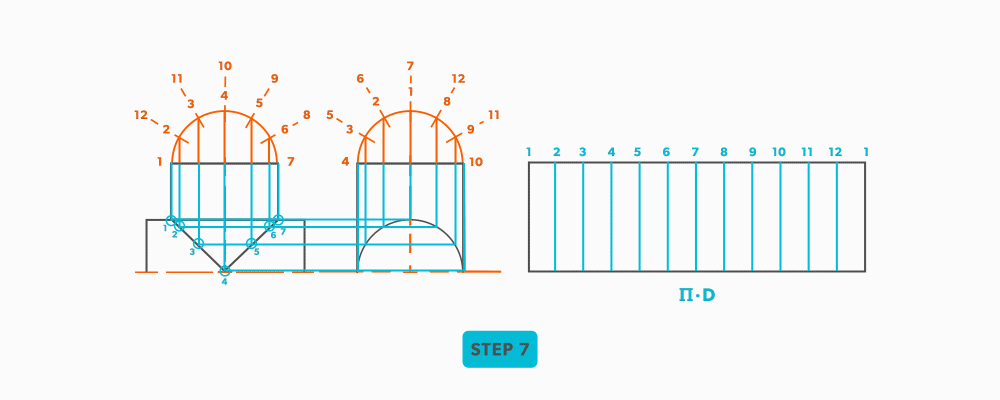
- Following the labeling, draw in the miter line in the front view.
- Draw the tee stretch-out and divide into 12 equal parts (see Divide a Line Using a Ruler on an Angle). Label the stretch-out to match the elevation views.
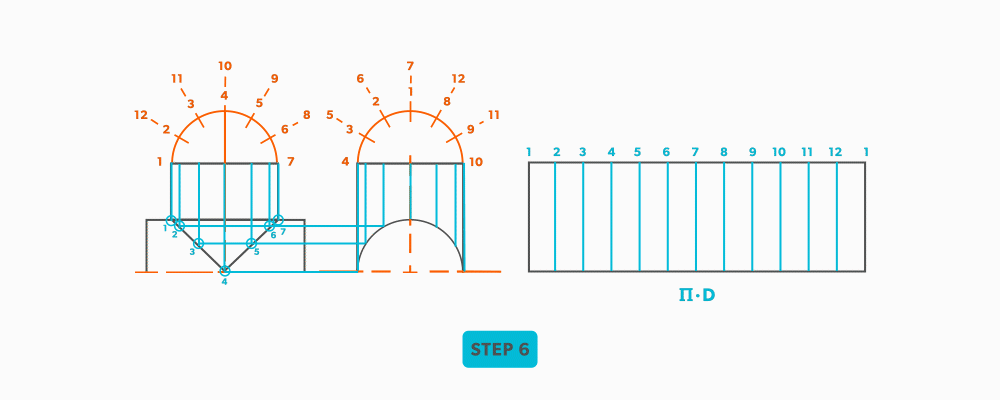
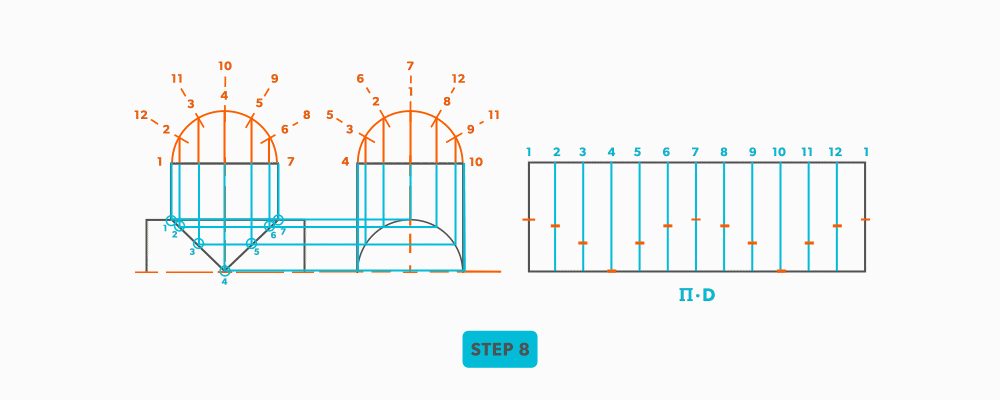
- Transfer/project the corresponding points from the elevation views to the stretch-out.
- Use a flexible curve to draw in the miter line, completing the pattern.
definition
looking at the front or side of something, to have elevation (height), 2D
a half of a plan view, drawn on the outside of an object
a line representing an edge or bend
a line/plane level with the horizon. Flat, level
an intersection of 2 pieces- an irregular cut on the end of something
a shape which has been “stretched out”, to take a perimeter and make it straight
the shape of the object, still in 2D form
