Configure Your AutoCAD Software
Learning Outcomes
When you have completed this module, you will be able to:
- Configure your AutoCAD software for the AutoCAD 2D book.
IMPORTANT – PLEASE READ BEFORE COMPLETING THIS MODULE
If you are working on the AutoCAD 2D course in an instructor-led educational institute and only completing the workalongs and lab exercises on the computers at your school or college, skip this module. Go directly to Module 1.
If you are working on the AutoCAD 2D book in an instructor-led educational institute and completing the workalongs and lab exercises on your personal computer, do the following:
- Go to the B.C. Open Collection and search for “AutoCAD 2D.” Download the Templates that are listed under “Supplemental Materials.”
- After you download the templates, complete the remainder of this module to configure your personal AutoCAD software. Complete Steps 1 to 48 in the next Workalong. Do not start Module 1 until you completed all 48 steps.
This book was written to be used with AutoCAD running on a computer with Windows software.
WORKALONG: Configuring Your AutoCAD Software
Step 1
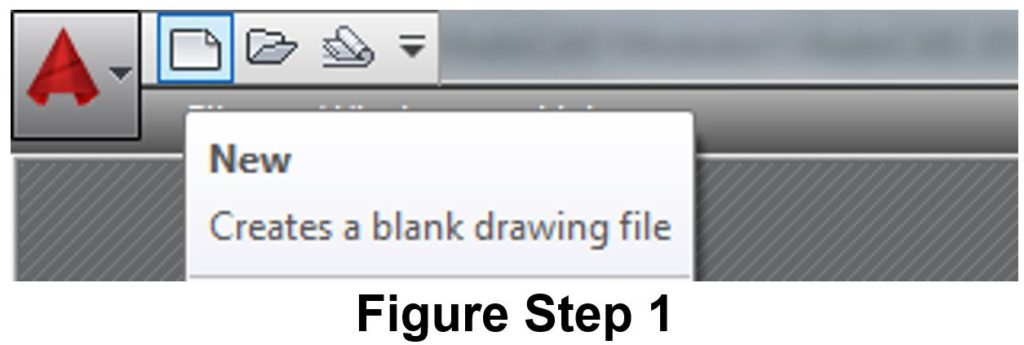
Start AutoCAD by clicking the desktop icon. In AutoCAD’s Graphic window, click the New icon located in the upper left corner. It will open the Select Template dialogue box (Figure Step 1).
Step 2
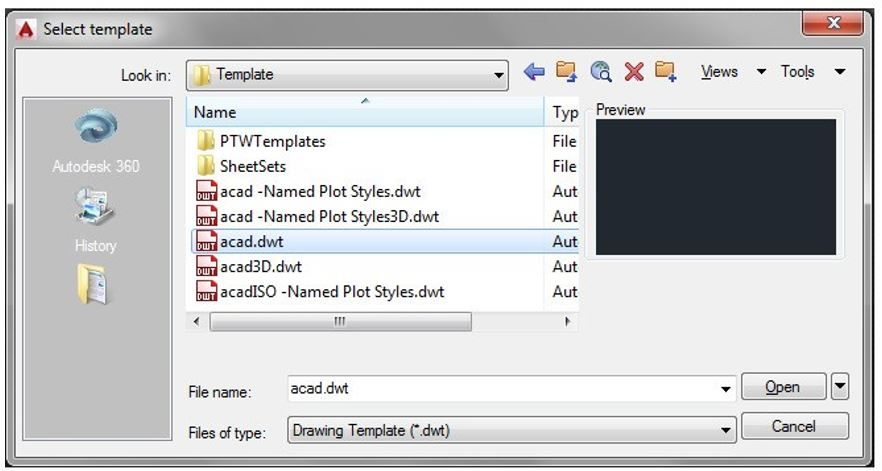
In the Select Template dialogue box, click the template file: acad.dwt (or just acad on some computers) to highlight it. Then click the Open button. This will display AutoCAD’s Graphic window. (Figure Step 2)
Step 3
Disable all features on the Status bar by clicking any that display with a blue background as shown in Figure Step 3A. All features should display with a gray background as shown in Figure Step 3B. (Figure Step 3A and 3B)


Step 4
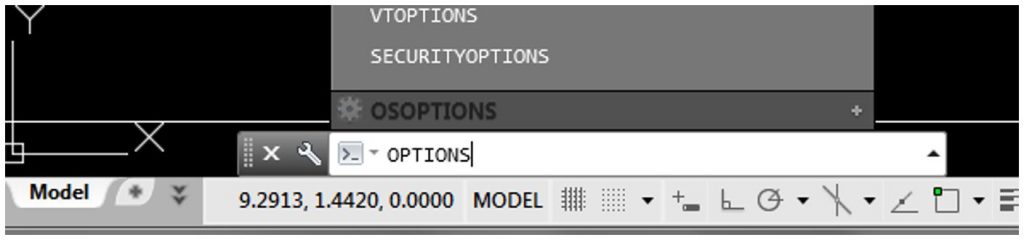
In the Command Line window, located on the bottom of the Graphic window, enter the OPTIONS command by typing it on your keyboard. This will open the Options dialogue box. (Figure Step 4)
Step 5
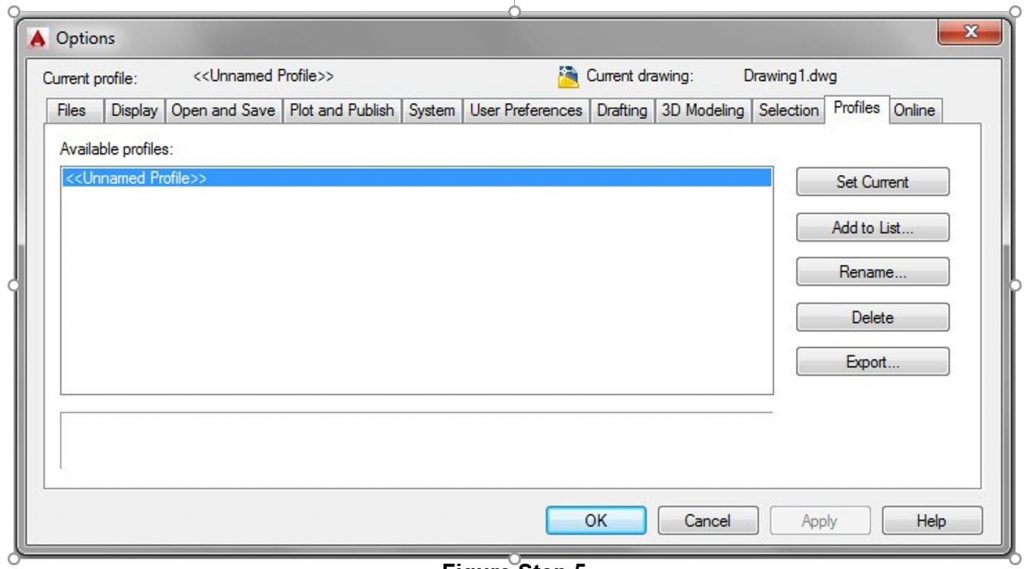
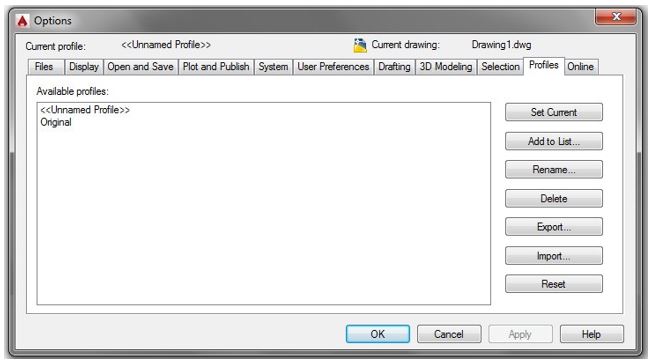
In the Options dialogue box, enable the Profiles tab. (Figure Step 5)
Step 6
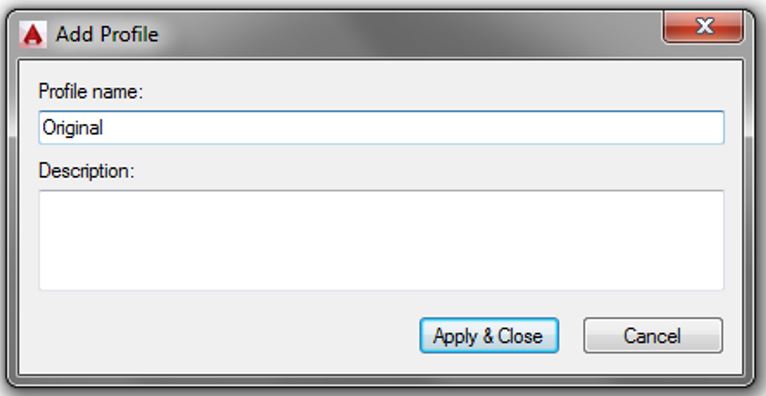
Click the Add to List button. This will open the Add Profile dialogue box. Enter the name: Original for the Profile name. (Figure Step 6A and 6B)
Step 7
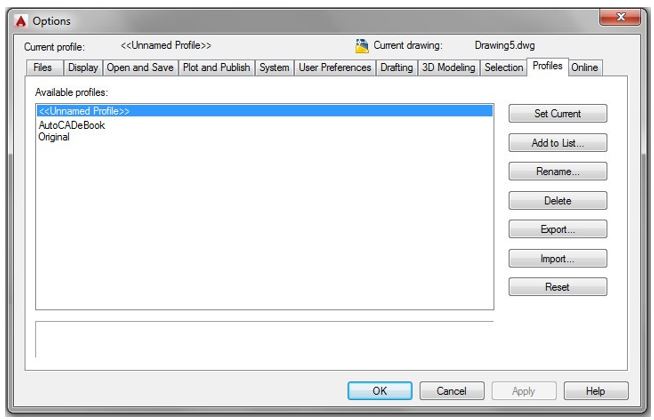
Using what you learned in Step 6, create a new profile named: AutoCADbook. (Figure Step 7)
Step 8
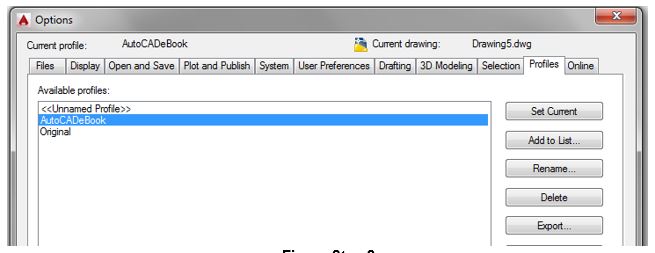
Click the AutoCADbook profile to highlight it. While it is selected, click the Set Current button. Ensure that the Current profile is AutoCADbook as shown across the top of the dialogue box. (Figure Step 8)
Step 9
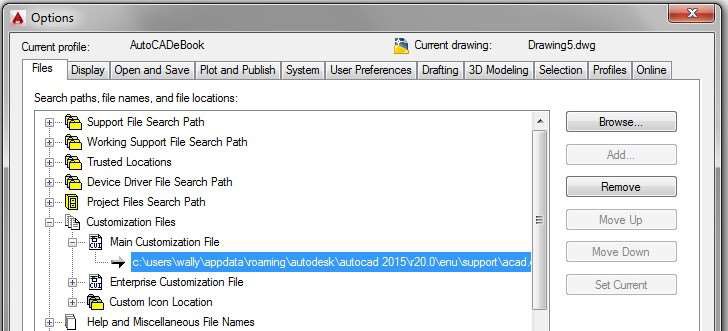
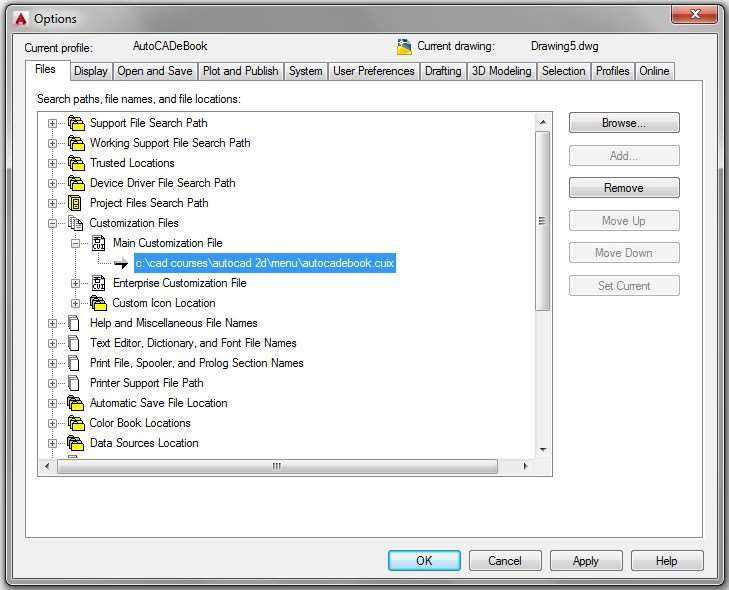
Enable the display of the Files tab. Click the + on Customization Files to expand it. Click the + on the Main Customization File to expand it. Click the file and location to highlight it as shown in the figure. While it is selected, click the Remove button. (Figure Step 9)
Step 10
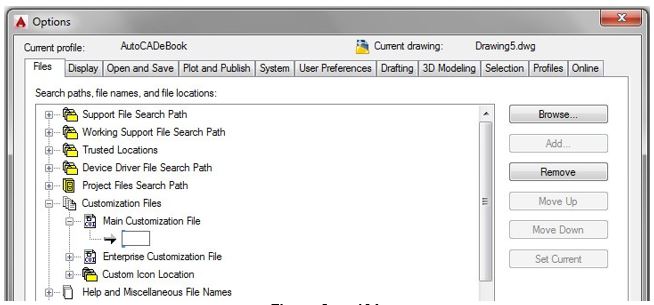
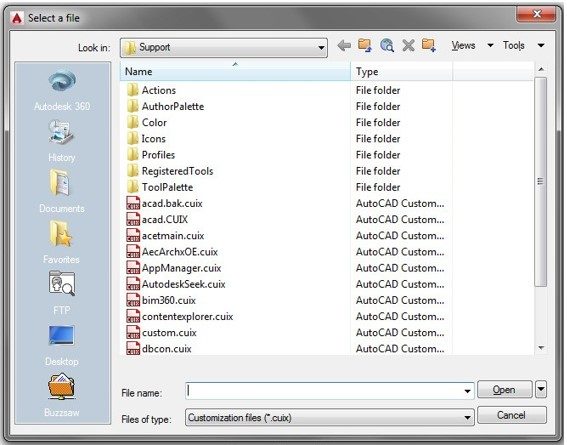
Step 9 will remove the customization file and show a blank box as shown in the figure. Click the Browse button to open the Select a file dialogue box. (Figure Step 10A and 10B)
Step 11
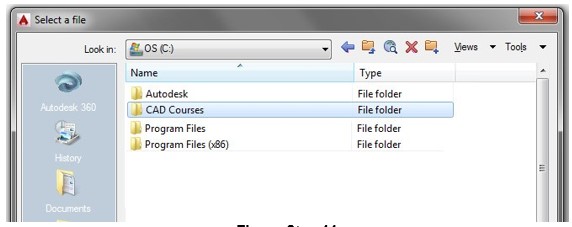
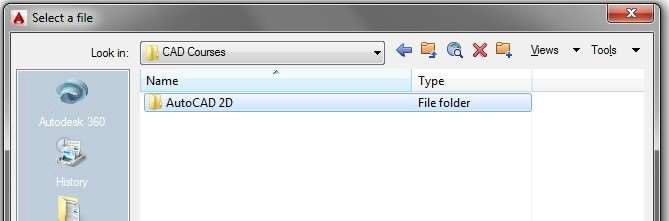
In the Select a file dialogue box, pull down the Look in: box and find C drive. Click the folder: CAD Courses. (Figure Step 11)
Step 12
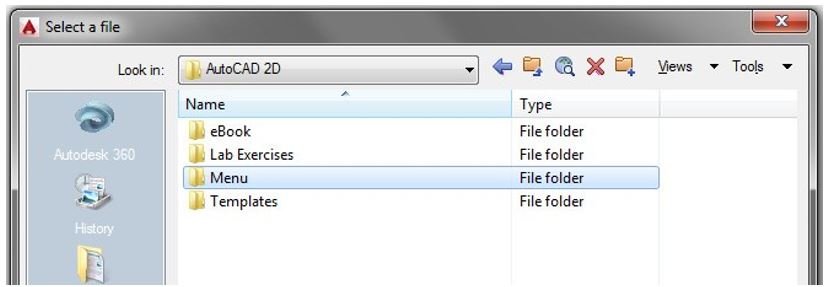
Under CAD Courses, click the folder: AutoCAD 2D. (Figure Step 12)
Step 13
Under the folder: AutoCAD 2D, click the folder: Menu. (Figure Step 13)
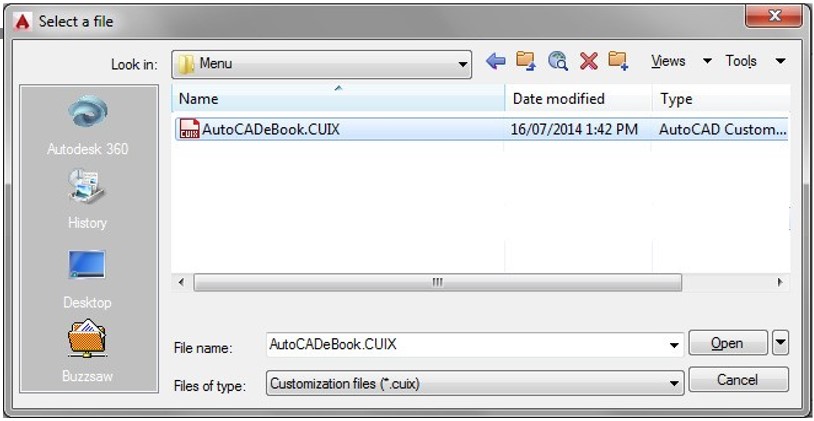
Step 14
In the folder: Menu, click the file: AutoCADbook.CUIX and then the Open box. (Figure Step 14)
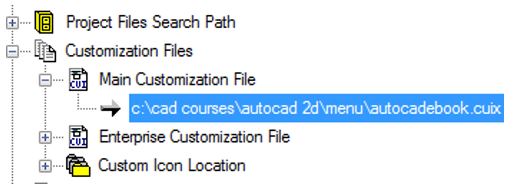
Step 15
You should now see the file location:
C:\CAD Course\AutoCAD 2D\Menu\AutoCADbook.CUIX. (Figure Step 15A and 15B)
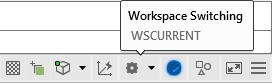
Step 16
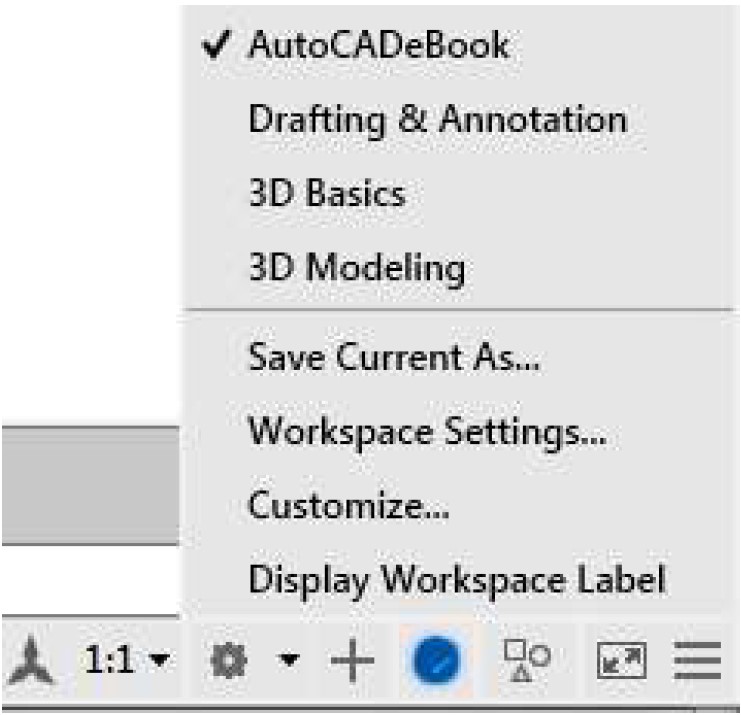
Click the small arrow in the Workplace Switching icon on the right end of the Status bar located along the bottom of the Graphic window. (Figure Step 16)
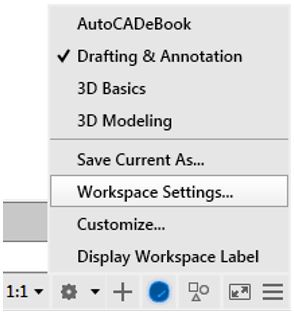
Step 17
In the Workspace pull-up menu, click Workspace Settings. This will open the Workspace Settings dialogue box. (Figure Step 17)
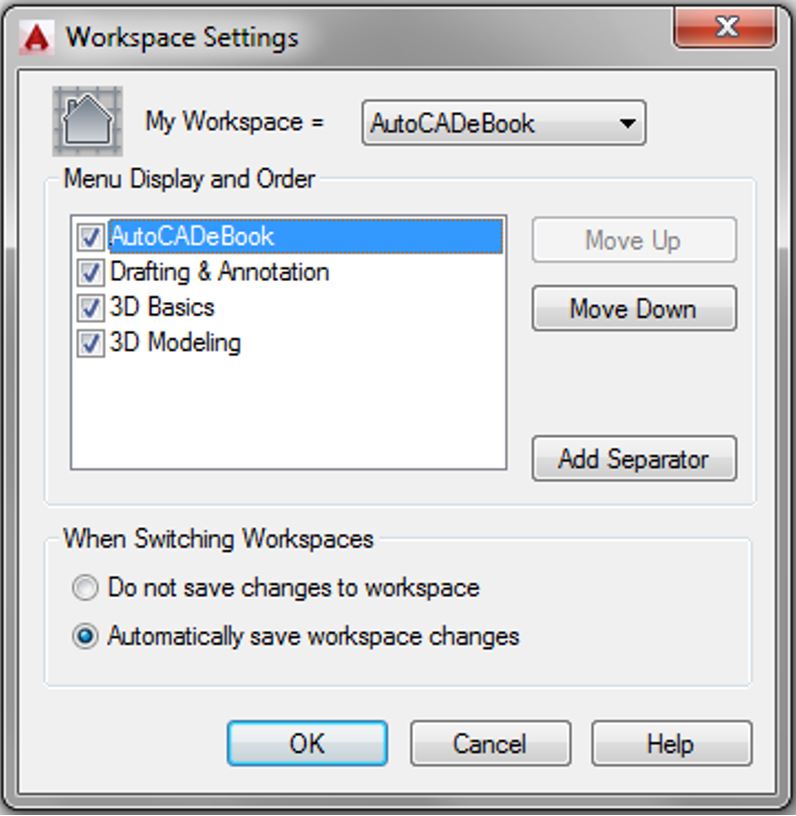
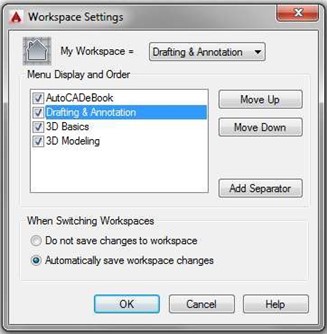
Step 18a (Toolbar Menus)
In the Workspace Settings dialogue box, set My Workspace to: AutoCADbook. Enable Automatically save workspace changes by clicking the radio button. Click OK to close the box. (Figure Step 18a)
Step 19a (Toolbar Menus)
Click the small arrow in the Workplace Switching icon again on the Status bar. Click the workspace: AutoCADbook to set it as the current workspace. Make sure that the check mark is beside the workspace: AutoCADbook as shown in the figure. (Figure Step 19a)
Step 18b (Ribbon Menus)
If you intend to use Ribbon menus to do this book, complete Steps 18b and 19b. If you intend to use Toolbar menus to do this book, skip to Step 20.
In the Workspace Settings dialogue box, set My Workspace to the workspace: Drafting & Annotation. Enable Automatically save workspace changes by clicking the radio button. Click OK to close the box (Figure Step 18b)
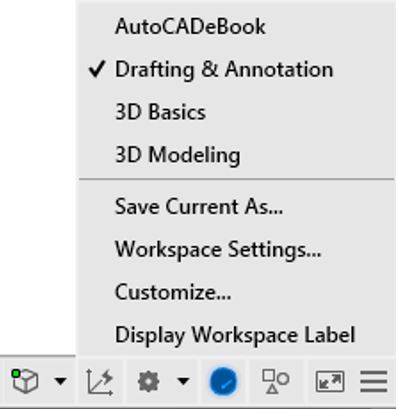
Step 19b (Ribbon Menus)
Click the small arrow in the Workplace Switching icon again on the Status bar. Click the workspace: Drafting & Annotation to set it as the current workspace. Make sure that the check mark is beside the workspace: Drafting & Annotation as shown in the figure. (Figure Step 19b)
Step 20
Click the Hamburger icon located on the far right side of the Status bar. This will display the Customization menu. Enable or disable each item in the menu until it matches the figure. (Figure Step 20)

Step 21
Enter the MENUBAR command and set it to 1, as shown below.
Command: MENUBAR
Enter new value for MENUBAR <0>: 1
Command:
Step 22
Enter the NAVBARDISPLAY command and set it to 0, as shown below.
Command: NAVBARDISPLAY
Enter new value for NAVBARDISPLAY <1>: 0
Command:
Step 23
Enter the VPCONTROL command and set it to OFF, as shown below.
Command: VPCONTROL
Enter new value for VPCONTROL <ON>: OFF
Command:
Step 24 (2015)
If you are using AutoCAD 2015 execute the following command:
Enter the NEWTABMODE command and set it to 0, as shown below.
Command: NEWTABMODE
Enter new value for NEWTABMODE <1>: 0
Command:
Step 24 (2016-2017)
If you are using AutoCAD 2016 or 2017 execute the following command:
Enter the STARTMODE command and set it to 0, as shown below.
Command: STARTMODE
Enter new value for STARTMODE <1>: 0
Command:
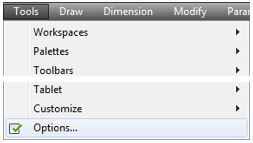
Step 25
Click Tools in the Pull-down menu. In the Pull-down menu, click Options. (Figure Step 25)
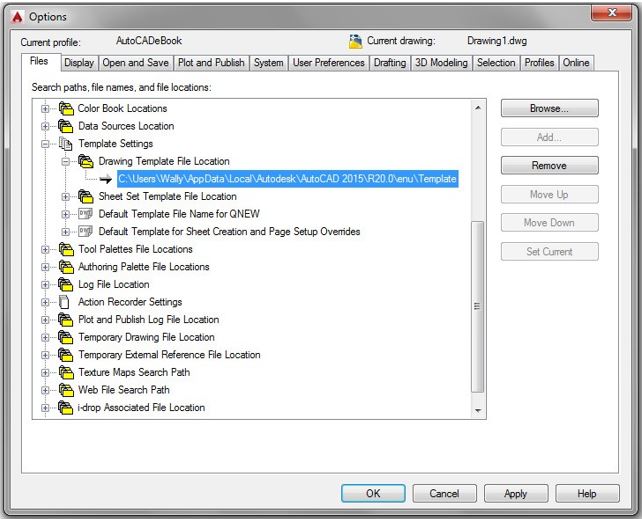
Step 26
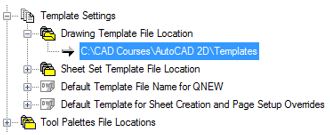
In the Options dialogue box, enable the Files tab. Expand Template Settings and Drawing Template File Location. Highlight the current location by clicking it. Click the Remove button. (Figure Step 26)
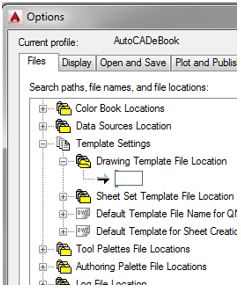
Step 27
It will display an empty box as shown in the figure. (Figure Step 27).
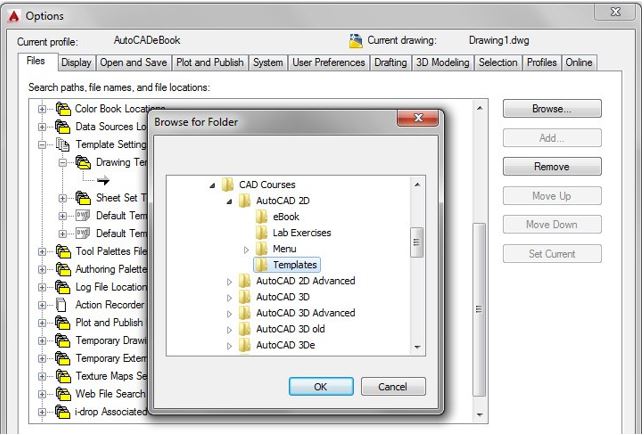
Step 28
Click the Browse button. In the Browse for Folders dialogue box, locate the folder: (Figure Step 28)
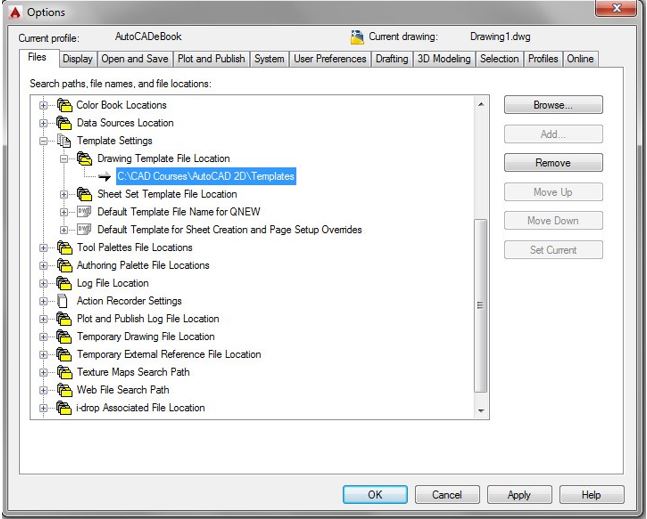
Step 29
Click OK and the new location will appear as shown in the figure. (Figure Step 29A and 29B)
Step 30
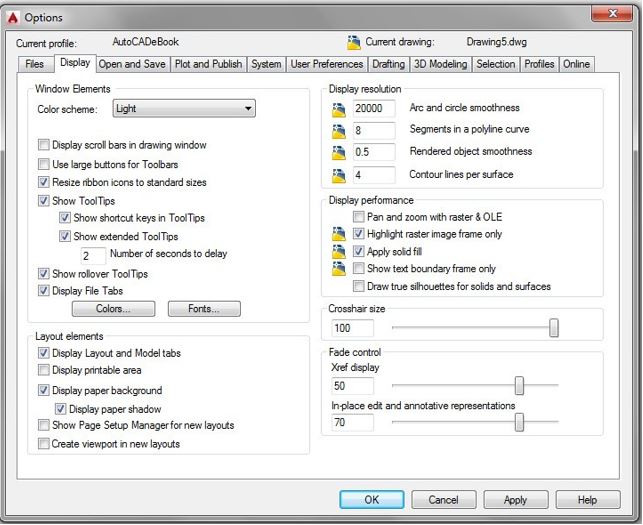
Enable the display of the Display tab. (Figure Step 30)
Step 31
In the Display resolution area, set the Arc and circle smoothness to 20000. (Figure Step 31)

Step 32
Set the Crosshair size to 100. (Figure Step 32)

Step 33
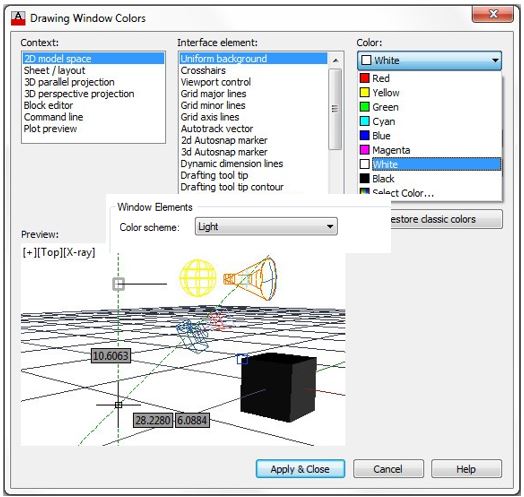
Click the Colors button to open the Drawing Window Color dialogue box. Highlight 2D model space, Uniform Background and then select the color White as shown in the figure. (Figure Step 33A and 33B)

Step 34
Click Apply and Close.
Step 35
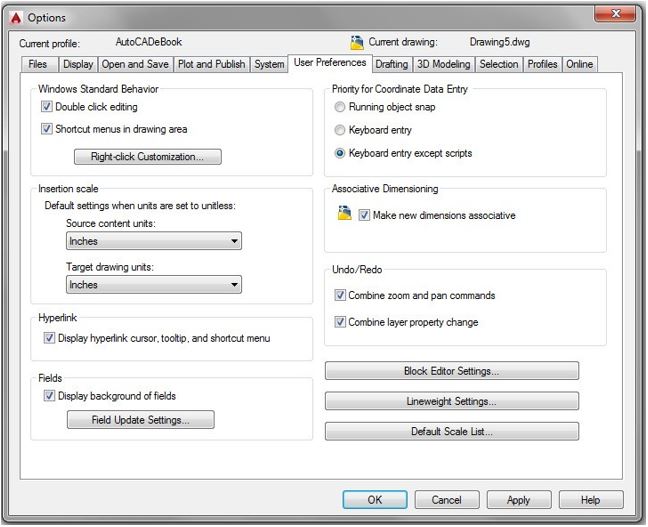
Enable the User Preferences tab. (Figure Step 35)
Step 36
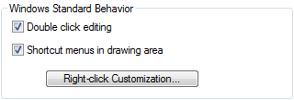
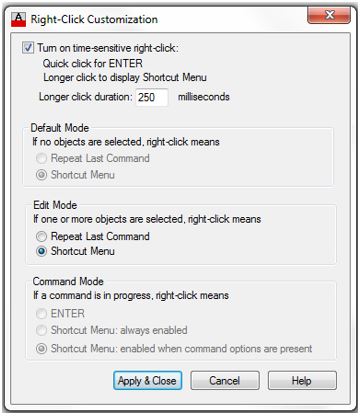
Ensure that both boxes are enabled in the Windows Standard Behavior area. Click the Right-click Customization button. Enable the box Turn on time sensitive right-click and set the Longer click duration to 250 milliseconds. (Figure Step 36A and 36B)
Step 37
Click Apply and Close.
Step 38
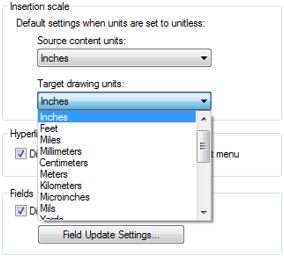
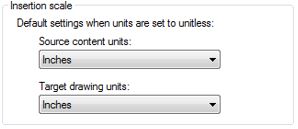
In the Insertion scale area, pull down the Source content units menu and select Inches. Do the same for the Target drawing units menu to set both to inches. (Figure Step 38A and 38B)
Step 39
Enable the Drafting tab. (Figure Step 39)
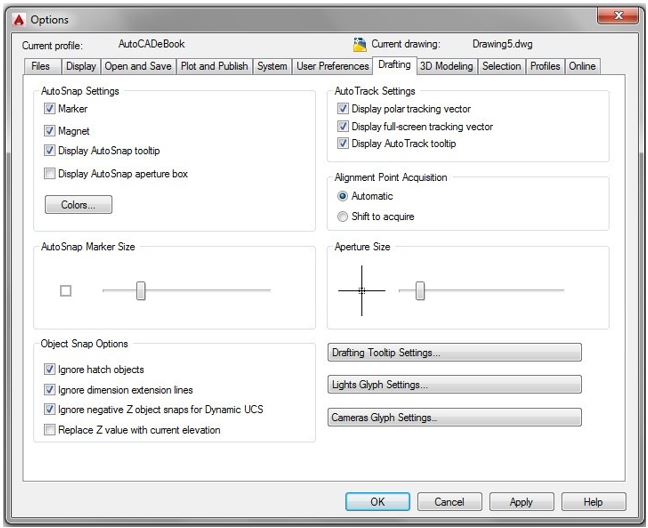
Step 40
Click the Colors box. In the Color box, pull-down the list and click Select Color. Enable the Index Color tab in the Select Color dialogue box, enter the number 253 and click OK. (Figure Step 40A, 40B, and 40C)
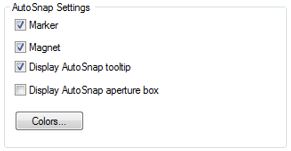
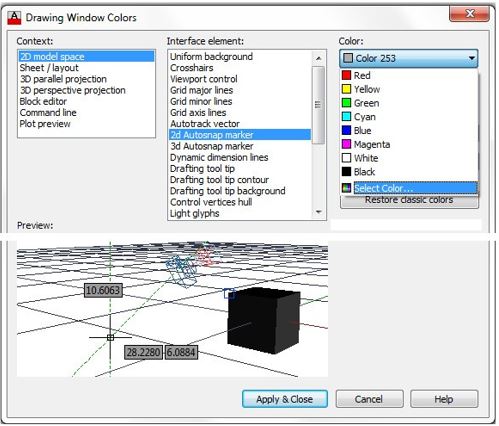
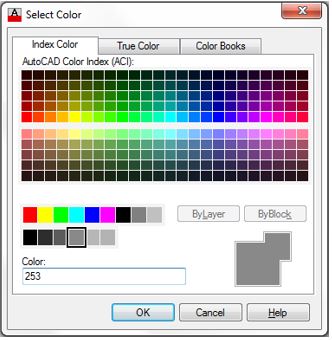
Step 41
Click OK and then click Apply and Close.
Step 42
Set the AutoSNAP Marker Size and the Aperture Size to approximately the sizes shown in the figures. If required, you can adjust these sizes, when required, as you work your way through the book. (Figure Step 42)

Step 43
Enable the 3D Modeling tab. (Figure Step 43)
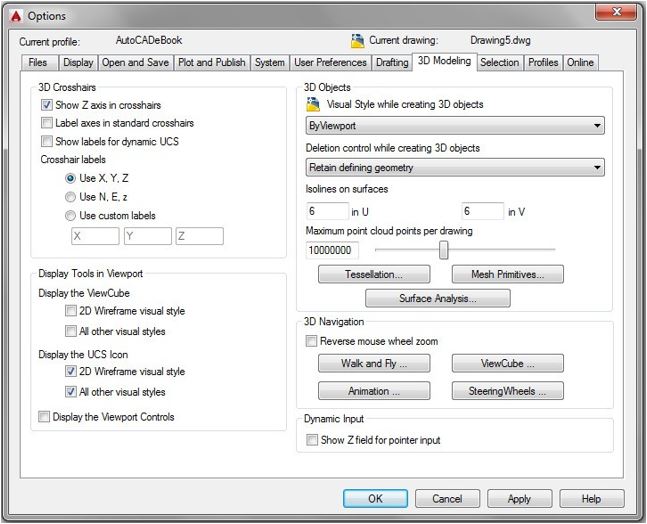
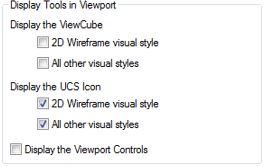
Step 44
In the Display Tools in Viewport area, set it as shown in the figure. (Figure Step 44)
Step 45
Enable the Selection tab. (Figure Step 45)
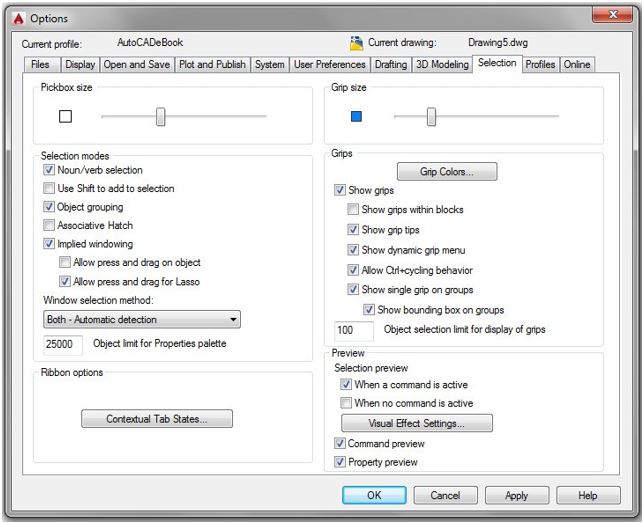
Step 46
Set the Pickbox Size and the Grip Size to approximately the sizes as shown in the figure. If required, you can adjust these sizes, when required, as you work your way through the book. (Figure Step 46)

Step 47
Click the OK button on the bottom of the Options dialogue box to close it.
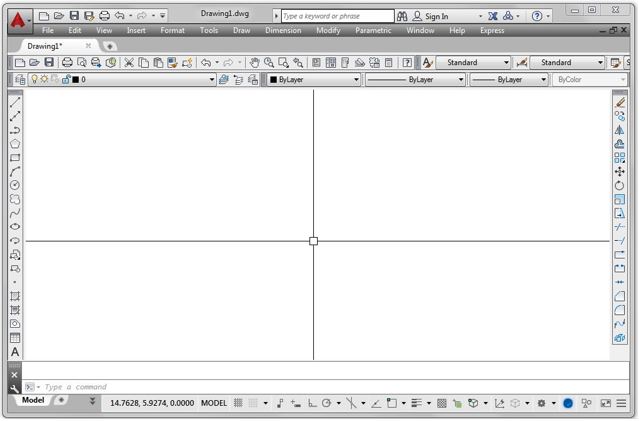
Step 48
Your AutoCAD software is now configured for the AutoCAD 2D book. Your Graphic window should closely match the figure. (Figure Step 48)
Step 49
Go to Module 1.
