Want to create or adapt books like this? Learn more about how Pressbooks supports open publishing practices.
Chapter 10. Tubes and Attachments
10.7 Ostomy Care
An ostomy is a surgically created opening from the urinary tract or intestines, where effluent (fecal matter, urine, or mucous) is rerouted to the outside of the body using an artificially created opening called a stoma. A stoma typically protrudes above the skin, is pink to red in colour, moist, and round, with no nerve sensations. Ostomy surgeries are performed when part of the bowel or urinary system is diseased and therefore removed. The output from the stoma (urine, feces, or mucous) is called effluent.
An ostomy is named according to the part of intestine used to construct it. A colostomy is the creation of a stoma from part of the colon (large bowel), where the intestine is brought through the abdominal wall and attached to the skin, diverting normal intestinal fecal matter through the stoma instead of the anus. An ileostomy is created from the ileum (small bowel), which is brought through the abdominal wall and used to create a stoma. A urostomy or ileal conduit is a stoma created using a piece of the intestine to divert urine to the outside of the body. The ureters are sewn to a piece of the intestine, brought through the abdominal wall, and sutured to create the stoma. These surgeries are performed on patients with diseases such as cancer of the bowel or bladder, inflammatory bowel diseases (such as colitis or Crohn’s), or perforation of the colon. Emergencies that may require an ostomy include diverticulitis, trauma, necrotic bowel, or radiation complications. An ostomy may be permanent or temporary, depending on the reason for the surgery. Other types of ostomies are called jejunostomy, double-barrel ostomy, and loop ostomy (Perry et al., 2014).
Pouching Systems (Ostomy Appliances)
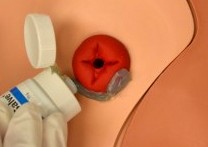
Individuals with colostomies, ileostomies, or urostomies have no control or sensation of frequency or output of the stoma. Patients with ostomies must wear a pouching system to collect the effluent from the stoma and protect the skin from irritation. The pouching system must be completely sealed to prevent leaking of the effluent and to protect the surrounding peristomal skin. The disposable pouching systems can be either a one-piece or a two-piece flexible system consisting of a plastic bag and a flange (skin barrier) that sit against the patient’s skin. The flange may be flat or convex. The ostomy pouch and flange come together to form one integrated, leakproof unit. The pouch has an open end to allow effluent to be drained, and may be closed using a plastic clip or Velcro strip. There are many different types of pouching systems to meet different needs. Step 2 in Checklist 87 shows ostomy supplies including a flange, an ostomy bag, and a one-piece system (Perry et al., 2104; United Ostomy Association of America, 2011).
The flange is cut to fit around the stoma without impinging on it. Ostomy pouching systems vary and are based on type of stoma, stoma characteristics, stoma location, patient abilities, skin folds, and patient preference. Depending on the type of pouching system, the system can last from four to seven days. The pouch must be changed if it is leaking, odour is present, there is excessive skin exposure, or the patient complains of itching or burning under the skin barrier. Patients with pouches can swim and take showers with the pouching system on. All patients are expected to participate in all aspects of the care of their ostomy; if they cannot, a caregiver may be taught to care for the ostomy (Perry et al., 2014).
Depending on the patient, a surgical procedure may be performed to create an internal pouch to collect feces or urine, which eliminates the need for an external pouch. The continent ileostomy is made from part of the ileum and is flushed a number of times each day to clean out the effluent. An ileoanal ostomy is a pouch created above the anal sphincter and is also created from a portion of the ileum. Two types of internal urinary diversions may be created from part of the intestine. The first is an orthotopic neobladder, where a bladder is created and placed in the body at a normal bladder position; over time, with continent training, the patient can learn to void normally. The second type is a continent urinary reservoir, where a pouch is created from part of the intestine, and a catheter is inserted a number of times during the day to remove the urine (Perry et al., 2014; United Ostomy Association of America, 2011).
Physical and Emotional Assessment
Patients may have co-morbidities that affect their ability to manage their ostomy care. Conditions such as arthritis, vision changes, Parkinson’s disease, or post-stroke complications may hinder a patient’s coordination and function to manage the ostomy. In addition, the emotional burden of coping with an ostomy may be devastating for some patients and may affect their self-esteem, body image, quality of life, and ability to be intimate. It is common for ostomy patients to struggle with body image and an altered pattern of elimination. Ensure the patient has the appropriate referrals to the wound and ostomy nurse and social workers, as well as access to support groups or online support groups. As a health care provider, be very aware of non-verbal cues: take care not to show disgust at the ostomy or at odour that may be present when changing an appliance or pouching system (Perry et al., 2014).
Checklist 87 reviews the steps to change an ostomy pouching system (ostomy appliance).
Checklist 87: Changing a Pouching System/Ostomy Appliance (Ileostomy or Colostomy)
Disclaimer: Always review and follow your hospital policy regarding this specific skill.
Safety considerations:
Pouching system should be changed every 4 to 7 days, depending on the patient and type of pouch.
Always consult a wound care specialist or equivalent if there is skin breakdown, if the pouch leaks, or if there are other concerns related to the pouching system.
Patients should participate in the care of their ostomy, and health care providers should promote patient and family involvement.
Encourage the patient to empty the pouch when it is one-quarter to one-half full of urine, gas, or feces.
Ostomy product choices are based on the patient’s needs and preference.
Follow all post-operative assessments for new ostomies according to agency policy.
Medications and diet may need adjusting for new ileostomies/ colostomies.
An ostomy belt may be used to help hold the ostomy pouch in place.
Factors that affect the pouching system include sweating, high heat, moist or oily skin, and physical exercise.
Always treat minor skin irritations right away. Skin that is sore, wet, or red is difficult to seal with a flange for a proper leakproof fit.
Steps
Additional Information
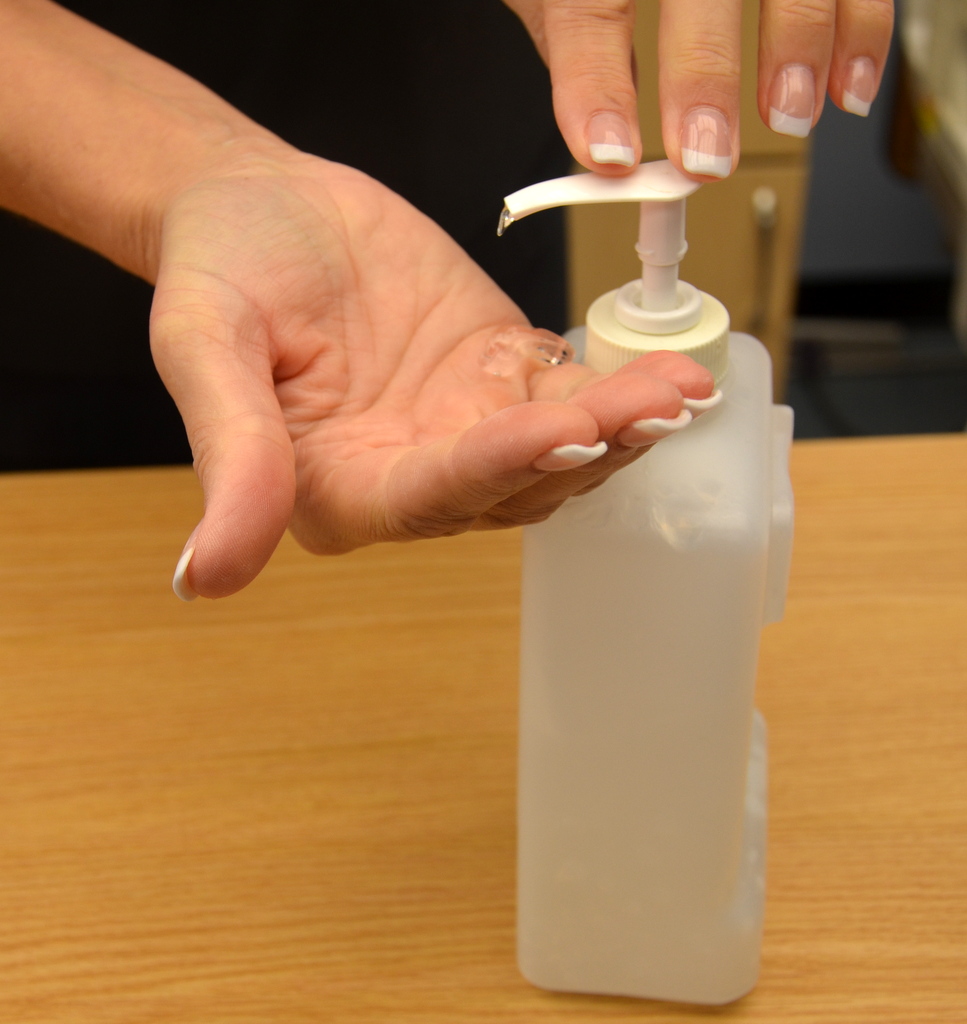
1. Perform hand hygiene.
This prevents the spread of microorganisms.
Hand hygiene with ABHR
2. Gather supplies.
Supplies include flange, ostomy bag and clip, scissors, stoma measuring guide, waterproof pad, pencil, adhesive remover for skin, skin prep, stomahesive paste or powder, wet cloth, non-sterile gloves, and additional cloths.Ostomy supplies
3. Identify the patient and review the procedure. Encourage the patient to participate as much as possible or observe/assist patient as they complete the procedure.
Proper identification complies with agency policy.
Encouraging patients to participate helps them adjust to having an ostomy.
4. Create privacy. Place waterproof pad under pouch.
The pad prevents the spilling of effluent on patient and bedsheets.
5. Apply gloves. Remove ostomy bag, and measure and empty contents. Place old pouching system in garbage bag.
Remove ostomy bag from flange
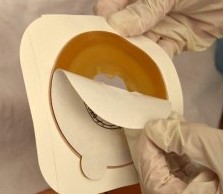
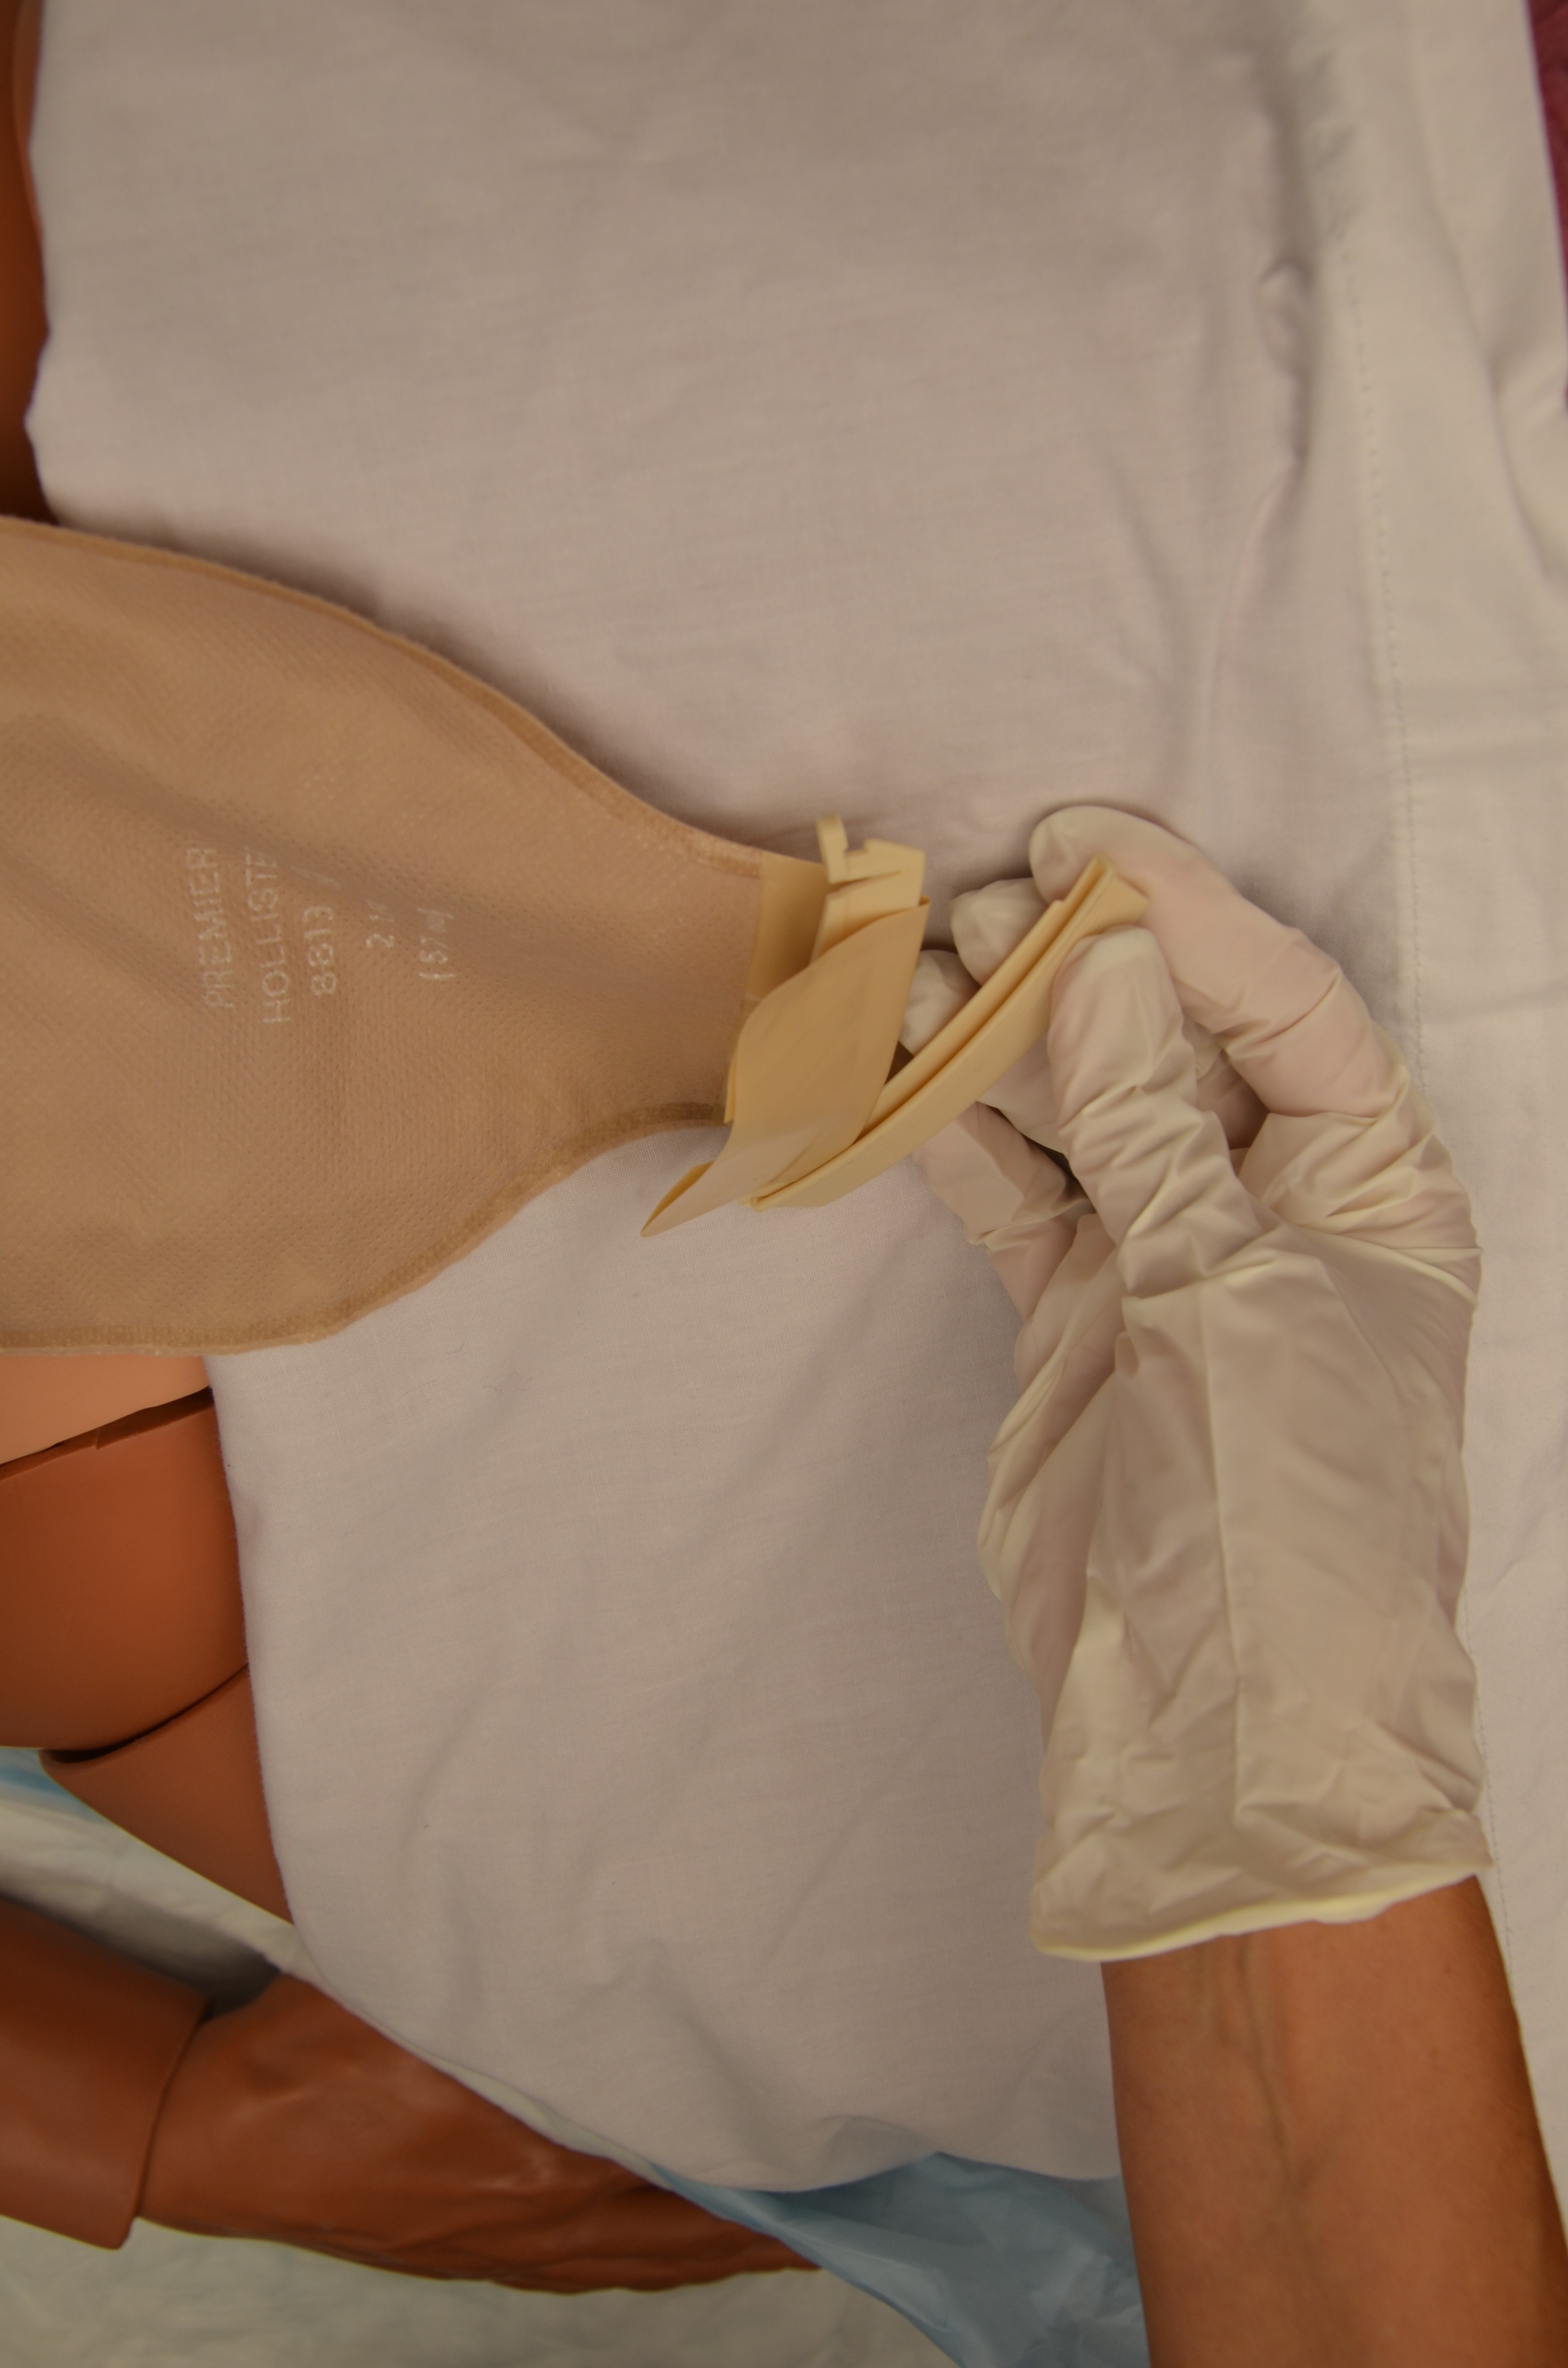
6. Remove flange by gently pulling it toward the stoma. Support the skin with your other hand. An adhesive remover may be used.
If a rod is in situ, do not remove.
Gentle removal helps prevent skin tears. An adhesive remover may be used to decrease skin and hair stripping.
Remove flange
A rod may be used during the formation of a stoma. It can only be removed by a physician or wound care nurse. If a rod is in place, it can be slid to allow the pouch to be removed.
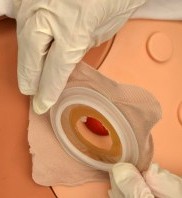
7. Clean stoma gently by wiping with warm water. Do not use soap.
Aggressive cleaning can cause bleeding. If removing stoma adhesive paste from skin, use a dry cloth first.
Clean stoma and peristomal skin
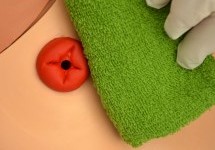
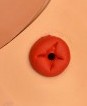
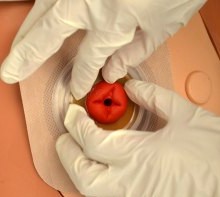
8. Assess stoma and peristomal skin.
A stoma should be pink to red in colour, raised above skin level, and moist.
Assess stoma
Skin surrounding the stoma should be intact and free from wounds, rashes, or skin breakdown. Notify wound care nurse if you are concerned about peristomal skin.
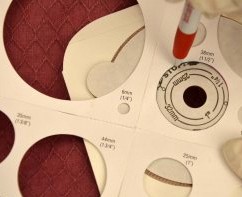
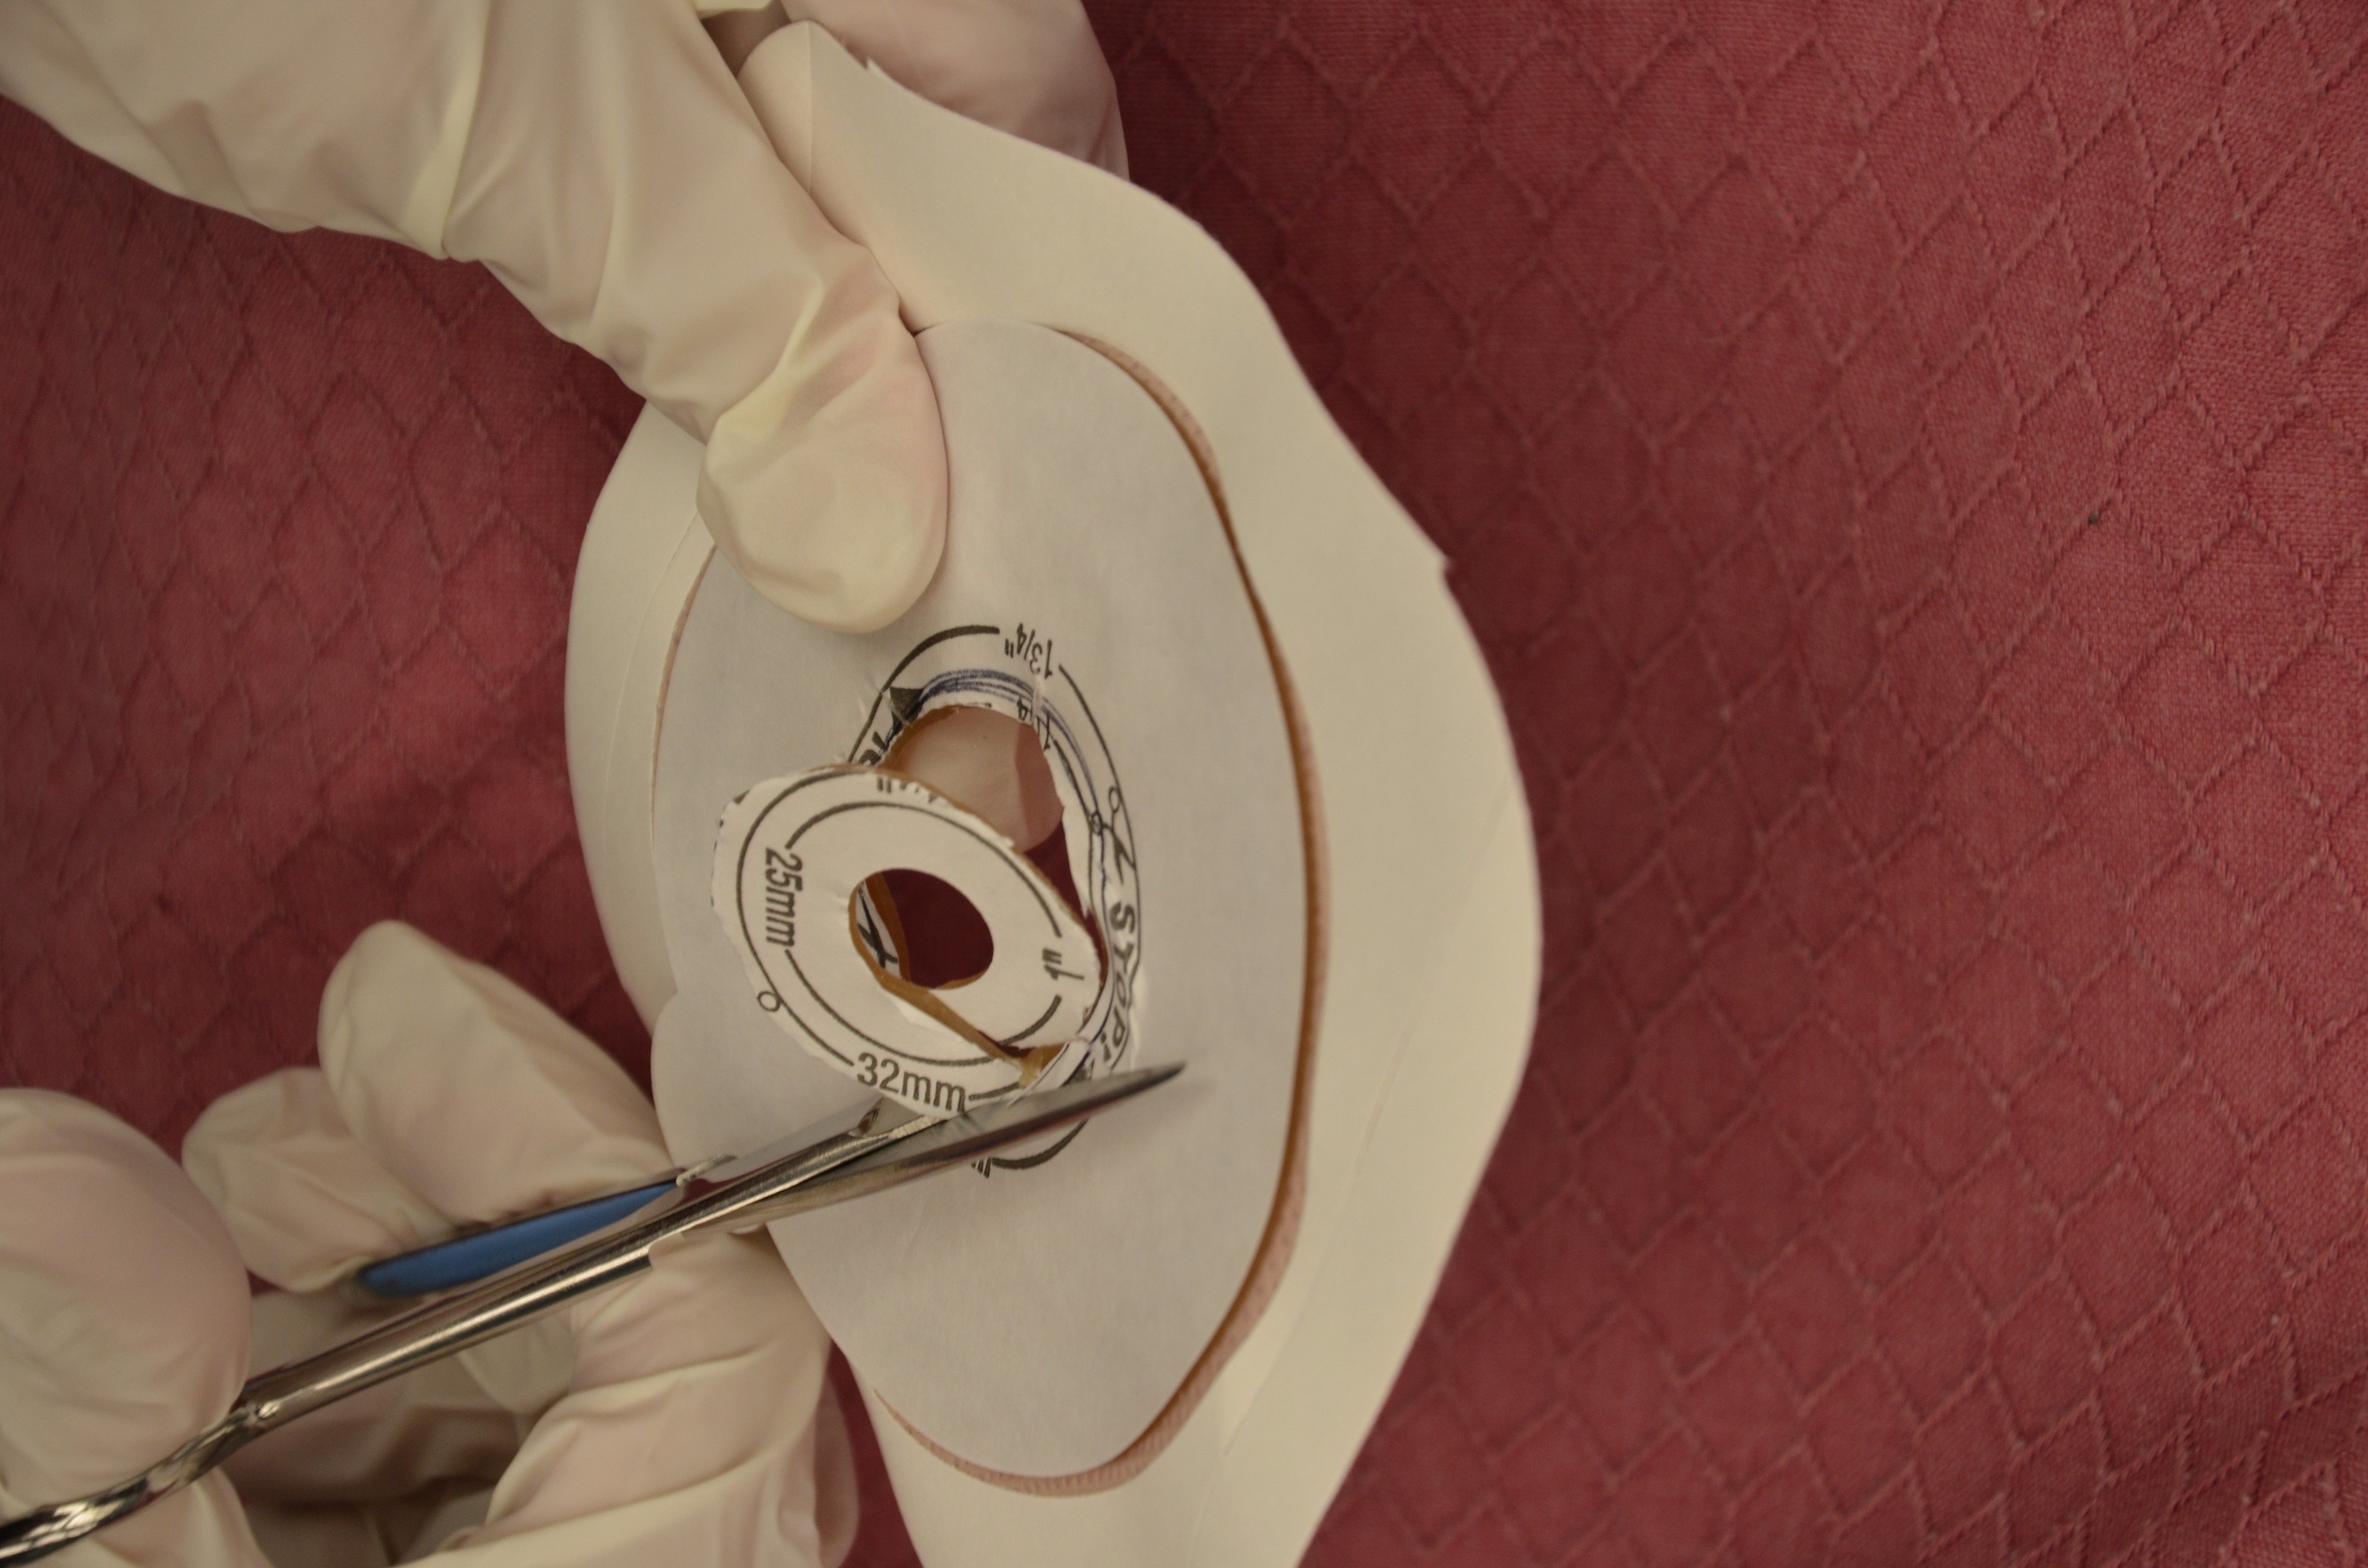
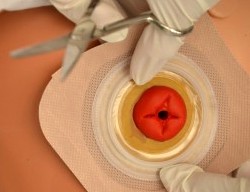
9. Measure the stoma diameter using the measuring guide (tracing template) and cut out stoma hole.
Trace diameter of the measuring guide onto the flange, and cut on the outside of the pen marking.
The opening should be 2 mm larger than the stoma size.
Keep the measurement guide with patient supplies for future use.
Trace templateOnce size is traced onto back of flange, cut out size to fit stomaAssess flange for proper fit to stoma
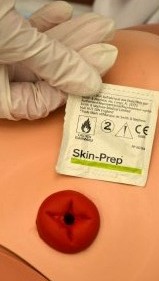
10. Prepare skin and apply accessory products as required or according to agency policy.
Accessory products may include stomahesive paste, stomahesive powder, or products used to create a skin sealant to adhere pouching system to skin to prevent leaking.
Wet skin will prevent the flange from adhering to the skin.
Peristomal skin prepStomahesive paste
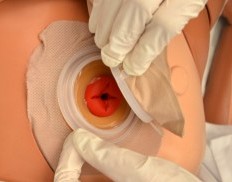
11. Remove inner backing on flange and apply flange over stoma. Leave the border tape on. Apply pressure. Hold in place for 1 minute to warm the flange to meld to patient’s body. Then remove outer border backing and press gently to create seal.
If rod is in situ, carefully move rod back and forth but do not pull up on rod.
The warmth of the hand can help the appliance adhere to the skin and prevent leakage.
Remove backing from flangeApply flange around stomaPress gently to create seal
12. Apply the ostomy bag. Attach the clip to the bottom of the bag.
This step prevents the effluent from soiling the patient or bed.
Apply ostomy pouchAttach clip to bottom of bag
13. Hold palm of hand over ostomy pouch for 2 minutes to assist with appliance adhering to skin.
The flange is heat activated.
14. Clean up supplies, and place patient in a comfortable position. Remove garbage from patient’s room.
Removing garbage helps decrease odour.
15. Perform hand hygiene.
This minimizes the transmission of microorganisms.
16. Document procedure.
Follow agency policy for documentation. Document appearance of stoma and peristomal skin, products used, and patient’s ability to tolerate procedure and assistance with procedure.
Data source: BCIT, 2015b; Berman & Snyder, 2016; Perry et al., 2014.
Special Considerations
When patients are discharged from an acute care facility, ensure they have referrals to a community nurse, are able to empty their pouch system independently or with assistance from a caregiver, have spare supplies, and know the signs and symptoms of complications and where to seek help.
Patients should be seen by the wound care or ET nurse and have a dietitian referral for new dietary needs related to the ileostomy or colostomy (Registered Nurses Association of Ontario, 2009).
The ostomy bag may become filled with gas from the intestine and may let out a “farting” sound that is usually quiet, but uncontrollable. Patients may “burp” the bag through the opening at the top in a two-piece system by opening a corner of the ostomy pouch from the flange to let the air out. Dietary restrictions may also help decrease the amount of gas produced by the intestines (Ostomy Canada Society, n.d.).
Urostomy Care
A urostomy is similar to a fecal ostomy, but it is an artificial opening for the urinary system and the passing of urine to the outside of the abdominal wall through an artificially created hole called a stoma. A urostomy is created for the following reasons:
Bladder cancer
Cystectomy
Trauma/surgery
Incontinence
Painful bladder/overactive bladder
Congenital abnormalities
Conversion of continent urinary diversion to incontinent stoma
Neurological conditions and diseases
Spinal cord injury
Chronic inflammation of bladder
Interstitial cystitis
Radiation damage
Inability to manage a continent urinary diversion or a neobladder
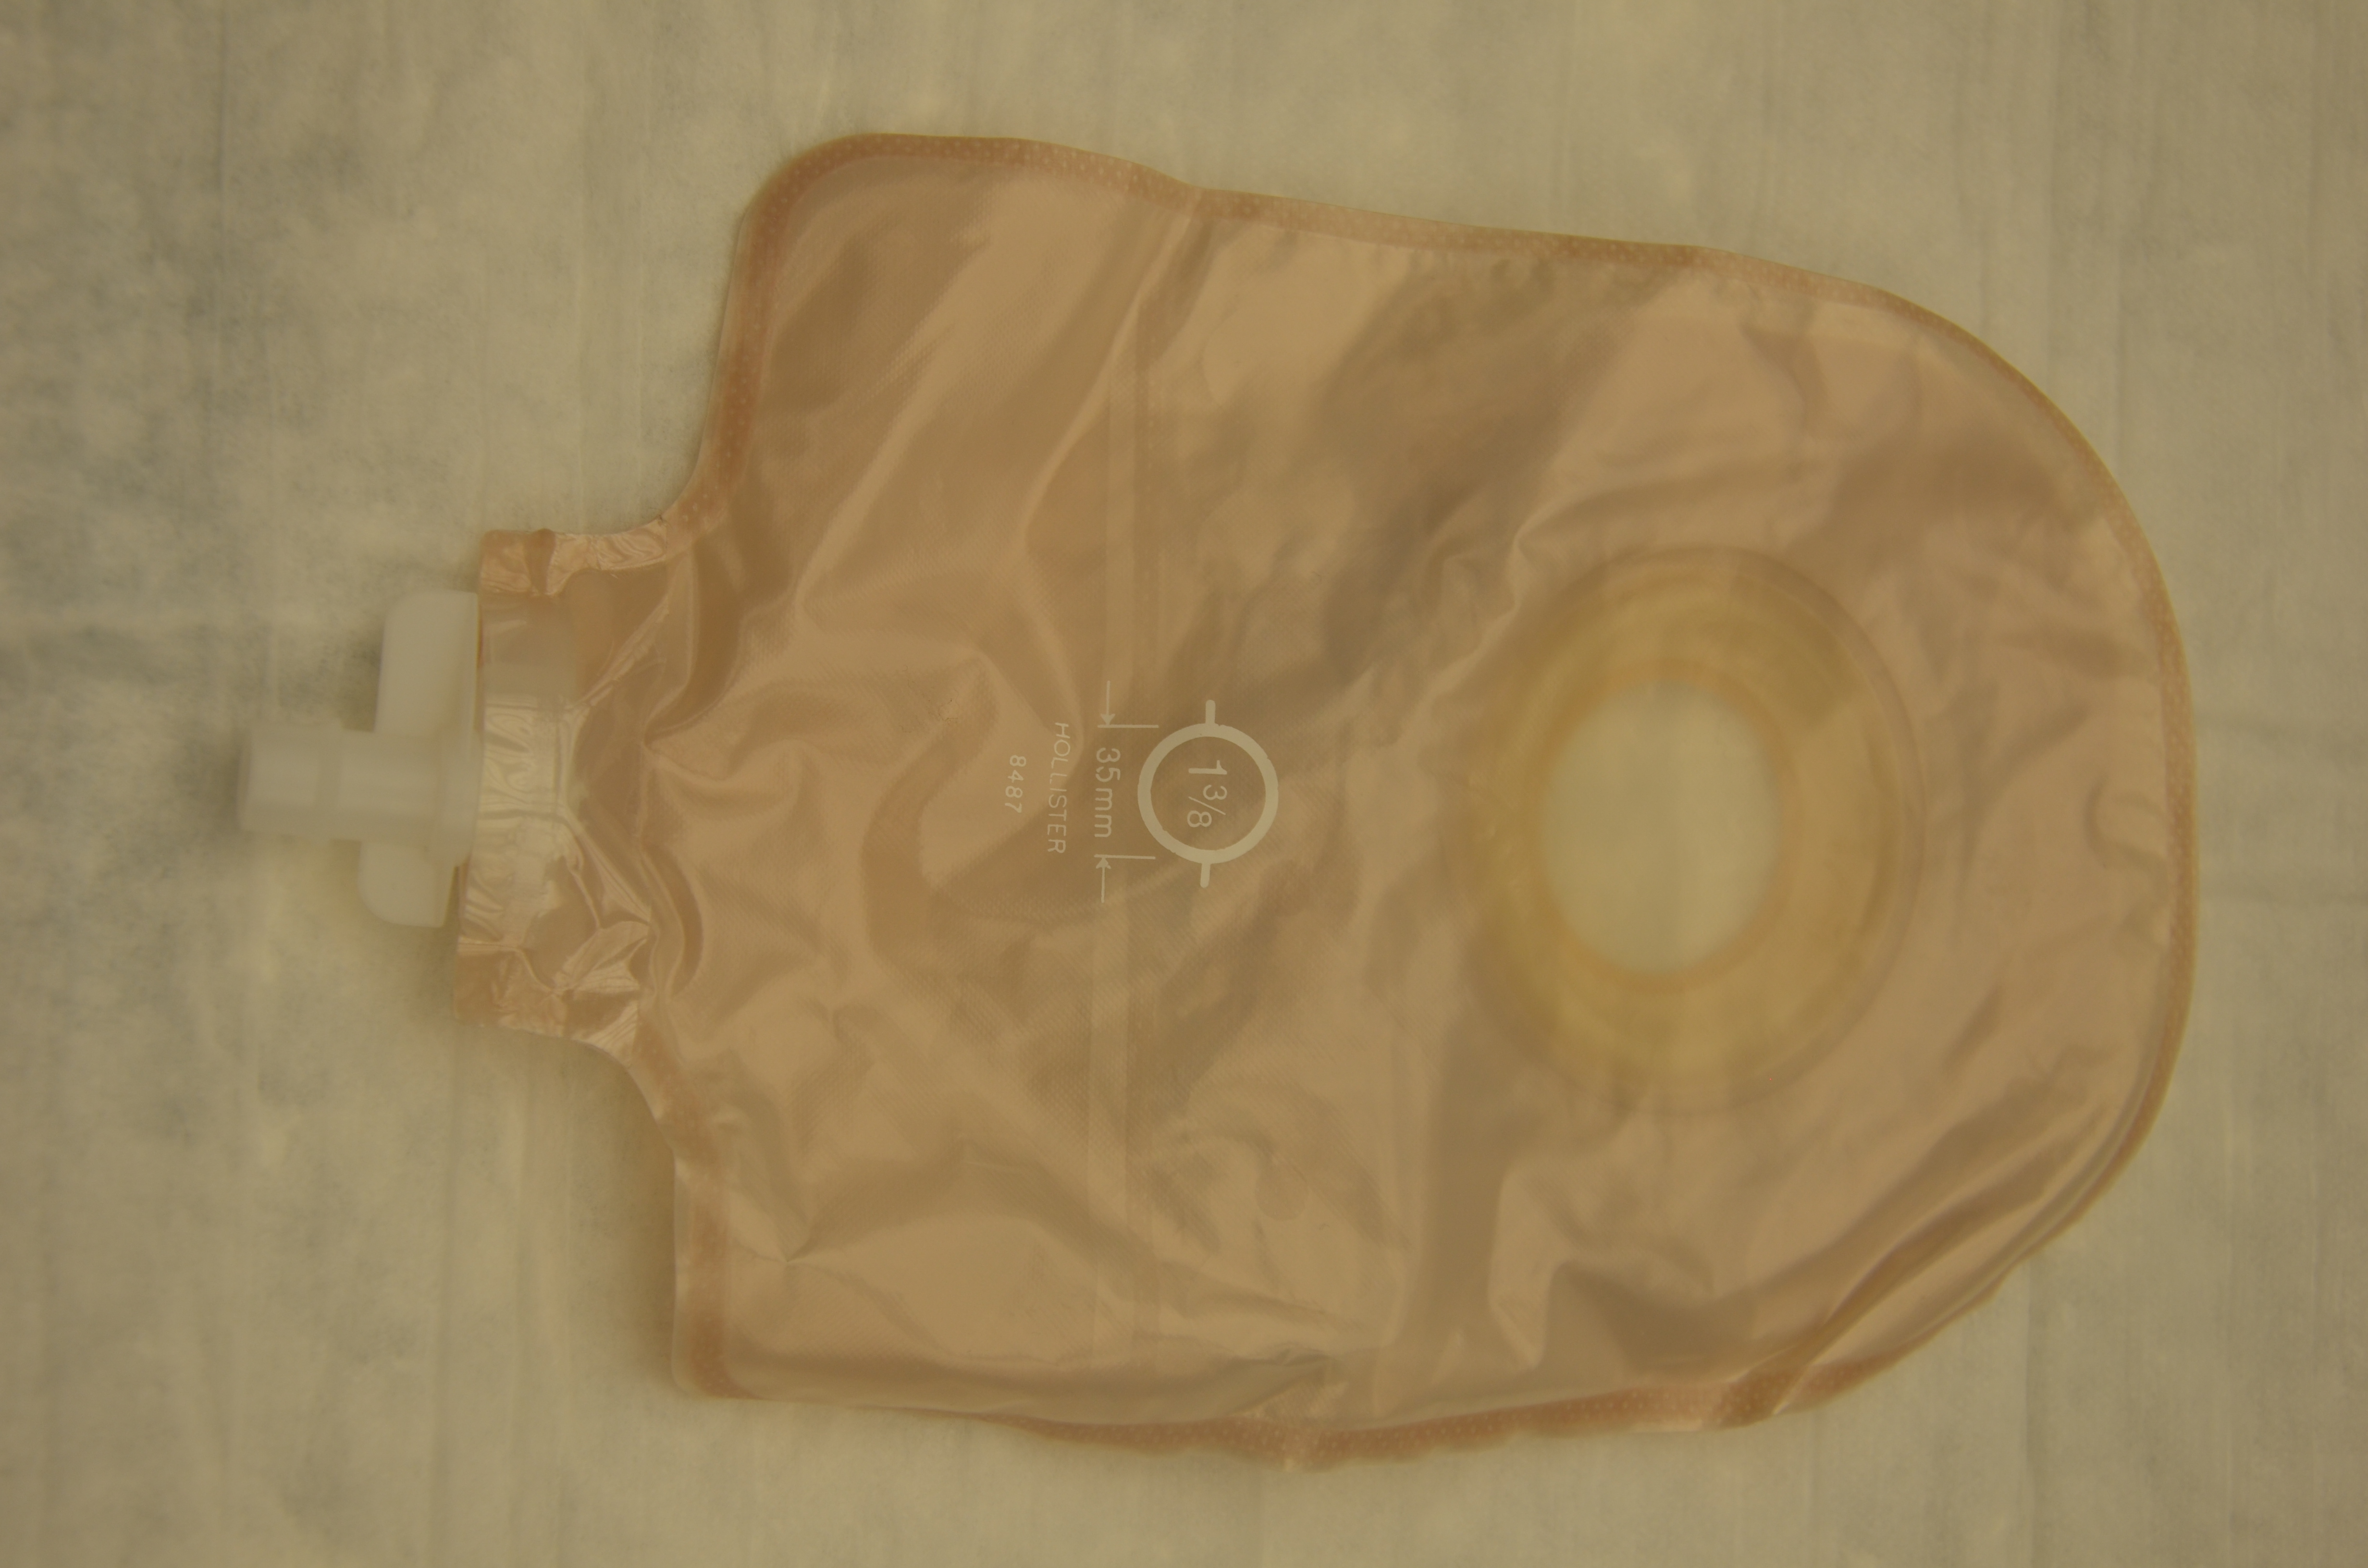
A urostomy patient has no voluntary control of urine, and a pouching system must be used and emptied regularly. Many patients empty their urostomy bag every two to four hours, or as often as they regularly used the bathroom prior to their surgery. Urostomy pouches (see Figure 10.9) have a drain at the end, and the pouch should be emptied when one-third full. The pouch may also be attached to a drainage bag for overnight drainage. Patients with a urostomy are more at risk for urinary tract infections (UTIs) and should be educated on the signs and symptoms of such infections (Perry et al., 2014).
Figure 10.9 Urostomy pouch
Checklist 88 describes how to change a urostomy pouch.
Checklist 88: Changing a Urostomy Pouch/Appliance
Disclaimer: Always review and follow your hospital policy regarding this specific skill.
Safety considerations:
Urine flows continually from a urostomy; thus, applying a pouch is more challenging than applying a regular ostomy.
A stent is usually placed in the stoma post-operatively to prevent stenosis of the ureters. The stents are usually removed in the hospital or at the first physician visit.
Sterile technique must be used when changing a urostomy pouch on a new urostomy. Always follow agency policy.
Since bacteria grow readily in urine, it is important to empty the pouch regularly and use a pouch with an anti-reflux valve to prevent backup of urine into the urostomy.
An ostomy belt may be used to hold the pouch in place.
A urostomy pouch should be changed every three to seven days, depending on the supplies used. It is best to change it before it leaks.
It is best to wait one or two hours after drinking fluids to change a urostomy appliance.
Sterile supplies are used in acute care with a fresh post-surgical urostomy. A patient in the community may not use sterile supplies, but strict adherence to proper hand hygiene is required to prevent infections of the bladder, kidney, or urinary tract.
Never place anything inside the stoma.
Bacteria can rapidly replicate and cause an infection. Educate the patient on the importance of proper hand hygiene and keeping supplies clean.
Factors that affect the pouching system include sweating, high heat, moist or oily skin, and physical exercise.
Always treat minor skin irritations right away. Skin that is sore, wet, or red is difficult to seal with a flange for a proper leakproof fit.
Steps
Additional Information
1. Perform hand hygiene and collect supplies.
Hand hygiene reduces the transmission of microorganisms.
Supplies include urostomy bag (one- or two-piece system), measuring guide, urinary collection bag, non-sterile gloves, scissors, pencil, adhesive remover, skin barrier pad, wick made from sterile gauze (rolled 2 x 2 gauze), waterproof garbage bag, waterproof pad, cleaning cloth, and drying cloth.
2. Identify the patient and review the procedure. Encourage patient to participate as much as possible or observe/assist as they complete the procedure.
Proper identification complies with agency policy.
Encouraging patients to participate helps them adjust to having an ostomy.
3. Create privacy and place waterproof pad under pouch.
This maintains patient dignity and the pad protects the patient’s bed.
4. Apply non-sterile gloves. Empty and measure urostomy contents. Discard old urostomy pouch.
A full urostomy bag may spill on the patient or bed.
5. Remove flange by gently pulling it toward the stoma. Support the skin with your other hand. An adhesive remover may be used. If stent is in place, do not remove it.
Gentle removal helps prevent skin tears. An adhesive remover may be used to decrease skin and hair stripping.
6. Place rolled gauze at stoma opening. Maintain gauze at the stoma opening continuously during pouch measurement and change.
This prevents urine from spilling on cleaned skin and new pouching system.
7. While keeping rolled gauze in contact with the stoma, cleanse peristomal skin gently with warm tap water using washcloth; do not scrub skin. If you touch stoma, minor bleeding is normal. Pat skin dry.
Aggressive cleaning can cause bleeding. If removing stomahesive paste from skin, use a dry cloth first.
8. Assess stoma and peristomal skin.
A stoma should be pink to red in colour, raised above skin level, and moist.
Skin surrounding the stoma should be intact and free from wounds, rashes, or skin breakdown. Notify wound care nurse if concerned about peristomal skin.
9. Measure the stoma diameter using the measuring guide (tracing template) and cut out stoma hole.
Trace diameter of the measuring guide onto the flange and cut on the outside of the pen marking.
Customizing the opening of the flange is important to ensure proper fit and prevent leakage.The opening should be 2 mm larger than the stoma.
Keep the measurement guide with patient supplies for future use.
10. Prepare the skin and apply accessory products as required or according to agency policy.
Accessory products may include stomahesive paste, stomahesive powder, or products used to create a skin sealant to adhere pouching system to skin to prevent leaking.
Wet skin will not allow for proper adhesion of flange.
11. Remove inner backing on flange.
Prepare flange to be placed on stoma.
12. Remove wick from stoma and apply flange around stoma. Leave the border tape on. Apply pressure. Hold in place for 1 minute to warm the flange to meld to patient’s body. Then remove border backing and attach to patient.
The flange is heat activated.
13. Apply the urostomy bag by ensuring the drain is turned to the “off” position, or connect the urostomy bag to a drainage bag at the bedside.
This prevents effluent from soiling the patient or bed.
If drainage bag is used, ensure the bag is hanging below the urostomy to prevent backflow of urine into the stoma.
14. Hold palm of hand over pouch for 2 minutes to assist with appliance adhering to skin.
Pouches are heat activated and adhere more effectively when heat is applied.
15. Remove waterproof pad, clean up supplies, place patient in a comfortable position, and perform hand hygiene.
This step prevents contamination from equipment and reduces the transmission of microorganisms.
Data source: BCIT, 2015b; Perry et al., 2014; Vancouver Coastal Health, 2014b
Special Considerations:
Teach patients how to change a urostomy bag even if they appear disinterested. Do not insist that they look at the ostomy; allow them time to adjust.
Educate patients on the importance of drinking adequate fluids each day (unless contraindicated) to prevent a UTI. Patients should drink at least 2 litres of fluid per day (unless contraindicated).
Some mucous in the urine is normal, but blood is not a normal or expected finding.
Educate patients on the signs and symptoms of a UTI, which include fever, flank (back) pain, cloudy or smelly urine, and feeling of malaise.
Educate patients on where to buy supplies and which supplies to have on hand in case the flange leaks and needs replacing (Perry et al., 2014).
Critical Thinking Exercises
What dietary or medication changes might be considered for a patient who has a new ileostomy and no longer has a small bowel?
A patient with a new colostomy refuses to look at his stoma or participate in changing the pouching system. What are some suggestions to help your patient adjust to the stoma?