Chapter 8. Intravenous Therapy

8.7 Transfusion of Blood and Blood Products

All health care practitioners who administer blood or blood products must complete specific training for safe transfusion practices and be competent in the transfusion administration process. Always refer to your agency policy for guidelines for preparing, initiating, and monitoring blood and blood product transfusions. These guidelines apply to adult patients only.

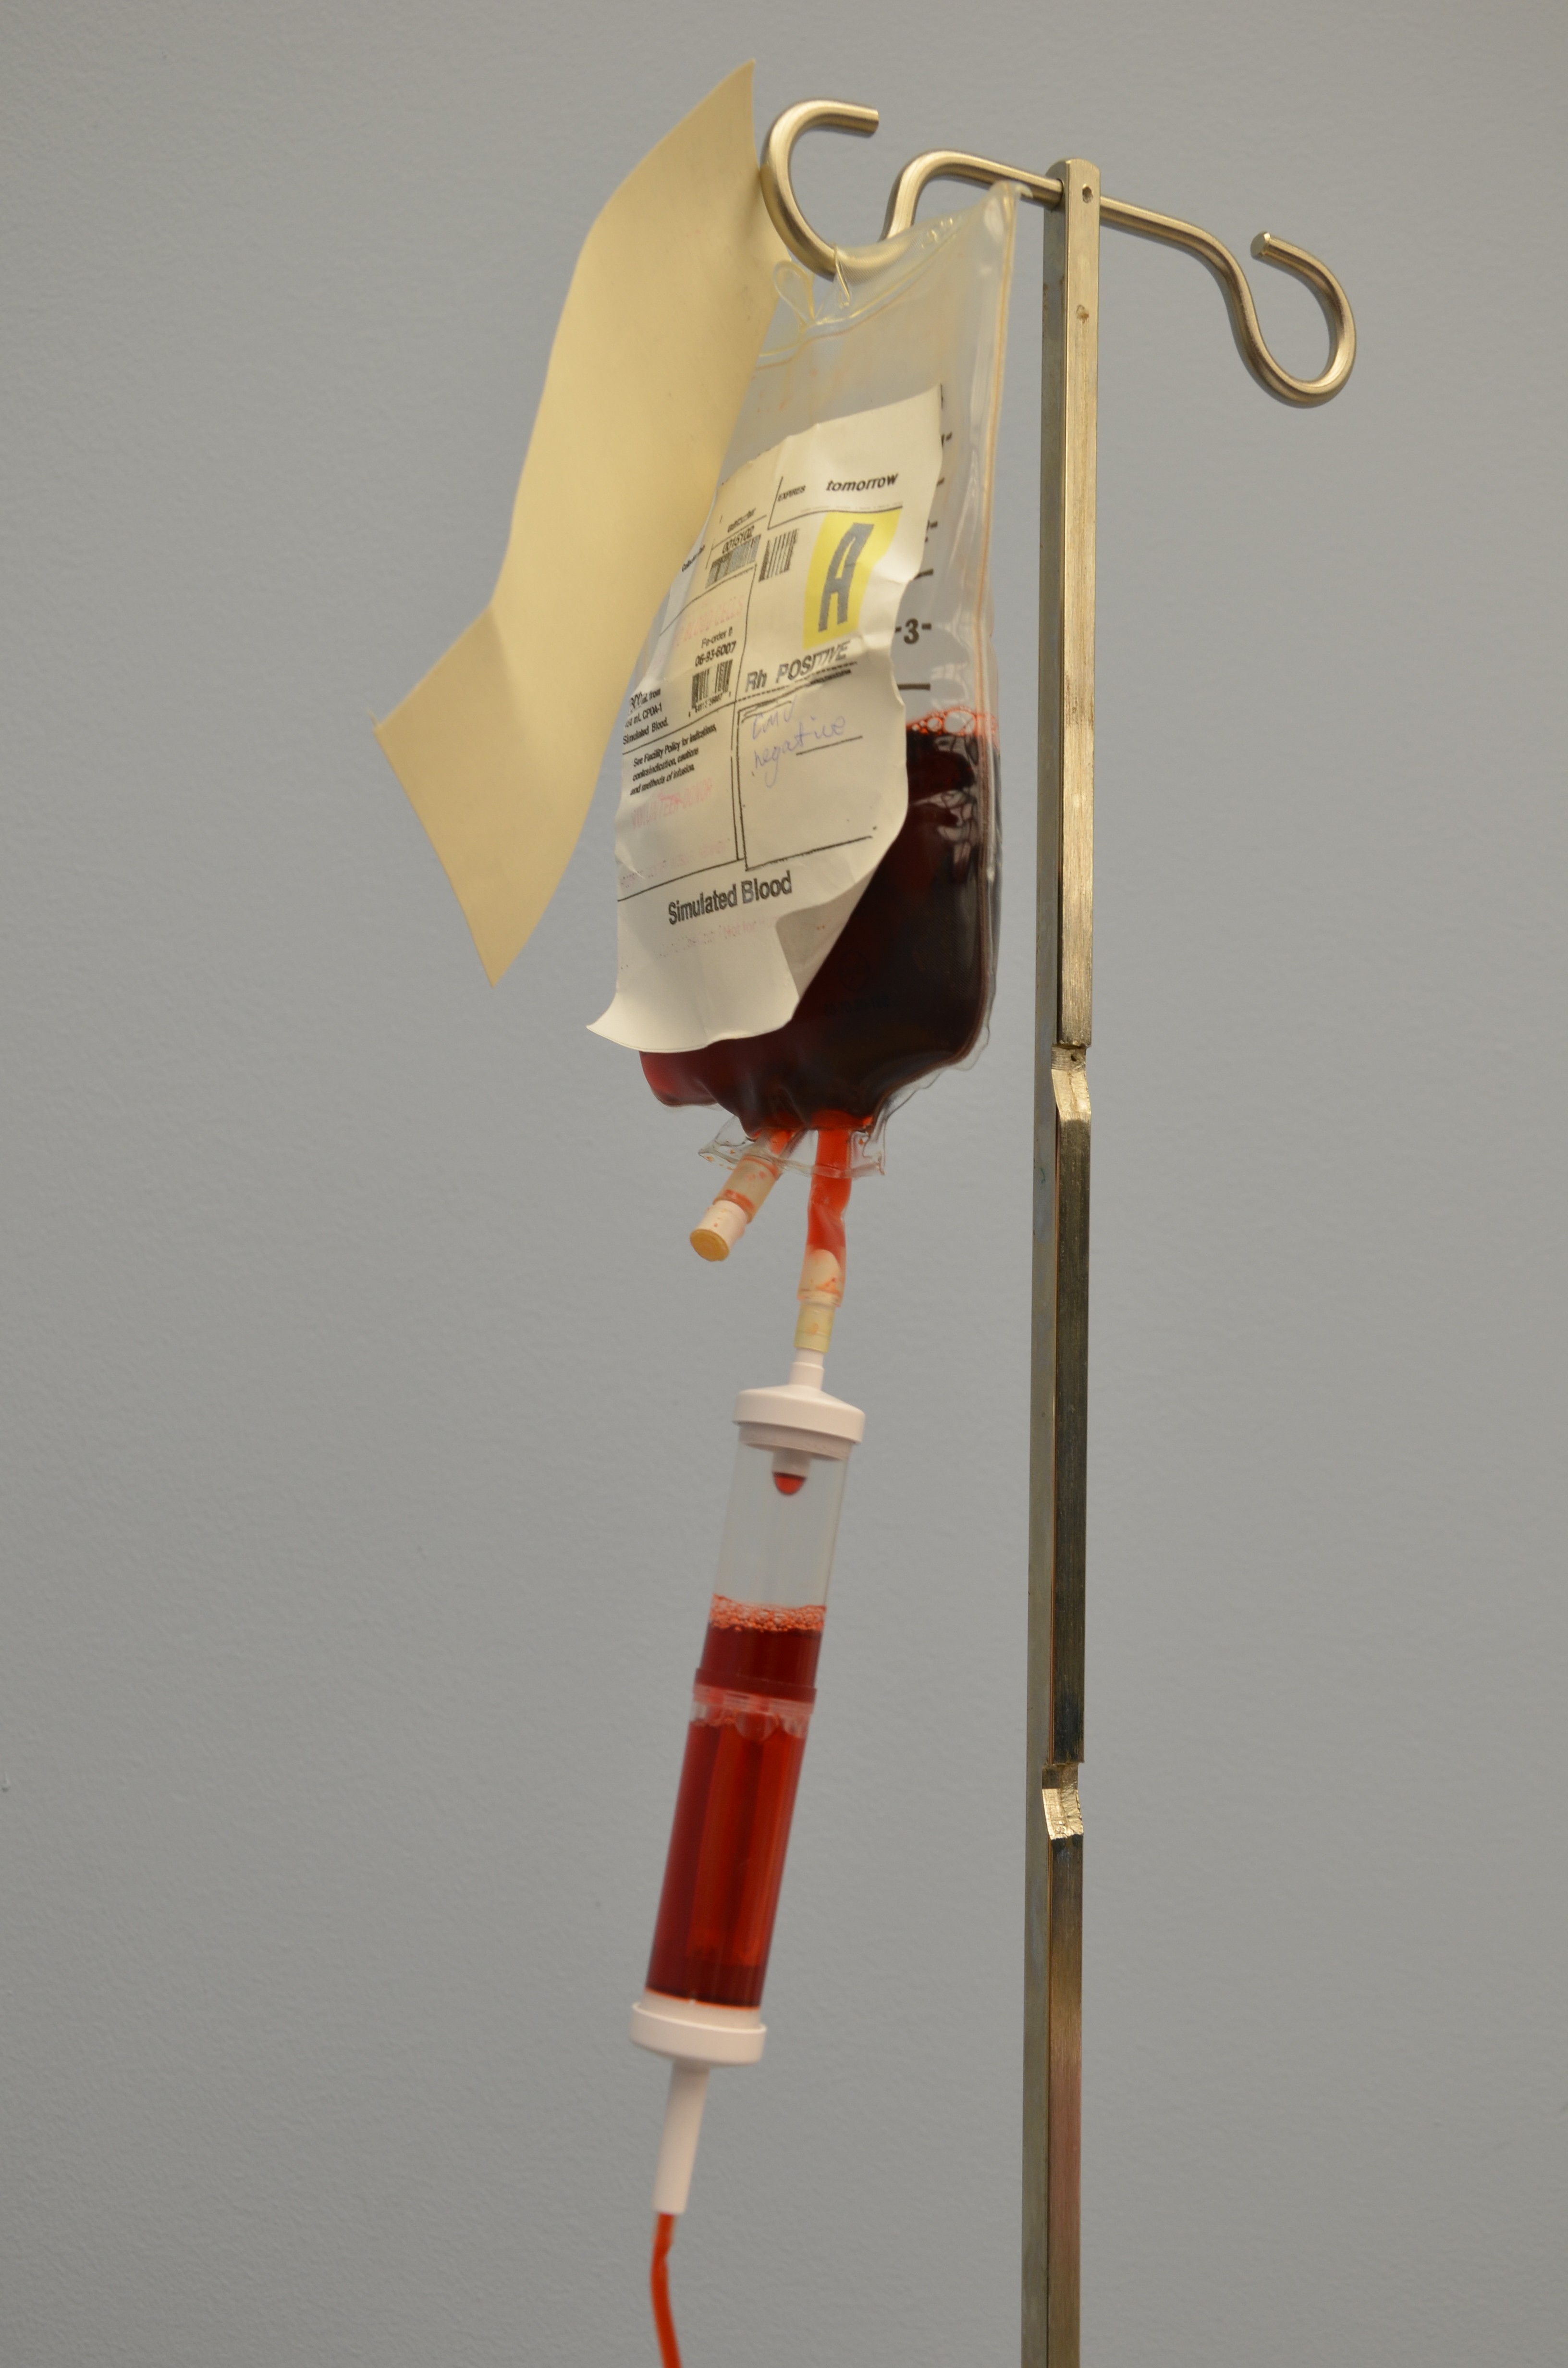
The transfusion of blood or blood products (see Figure 8.8) is the administration of whole blood, its components, or plasma-derived products. The primary indication for a red blood cell (RBC) transfusion is to improve the oxygen-carrying capacity of the blood (Canadian Blood Services, 2013). A health care provider order is required for the transfusion of blood or blood products. RBC transfusions are indicated in patients with anemia who have evidence of impaired oxygen delivery. For example, individuals with acute blood loss, chronic anemia and cardiopulmonary compromise, or disease or medication effects associated with bone marrow suppression may be candidates for RBC transfusion. In patients with acute blood loss, volume replacement is often more critical than the composition of the replacing fluids (Canadian Blood Services, 2013). Transfusions can restore blood volume, restore oxygen-carrying capacity of blood with red blood cells, and provide platelets and clotting factors. The most common type of blood transfusion is blood that is donated by another person (allogeneic). Autologous transfusion is the transfusion of one’s own blood (Perry et al., 2014).

Red Blood Cells and Blood IV tubing
Figure 8.8 Red blood cells and blood IV tubing

Transfusion therapy is considered safe, and stringent precautions are followed in the collection, processing, and administration of blood and blood components. However, transfusions still carry risks such as incompatibility, human error, and disease transmission, and blood transfusion must be taken seriously at all times. Incompatibility can be decreased by using irradiated red blood cells or leukocyte-reduced blood. The majority of blood transfusion complications are a result of human error (Perry et al., 2014).

Compatibility testing is vital for all recipients of blood or blood products. Recipients must be transfused with an ABO group specific to their own blood type or ABO group-compatible. There are three types of blood typing systems: ABO, Rh, and human leukocyte antigen (HLA). For more information on these, refer to the online resources at the end of this chapter. It is vital to understand what types of blood groups are compatible for transfusions (Canadian Blood Services, 2013).

When administering blood and blood products, it is important to know the patient’s values and beliefs regarding blood products. Some groups of individuals, mainly Jehovah Witnesses, will refuse blood transfusions or blood products based on religious beliefs. These individuals will refuse transfusion of whole blood and primary blood components but may accept transfusion of derivatives of primary blood components such as albumins solutions, clotting factors and immunoglobulins. Always assess each individual preference to establish if a blood component is an acceptable treatment to manage their illness or condition (Canadian Blood Services, 2007).

When managing blood transfusions, it is important to prevent complications from occurring and to identify issues promptly to manage reactions effectively. Transfusion reactions (mild to life-threatening) may occur despite all safety measures taken. All transfusion reactions and transfusion errors must be reported to the hospital’s transfusion services (blood bank). It is imperative to know what signs and symptoms to look for, and to educate your patient on what to report and when to report potential transfusion reactions. Mild to severe reactions may include (Canadian Blood Services, 2011):

  • Temperature ≥ 38.0 C or change of 1°C from pretransfusion value within 15 minutes after initiation of transfusion
  • Acute or delayed hemolytic transfusion reaction
  • Hypotension/shock
  • Rigors
  • Anxiety
  • Back or chest pain
  • Nausea/vomiting
  • Shortness of breath (dyspnea)
  • Hemoglobinuria
  • Bleeding/pain at IV site
  • Tachycardia/arrhythmia
  • Generalized flushing
  • Rash ≥ 25% of body
  • Urticaria and other anaphylaxis reactions
  • Hemolysis after transfusion
  • Cytopenias after transfusion
  • Virus, parasite, and prion infections
  • Non-immunological reactions including infection
  • Circulatory overload
  • Hypothermia

For more information on types of reactions, signs and symptoms, and treatments, review the article adverse events related to blood transfusions, or see the online resources at the end of this chapter. If patient has a blood transfusion reaction, always follow agency policy to manage mild to severe blood reactions. In general, if a reaction occurs, follow the steps outlined in Checklist 73.

Checklist 73: Managing a Blood or Blood Product Transfusion Reaction
Disclaimer: Always review and follow your hospital policy regarding this specific skill.
Safety considerations: 
  • Always review your agency’s algorithm for managing mild to severe reactions. If a reaction is mild (e.g., fever), and without any other complications, a patient may continue the transfusion if monitored closely. Most other transfusion reactions require the transfusion to be stopped immediately.
  • A blood transfusion reaction may occur 24 to 48 hours post-transfusion.
  • Each separate unit presents a potential for an adverse reaction.
  • Follow emergency transfusion guidelines when dealing with an emergency blood or blood product transfusion.
  • Be aware of which types of blood or blood products cause the most types of transfusion reactions.
  • Be aware of the types of patients at high risk for blood or blood product transfusion reactions.
  • Always have emergency equipment and medications available during a transfusion. For example, epinephrine IV should always be readily available.

Steps

 Additional Information

1. Stop transfusion immediately. The severity of a blood transfusion reaction is related to the amount of product infused and the amount of time it has been infusing.
2. Keep IV line open with 0.9% saline. Keeps IV site patent for emergency medications if required.
3. Complete cardiovascular and vital signs assessment. Assessment monitors the type and severity of reaction. In addition to assessment:

  • Maintain good urinary output.
  • Avoid fluid overload.
  • Manage DIC (disseminated intravascular coagulation) or hemorrhage if clinically indicated.
  • Provide supportive measures as required (oxygen, etc.).
4. Contact physician for medical assessment and to inform about reaction. The physician responsible for the patient must be informed of all transfusion reactions.
5. Check vital signs every 15 minutes until stable. Vital signs must be monitored to identify improving or worsening condition.
6. Obtain blood and urine samples as soon as possible. Blood and urine samples can help identify the type of blood transfusion reaction.
7. Check all labels, tags, forms, blood order, and patient’s identification band to determine if there is a clerical discrepancy. Clerical errors account for the majority of blood transfusion reactions.
8. Keep all blood and IV tubing for further testing by the blood bank for verification of blood product and patient identification. All blood products and IV tubing are investigated by the transfusion services and reported to Canadian Blood Services and Public Health Agency of Canada. These professional bodies are responsible for reporting and recording incidents of reactions.
9. Notify blood bank. Notify blood bank when an adverse reaction occurs, even if transfusion is continued.
10. Document as per agency policy. Document time, date, signs and symptoms, type of product, notification to the physician and management of reaction, and patient response to management of reaction.

Documentation includes, but is not limited to:

  • Transfusion reaction form
  • Patient chart
  • Report for transfusion services (blood bank)
  • Adverse event form (Patient Safety Learning System or PSLS)
Data source: Alberta Health Services, 2015a; Canadian Blood Services, 2011; Perry et al., 2014; Vancouver Coastal Health, 2008

In preparation for a blood or blood product transfusion (Alberta Health Services, 2015a, 2015b; Perry et al., 2014; Vancouver Coastal Health, 2008), the steps listed in Checklist 74 must be completed. These steps must be completed before obtaining the blood or blood product from the blood bank.

Checklist 74: Preparing for a Blood or Blood Product Transfusion
Disclaimer: Always review and follow your hospital policy regarding this specific skill.
Safety considerations: 
  • If there is any discrepancy between patient information, group and screen, product ordered, etc., do not proceed. Stop and verify any discrepancies.
  • Be diligent when preparing to infuse blood. Distractions may lead to errors when verifying information.

Steps

 Additional Information

1. Verify the physician’s order for the specific blood or blood product. Order must be verified for the type of product; the amount, date, time, and rate and duration of infusion; any modifications to a blood component (e.g., irradiation); specific transfusion requirements; and possible sequence in which multiple components are to be transfused.

Physician orders for a blood transfusion
2. Verify the health care provider’s orders for any pre- or post-transfusion medications to be administered. Some patients may require Benadryl IV or Tylenol pretransfusion or Lasix post-transfusion.
3. Obtain the patient’s transfusion history, and note any known allergies and previous transfusion reactions. Past complications may require patient to have pre- and post-transfusion medications to prevent further transfusion reactions.
4. Verify that type and cross-match (also known as a G & S) have been completed within the past 96 hours. Verification allows for the identification of any newly developed antibodies, and ensures current compatibility between donor red blood cells and recipient’s plasma. If G & S is outdated or not available, initiate process for new G & S sample.
5. Verify patency of IV site. The patient’s IV cannula must be patent and without complications, such as infiltration or phlebitis. The size of cannula (#18 to #20) must match the guidelines set by Canadian Blood Services.

Assess patency of IV site
6. Ensure appropriate patient identification band is available and legible. To complete all safety identification checks, proper identification must be on the patient.
7. Assess laboratory values, such as hematocrit, coagulation values, and platelet count. This ensures the transfusion is appropriate for the patient.
8. Check that the patient has properly completed and signed the transfusion consent form.

Assess patient’s understanding of the procedure and its rationale. Consent is required for the transfusion of blood and blood components and products.

All blood products must have a consent form signed prior to the transfusion.

Consent
Example of a consent form

Consent is mandatory for all blood and blood product transfusions. Follow agency policy if patient is unable to sign or consent to blood or blood product transfusions.

9. Know the indications for the transfusion. Know why the patient is receiving the transfusion.
10. Obtain and record the patient’s pretransfusion baseline vital signs, including temperature, pulse, respiration, blood pressure, and oxygen saturation level. If the patient is febrile, which means the patient’s temperature is higher than 37.8°C (100°F), notify the health care provider before initiating the transfusion. Pretransfusion vital signs are a mandatory component of blood administration.

Pre-assessment of vital signs
11. Have emergency equipment available at the bedside (oxygen, suction, etc.). Be prepared for potential complications, as prompt intervention may be required to prevent serious complications.

Emergency equipment at bedside
Emergency equipment check at bedside
12. Complete all documentation as required per agency policy. Proper documentation provides evidence that all required procedures have been followed to prepare for a transfusion.
Data source: Alberta Health Services, 2015b; Canadian Blood Services, 2011; Perry et al., 2014; Vancouver Coastal Health, 2008

Checklist 75 provides steps to administering blood and blood products safely in the acute care setting.

Checklist 75: Transfusion of Blood and Blood Products
Disclaimer: Always review and follow your hospital policy regarding this specific skill.
Safety considerations: 
  • No medications may be added to blood units or through IV tubing.
  • Specific blood administration tubing is required for all blood transfusions. Blood tubing is changed every 4 hours or 4 units, whichever comes first.
  • See agency policy for using EID for the administration of blood products.
  • Intravenous immunoglobulin (IVIG) is only compatible with D5W.
  • All blood products taken from the blood bank must be hung within 30 minutes and administered (infused) within 4 hours due to the risk of bacterial proliferation in the blood component at room temperature.

Steps

 Additional Information

1. Verify physician orders and all preparation steps as listed in Checklist 74.
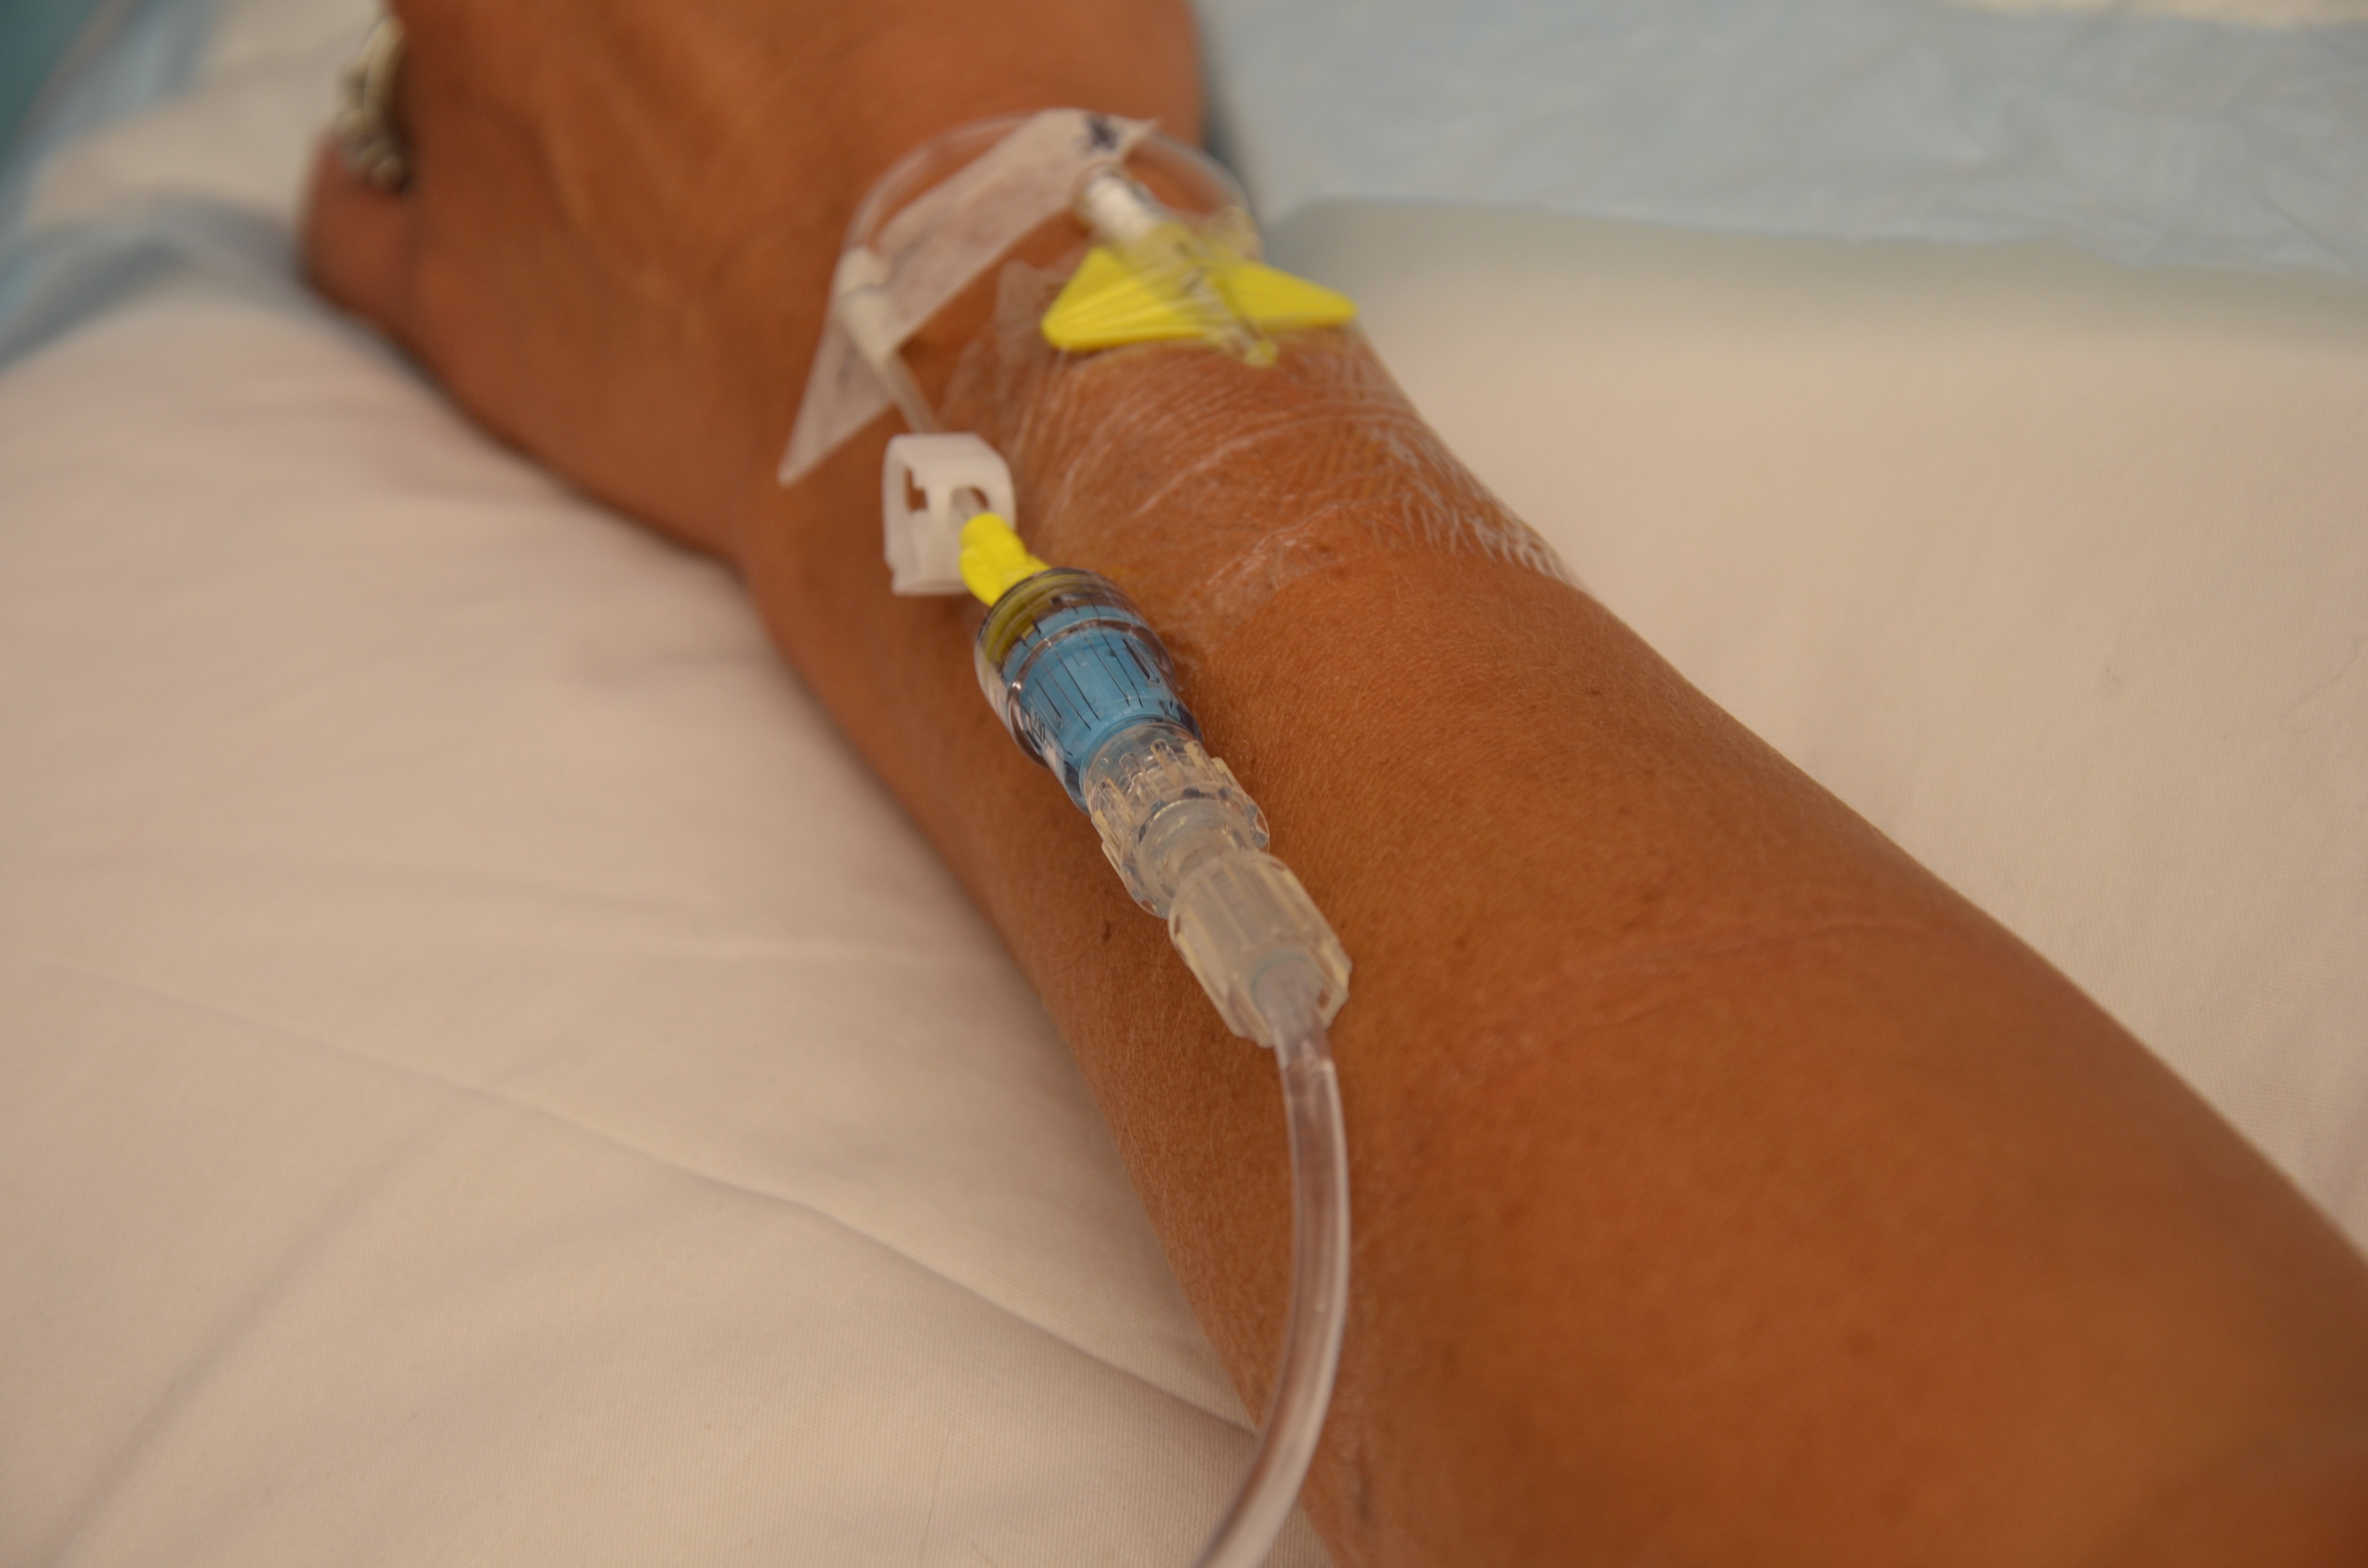
2. Assess or initiate venous access. Appropriate needle gauge is based on clinical status of patient, urgency of transfusion, and venous access:

  • #18 gauge for trauma/surgery
  • #20 to #22 for elective medical/geriatric

Transfusion set must be Luer-locked to a 2.0 ml maximum extension tubing, either directly to cannula or through a Max Plus positive pressure cap.
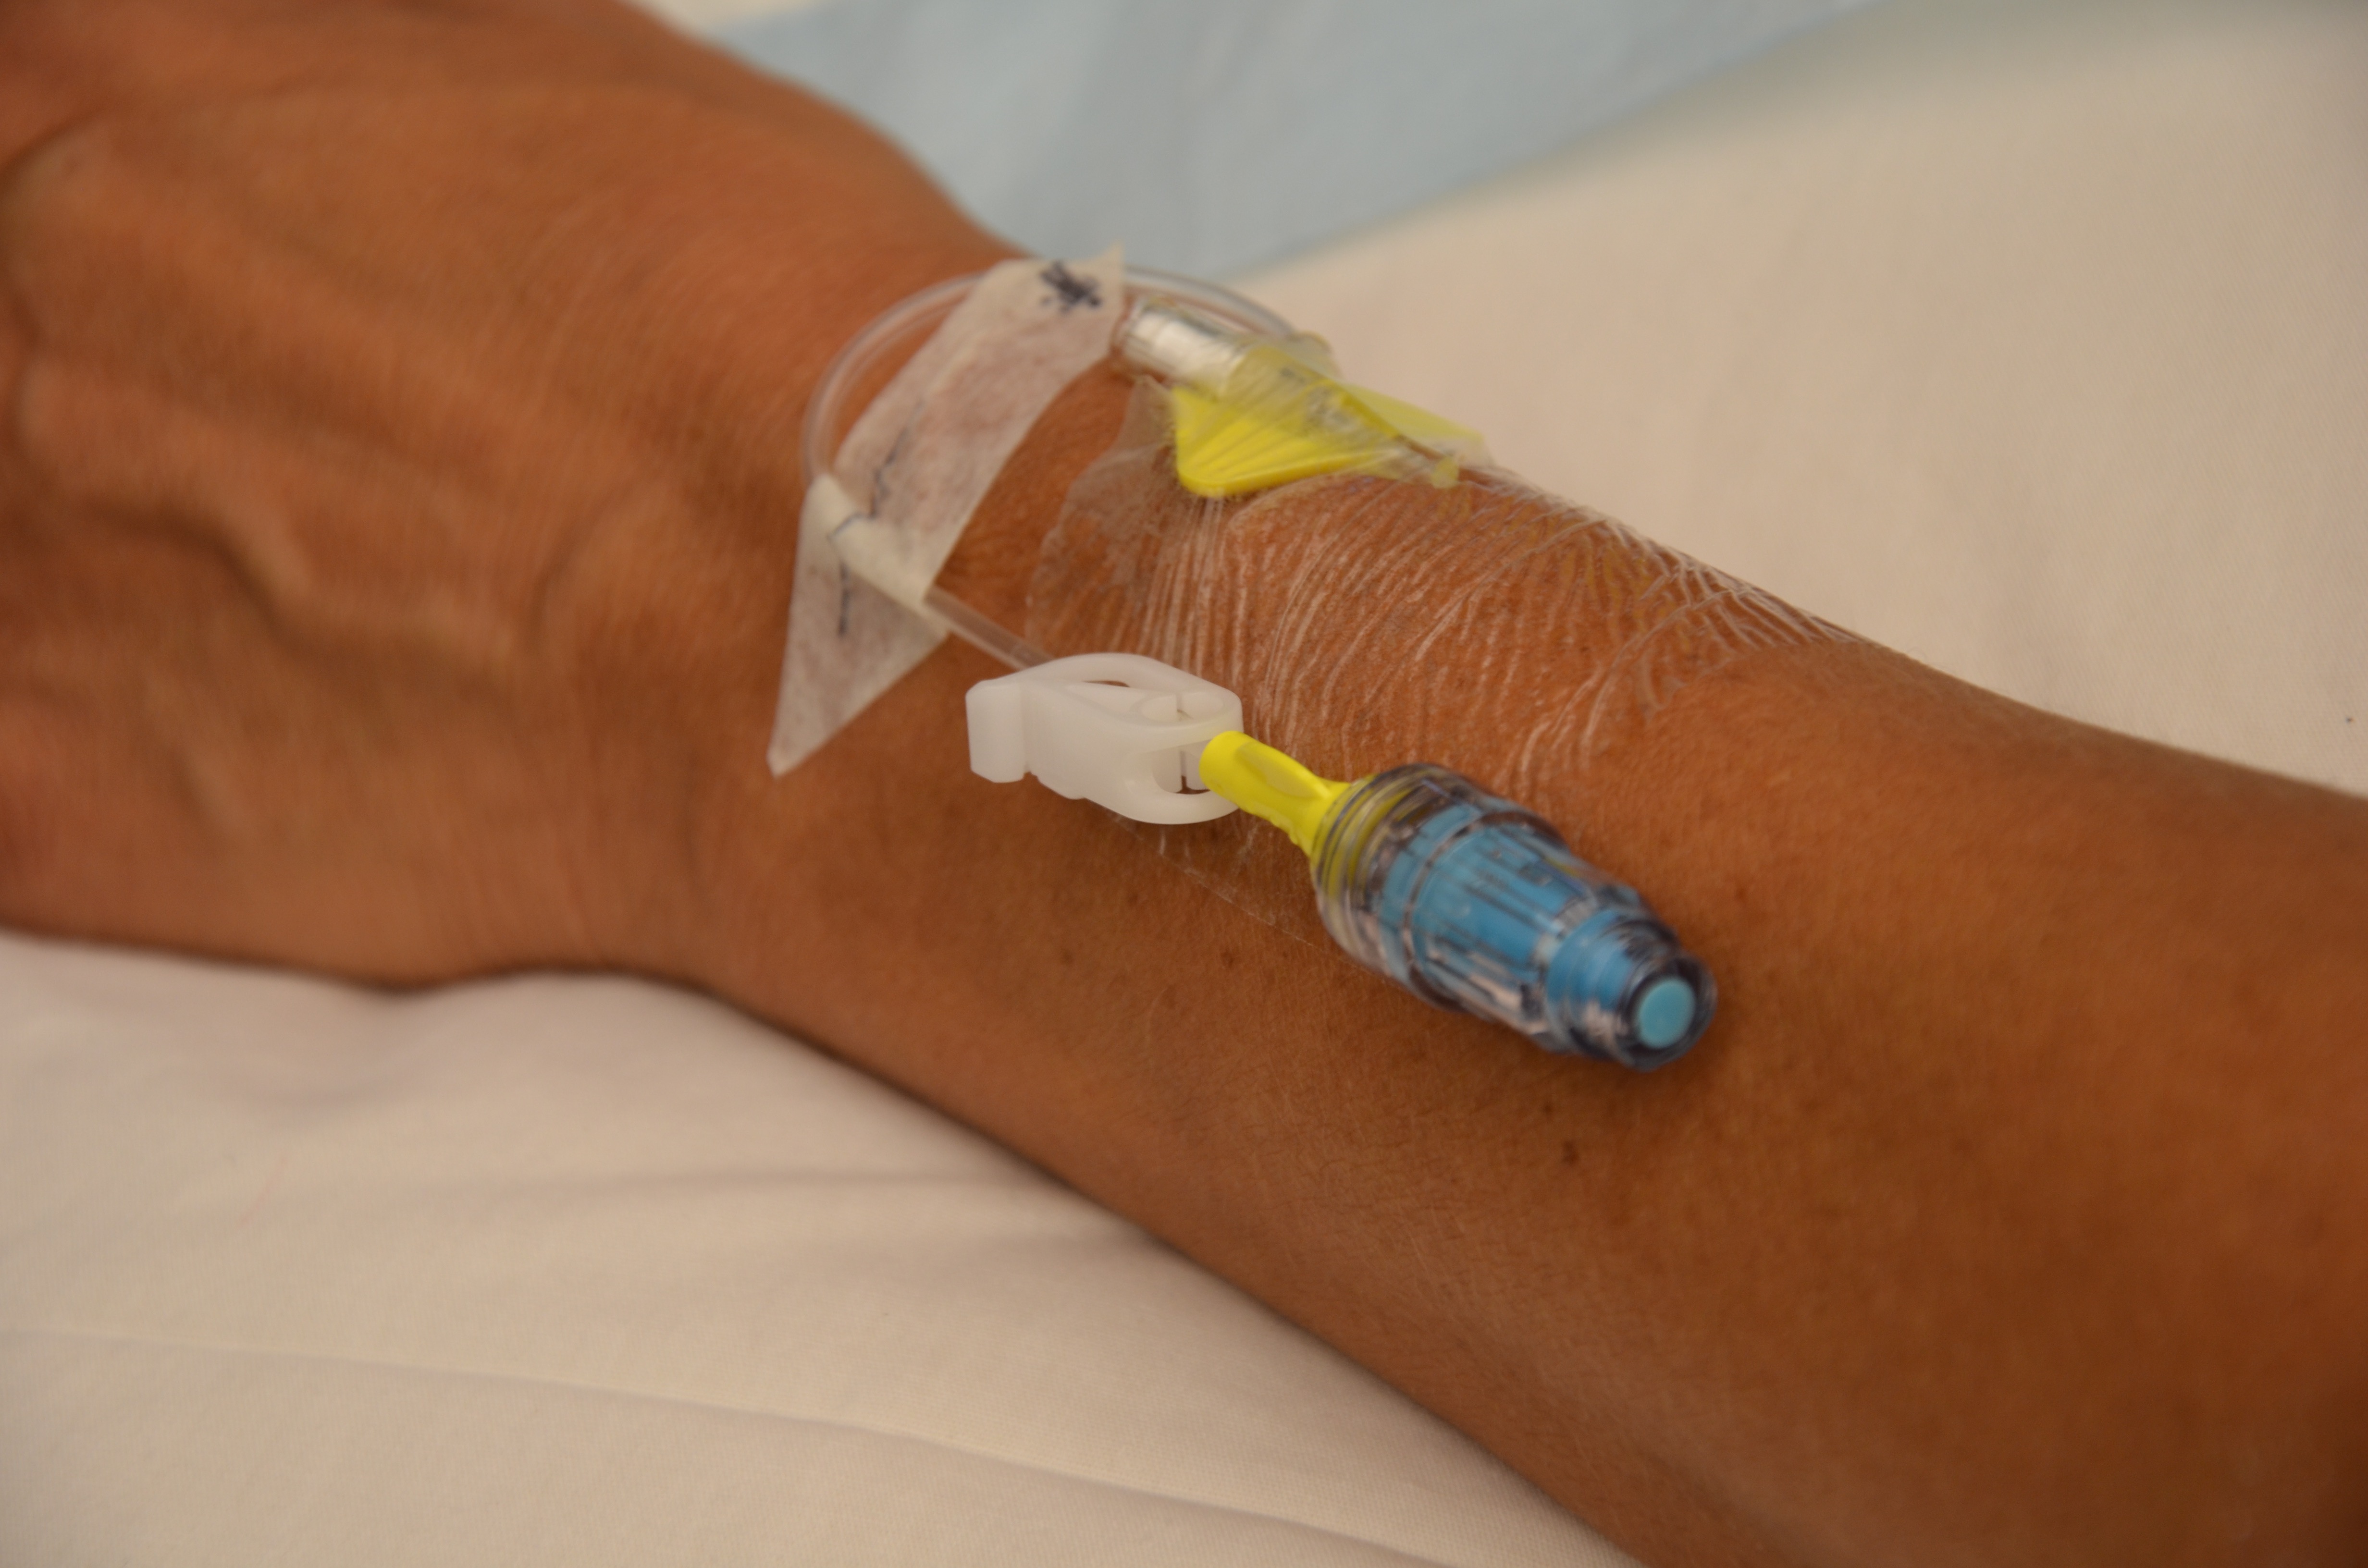
Saline lock
Saline lock
3. Initiate primary infusion at TKVO. Prime an IV line following Checklist 66.

  • 0.9% NS for RBC
  • D5W for IVIG

Refer to blood product fact sheets for all other products.

Sterile IV solution
Normal saline IV solution
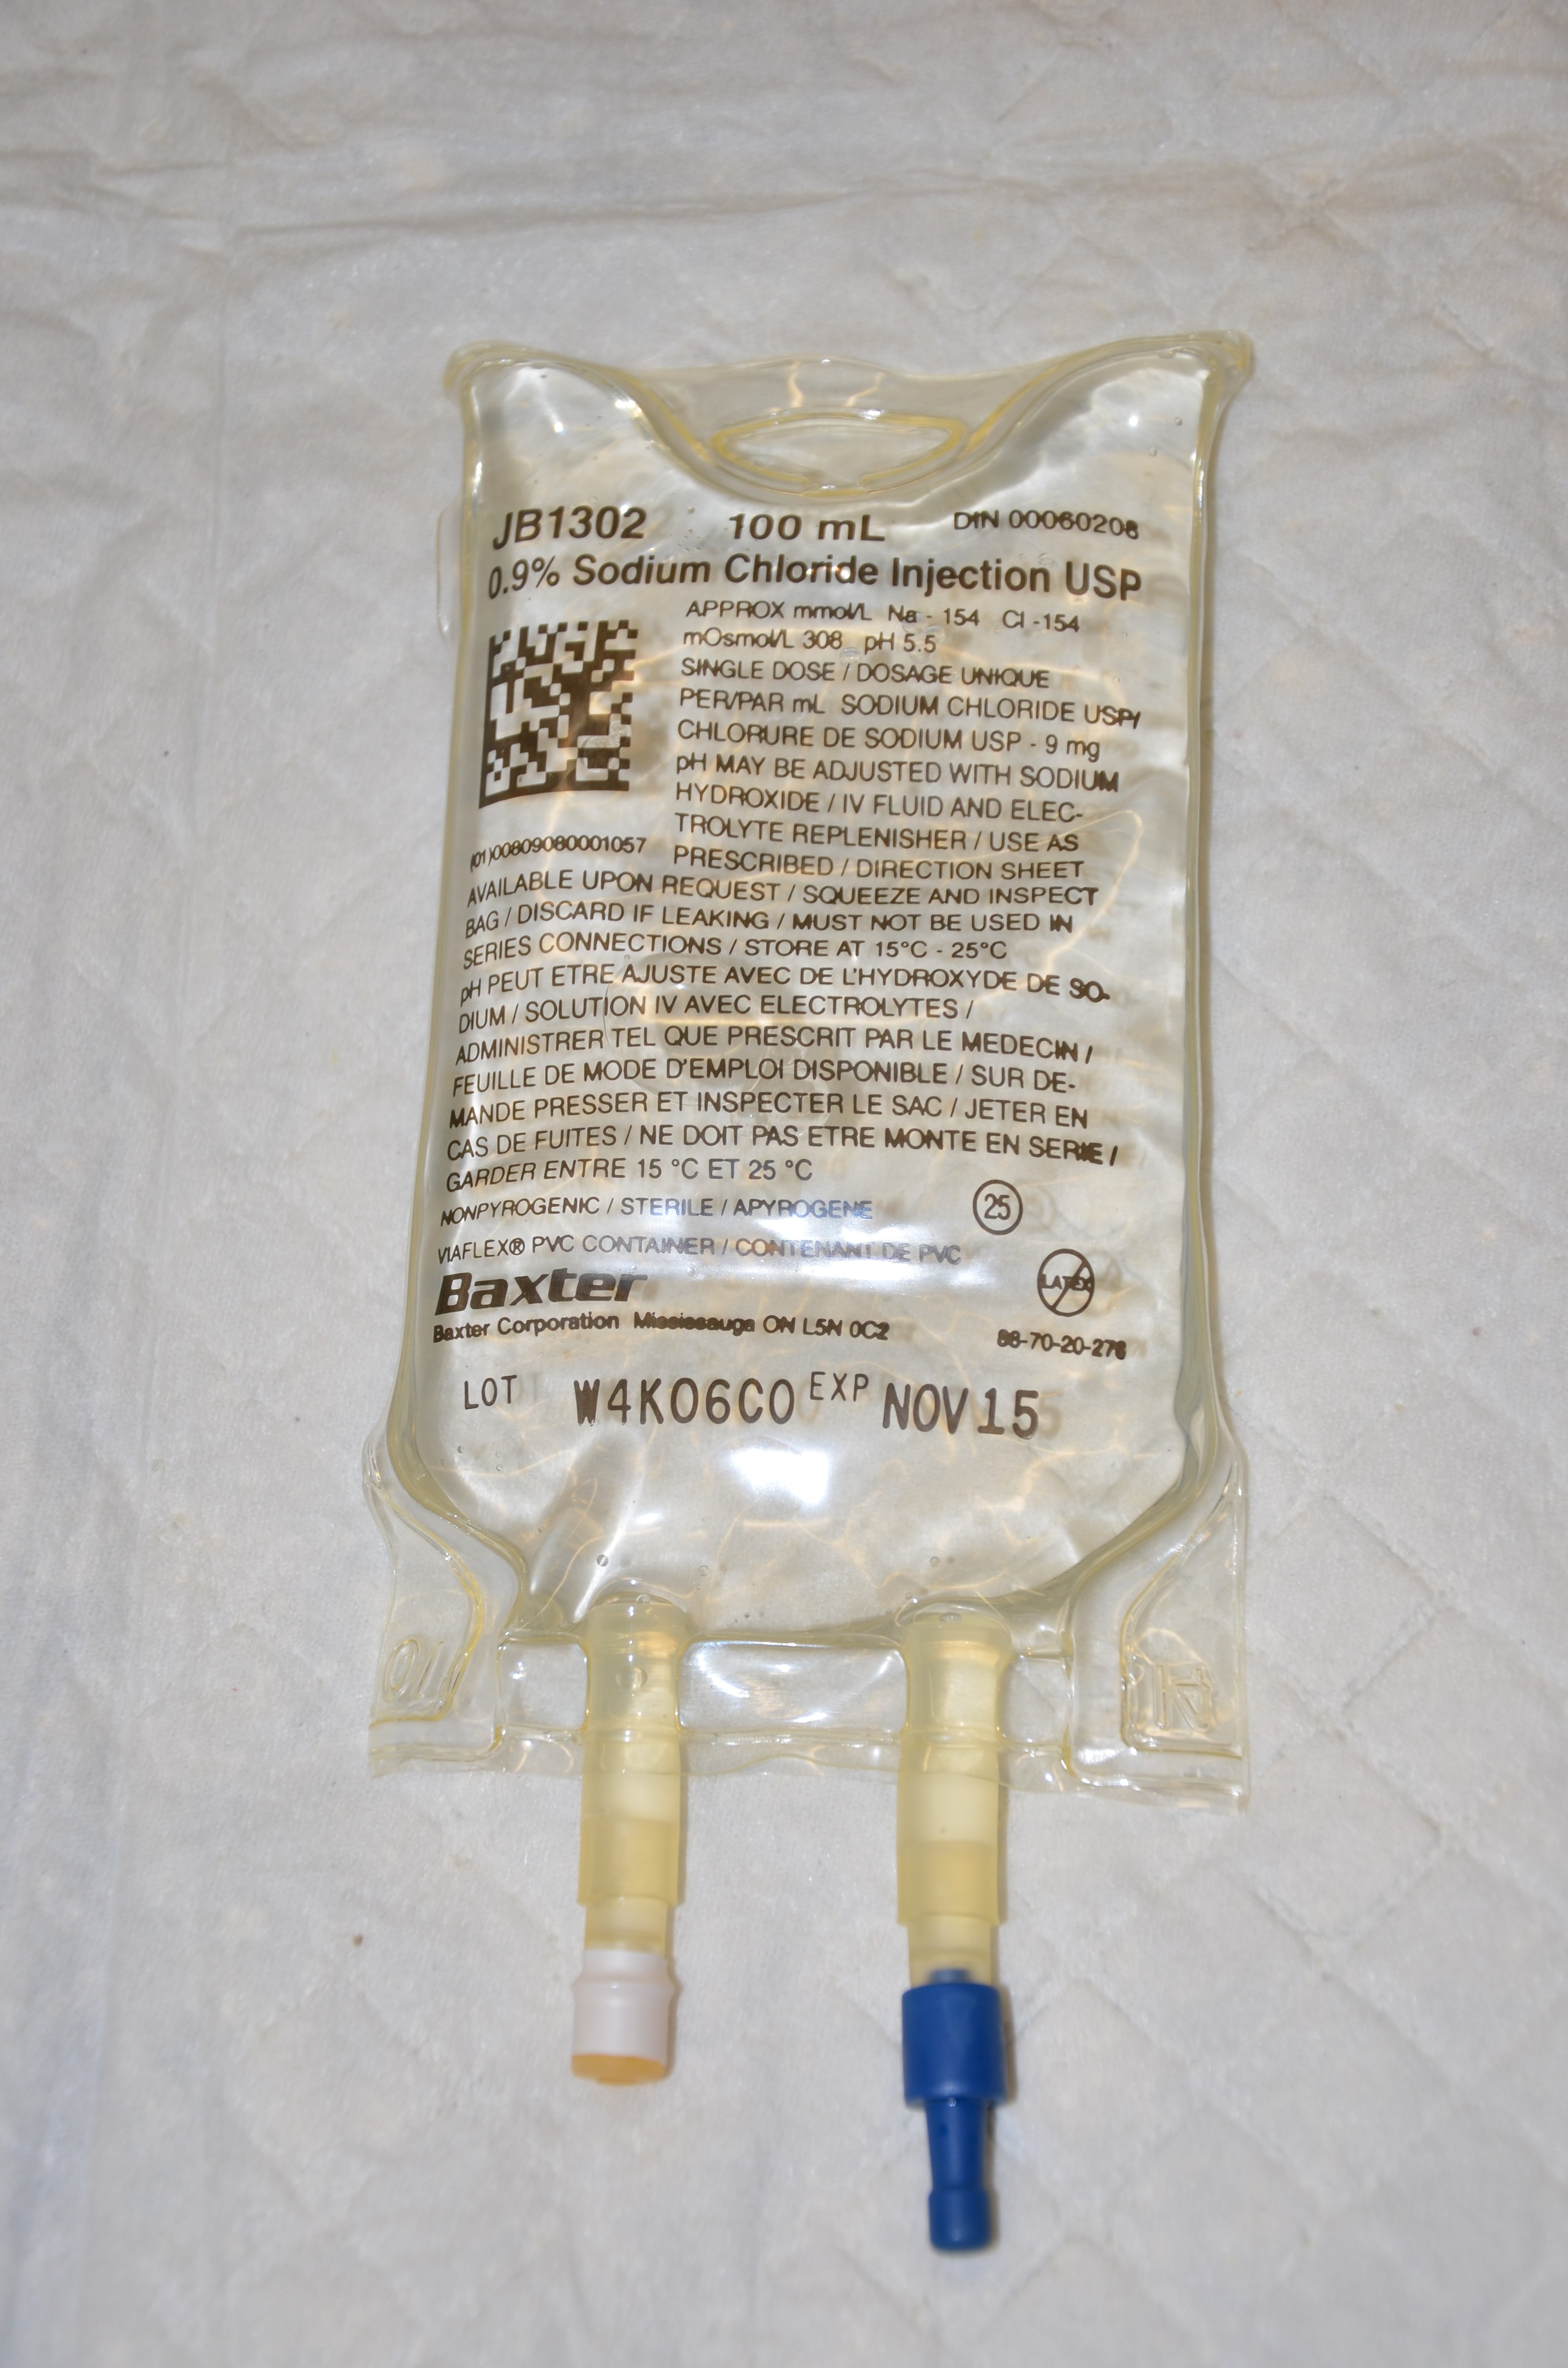
4. Complete and document cardiovascular assessments and initial vital signs. Document any clinical sign or symptom that may be confused with a transfusion reaction (e.g., existing fever).
5. Obtain products from the transfusion areas within 30 minutes of planned transfusion. Plan for pickup or delivery of blood and blood products. Do not request blood or blood products if Steps 1 to 4 are not complete.
6. Complete visual inspection of product. Assess blood bag for any signs of leaks or contamination, such as clumping, clots, gas bubbles, or a purplish discoloration. Return to blood bank if blood bag contains any of the above signs.

Visual inspection of the blood bag
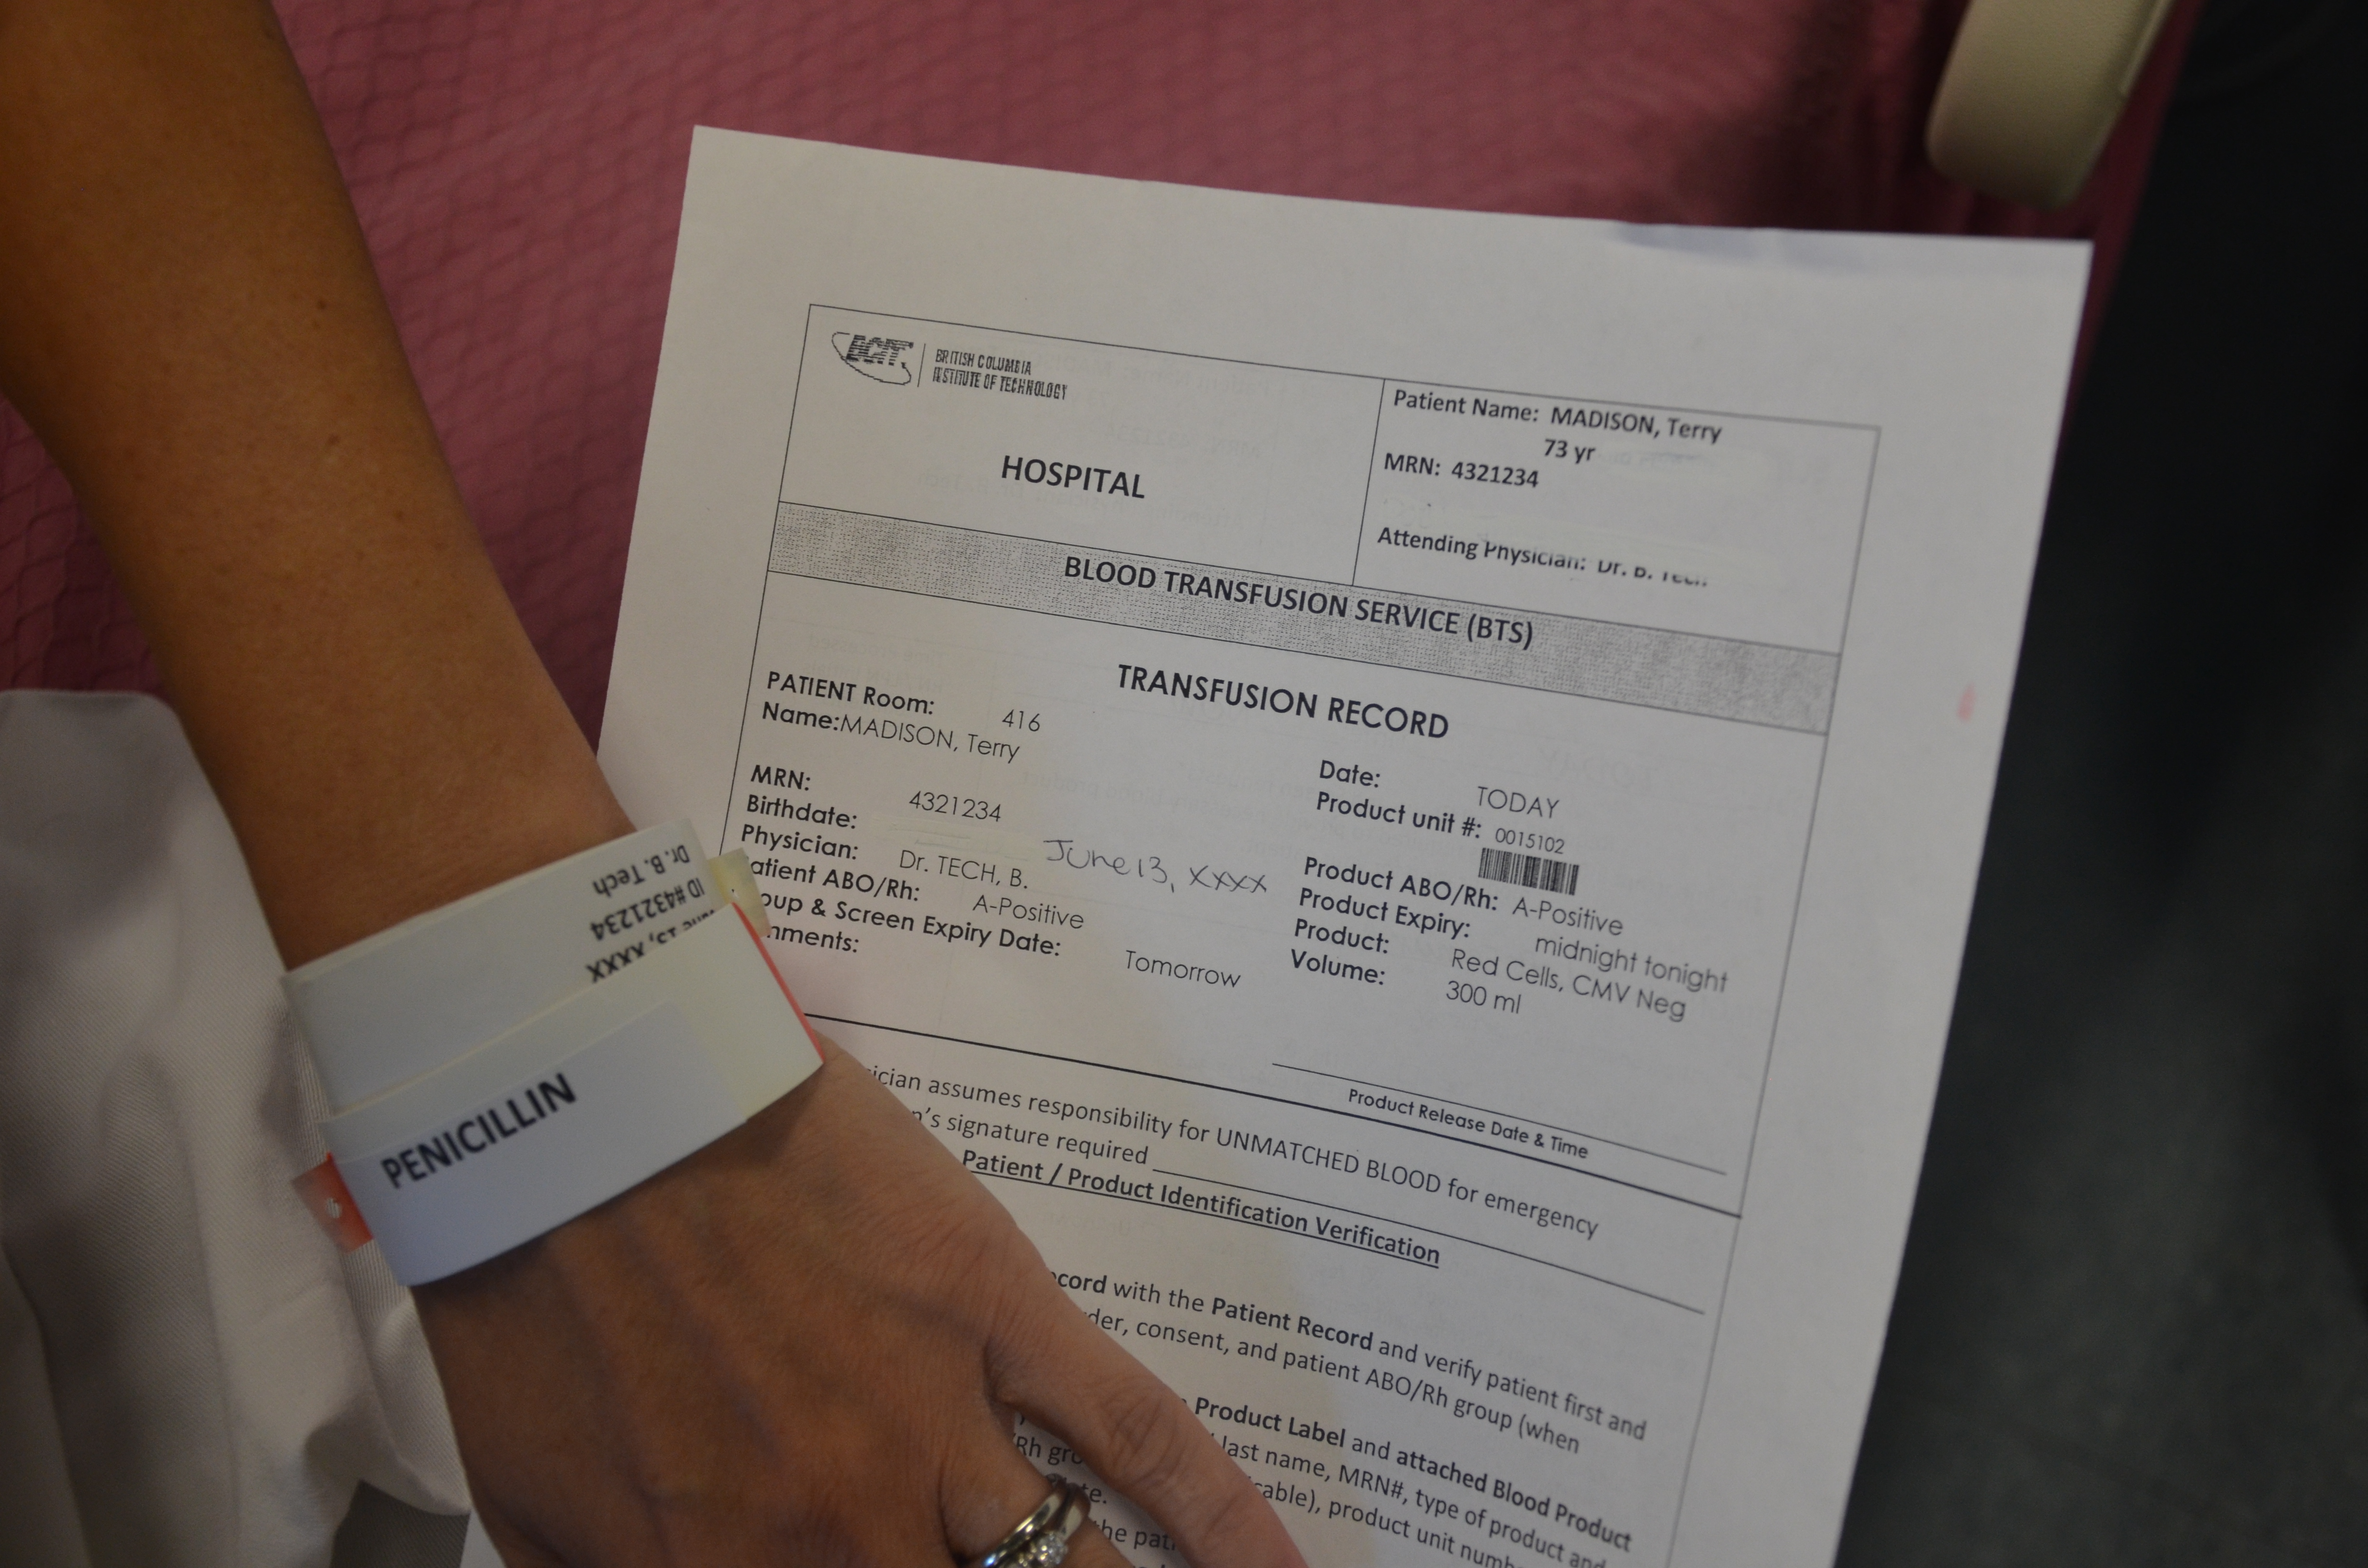
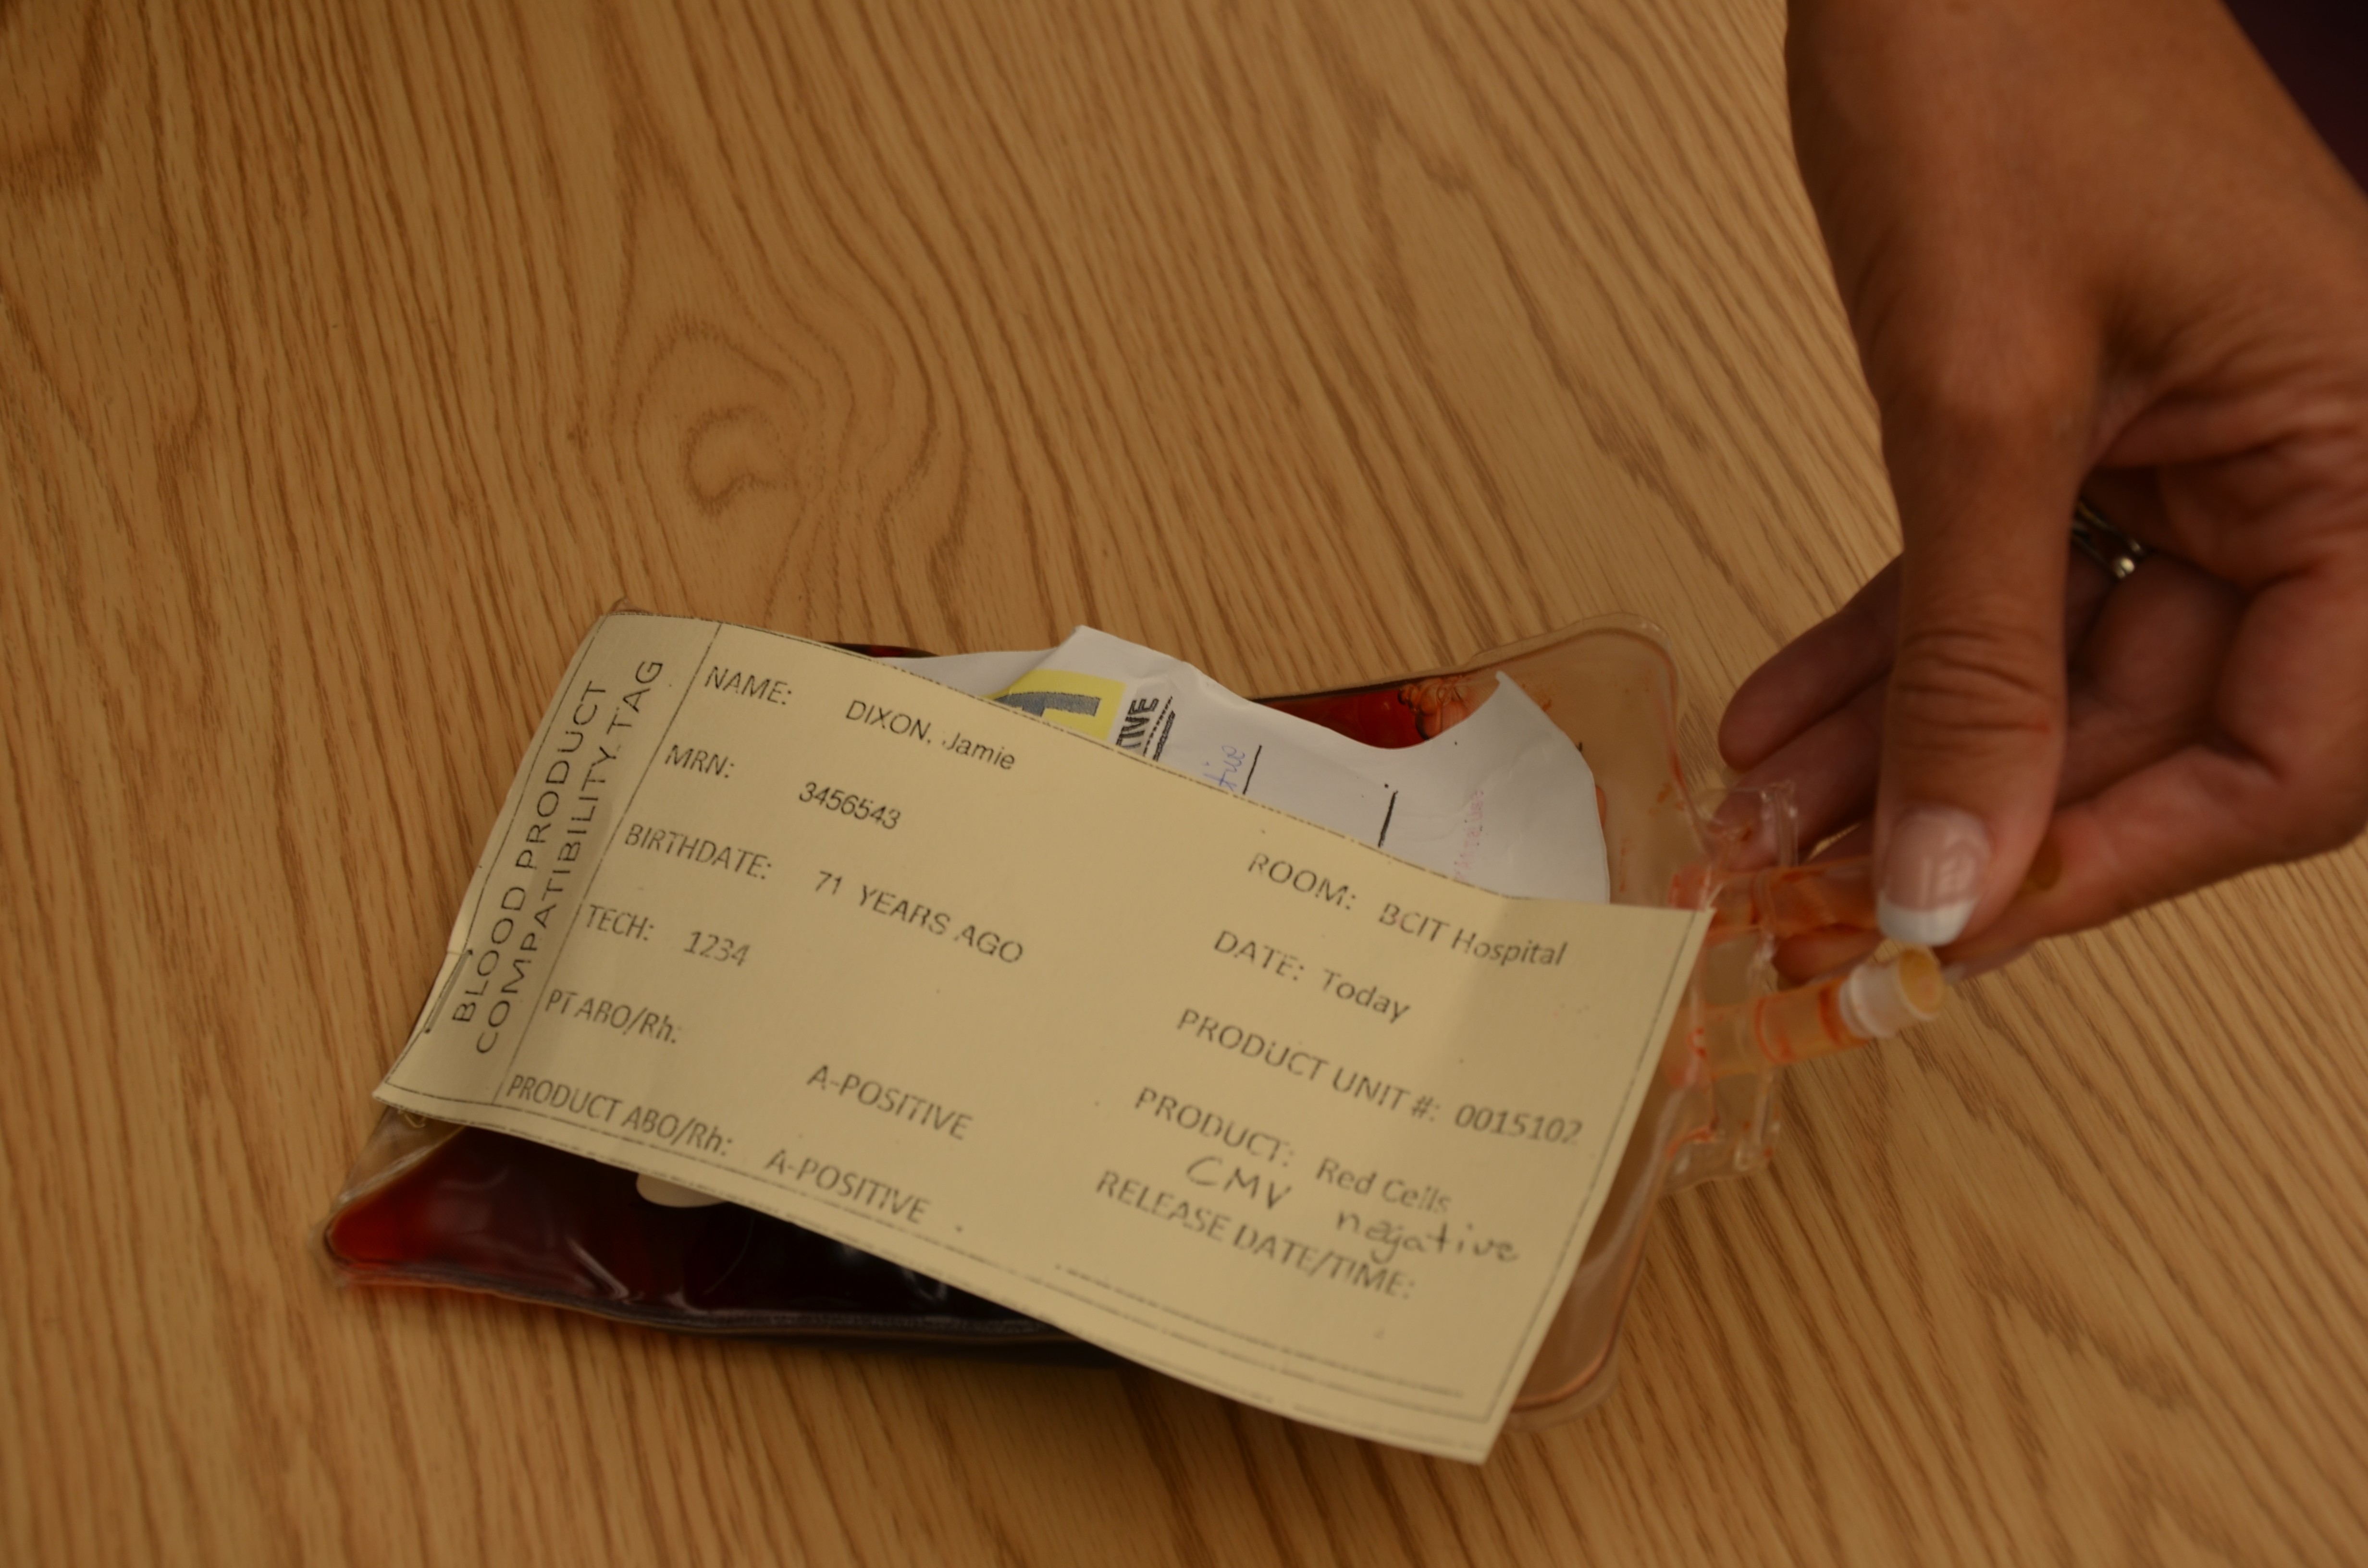
7. Initial verification:

a. Compare the transfusion medical services (TMS) documentation with the patient record to verify:

  • Patient first and last name and unique identifier number
  • Physician order
  • Consent
  • Patient ABO grouping (G & S)

b. Compare the TMS documentation with the product label attached to the product tab and verify:

  • Patient first and last name and unique identifier number
  • Type of blood product and ABO blood grouping
  • 11-digit serial number
  • Product expiry date and time
  • Special requirements (e.g., irradiated)
  • G & S expiry date
All verification numbers/information must match exactly.

Must be completed by two trained staff members competent in blood transfusion administration process as set out by the agency.

Confirm the patient blood type and Rh are compatible with the donor blood type and Rh.

If there are any discrepancies, stop the process and contact the TMS for resolution and direction. Do not proceed.

Ensure the blood product matches the physician’s orders (red blood cells or platelets).

TMS record
TMS record
8 Administer pre-medications as ordered. Medications must be administered through an IV infusion set, and the IV site cleared with 0.9% NS.
9. Final verification (must be completed by the same two staff members as noted in Step 7).

Compare the patient’s first and last name and unique identifier number using all of the following:

  • Patient identification band or equivalent ID process as approved by the TMS (Ask the patient to spell first and last name and state date of birth.)
  • TMS documentation
  • Compatibility tag and label attached to blood product

Only after recipient identification and product check is confirmed, invert product 5 to 10 times and insert spike of the blood administration set into the blood product container.

All verification numbers must match exactly. If there are any discrepancies, stop the process and contact the TMS for resolution and direction. Do not proceed.

Identify patient
Identify patient

Patients who are alert and oriented should be asked to:

  • Spell first and last name
  • State their date of birth

All identifying information attached to the blood bag must remain attached at least until completion of transfusion.

10. Perform hand hygiene. Prime the blood product administration set:

  • Close clamp. Completely cover the filter with product.
  • A straight blood administration set is used for all transfusions.
  • A Y-type blood administration set should only be considered in clinical situations where additional fluid volume may be required.
Do not remove the product from the presence of the patient; prime at bedside. If product is removed from bedside, the final verification process must be completed again.

Prime blood tubing
Prime blood tubing
11. Initiate transfusion:

  • Obtain vital signs immediately prior to transfusion, then 15 minutes after initiation, then every hour until transfusion is complete.
  • Maintaining asepsis, disconnect the NS infusion and connect blood administration set and start transfusion.
  • Advise patient on the signs and symptoms of transfusion reaction and what and when to report.
Adults: Initiate red cells slowly (25 ml in the first 15 minutes). For all other blood transfusions, refer to the blood and product sheet as per your agency policy.

Some agencies use an EID to administer blood transfusions. Always check agency policy prior to transfusion.

For each and every unit:

  • Remain with the patient for the first 5 minutes and assess for clinical signs of transfusion reaction.
  • Complete transfusion within 4 hours of removal from the blood bank.

Most transfusion reactions occur within first 15 minutes of a transfusion. Infusing small amounts of blood component initially minimizes volume of blood to which patient is exposed, thereby minimizing severity of reaction.
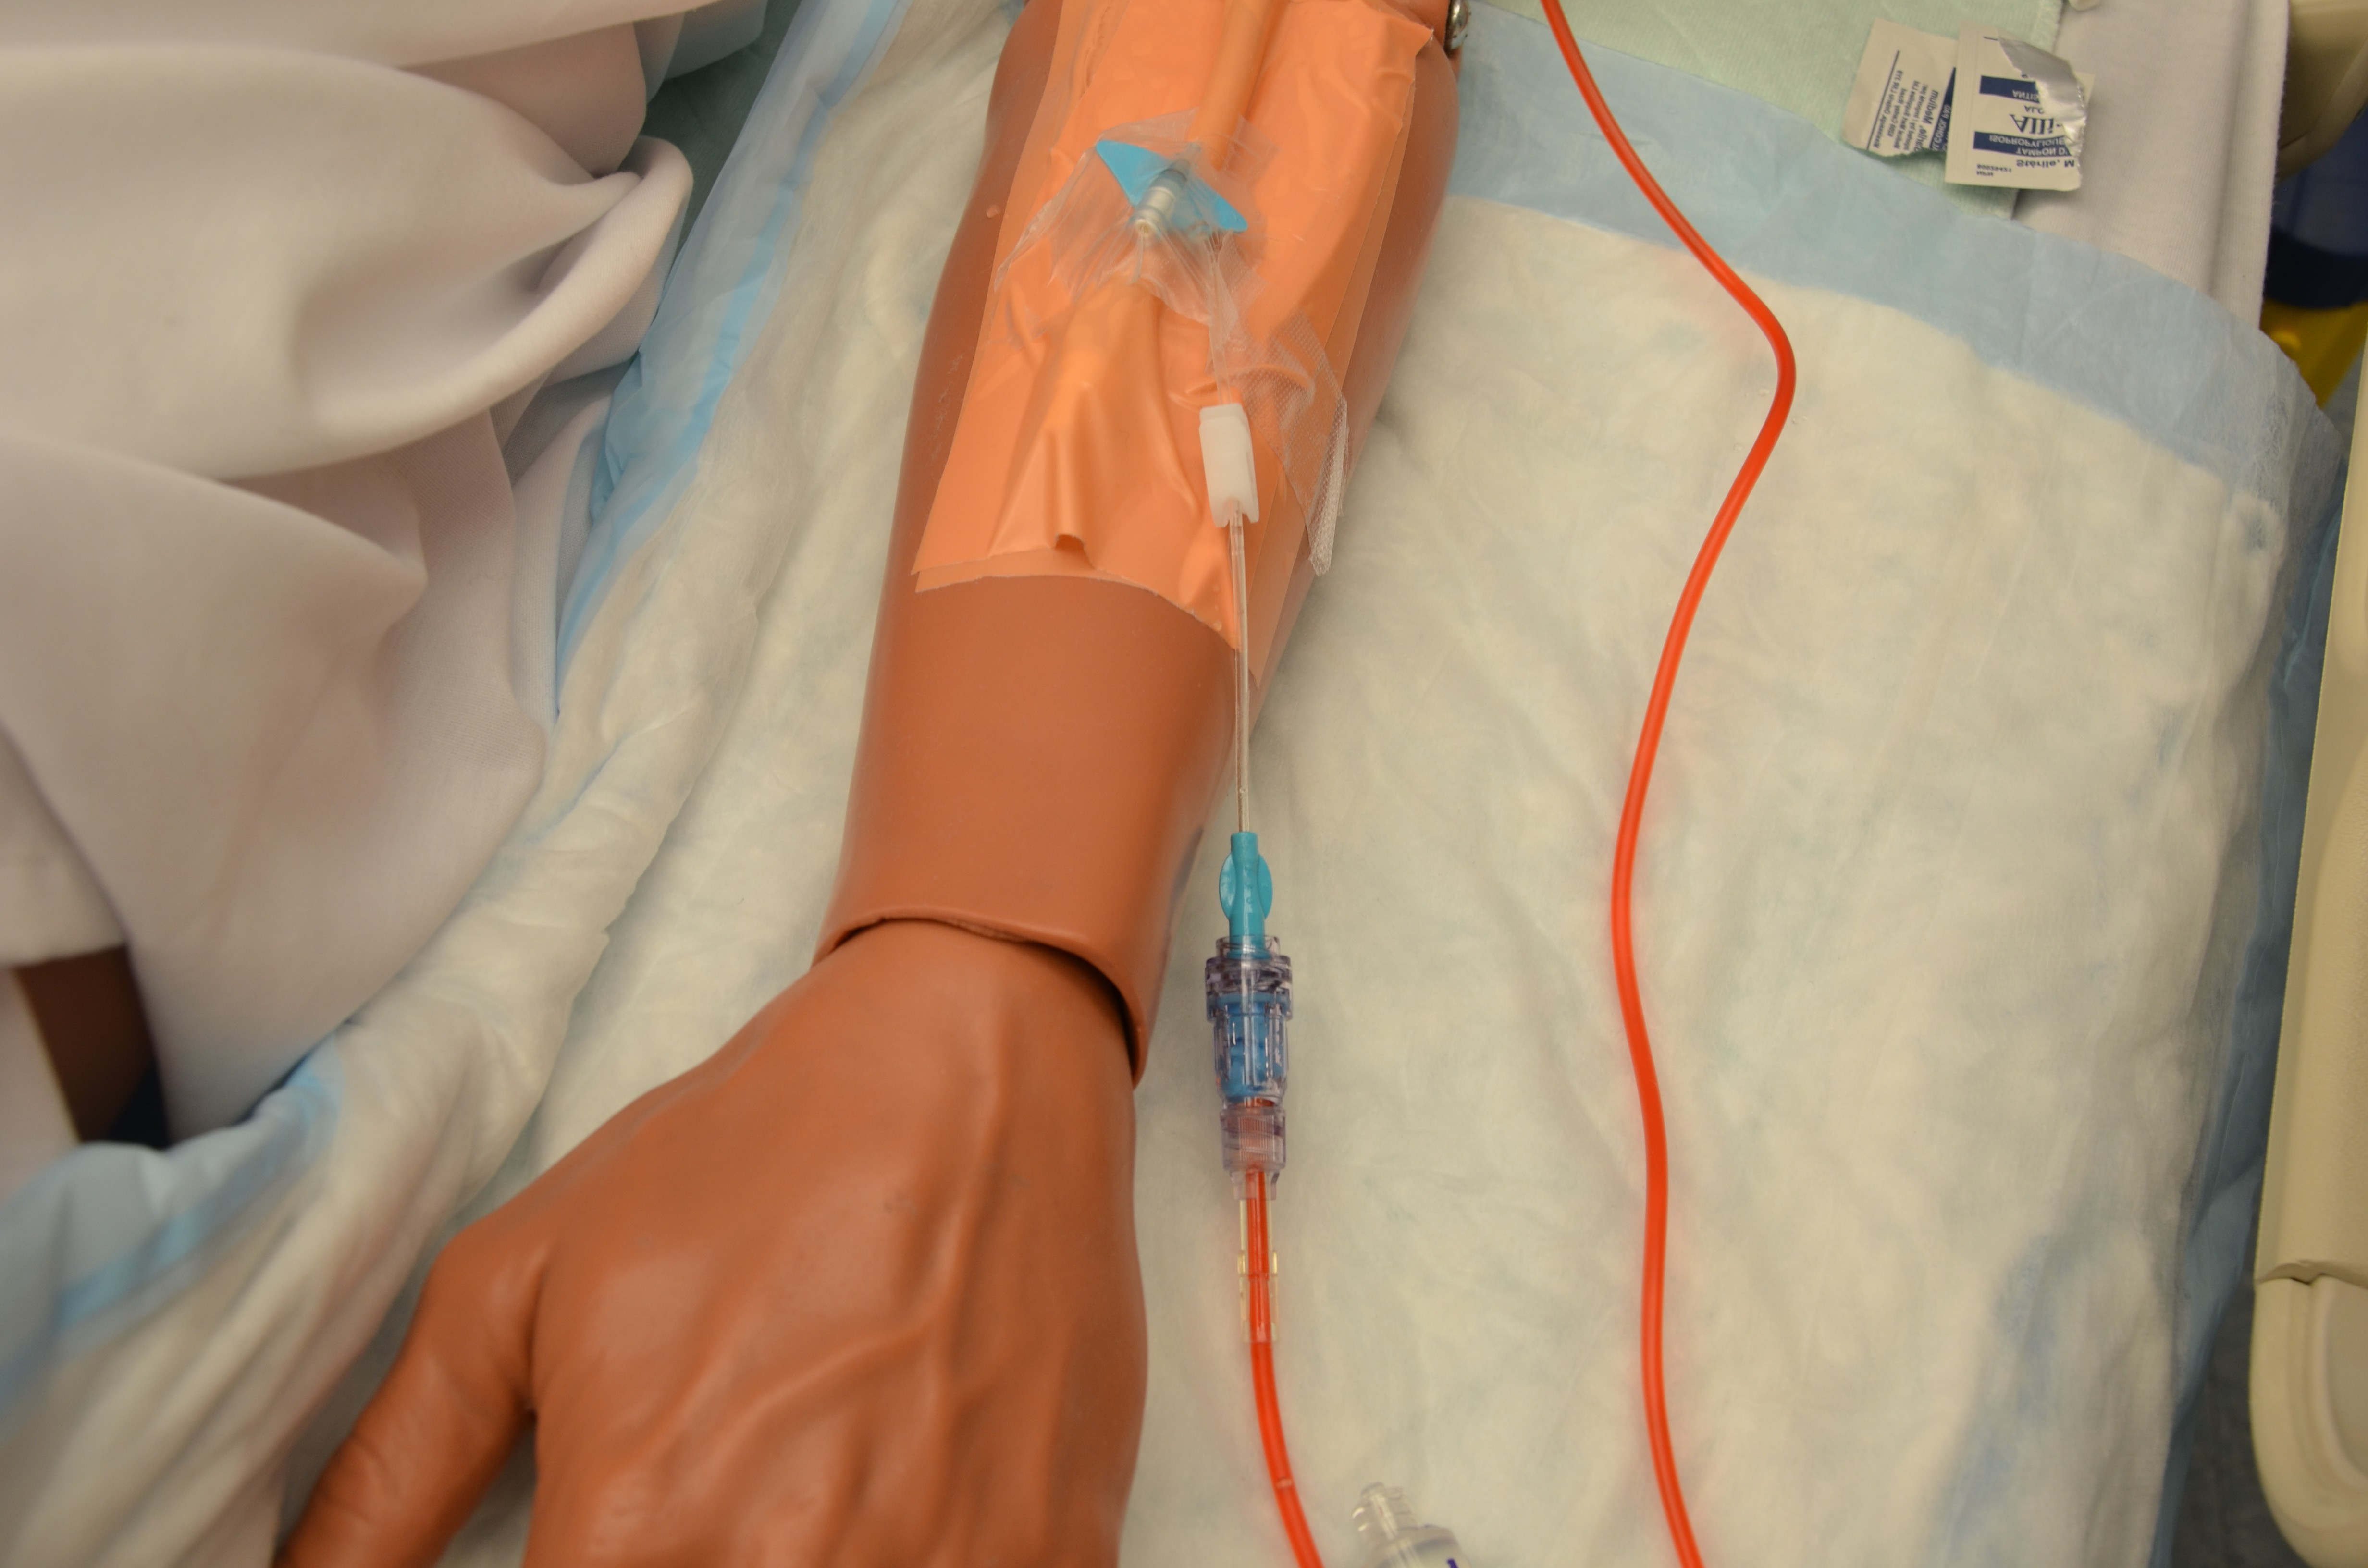
Infusion of packed RBC
Infusion of packed red blood cells
12. Monitor:

  • Assess and observe for clinical signs and symptoms of reactions up to 24 hours post-transfusion.
  • Complete all appropriate clinical documentation.
Vital signs must be monitored:

  • Immediately prior to infusion
  • Within 10 to 15 minutes
  • Every hour until transfusion is complete
vital signs
Vital signs
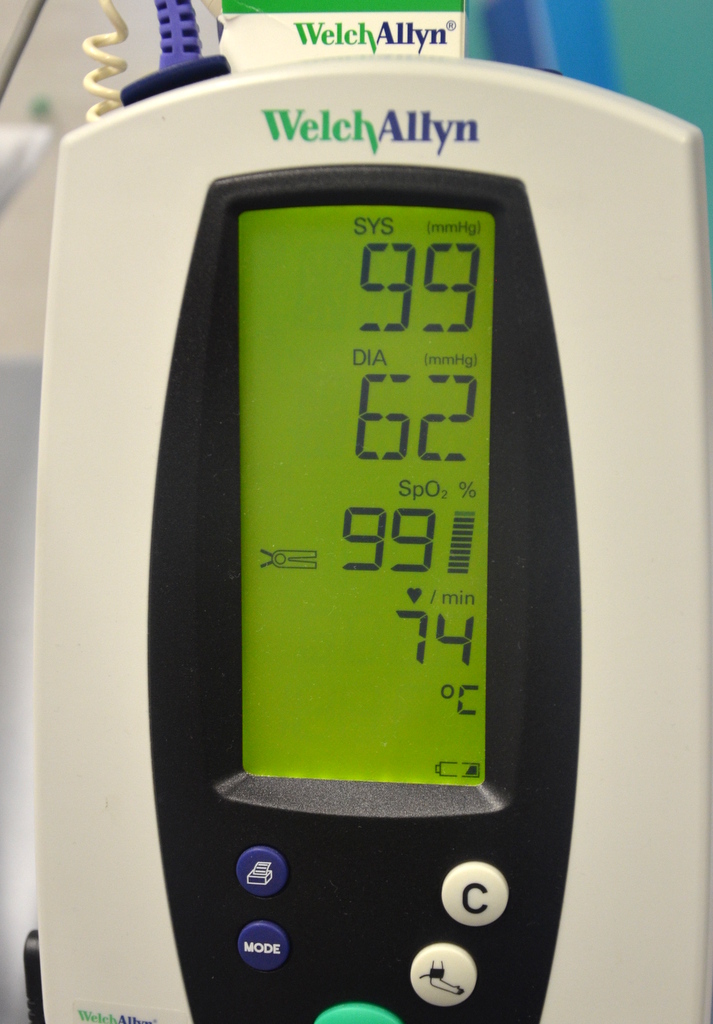
13. In the event of a transfusion reaction, stop the infusion.
  • Manage transfusion reactions as per protocol.
  • Complete required transfusion reaction form.
  • Return remaining blood to blood bank for further investigation.
14. For additional units, repeat steps 6 to 12. Follow the same process to ensure patient safety.
15. Flush administration set with maximum of 50 ml of normal saline and re-establish IV or SL as per physician orders. Flushing displaces any blood or blood product from the administration set. It is not necessary to flush between units of the same blood product.
16. Discard waste in biohazard waste container. This prevents the spread of biohazard waste.
17. Complete all documentation as required by agency. Documentation may include:

  • Transfusion record form
  • All vital signs and reactions
  • Any significant findings, initiation and termination of transfusion
  • Record of transfusion on the in-and-out sheet
Data source: Alberta Health Services, 2015a, 2015b; Perry et al., 2014; Vancouver Coastal Health, 2008

Critical Thinking Exercises

  1. How many units of blood can be transfused through one blood administration set?
  2. What are the steps to managing a blood transfusion reaction?

License

Icon for the Creative Commons Attribution 4.0 International License

Clinical Procedures for Safer Patient Care by Glynda Rees Doyle and Jodie Anita McCutcheon is licensed under a Creative Commons Attribution 4.0 International License, except where otherwise noted.

Share This Book