Want to create or adapt books like this? Learn more about how Pressbooks supports open publishing practices.
Chapter 8. Intravenous Therapy
8.6 Converting an IV Infusion to a Saline Lock and Removal of a Peripheral IV
A peripheral IV may be converted to a saline lock when a prescribed continuous IV therapy is switched to intermittent IV or a saline lock for future use. A physician’s order is required to stop a continuous infusion. Checklist 71 describes how to convert an infusion to a saline lock.
Checklist 71: Converting an IV Infusion to a Saline Lock
Disclaimer: Always review and follow your hospital policy regarding this specific skill.
Steps
Additional Information
1. Verify physician orders to convert IV infusion to a saline lock.
Ensures correct order is being implemented.
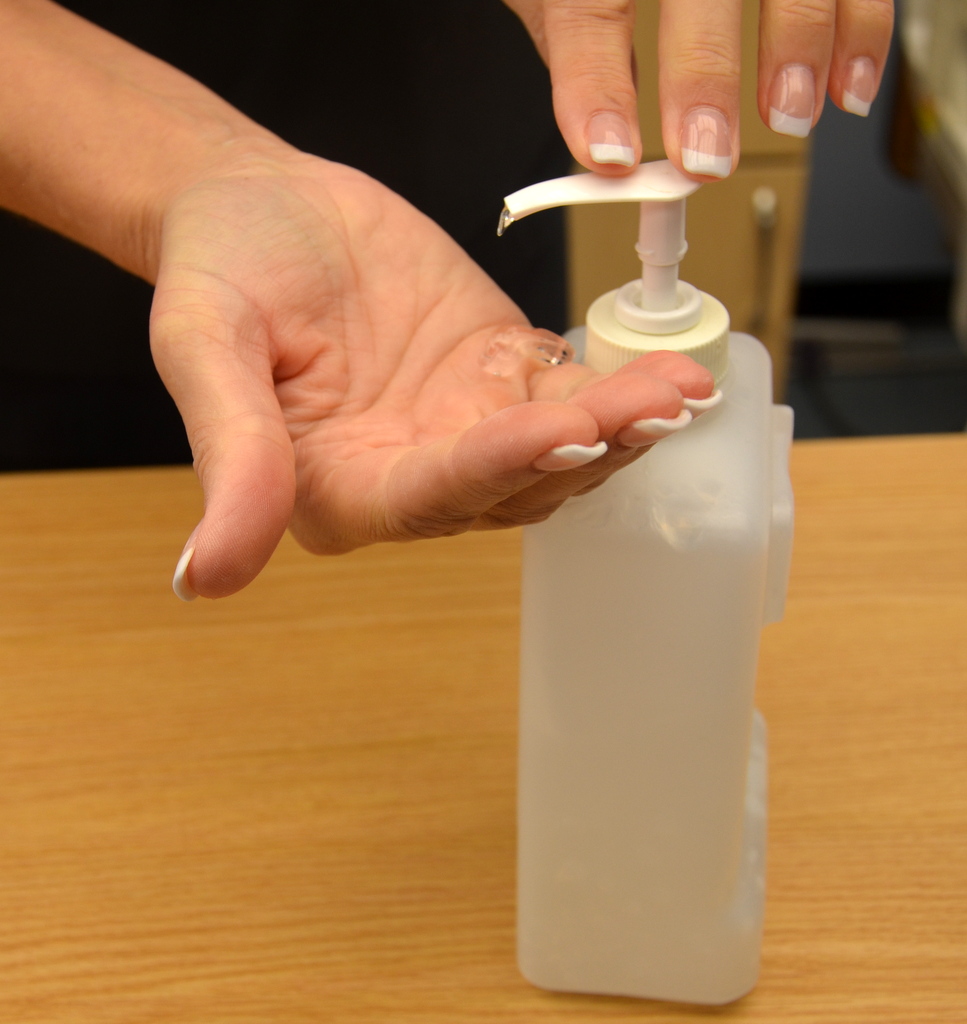
2. Perform hand hygiene; collect supplies.
This prevents the transmission of microorganisms.
Hand hygiene with ABHR
3. Identify yourself; identify the patient using two identifiers and comparing the MAR to the patient’s wristband; explain the procedure to the patient.
Proper identification prevents errors. Explaining the procedure educates the patient and allows time for patient to ask questions.
Compare MAR with patient wristband
4. Perform hand hygiene.
This step prevents the transmission of microorganisms.
5. Stop IV infusion with clamp or turn off EID. Apply clean gloves.
This prevents fluid from escaping from tubing when disconnecting tubing from positive pressure cap (hub).
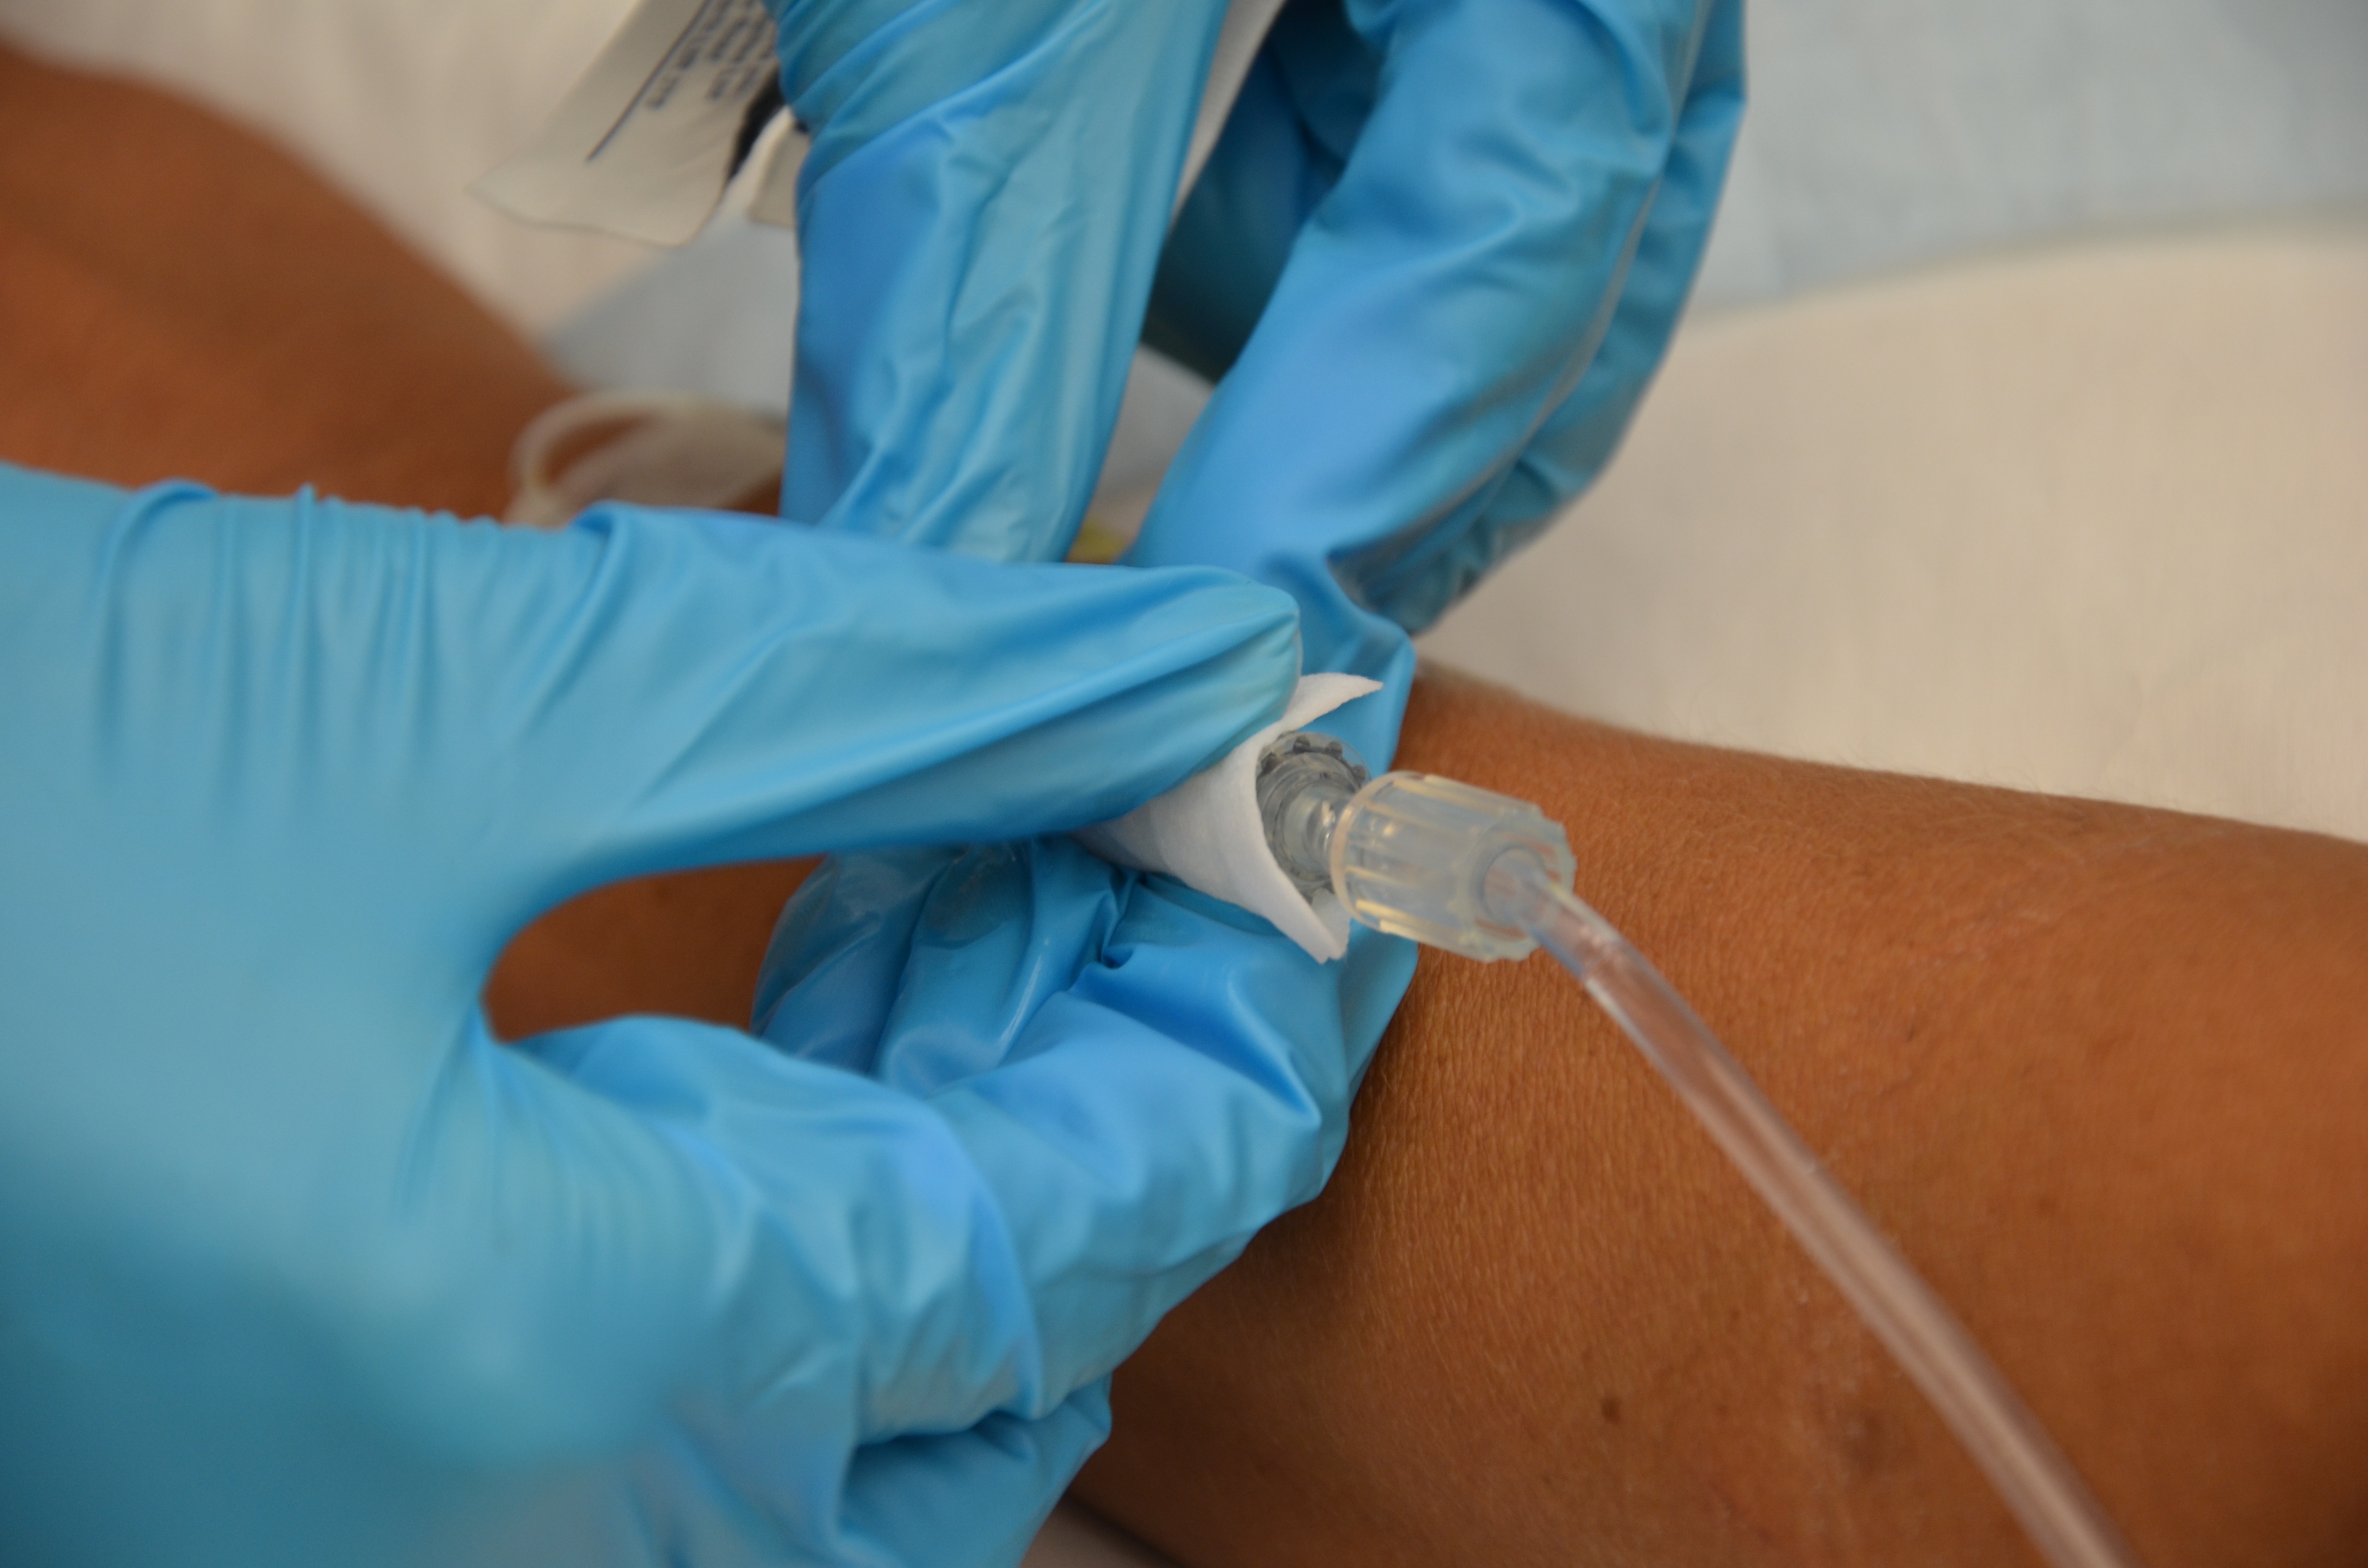
6. Scrub the connection area between the hub and IV tubing for 15 seconds and let dry for 30 seconds.
Scrub the connection between the IV tubing and positive pressure cap
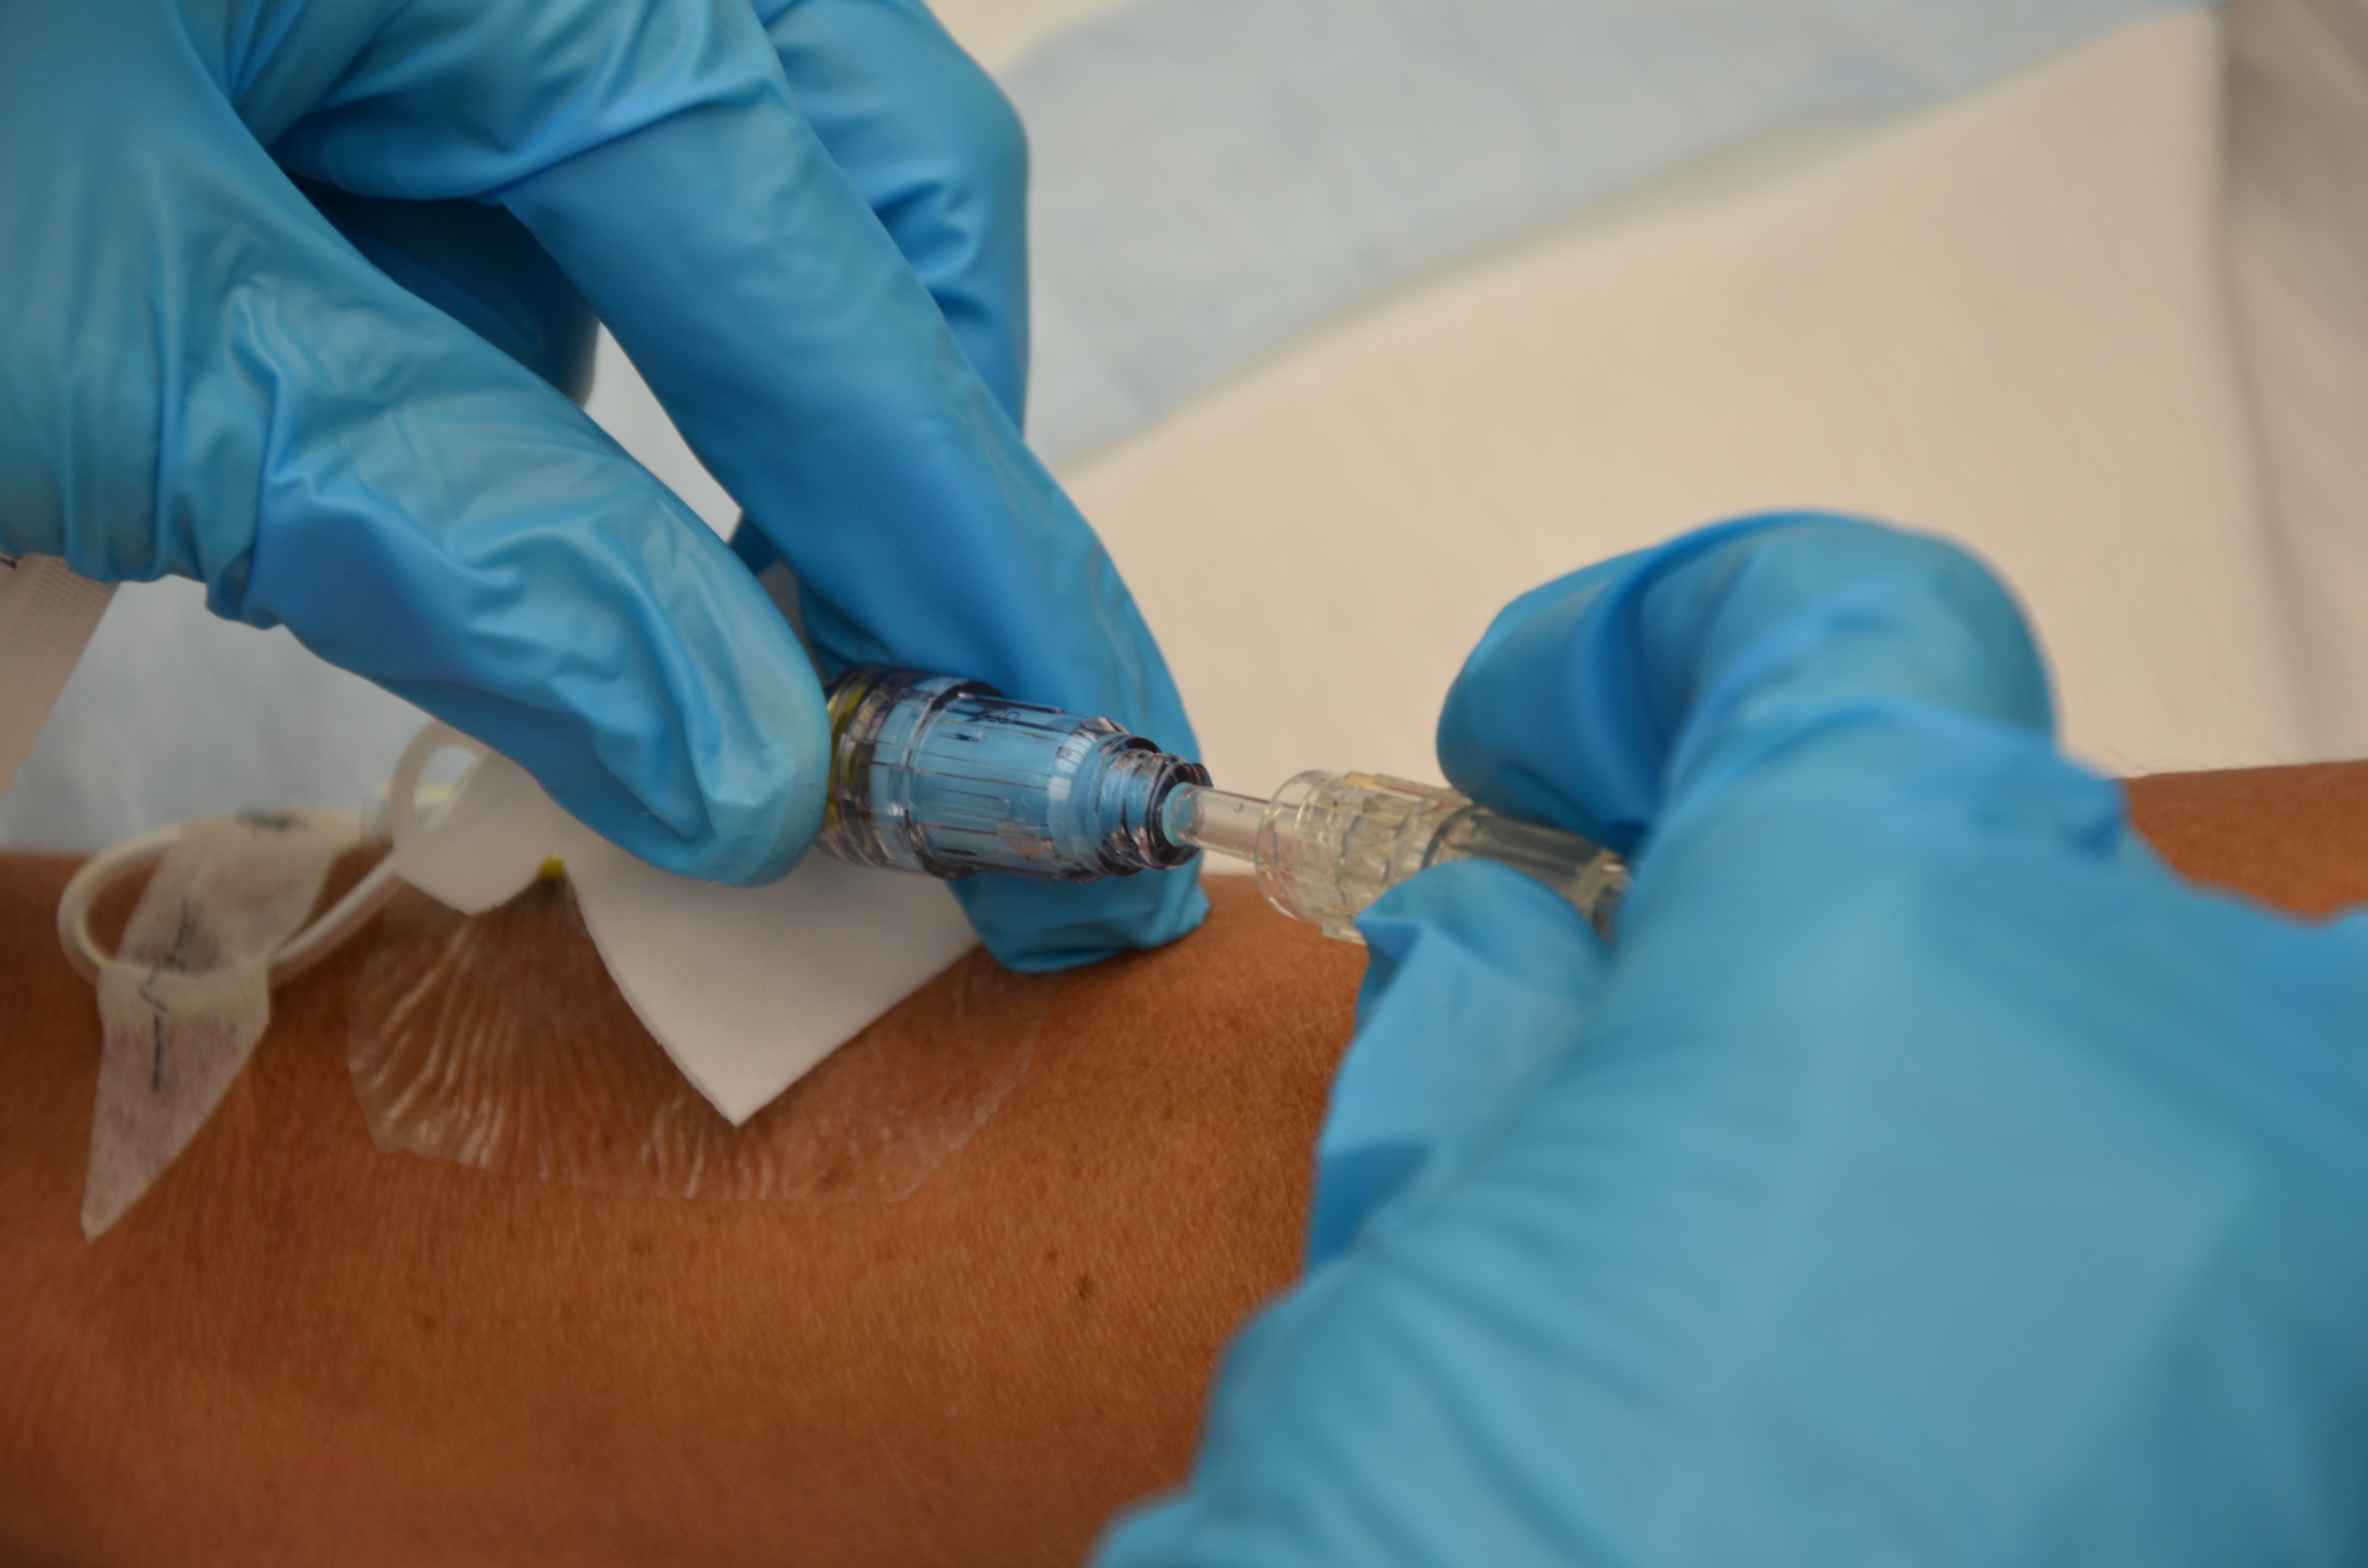
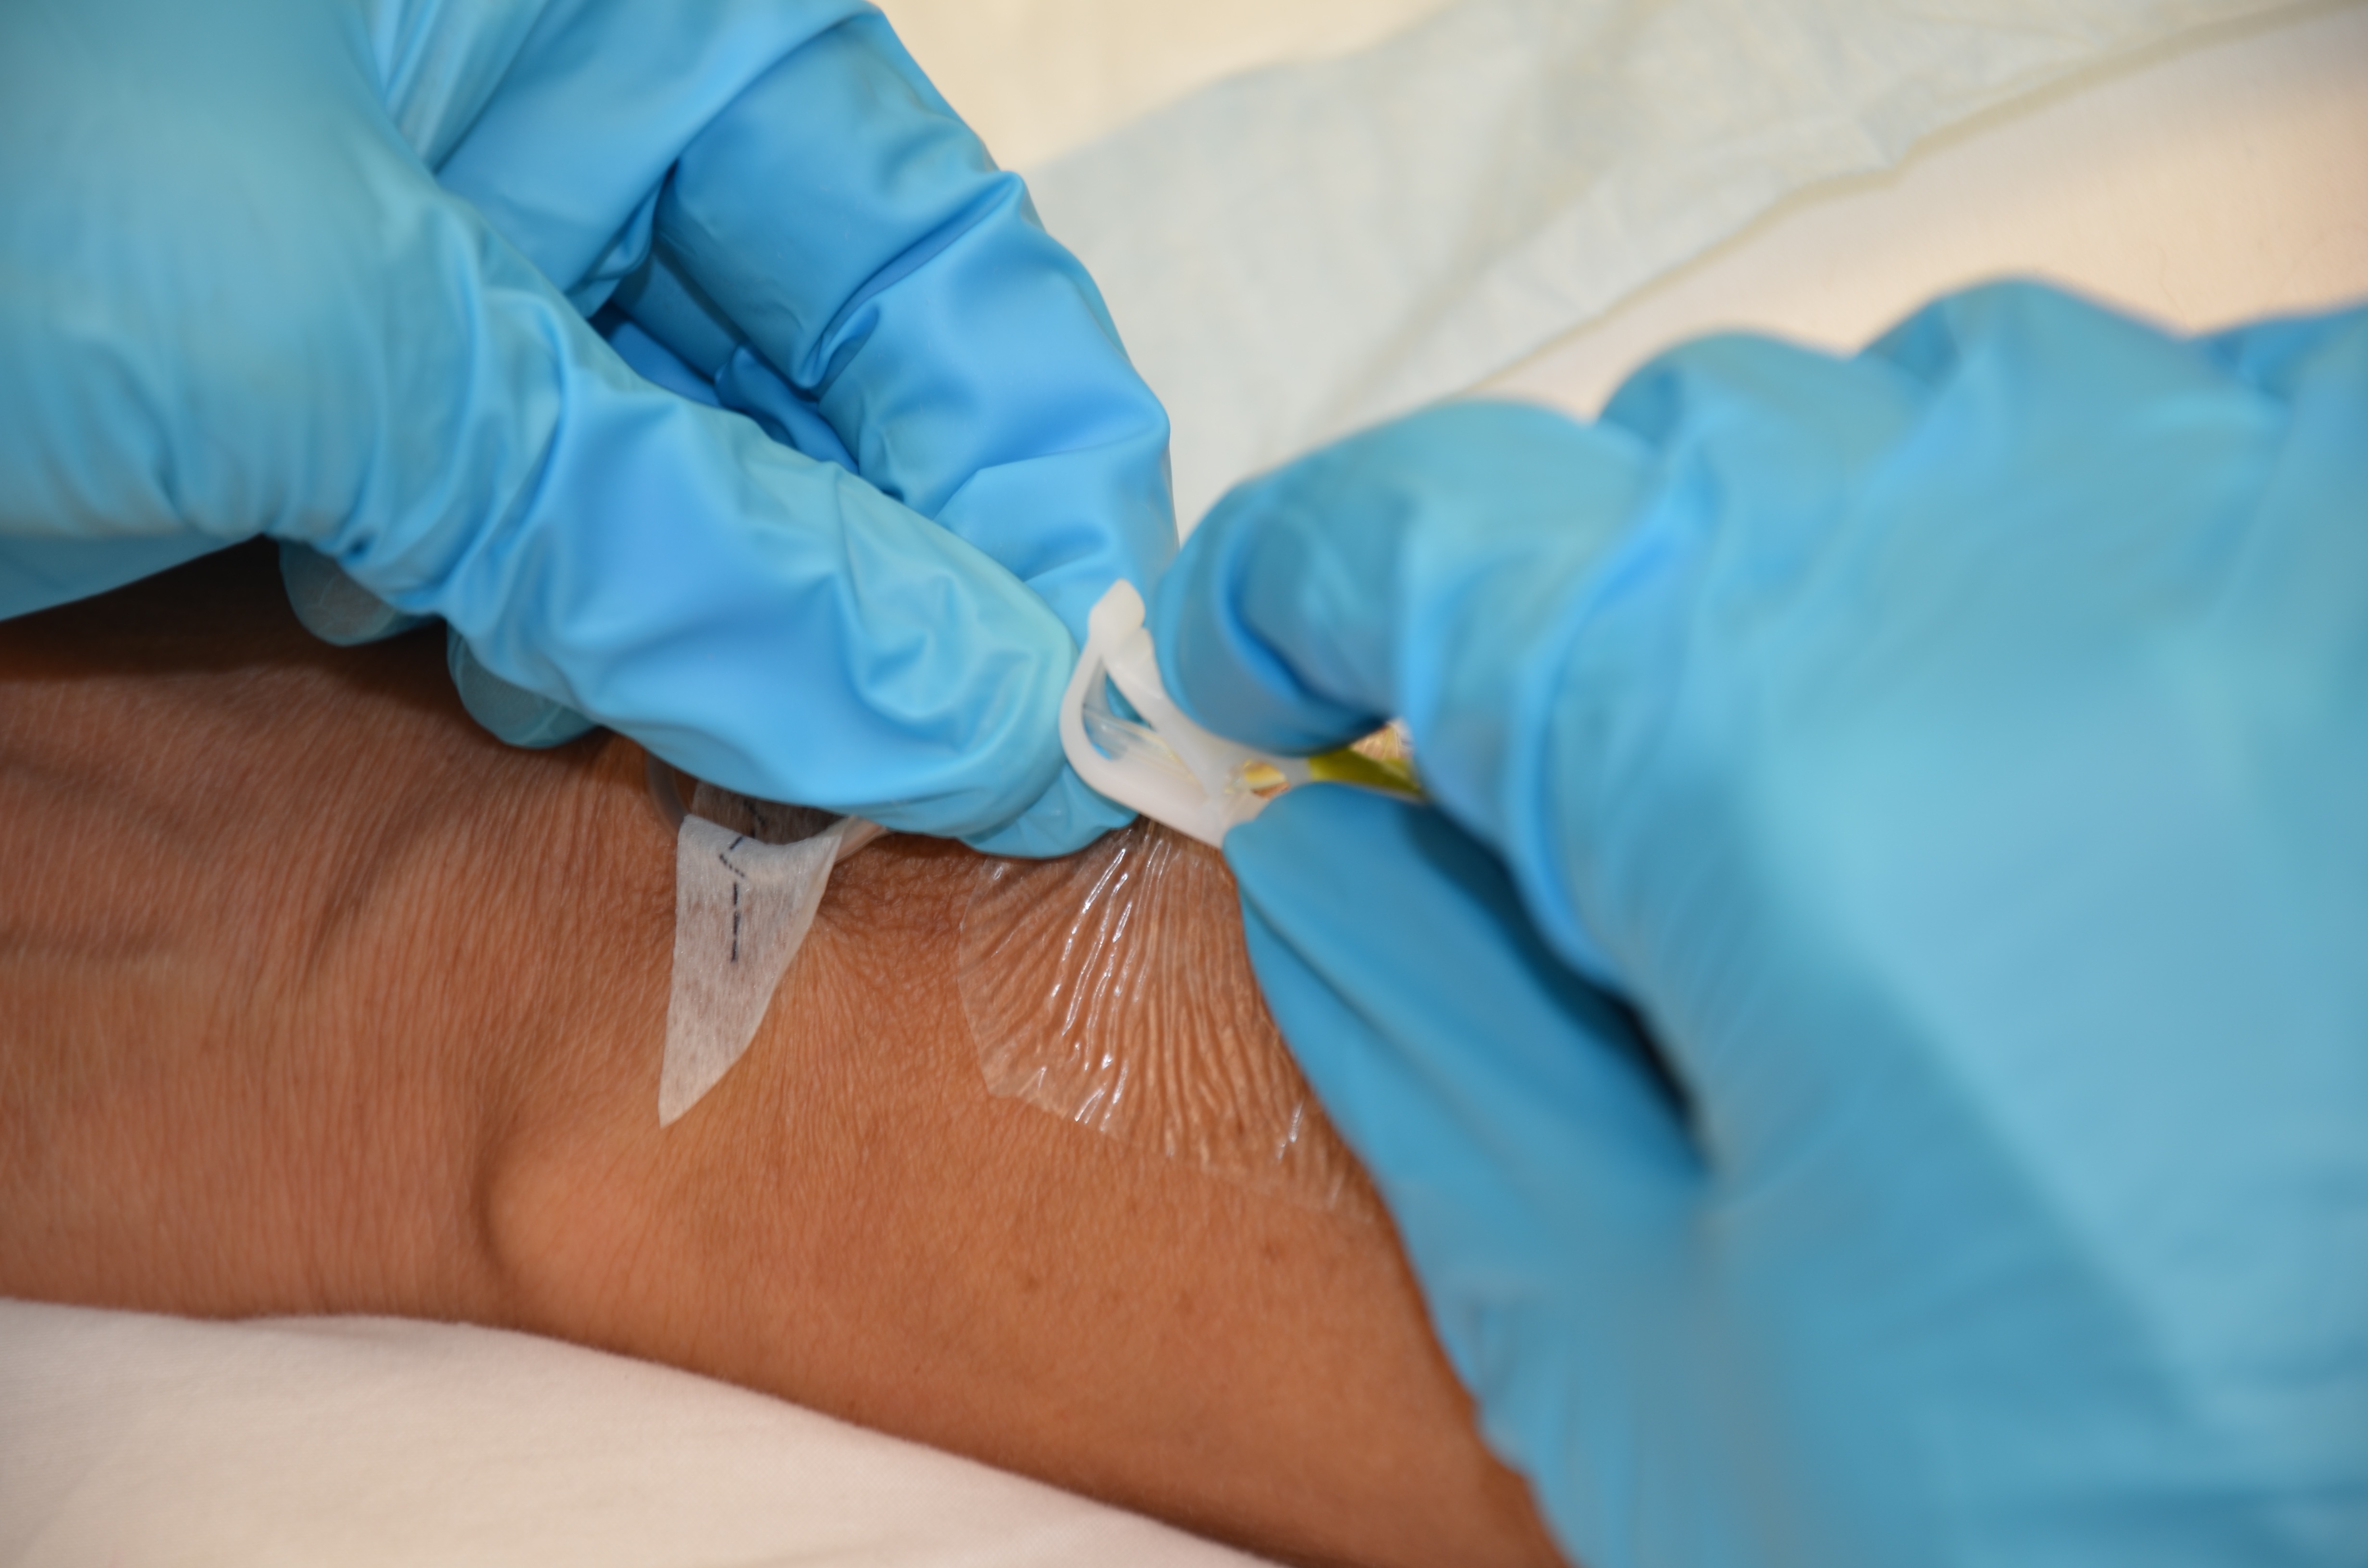
7. Disconnect primary tubing from the extension tubing; ensure the positive pressure cap remains on the extension tubing. Place a sterile cap on end of IV tubing if tubing will be reconnected for later infusion.
Disconnect IV tubing from saline lock
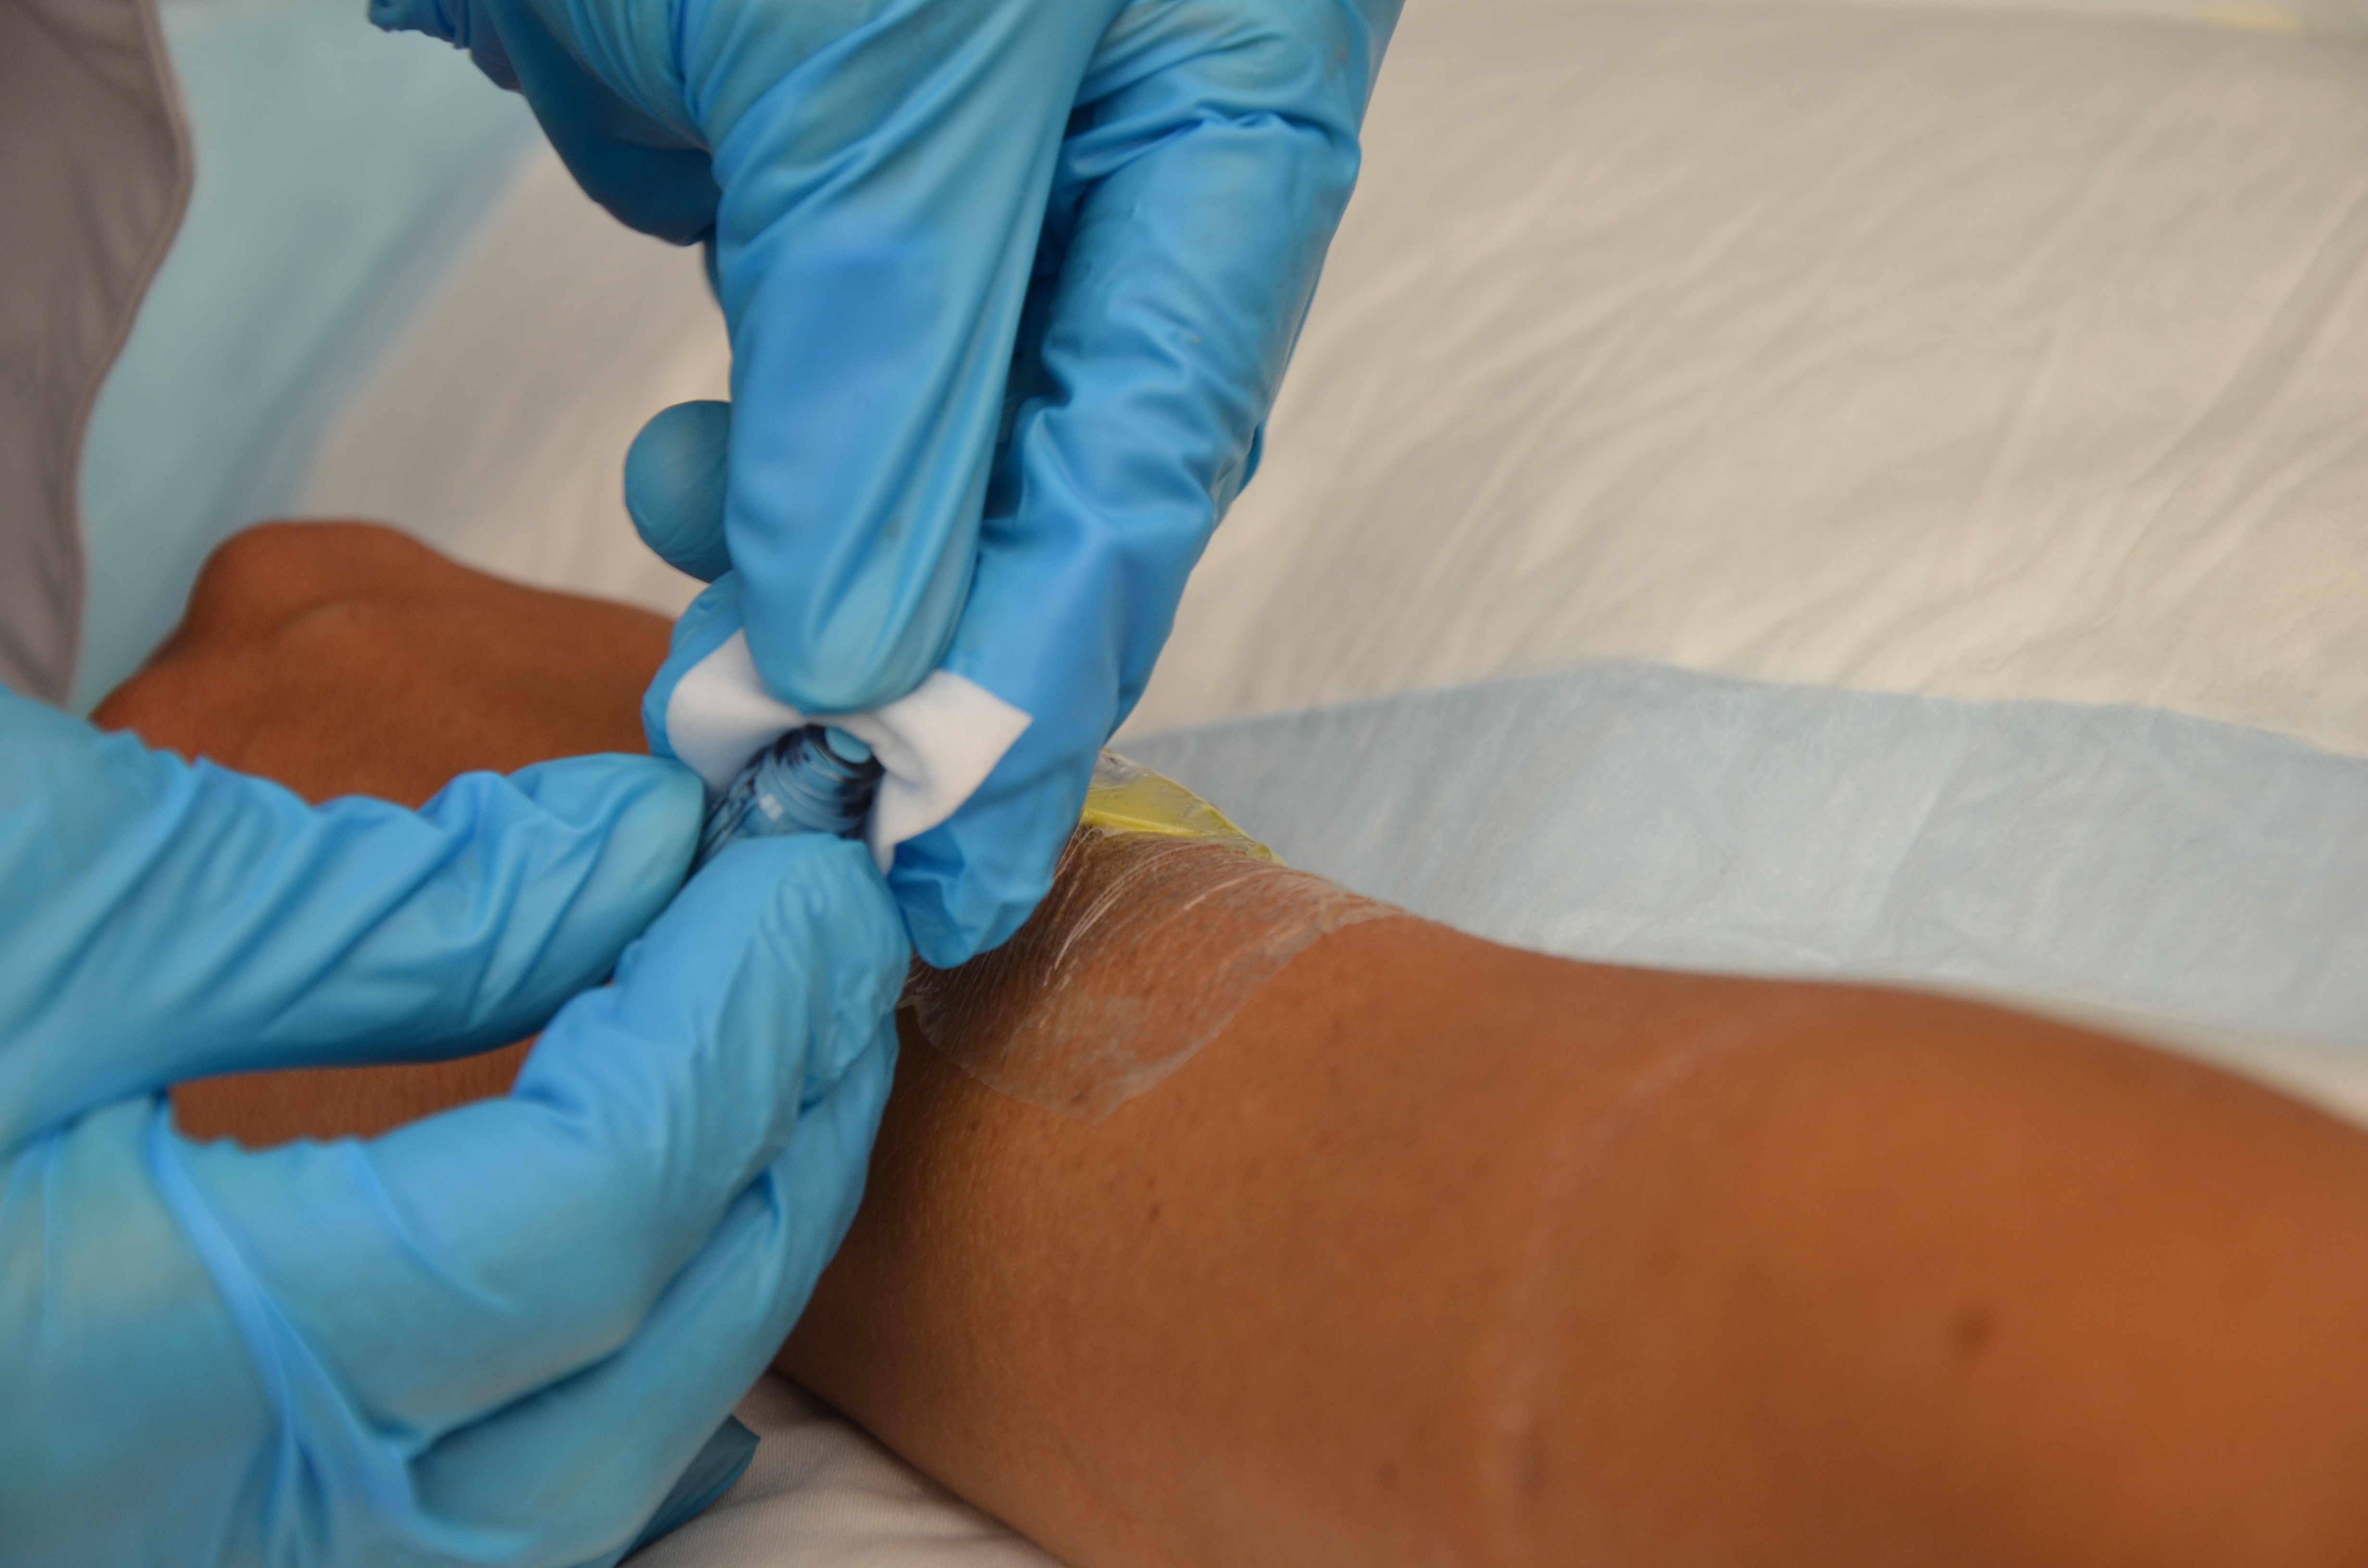
8. Scrub the hub for 15 seconds and let dry for 30 seconds.
Aseptic technique is required for all IV procedures. All access ports must be disinfected to decrease the bacterial load prior to use.
Clean positive pressure cap (Max Plus) with alcohol swab
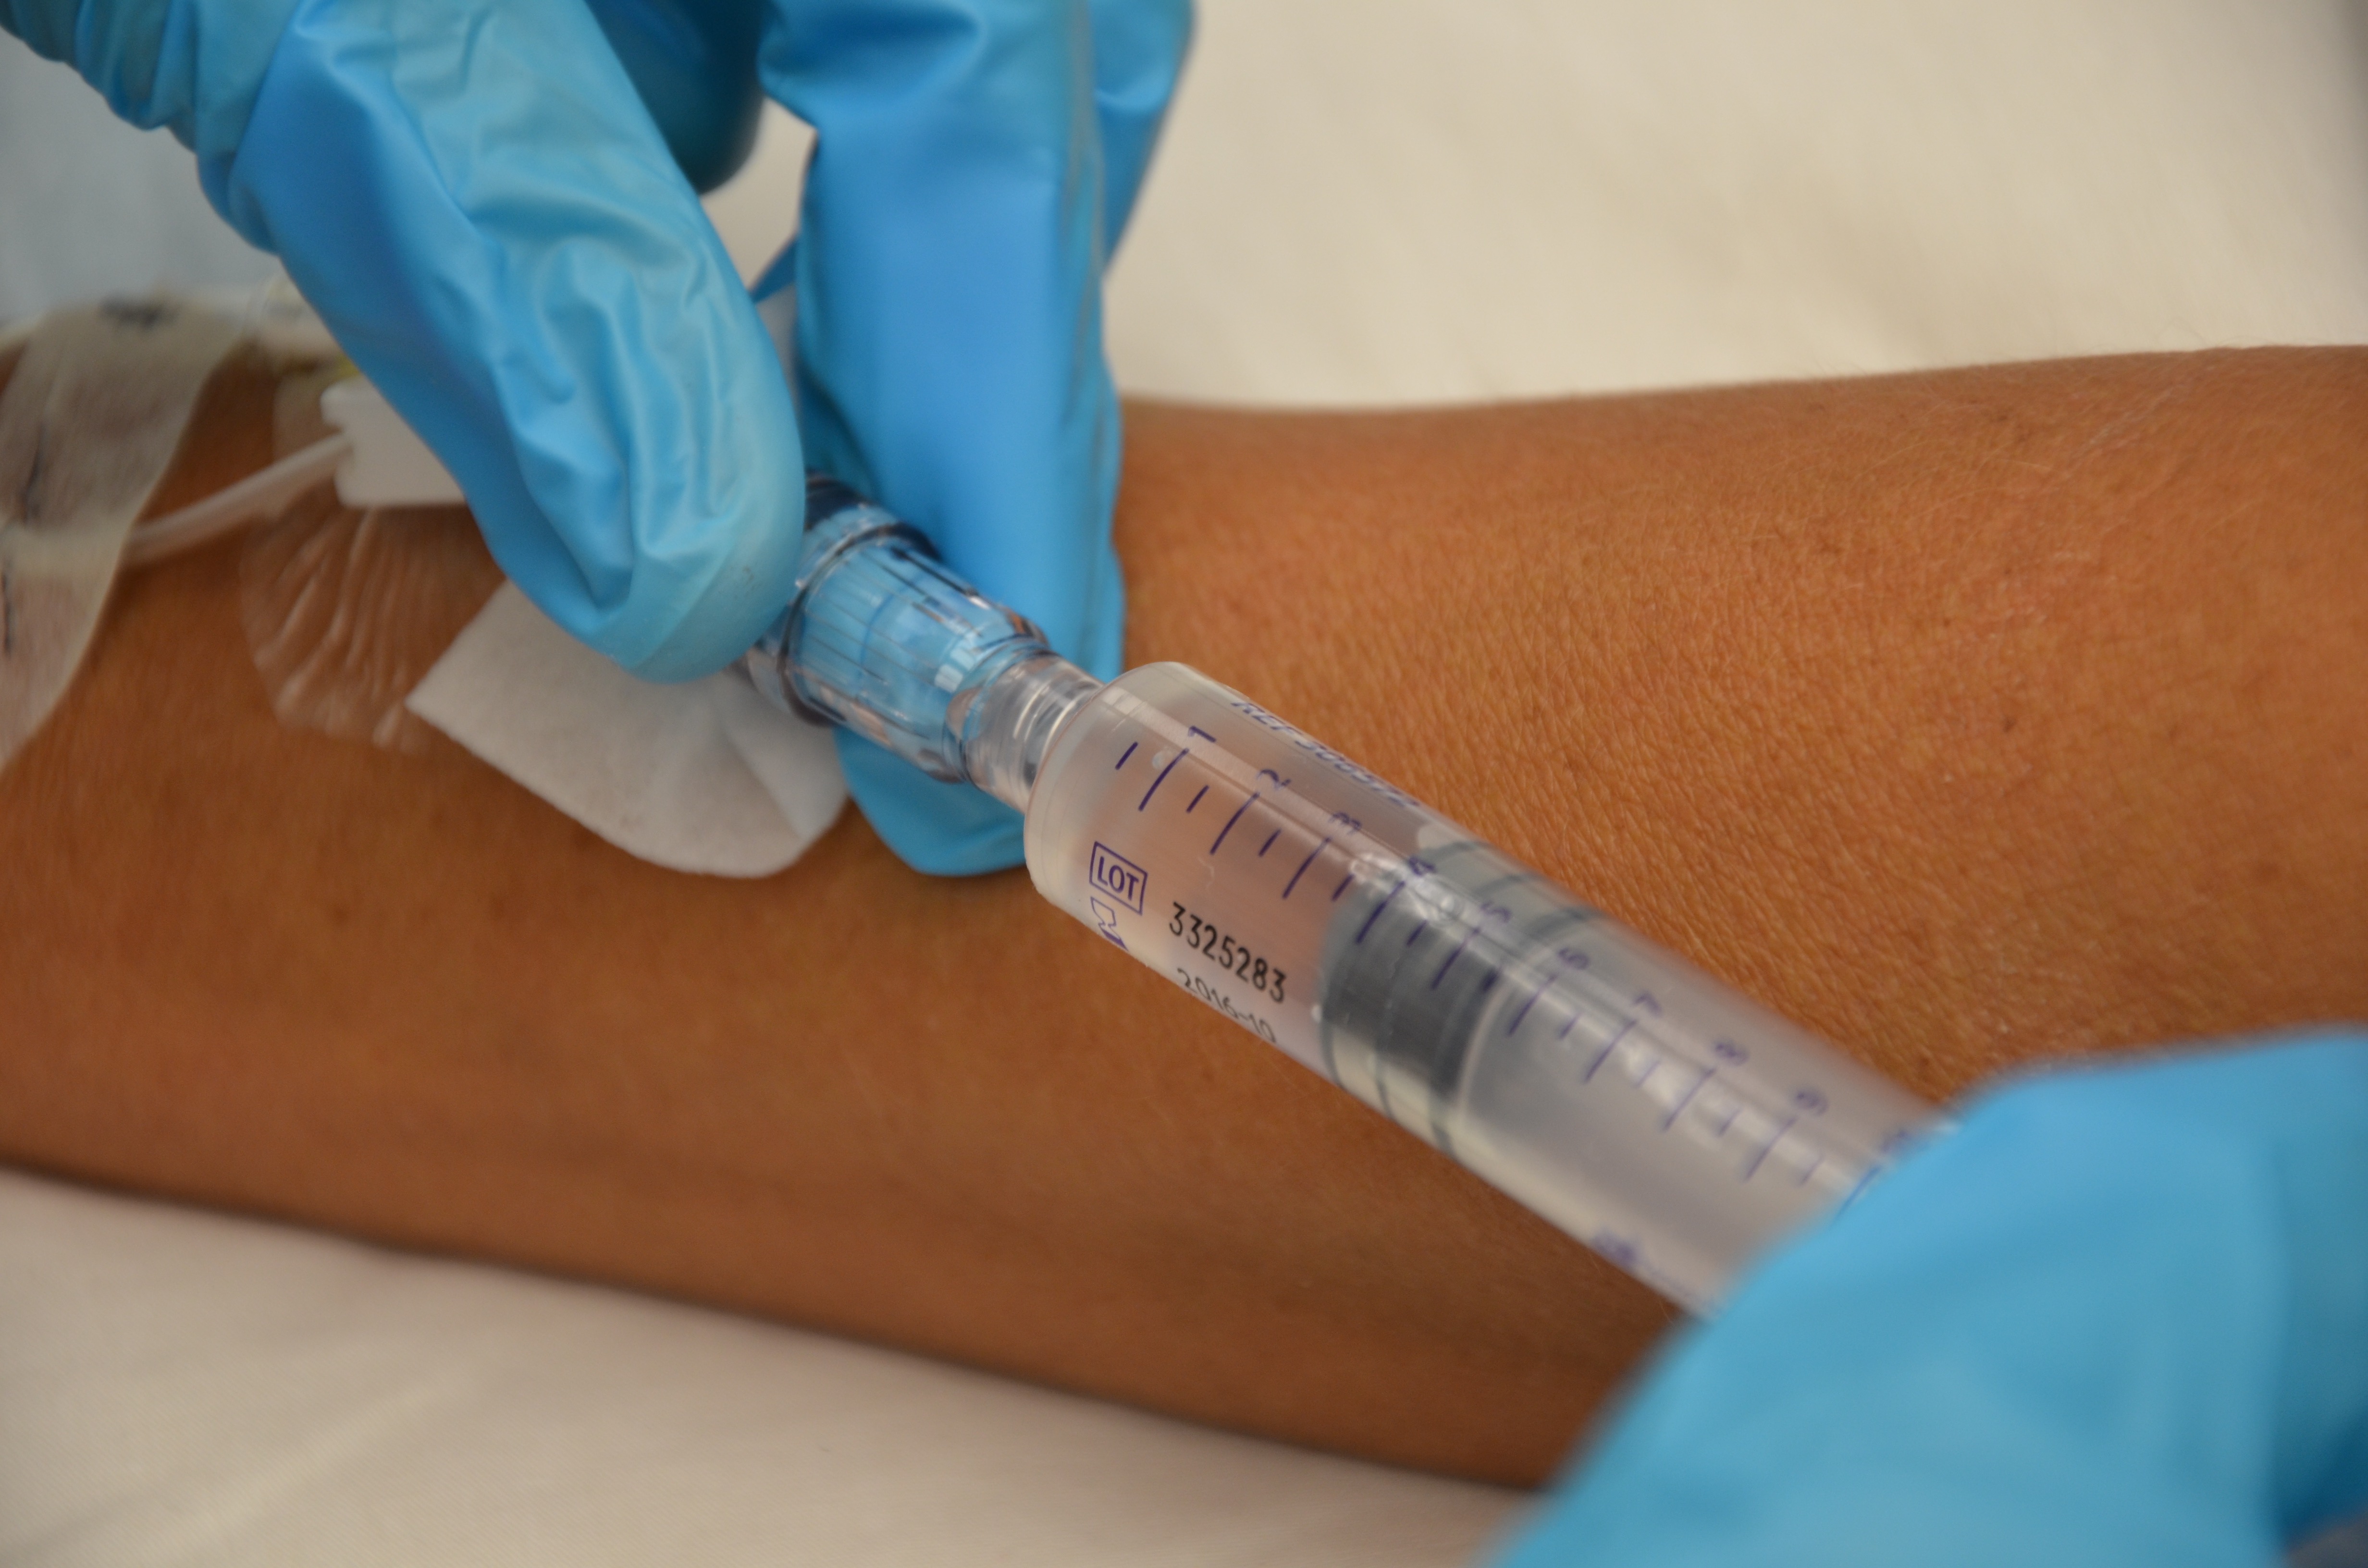
9. Attach 10 ml syringe prefilled with 0.9% normal saline and flush saline lock to clear the positive pressure cap. Do not bottom out syringe.
Turbulent stop-start flush ensures full flushing of the catheter.
Bottoming out the saline syringe with the plunger can cause reflux of fluid back into the catheter.
If resistance is felt, do not force flush. Assess IV site for pain, redness, or swelling.
Flush saline lock
10. Remove syringe and discard.
Proper disposal of equipment prevents the spread of microorganisms.
Discard syringe
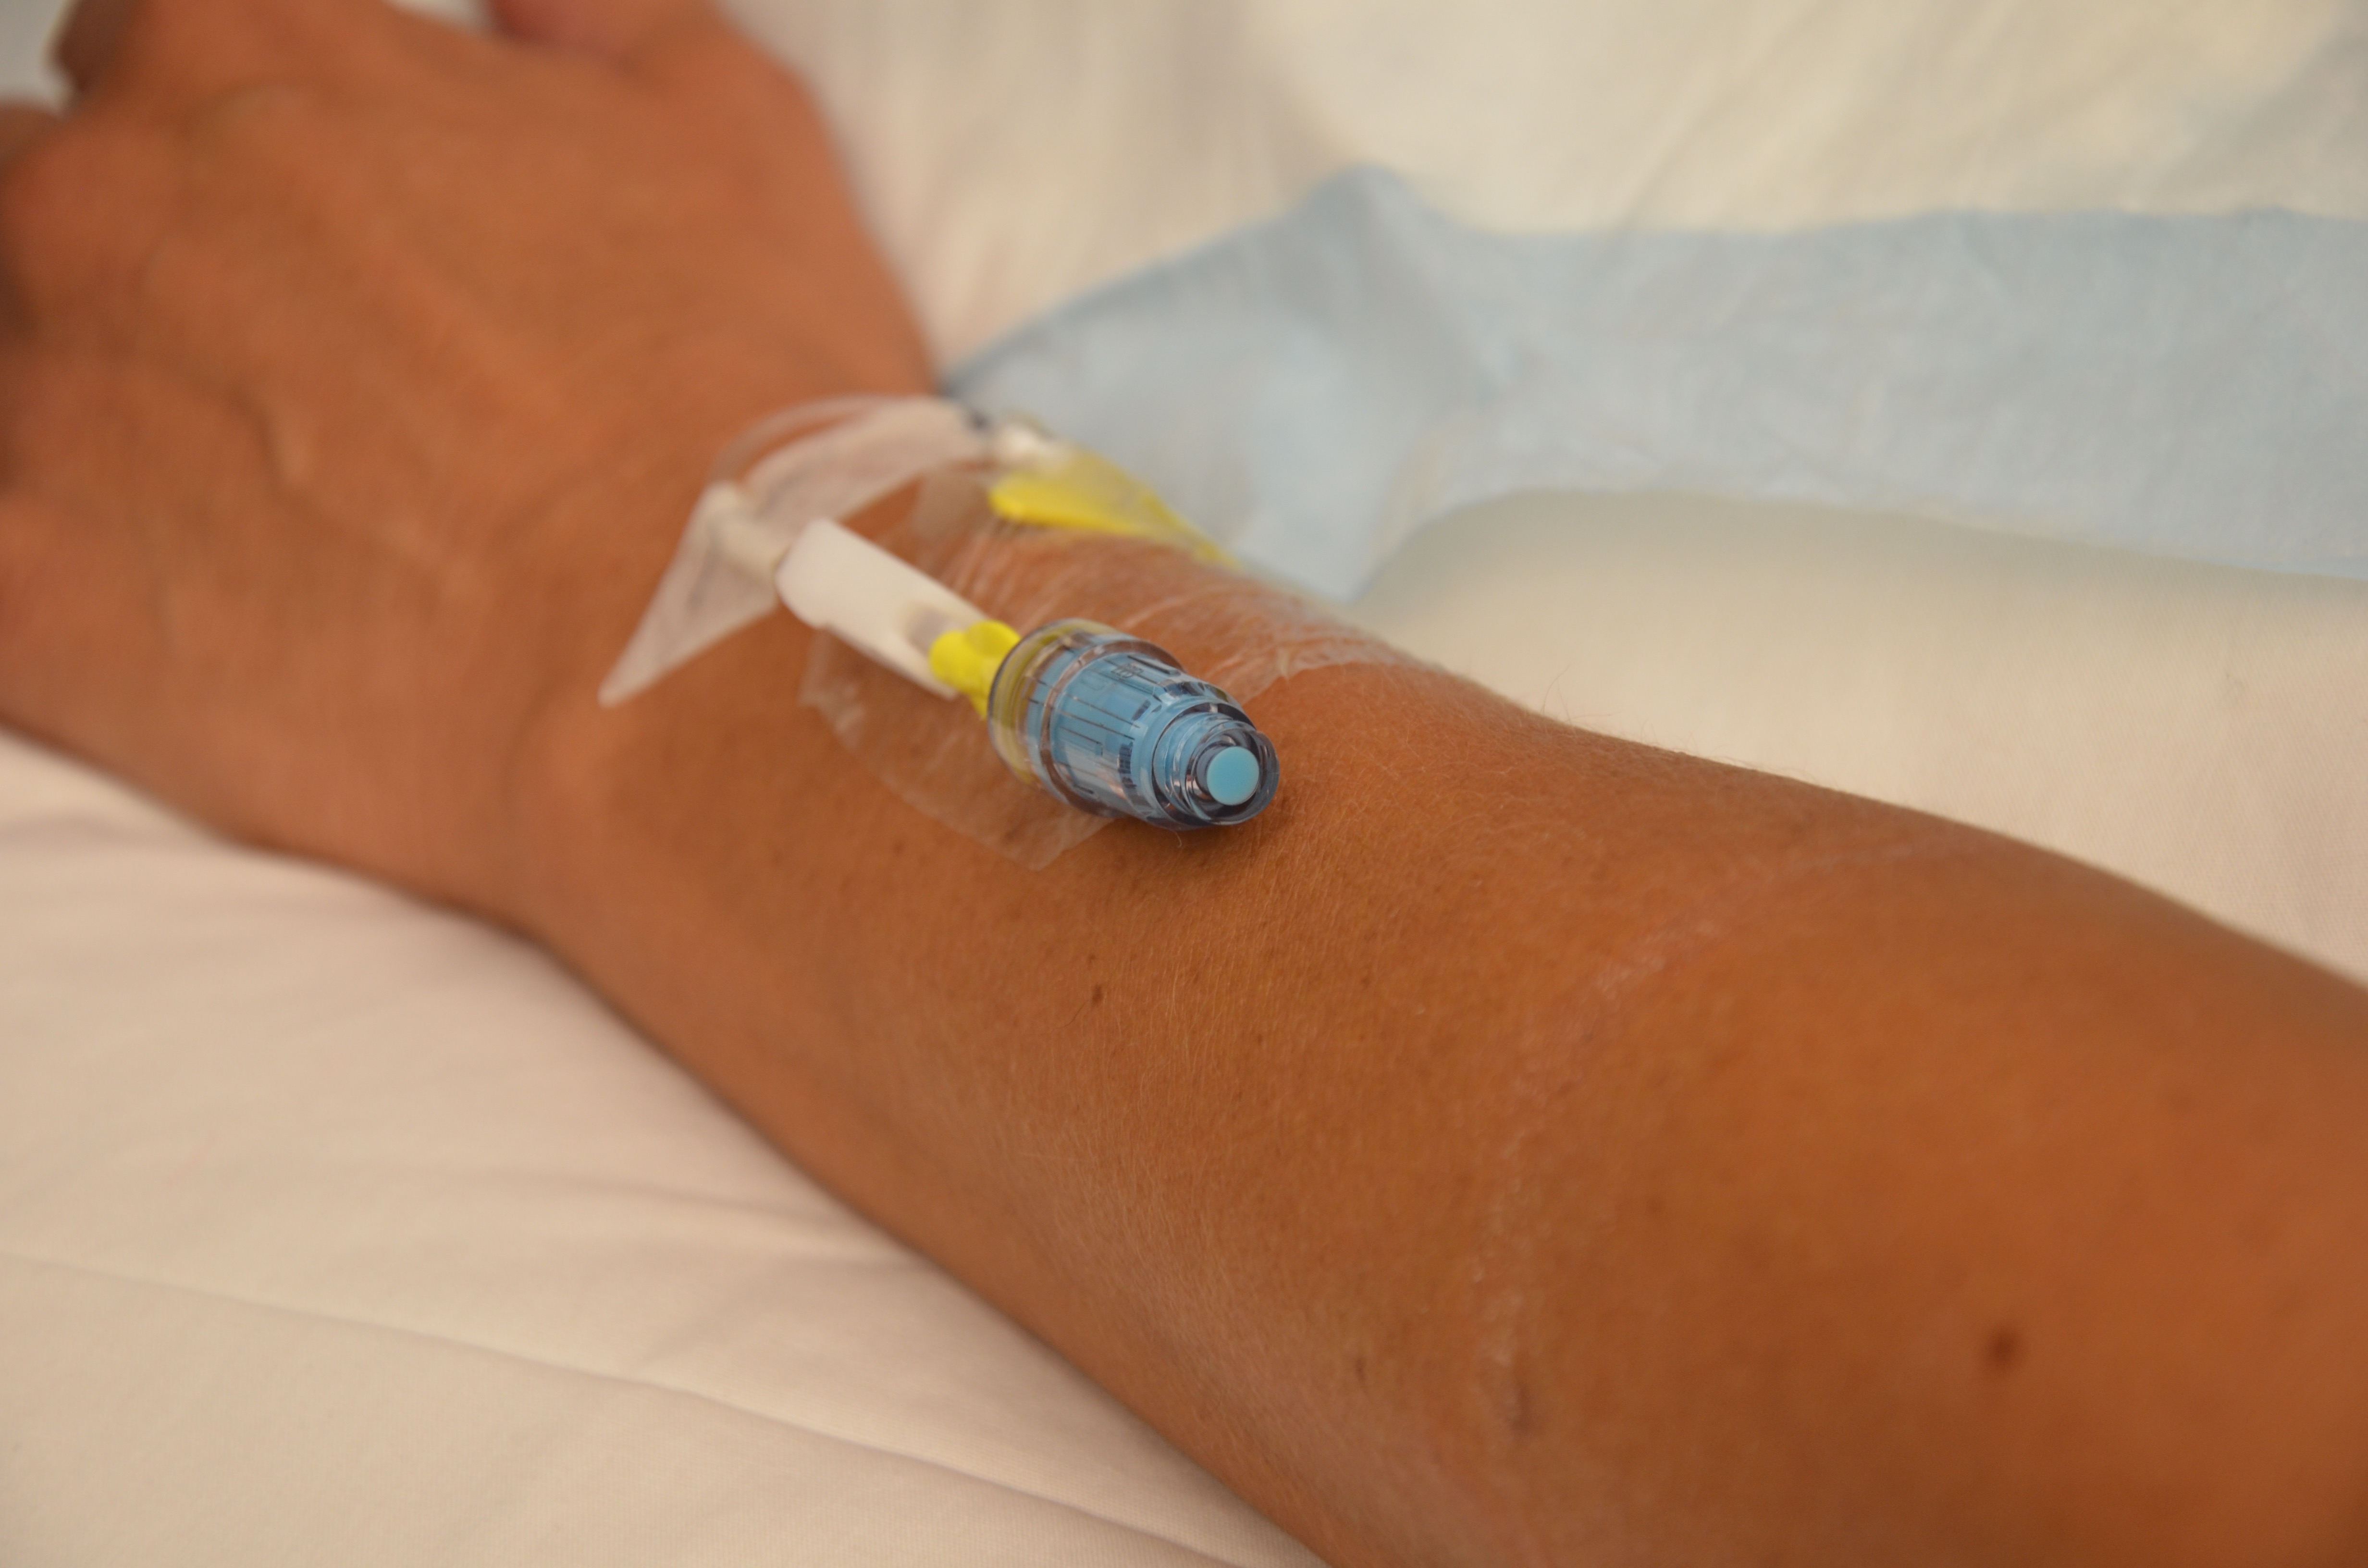
11. Clamp extension tubing.
Clamping the extension tubing as close to the IV site as possible prevents negative fluid displacement and accidental aspiration of blood at the catheter tip.
Close clamp on saline lockSaline lock
12. Wipe top of positive pressure cap with alcohol swab to remove fluid residue.
Removal of excess fluid prevents bacterial growth on the hub.
13. Document procedure as per agency policy.
Document date, time, and IV site assessment.
Data source: Perry et al., 2014; Vancouver Coastal Health, 2008
A peripheral IV (saline lock) may be discontinued if ordered by a physician or nurse practitioner; if the patient is discharged from a health care facility; if signs of phlebitis, infiltration, or extravasation occur; or if the saline lock is no longer required for fluids or medication (Fulcher & Fraser, 2007). Peripheral IV’s should be removed promptly when no longer needed to avoid a catheter-related bloodstream infection (CR-BSI), as well as unnecessary pain and trauma (Infusion Nurses Society, 2012). In general, saline locks are changed every 72 hours. If a patient has a peripheral IV in an area of flexion, the IV site should be replaced within 24 hours, or when the patient is stable. Other research shows that peripheral IV cannulas should not be routinely changed but replaced based on whether the site is functioning, the saline lock is required, the insertion site is patent, and/or the insertion site is a source of infection (CDC 2011; Infusion Nurses Society, 2011).
At times, a physician may order IV fluids to be discontinued but request to have the IV converted to saline lock. Be sure to assess the order for discontinuing an IV. Before removing an IV, consider the following:
Is the patient drinking enough fluids?
Is the patient voiding, passing gas, and having bowel sounds?
Is there a need for the IV (IV meds)?
Are the lab values within normal limits (Hgb, K)?
Is the patient using an epidural/PCA?
Do you have a physician order?
Review the steps in Checklist 72 for removing a peripheral IV.
Checklist 72: Removing a Peripheral IV
Disclaimer: Always review and follow your hospital policy regarding this specific skill.
Safety considerations:
Assess the patient and be sure they are medically stable prior to removing SL. Check the following: lab values, ongoing need for fluids or IV medications, inability to eat or drink, presence of nausea or vomiting.
If patient has ongoing medical concerns requiring an IV, alert the physician.
Steps
Additional Information
1. Confirm physician’s order or the reason to remove the IV cannula.
This step prevents errors in the health care setting.
2. Perform hand hygiene and collect supplies.
You will need sterile gauze (two 2x2s), clean gloves, tape, alcohol swab as required, C & S swab if purulent drainage present.
3. Identify yourself; identify the patient using two identifiers and comparing the MAR to the patient’s wristband; explain the procedure to the patient.
Proper identification prevents errors. Explaining the procedure educates the patient and allows patient to ask questions.
Compare MAR with patient wristband
4. Perform hand hygiene and apply clean gloves. Open up sterile gauze for easy access and place close by.
Preparing gauze allows for easy access once cannula is removed.
5. Remove tape on extension tubing.
Tape must be removed prior to removing cannula.
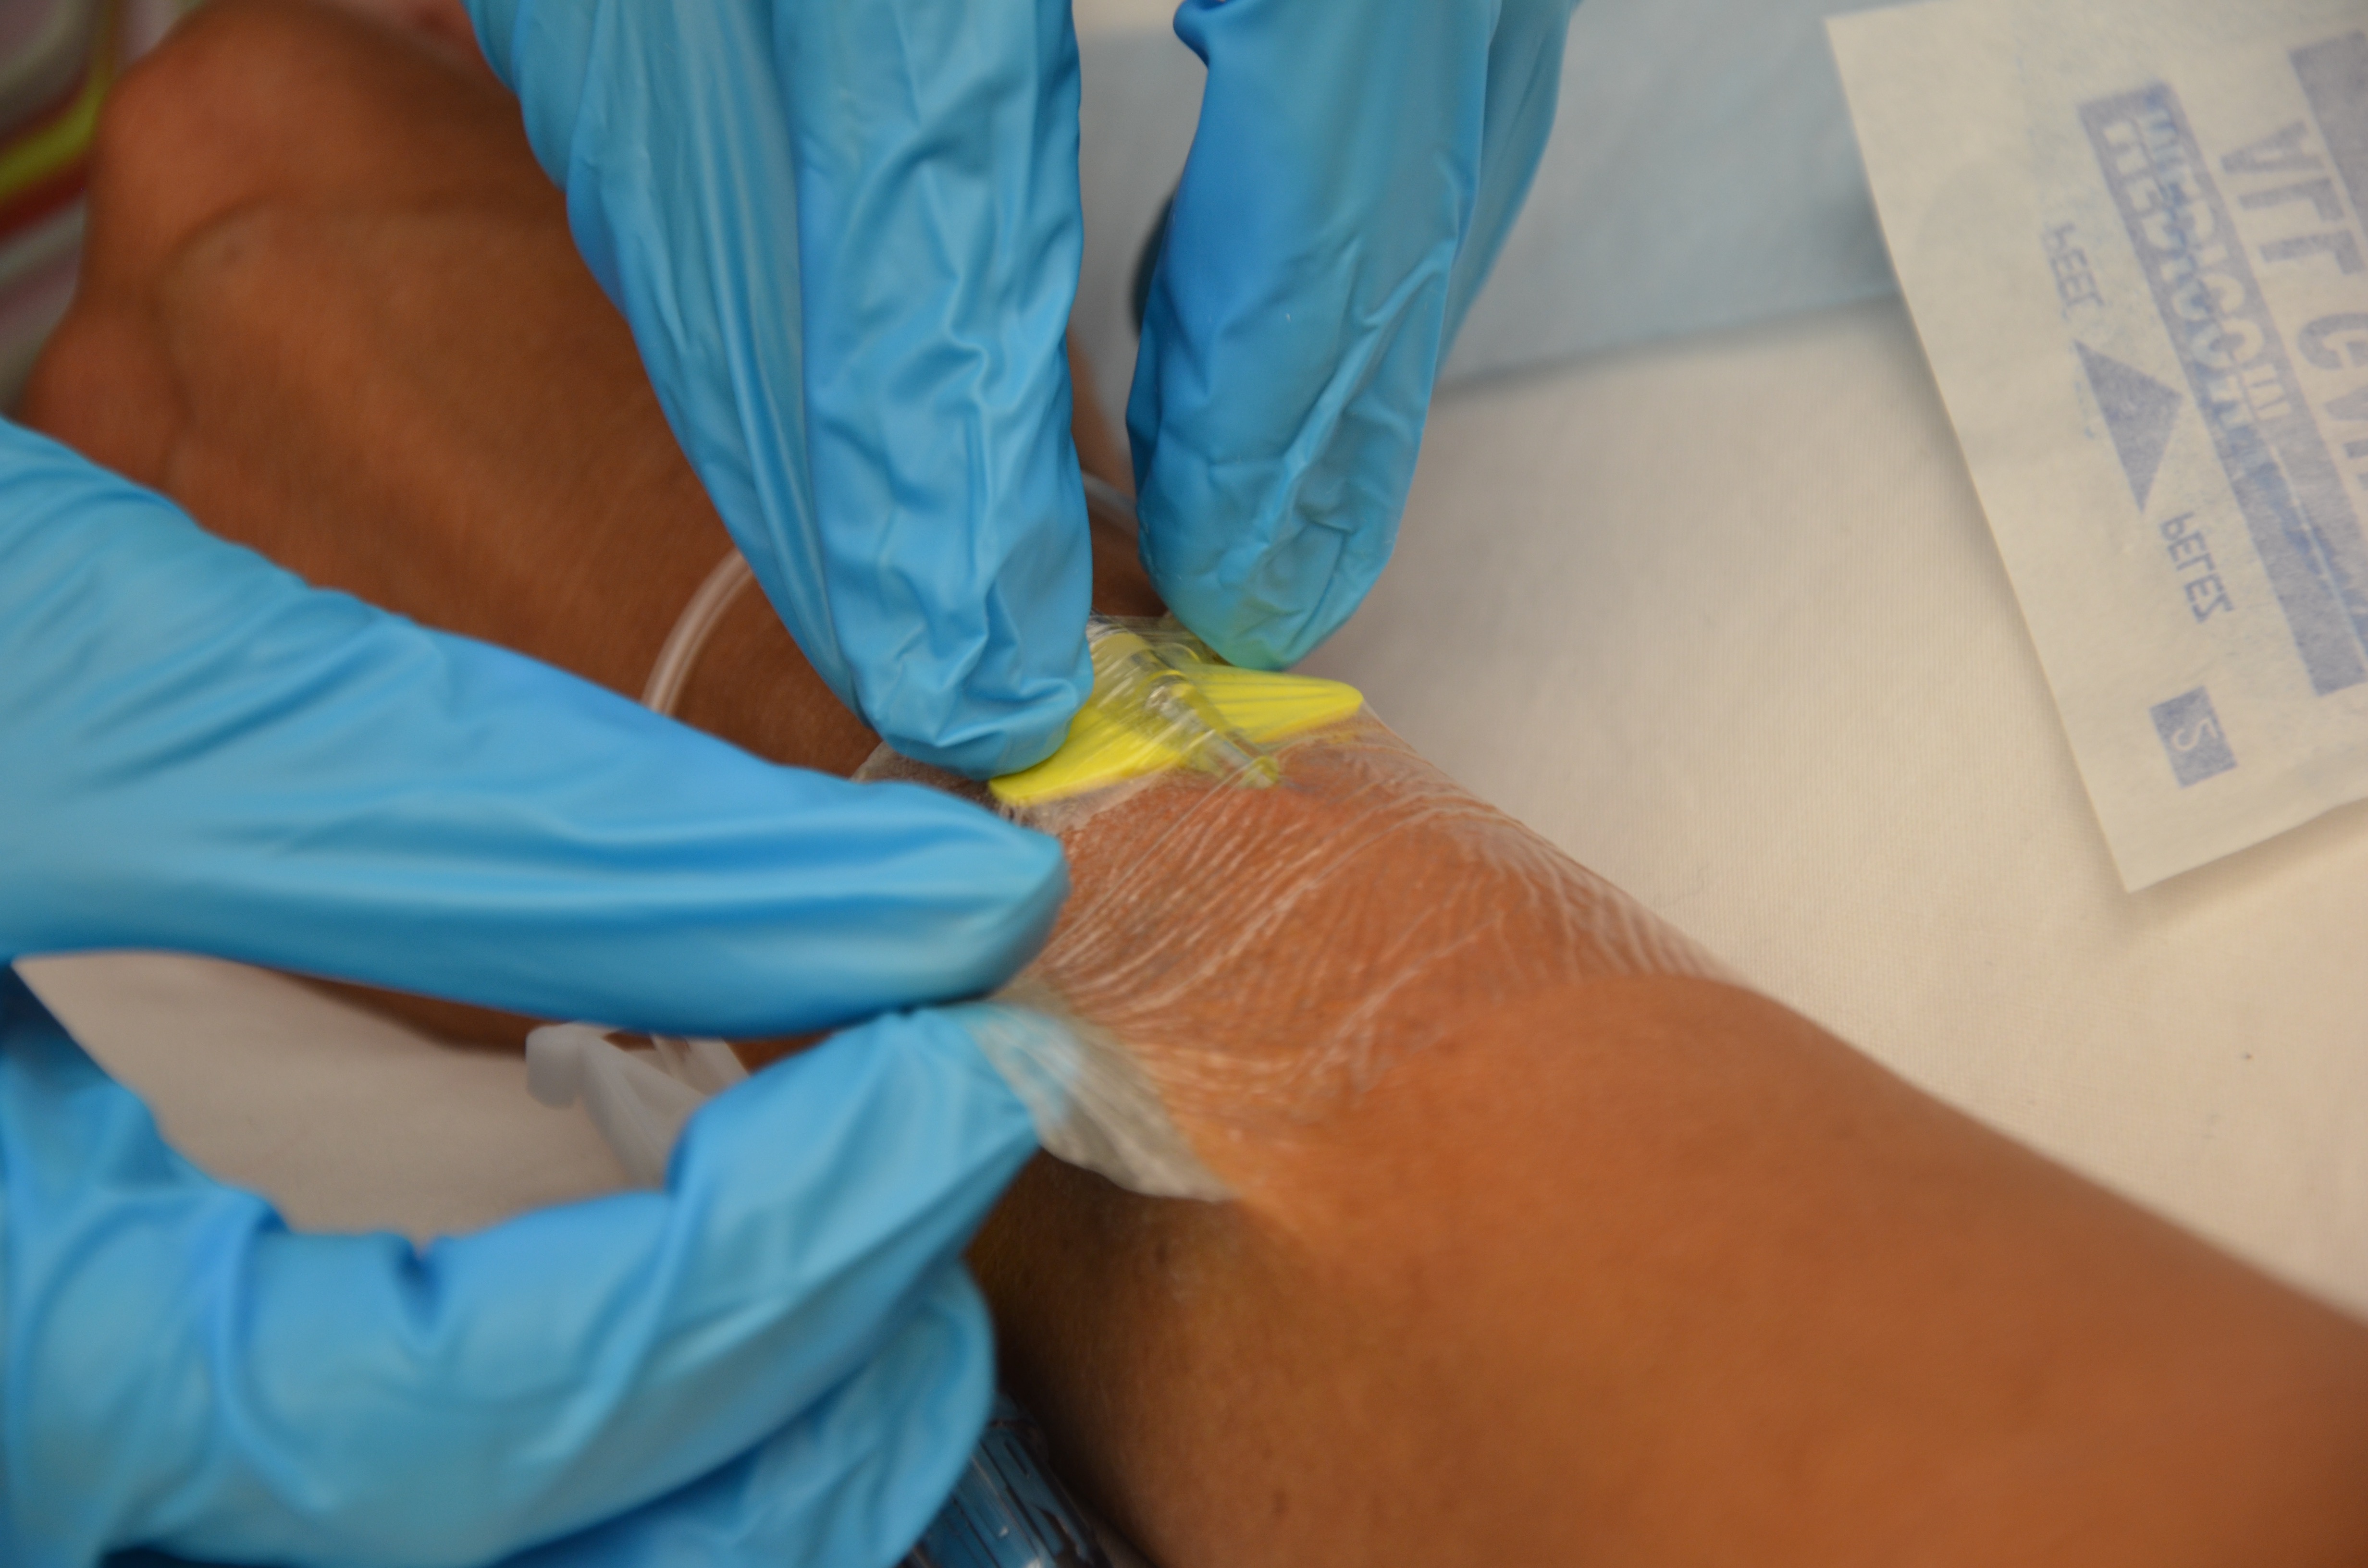
6. Remove transparent dressing:
Stabilize the IV cannula.
Loosen one edge of transparent dressing toward the IV site by stretching the dressing in the direction of loosened edge.
Loosen the other edge of the dressing and repeat previous step.
Removing transparent dressingCompletely remove dressing from IV site
7. If purulent drainage is present, perform C & S swab and clean area with alcohol swab.
This provides follow-up data for potential infection.
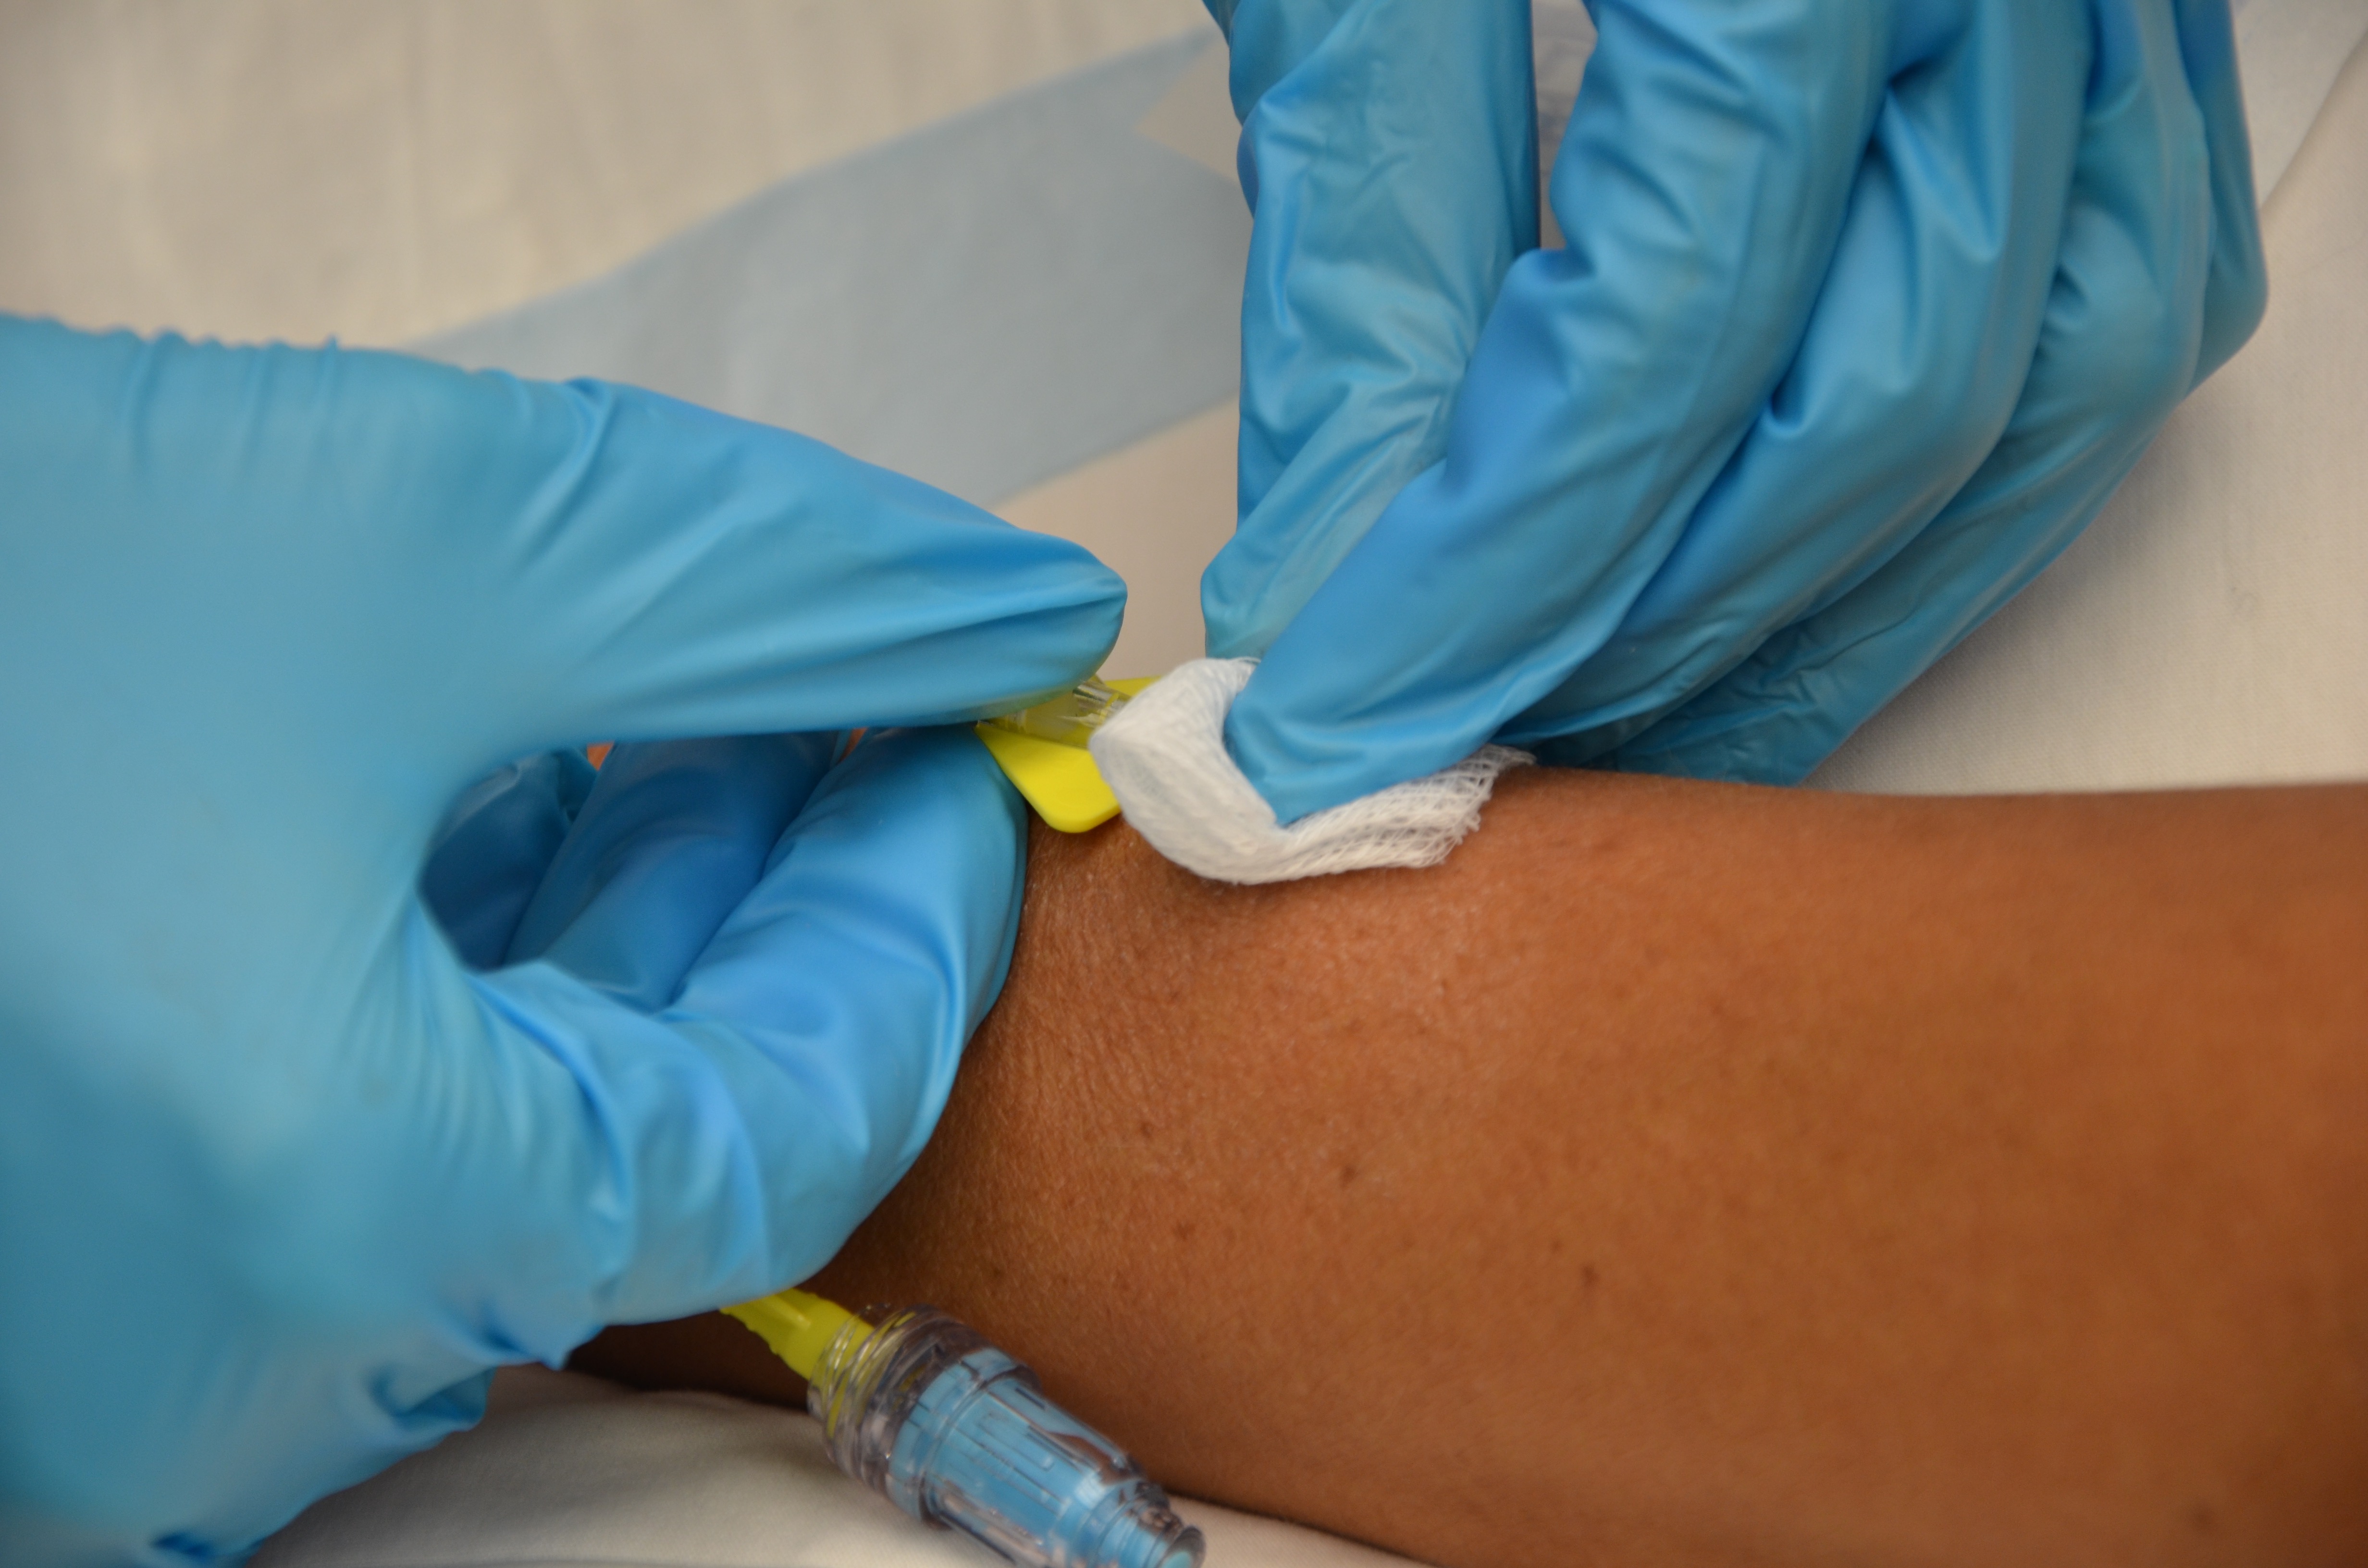
8. Hold sterile gauze above the insertion site; do not apply pressure. Keeping the cannula parallel to the skin, pull out in a straight, slow, steady motion. Assess catheter tip and discard cannula as per agency policy.
Applying pressure to the IV site upon removal of the catheter is painful for the patient. Remove catheter first, then apply pressure.
Gauze over cannulaRemove saline lock
9. Place sterile gauze over insertion site and apply gentle pressure until bleeding stops, usually for 2 to 3 minutes.
If patient is on coagulation therapy, extended pressure will be required to stop bleeding at IV site for 5 minutes.
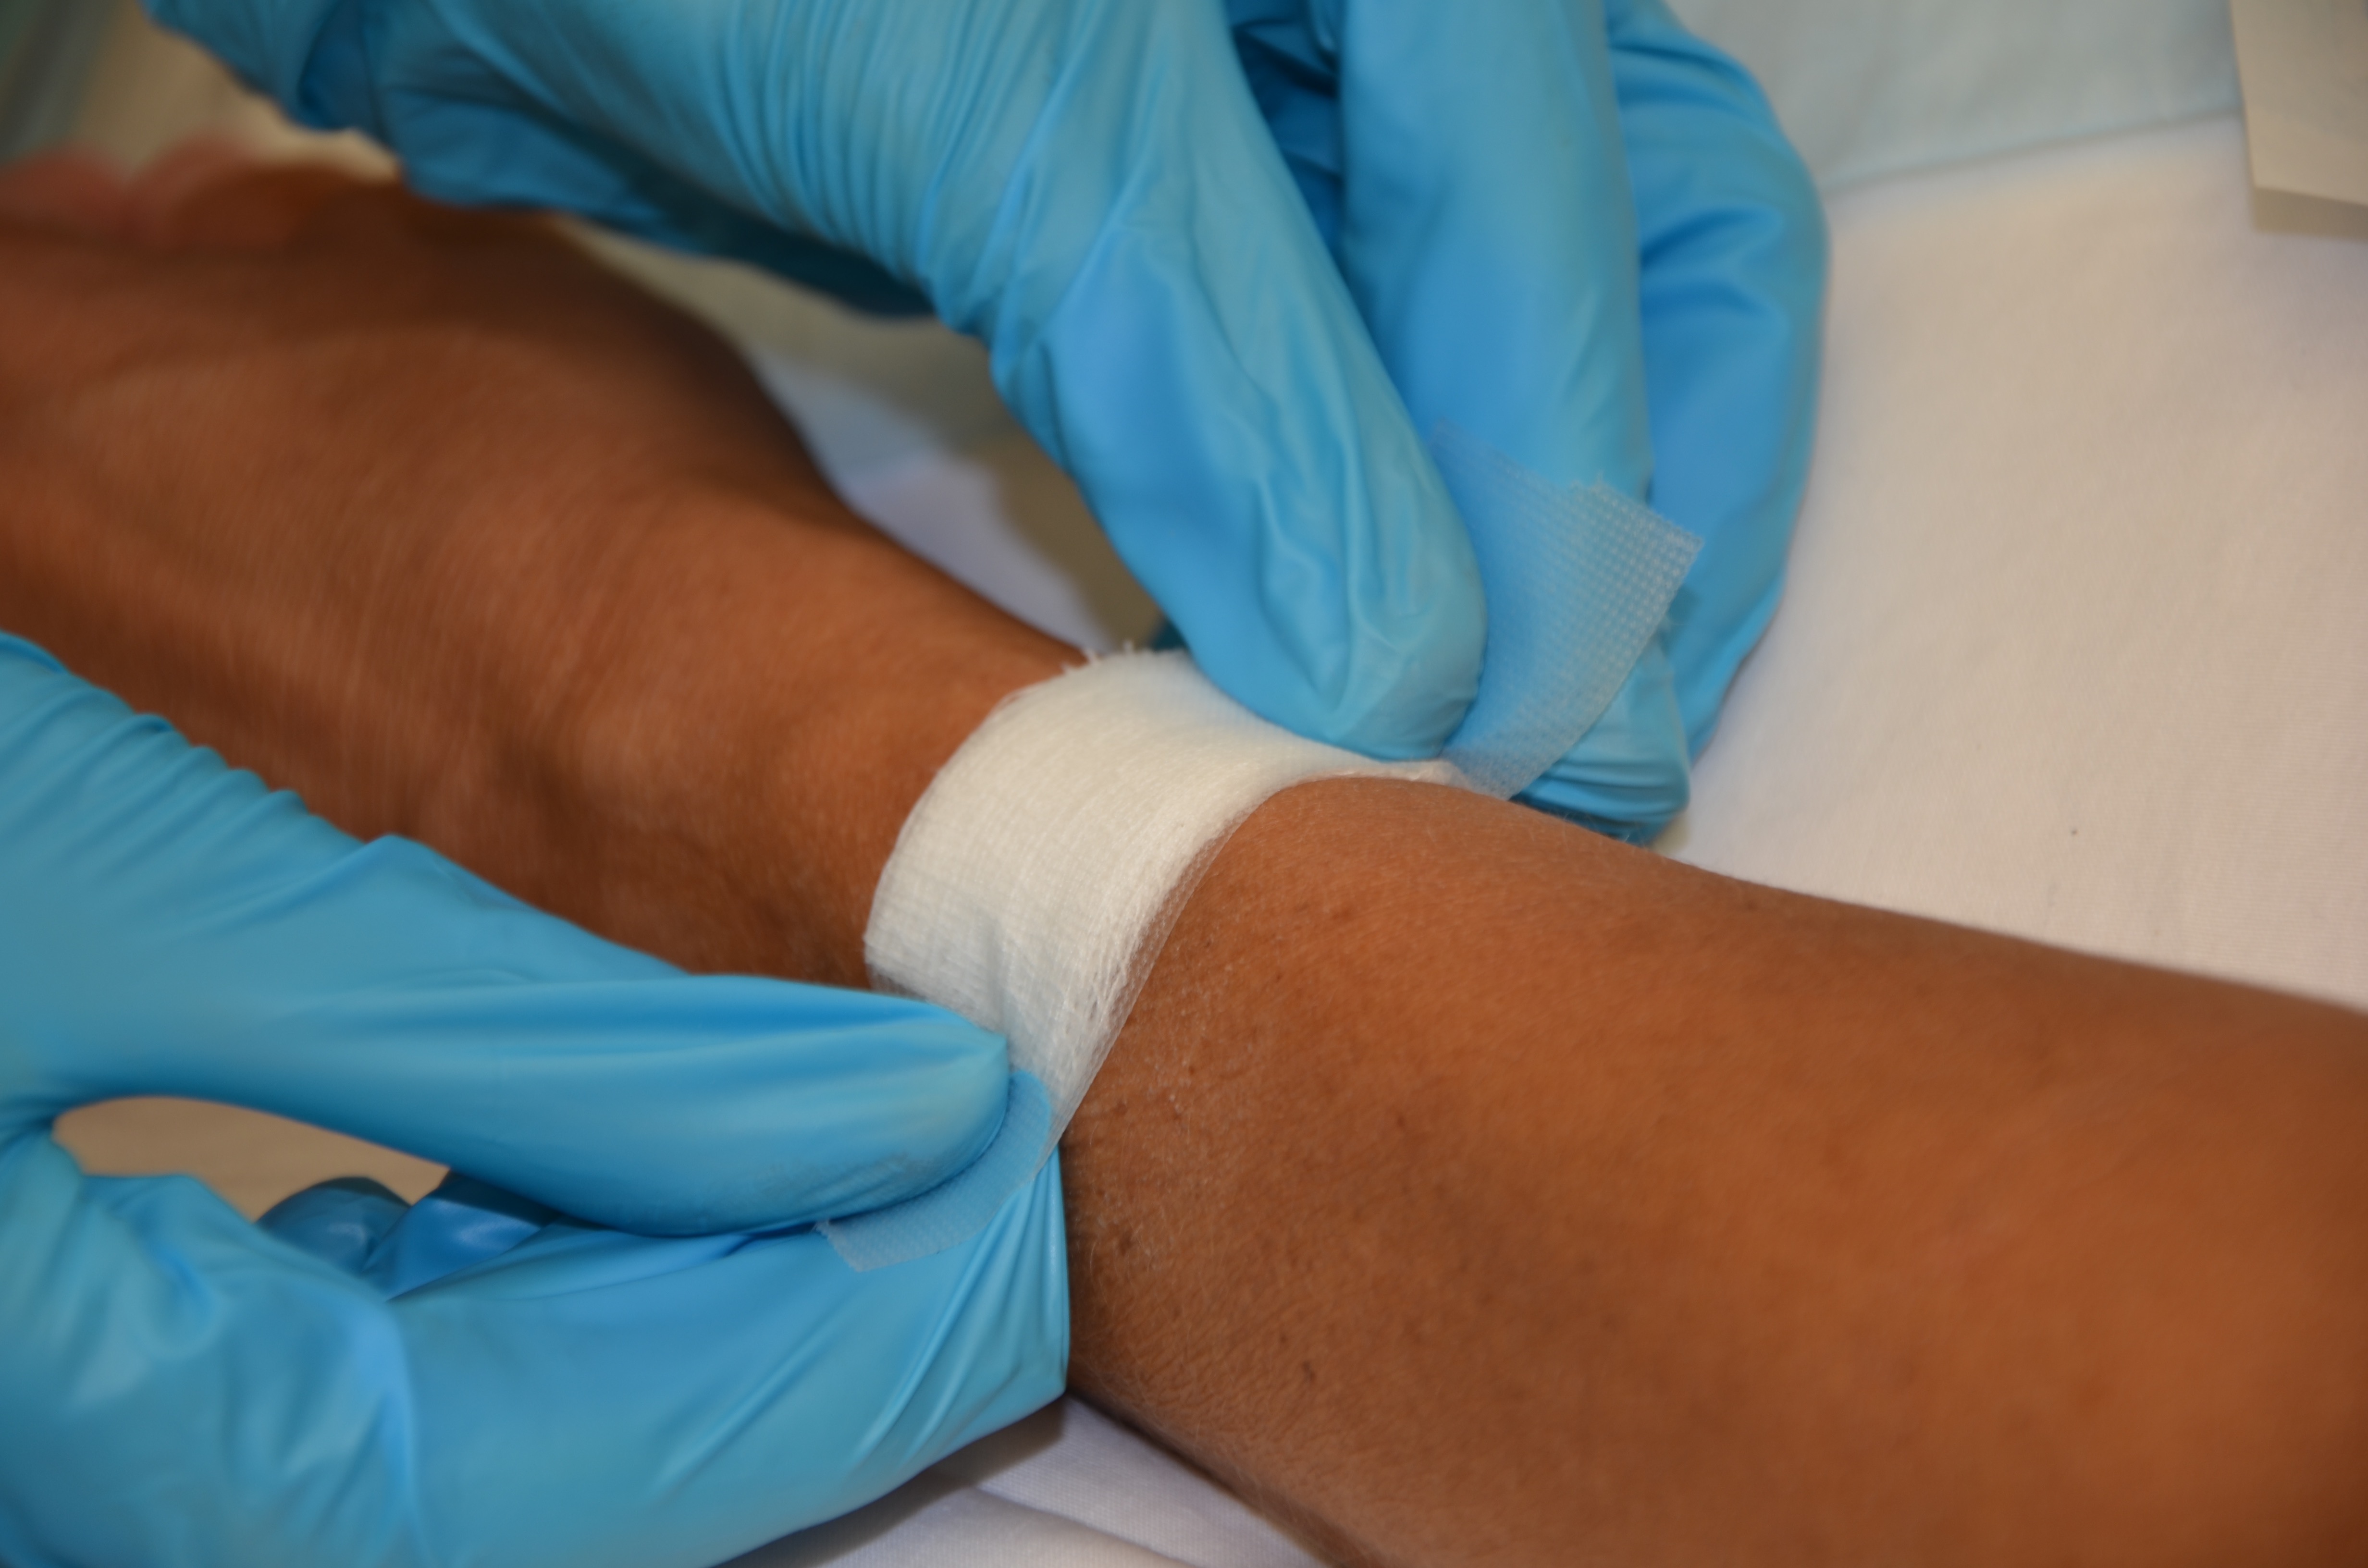
10. Apply new sterile gauze and tape to create occlusive dressing on old IV site.
This prevents bacteria from entering the old IV site.
Apply sterile gauze over IV insertion site
11. Discard supplies, remove gloves, and perform hand hygiene.
These steps prevent the spread of microorganisms.
Hand hygiene with ABHR
12. Document procedure as per agency policy.
Document date, time, condition of cannula, appearance of IV site, and type of dressing applied.
Data source: ATI, 2015; Perry et al., 2014; Phillips, 2005