Want to create or adapt books like this? Learn more about how Pressbooks supports open publishing practices.
Chapter 10. Tubes and Attachments
10.5 Tracheostomies
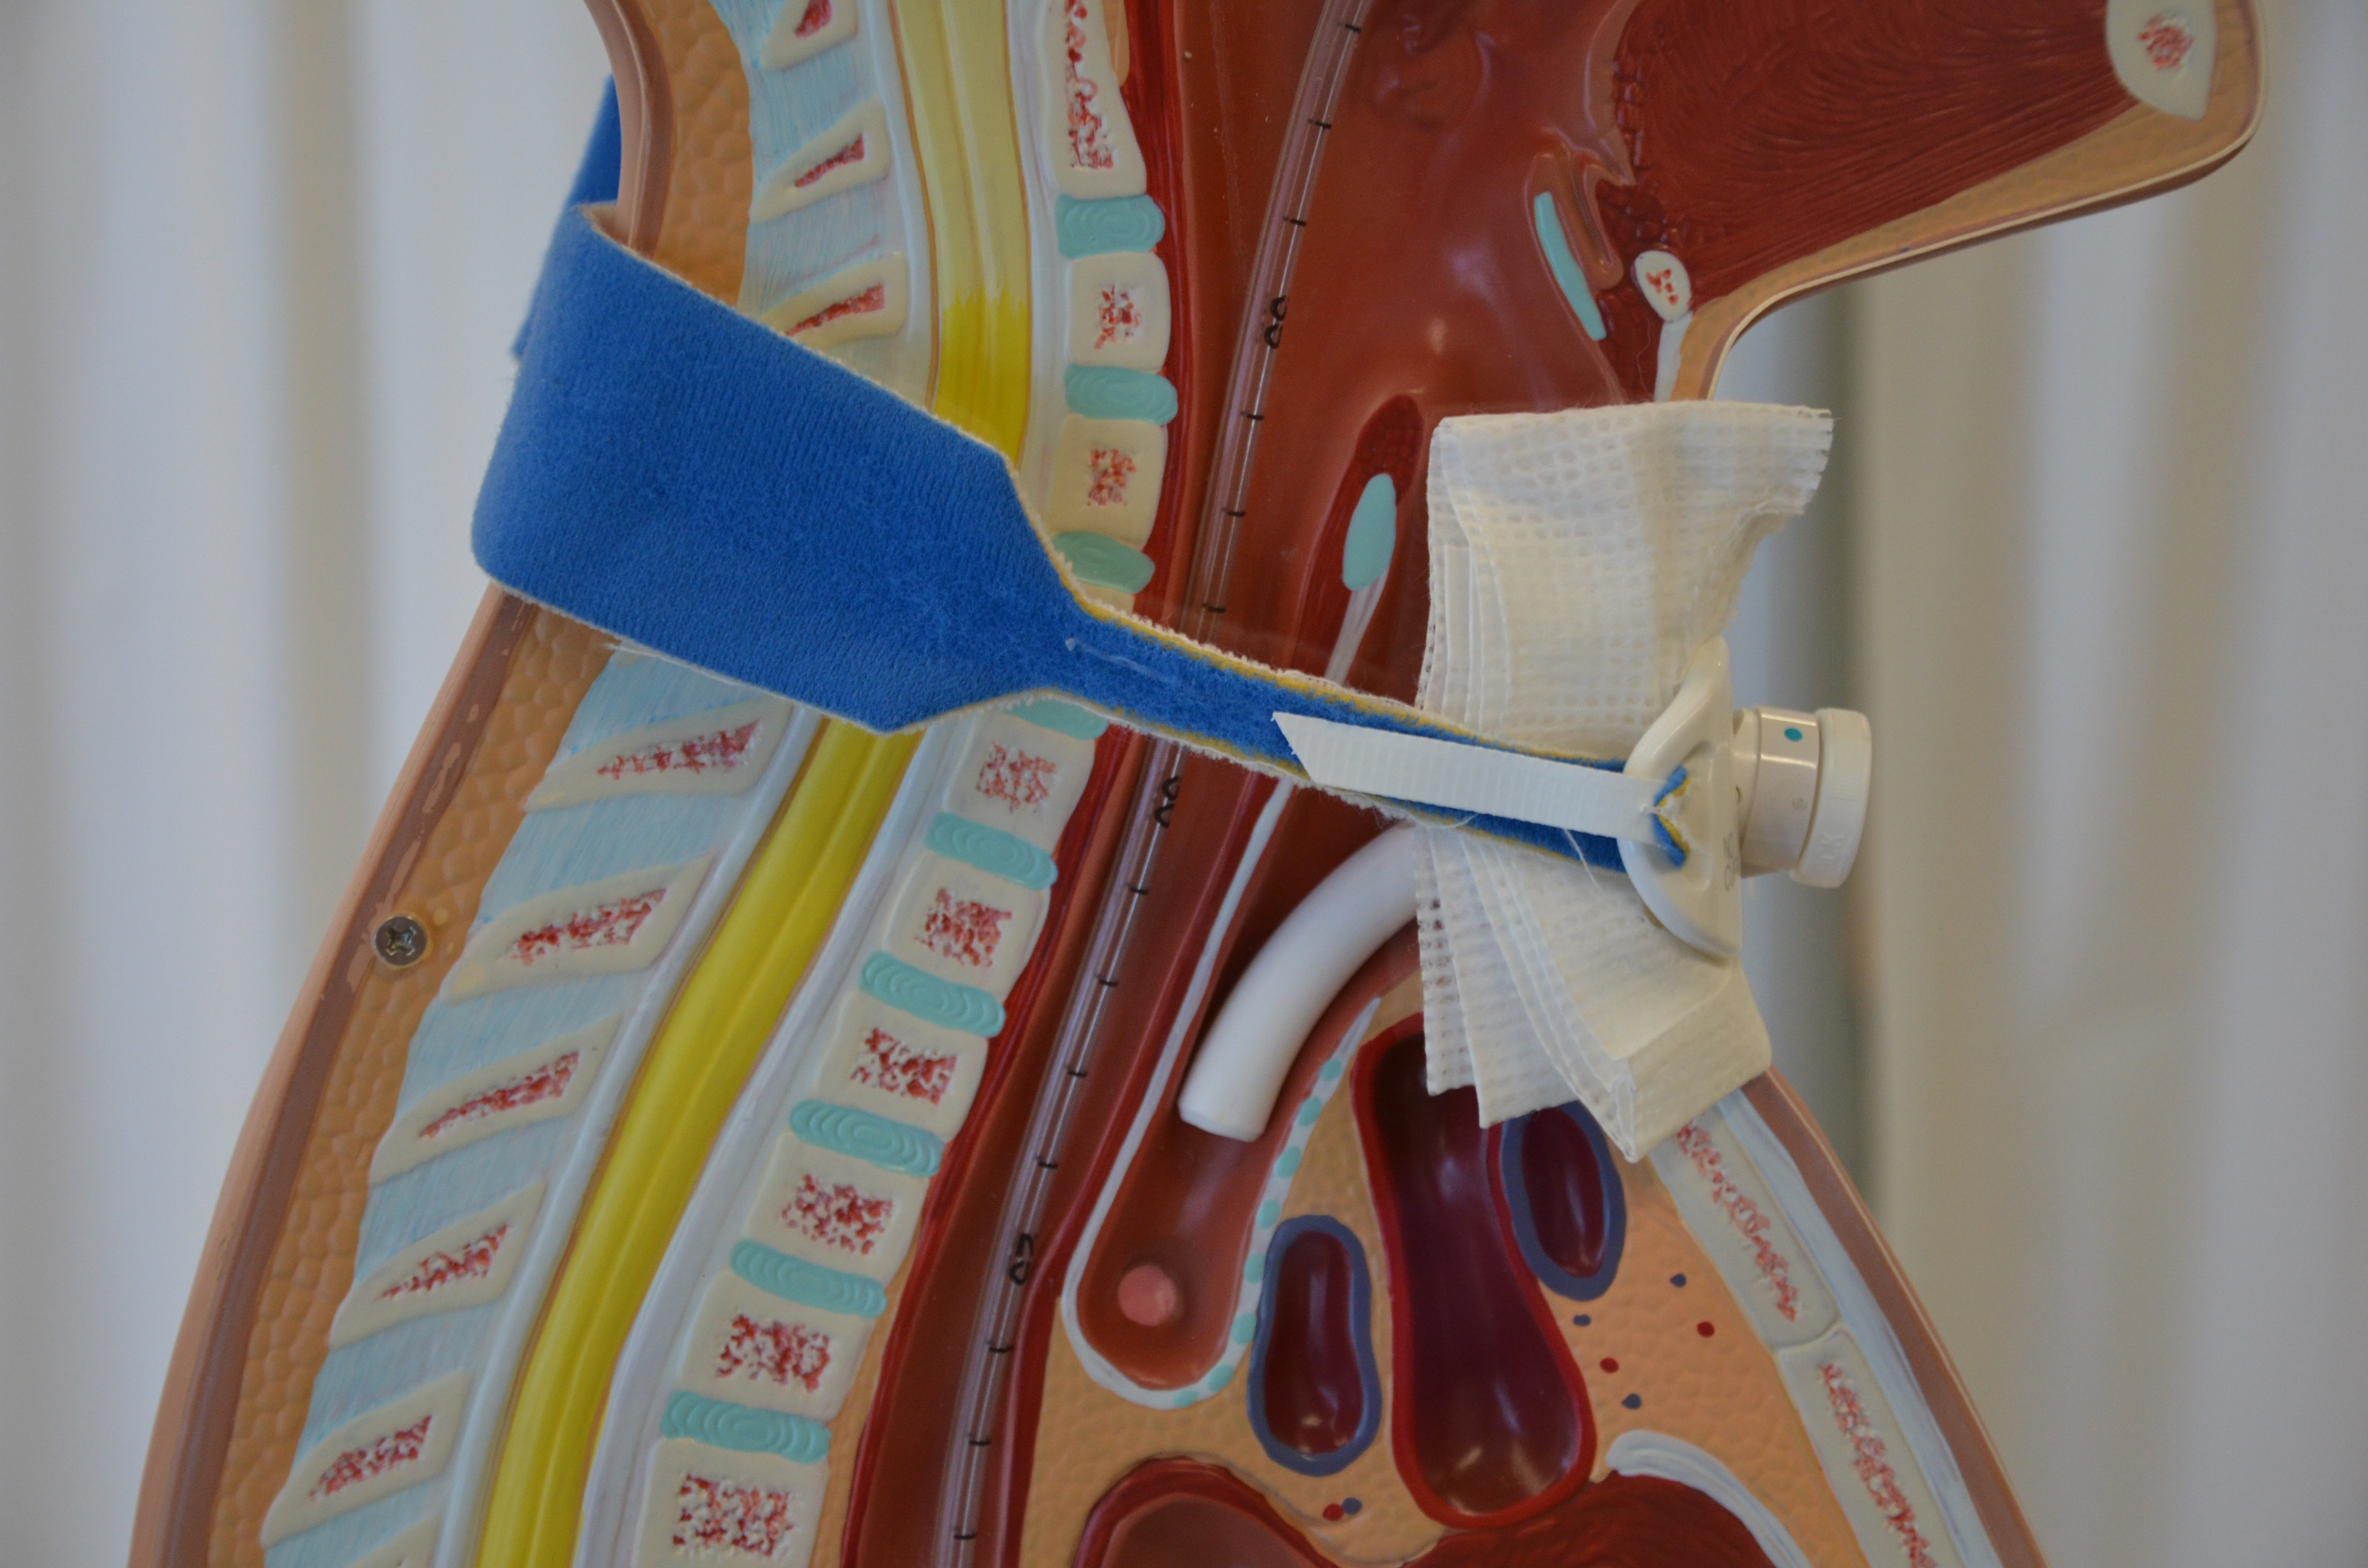
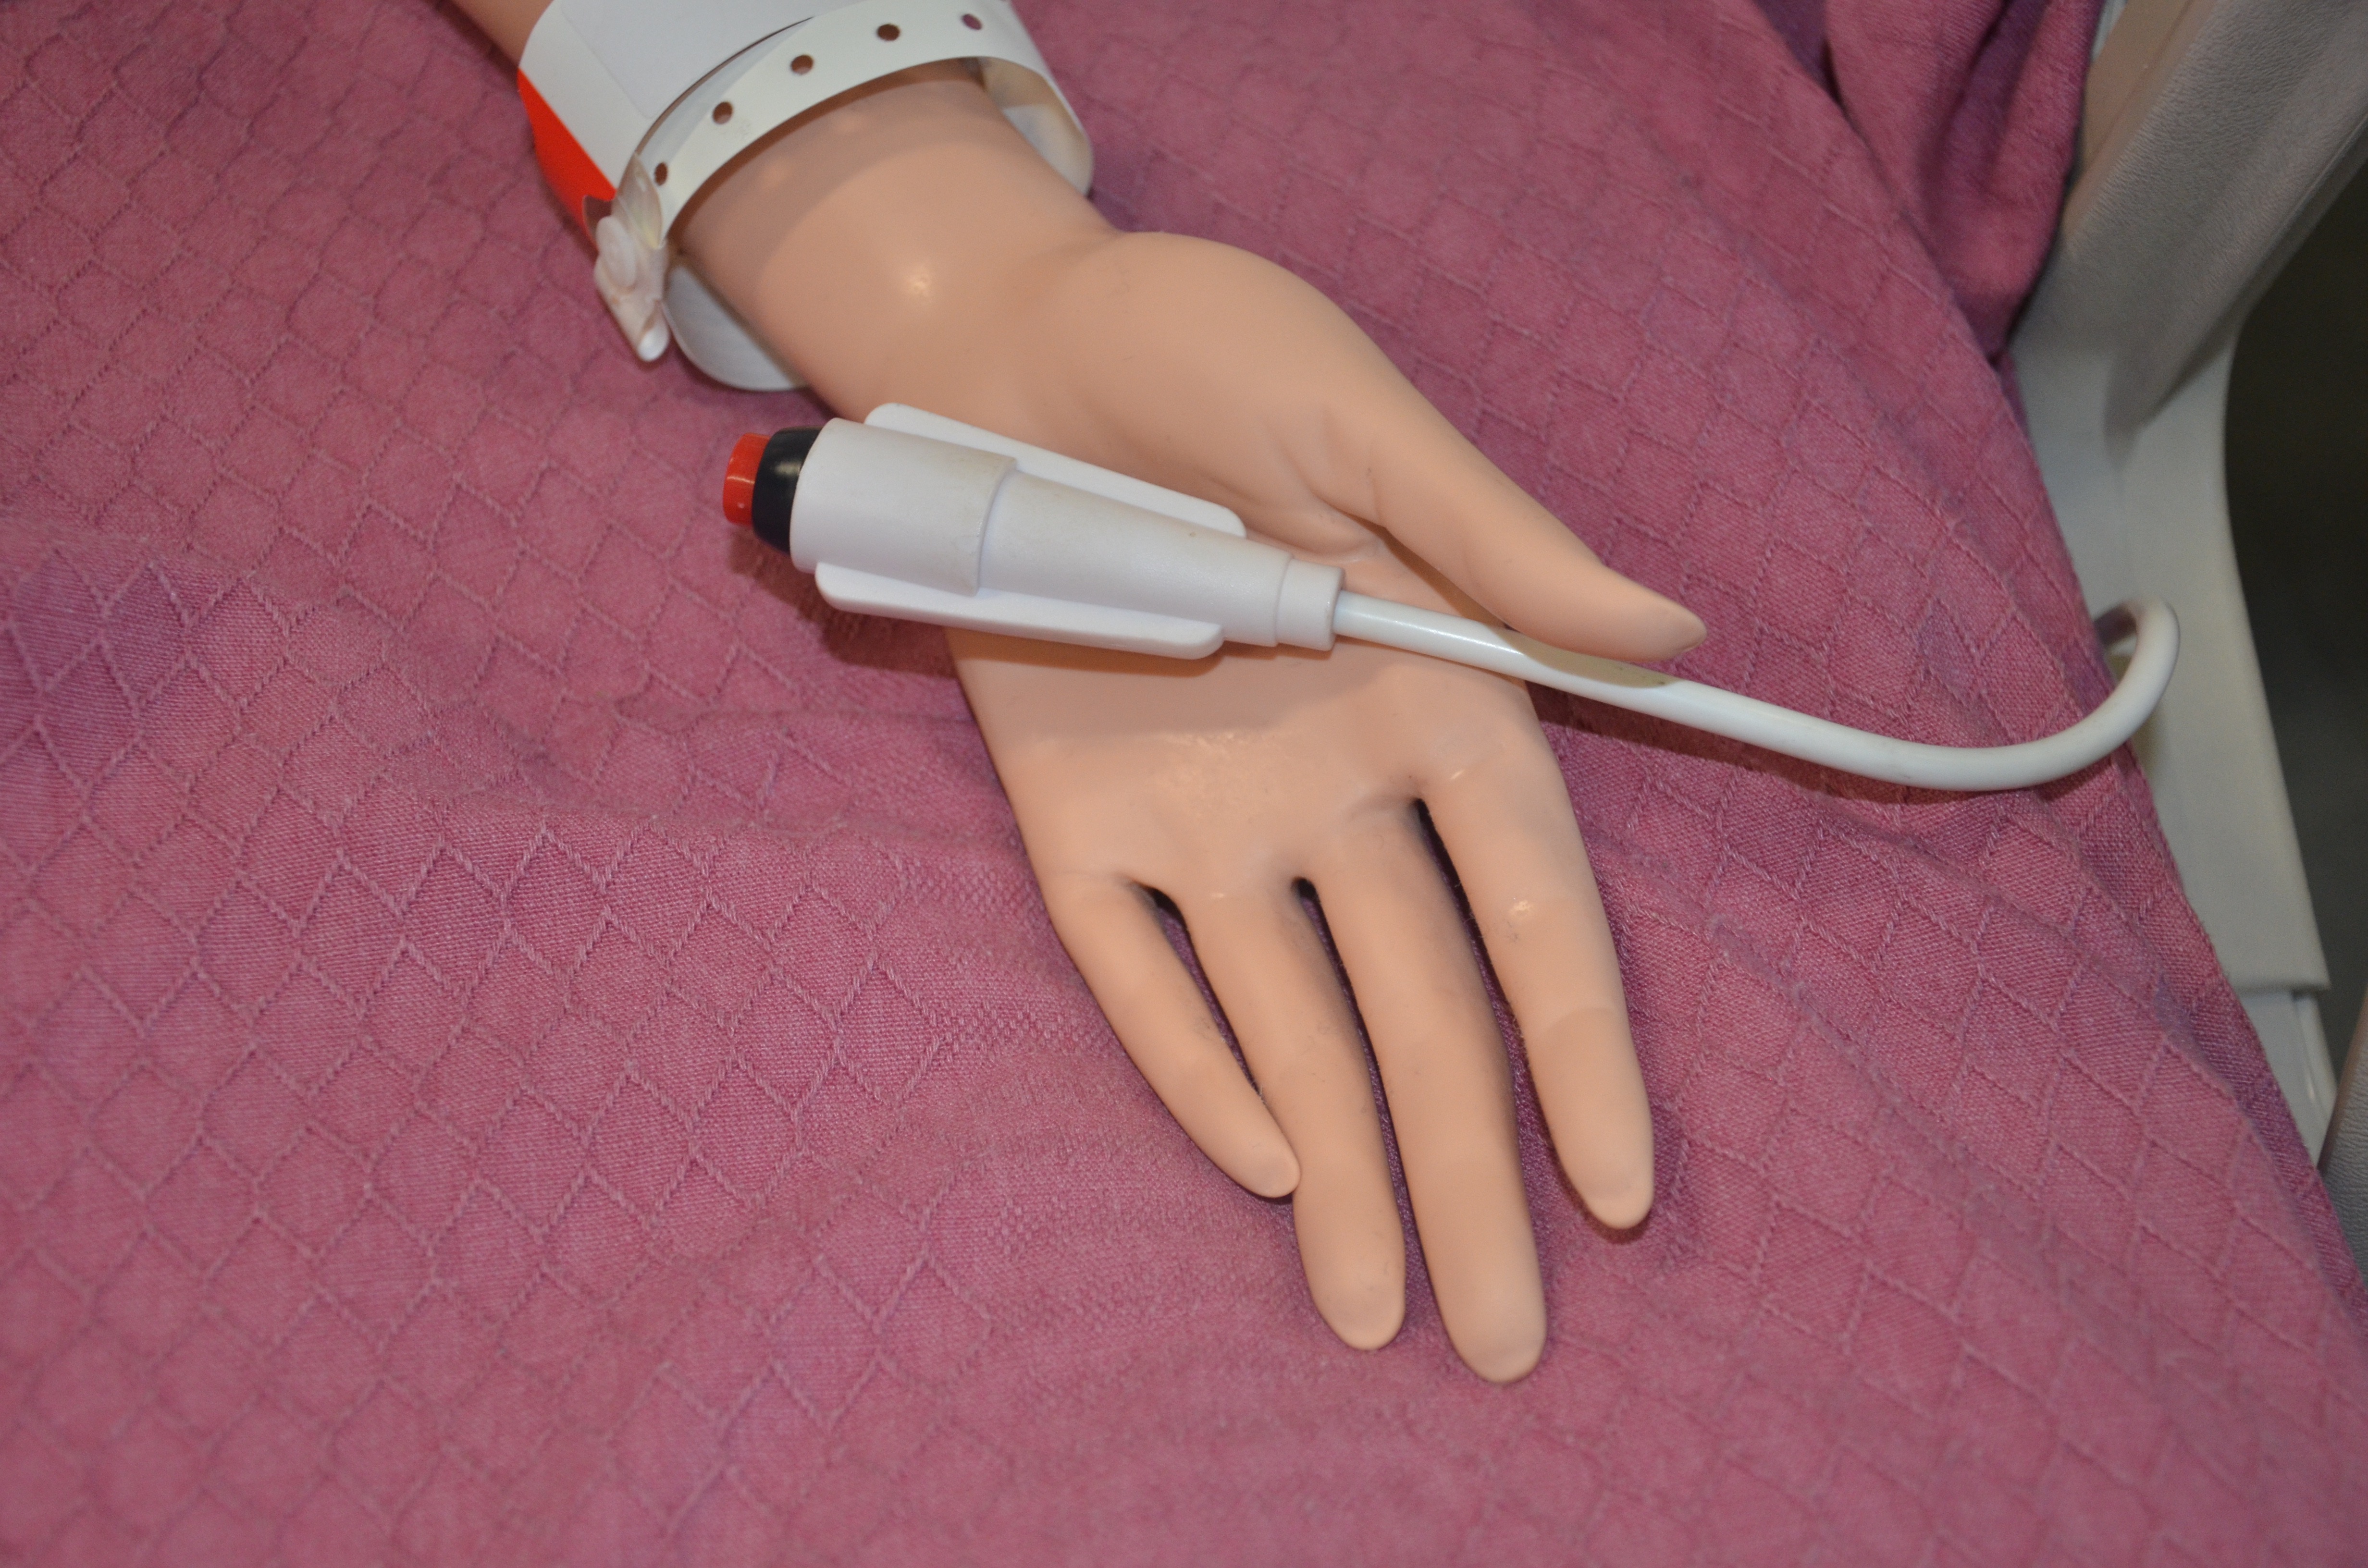
A tracheostoma is an artificial opening made in the trachea just below the larynx. A tracheostomy tube is a tube that is inserted through the opening, or stoma, to create an artificial airway. Patients who need long-term airway support (long-term patients who are intubated) or who have a need to bypass the upper airway may receive a tracheostomy. A tracheostomy (see Figure 10.1) can be very traumatic for a patient, and many find it difficult to adjust to having one.
The tracheostomy may be permanent or temporary. It is created surgically through the trachea (upper airway remains intact), larynx (upper airway is not patent), or cricothyroid (usually for temporary emergency access to airway). Tracheostomy tubes are inserted for airway maintenance, ventilation, removal of secretions, or as an alternate airway (e.g., following laryngectomy).
Figure 10.1 Cross-section view of a tracheostomy (on a model) inserted in the trachea anterior to the esophagus
Tracheostomy Tubes
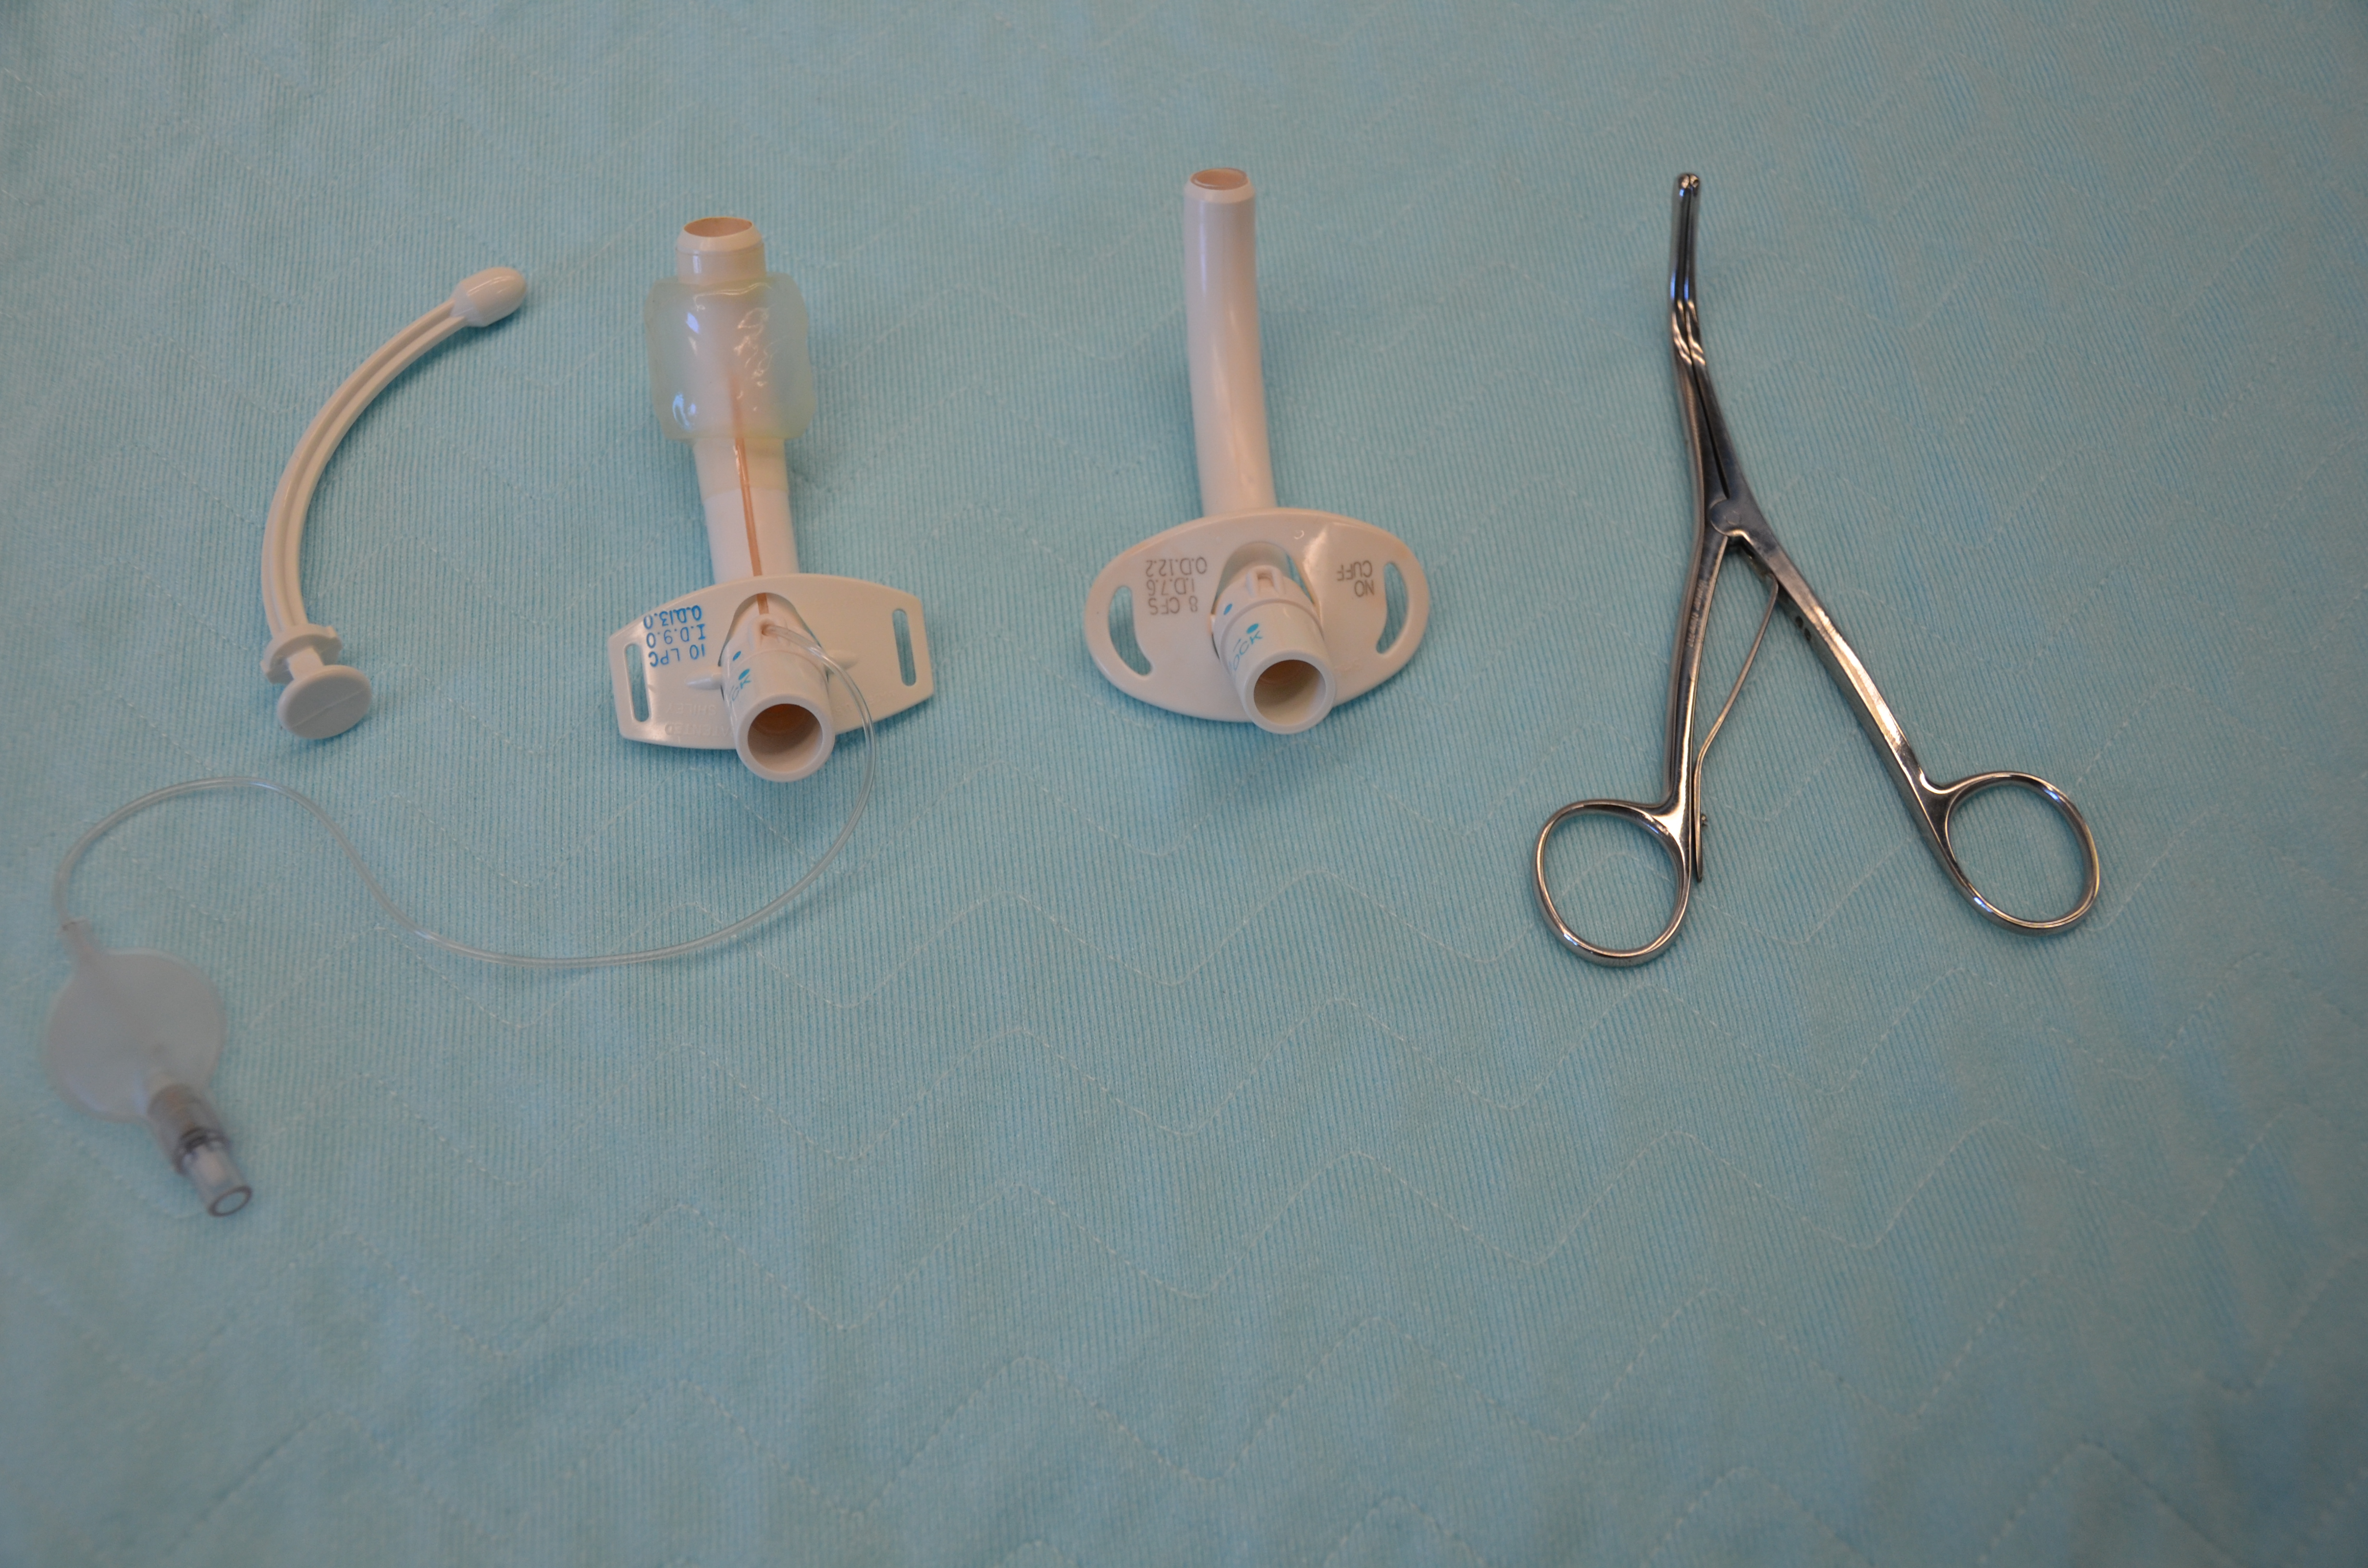
Tracheostomy tubes can be soft plastic, hard plastic, or, at times, metal. All tracheostomy devices are made up of an outer cannula, inner cannula, and an obturator used to insert the tube (see Figure 10.2). They come in different sizes and may have a cuff. A cuff tracheostomy produces a tight seal between the tube and the trachea. This seal prevents aspiration of oropharyngeal secretions and air leakages between the tube and the trachea. Tracheostomies are firmly tied and secured around the patient’s neck. The ties prevent accidental de-cannulation of the trachea. Sterile gauze and cleaning supplies are used daily to clean the trachea stoma and prevent infection to the site.
Figure 10.2 Left to right: obturator, cuffed tracheostomy tube, non-cuffed tracheostomy tube, tracheal dilators
Humidification
When a patient has a tracheostomy, air is no longer filtered and humidified as it is when passing through the upper airways. Most patients will have humidification and oxygen support. The following is a list of the special considerations of patients with a tracheostomy tube (BCIT, 2015c).
Patients need to lie at a 30-degree, or greater, angle to facilitate breathing and lung expansion.
All tracheostomy patients must have suction equipment and emergency supplies at the bedside. Emergency equipment is usually in a clear bag on an IV pole attached to the patient’s bed. A tracheostomy patient must be assessed every two hours to determine if suctioning is required.
Tracheostomy patients are often not permitted anything to drink or eat. Consult with the RN in charge.
A patient with a tracheostomy tube cannot speak; because the vocal cords are above the level of the tracheostomy tube, air cannot pass over the vocal cords. Speech is not possible without a speaking device.
Tracheostomy patients always have the tracheostomy tied securely around the neck using ties, according to agency policy.
Patients with a tracheostomy produce more secretions than usual and may not be able to clear secretions from the tracheostomy with coughing. If secretions in the tracheostomy decrease air entry and cause respiratory distress, the patient should be suctioned immediately.
Potential Complications
Early potential complications may include hemorrhage, pneumothorax, subcutaneous emphysema, cuff leak, tube dislodgement, and respiratory/cardiovascular arrest. Late potential complications may include airway obstruction, fistulae, infection, aspiration, and tracheal damage/erosion.
Emergency supplies at the bedside must include the following:
1. Suction equipment
2. Oxygen equipment with humidification
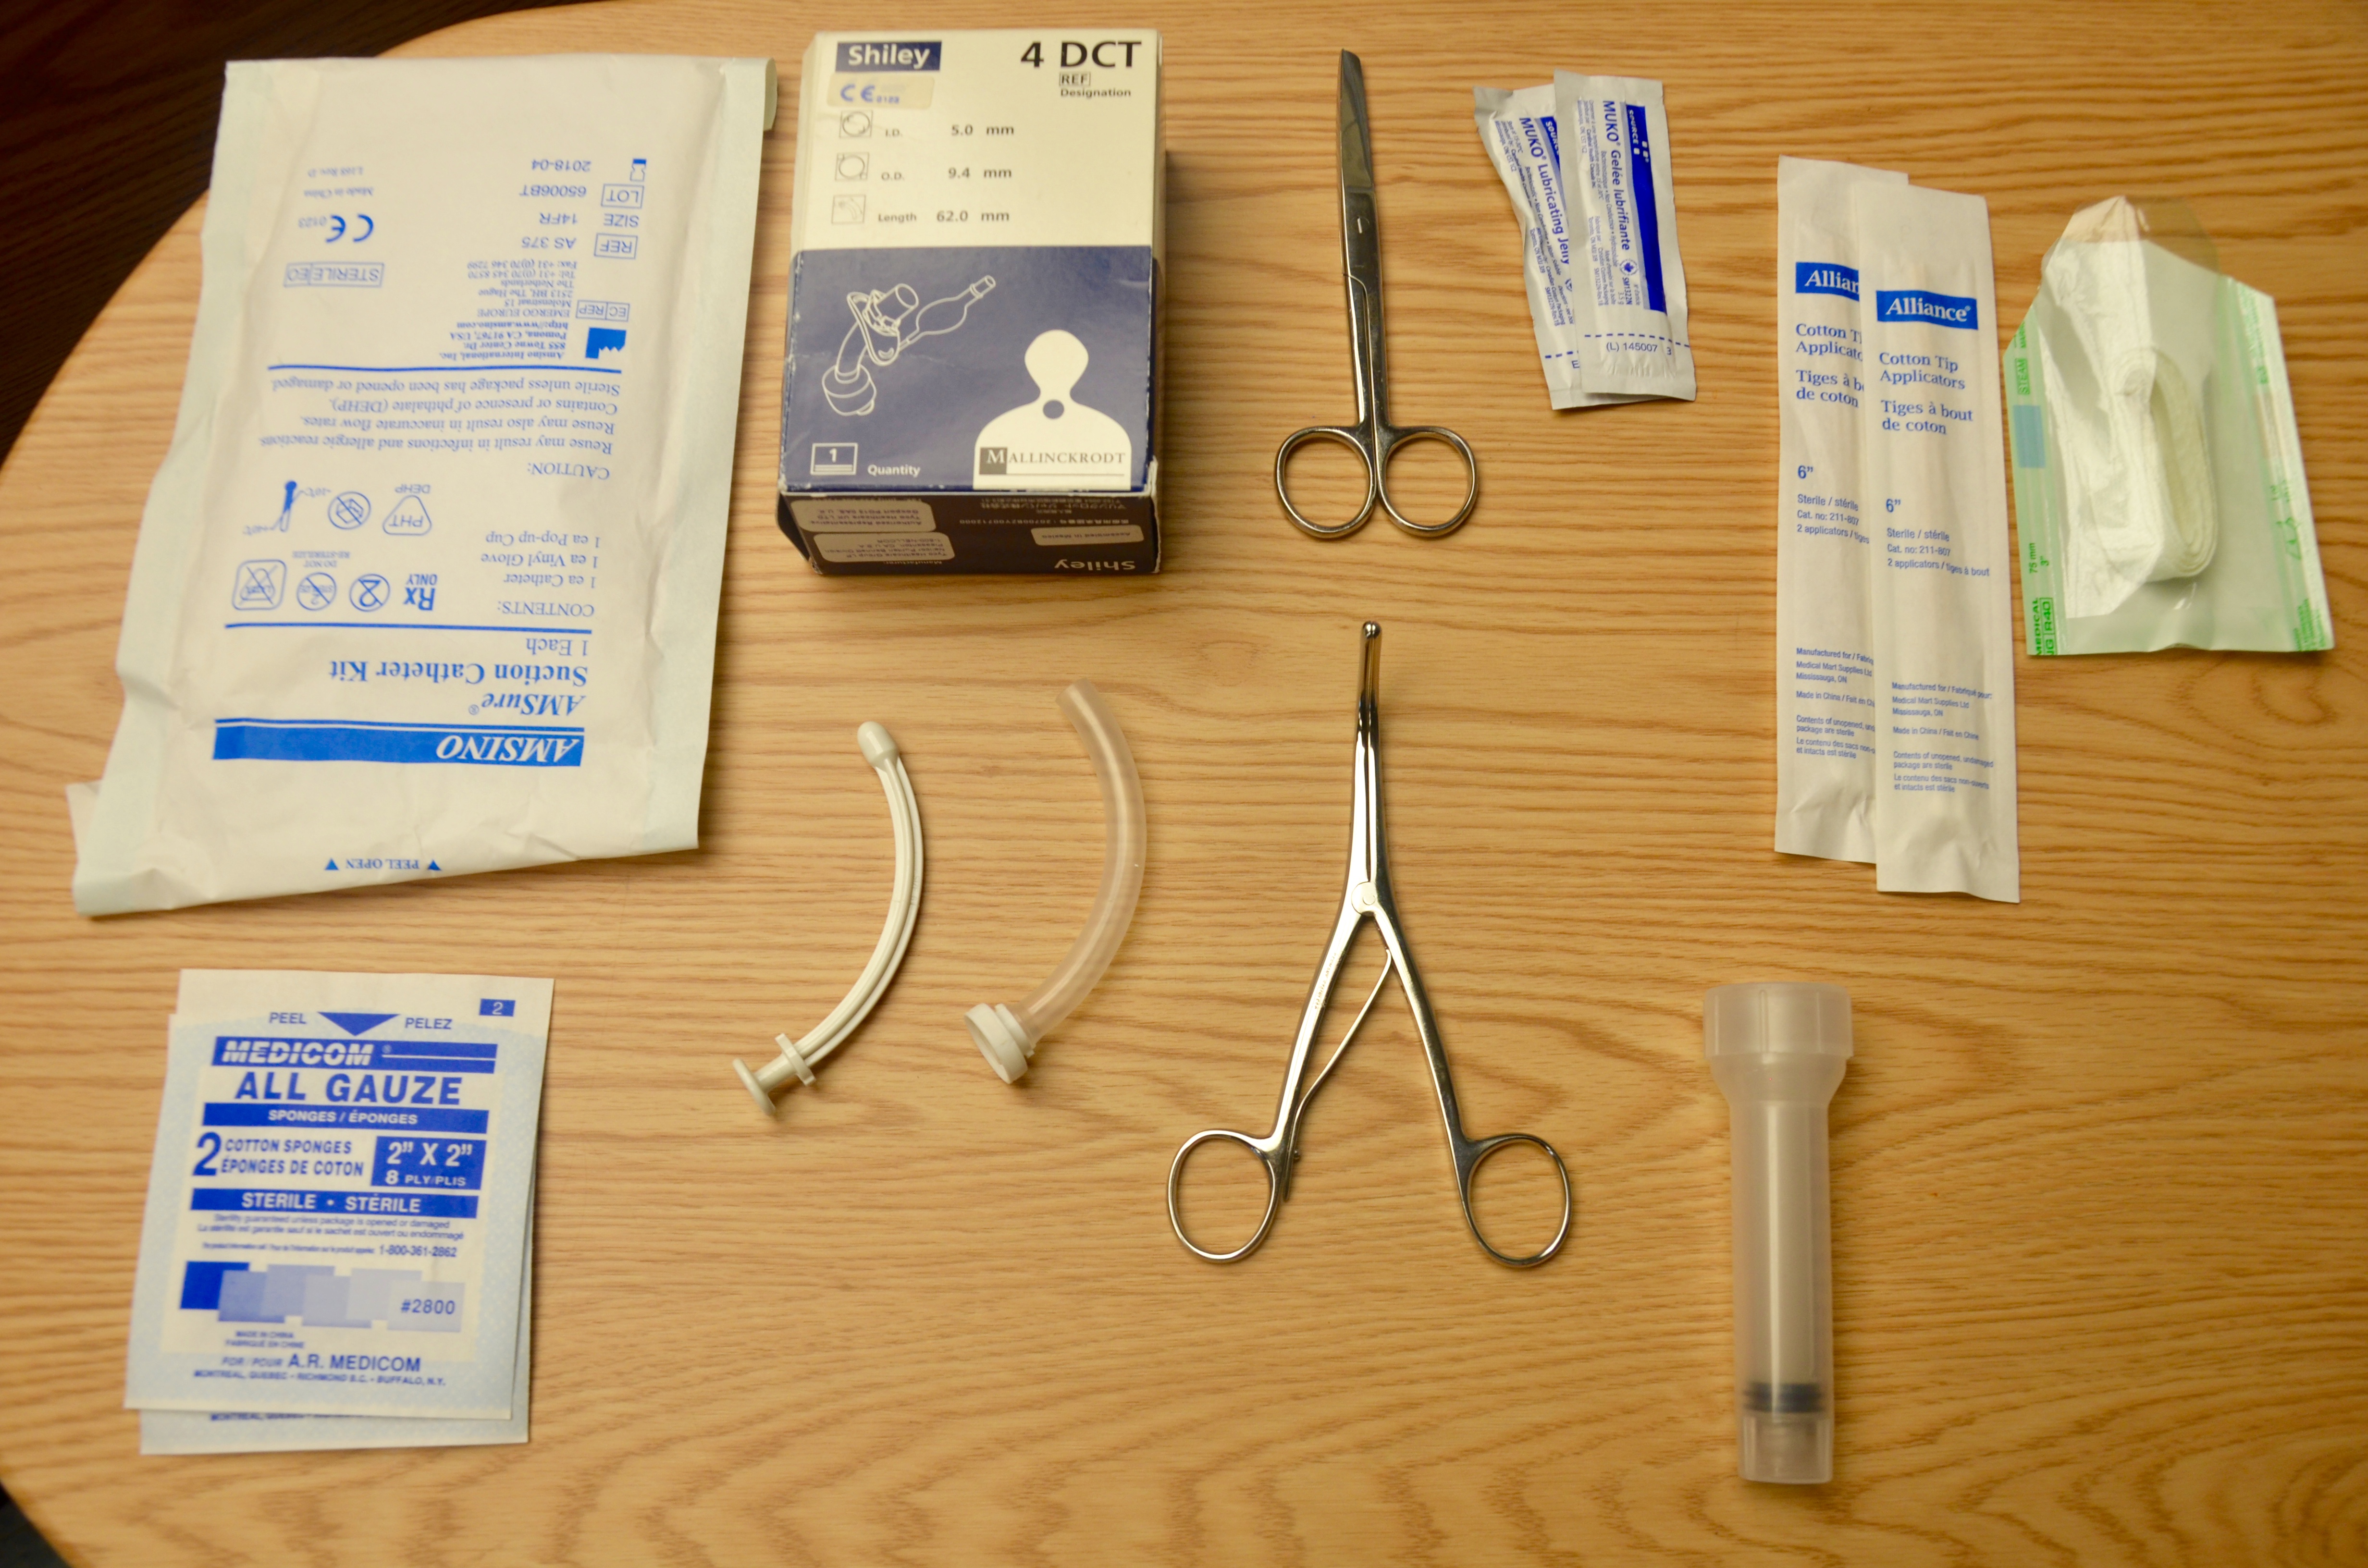
3. An emergency bag containing (see Figure 10.3):
Two replacement tracheostomy tubes (one of the same size, and one a smaller size than the current tube)
Obturator and spare inner cannula
10 ml syringe
Tracheal tube exchanger
Tracheal dilators
Sterile gloves
Water-soluble lubricant
If the open stoma is below the sternal notch, an endotracheal tube as per the ENT physician
Figure 10.3 Equipment for emergency bag for tracheostomy patients. Clockwise from top left: sterile gloves, spare tracheostomy tube, scissors, lubricant, cotton-tip applicators, ties, 10ml syringe, tracheal dilators, inner cannula, obturator, sterile gauze
The emergency bag must accompany patients when they are transported off the unit. Table 10.2 outlines methods to prevent possible complications that may arise from tracheostomies, and how to intervene if they do occur.
Table 10.2 Prevention and Interventions for Complications
Complication
Prevention
Interventions
Hemorrhage
Assess stoma for bleeding (excessive suctioning may also result in blood-streaked secretions).
Report neck swelling.
Report vigorous pulsation around the trachea.
Inflate cuff.
Suction.
Notify physician immediately if you suspect bleeding.
CODE BLUE if pulsating frank blood.
Monitor vital signs.
Apply pressure to bleed if possible.
Stomal/pulmonary infection
Perform dressing changes and tracheostomy care every 8 hours and as needed.
Use sterile technique for tracheostomy suctioning.
Use clean technique for tracheostomy care.
Use humidified oxygen or air.
Follow respiratory assessment as per agency policy.
Have patient do deep breathing and coughing (DB&C) exercises every 2 to 4 hours and as needed.
Instill small amounts of normal saline when suctioning to help loosen secretions as needed.
Suction as necessary.
Maintain hydration.
Take vital signs every four hours.
Report potential signs of infection:
Redness
Sweeping
Purulent drainage
Fever
Abnormal breath sounds
Increased secretions
Decreased oxygen sats
Tube occlusion
Keep inner cannula of dual tracheostomy tube in situ at all times.
Check patency of single-lumen tracheostomy tube regularly.
Clean inner cannula every 8 hours at a minimum, and as needed.
Maintain humidification.
Maintain hydration (secretions should be loose and thin).
Do DB&C exercises every 2 to 4 hours and as needed.
Suction and instill normal saline to loosen secretions as needed.
If tube occludes:
Place patient supine to expose neck and check for tube dislodgement.
Try ventilation using ambu-bag but do not force air entry.
If unable to ventilate, try suction and instillation of normal saline to clear cannula.
Remove inner cannula if suction catheter still does not pass; check patency and replace with new inner cannula.
If still unable to ventilate, deflate cuff or cuffed tube and notify physician and/or respiratory therapist.
If patient is still unable to ventilate, call CODE BLUE and cut tie tapes, remove tracheostomy tube, insert dilators, and hold stoma open with tracheal dilators until trained health care professional is able to reinsert a tracheostomy tube.
Aspiration
All tracheostomy patients require a swallow assessment (usually requires a physician order) prior to oral feeding.
No swallow assessment or feeding occurs when cuff is inflated.
Consult speech and language therapist.
Patient should be placed in a semi- to high-upright sitting position.
Ensure cuff is inflated and check cuff pressure once per shift and as needed.
Always suction above cuff prior to cuff deflation.
Report any signs of aspiration:
Excessive coughing and gagging (particularly with eating and drinking)
Increased or changed secretions
Presence of food in secretions
Drop in O2 sats
If patient vomits:
Inflate cuff if present.
Suction immediately.
Raise head of bed; sit patient upright.
Accidental decannulation
Tracheostomy ties must be secure.
Secure new ties before removing old ties.
Assess patient for restlessness/confusion.
If partial decannulation occurs (air movement is felt from tube):
Deflate cuff if inflated.
Remove inner cannula and insert obturator.
Gently reinsert tube while holding obturator in place.
Remove obturator and replace inner cannula.
Check correct placement.
Feel for air movement from tube.
Check patient’s O2 sats.
Ensure patient’s breathing returns to baseline.
Ensure tie tapes are secure and cuff is inflated if ordered.
If complete decanulation occurs, call for trained health care professional to reinsert tracheostomy tube. In the meantime:
Maintain tracheal airway and ventilation with bag tracheostomy mask as best as possible.
Protect airway from foreign-body aspiration.
If stoma is less than 7 days old, use tracheal dilators to maintain stoma potency if necessary.
If patient is not ventilating adequately, close stoma and ventilate with bag and face mask with 100% O2 until CODE team arrives. If patient has known upper-airway obstruction, or a laryngectomy, ventilate via stoma with a tracheostomy or pediatric mask.
Note: Do not hyperextend neck if patient has a known or suspected neck injury.
Data source: BCIT, 2015c; Vancouver Coastal Health, 2012a
The purpose of suctioning is to maintain a patent airway, to remove secretions from the trachea and bronchi, and to stimulate the cough reflex (Vancouver Coastal Health, 2006). Patients with tracheostomies often have more secretions than normal and will require suctioning to remove secretions from the airway to prevent airway obstruction. Tracheostomy patients should be assessed every two hours and as required to see if suctioning is required. Sterile suction equipment is used each time tracheal suctioning is performed. Secretions can be aspirated using a suction catheter connected to a suction source.
Tracheal suctioning is indicated with noisy respirations, decreased O2 sats, anxiousness, restlessness, increased respirations or work of breathing, change in skin colour, or wheezing or gurgling sounds. These are signs and symptoms of respiratory distress, and the patient should be suctioned immediately. Checklist 82 outlines the steps for tracheal suctioning.
Checklist 82: Tracheal Suctioning
Disclaimer: Always review and follow your hospital policy regarding this specific skill.
Safety considerations:
Perform hand hygiene.
Check room for additional precautions.
Introduce yourself to patient.
Confirm patient ID using two patient identifiers (e.g., name and date of birth).
Explain process to patient; offer analgesia, bathroom, etc.
Listen and attend to patient cues.
Ensure patient’s privacy and dignity.
Assess ABCCS/suction/oxygen/safety.
Apply principles of asepsis and safety.
Check vital signs.
Complete necessary focused assessments.
Pre-hyperoxygenate patient if required and as per agency policy.
Steps
Additional Information
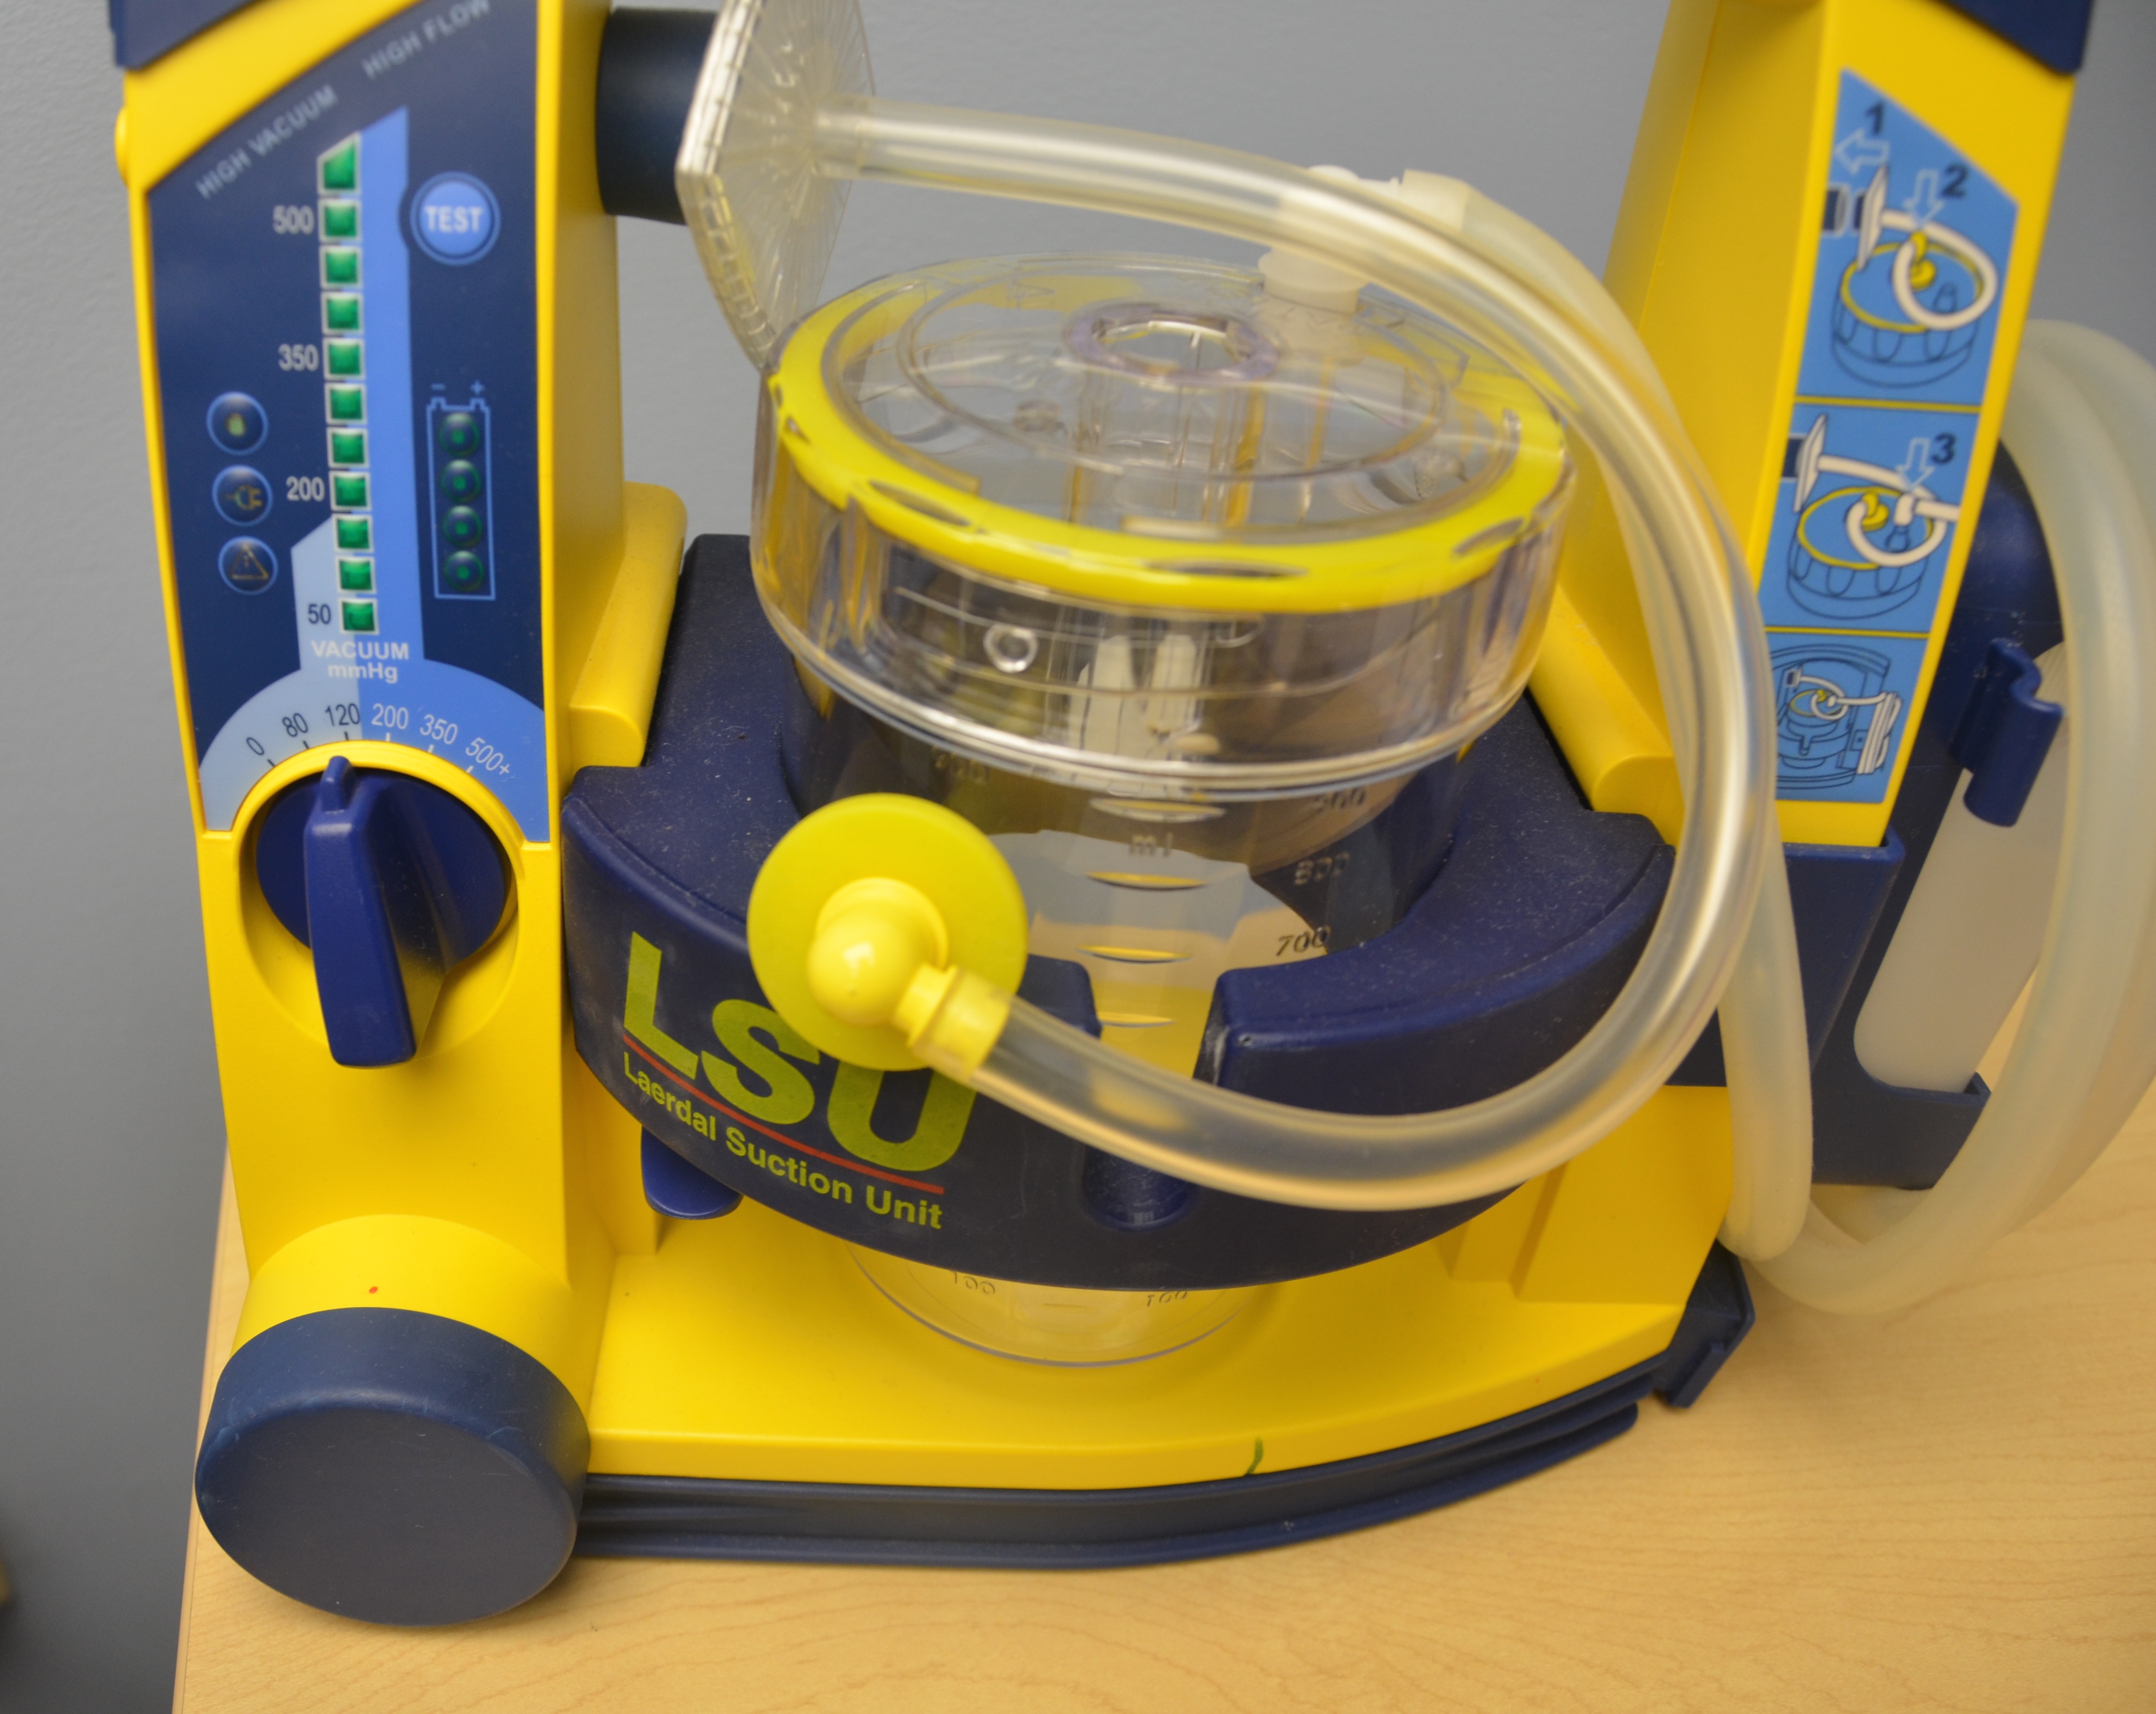
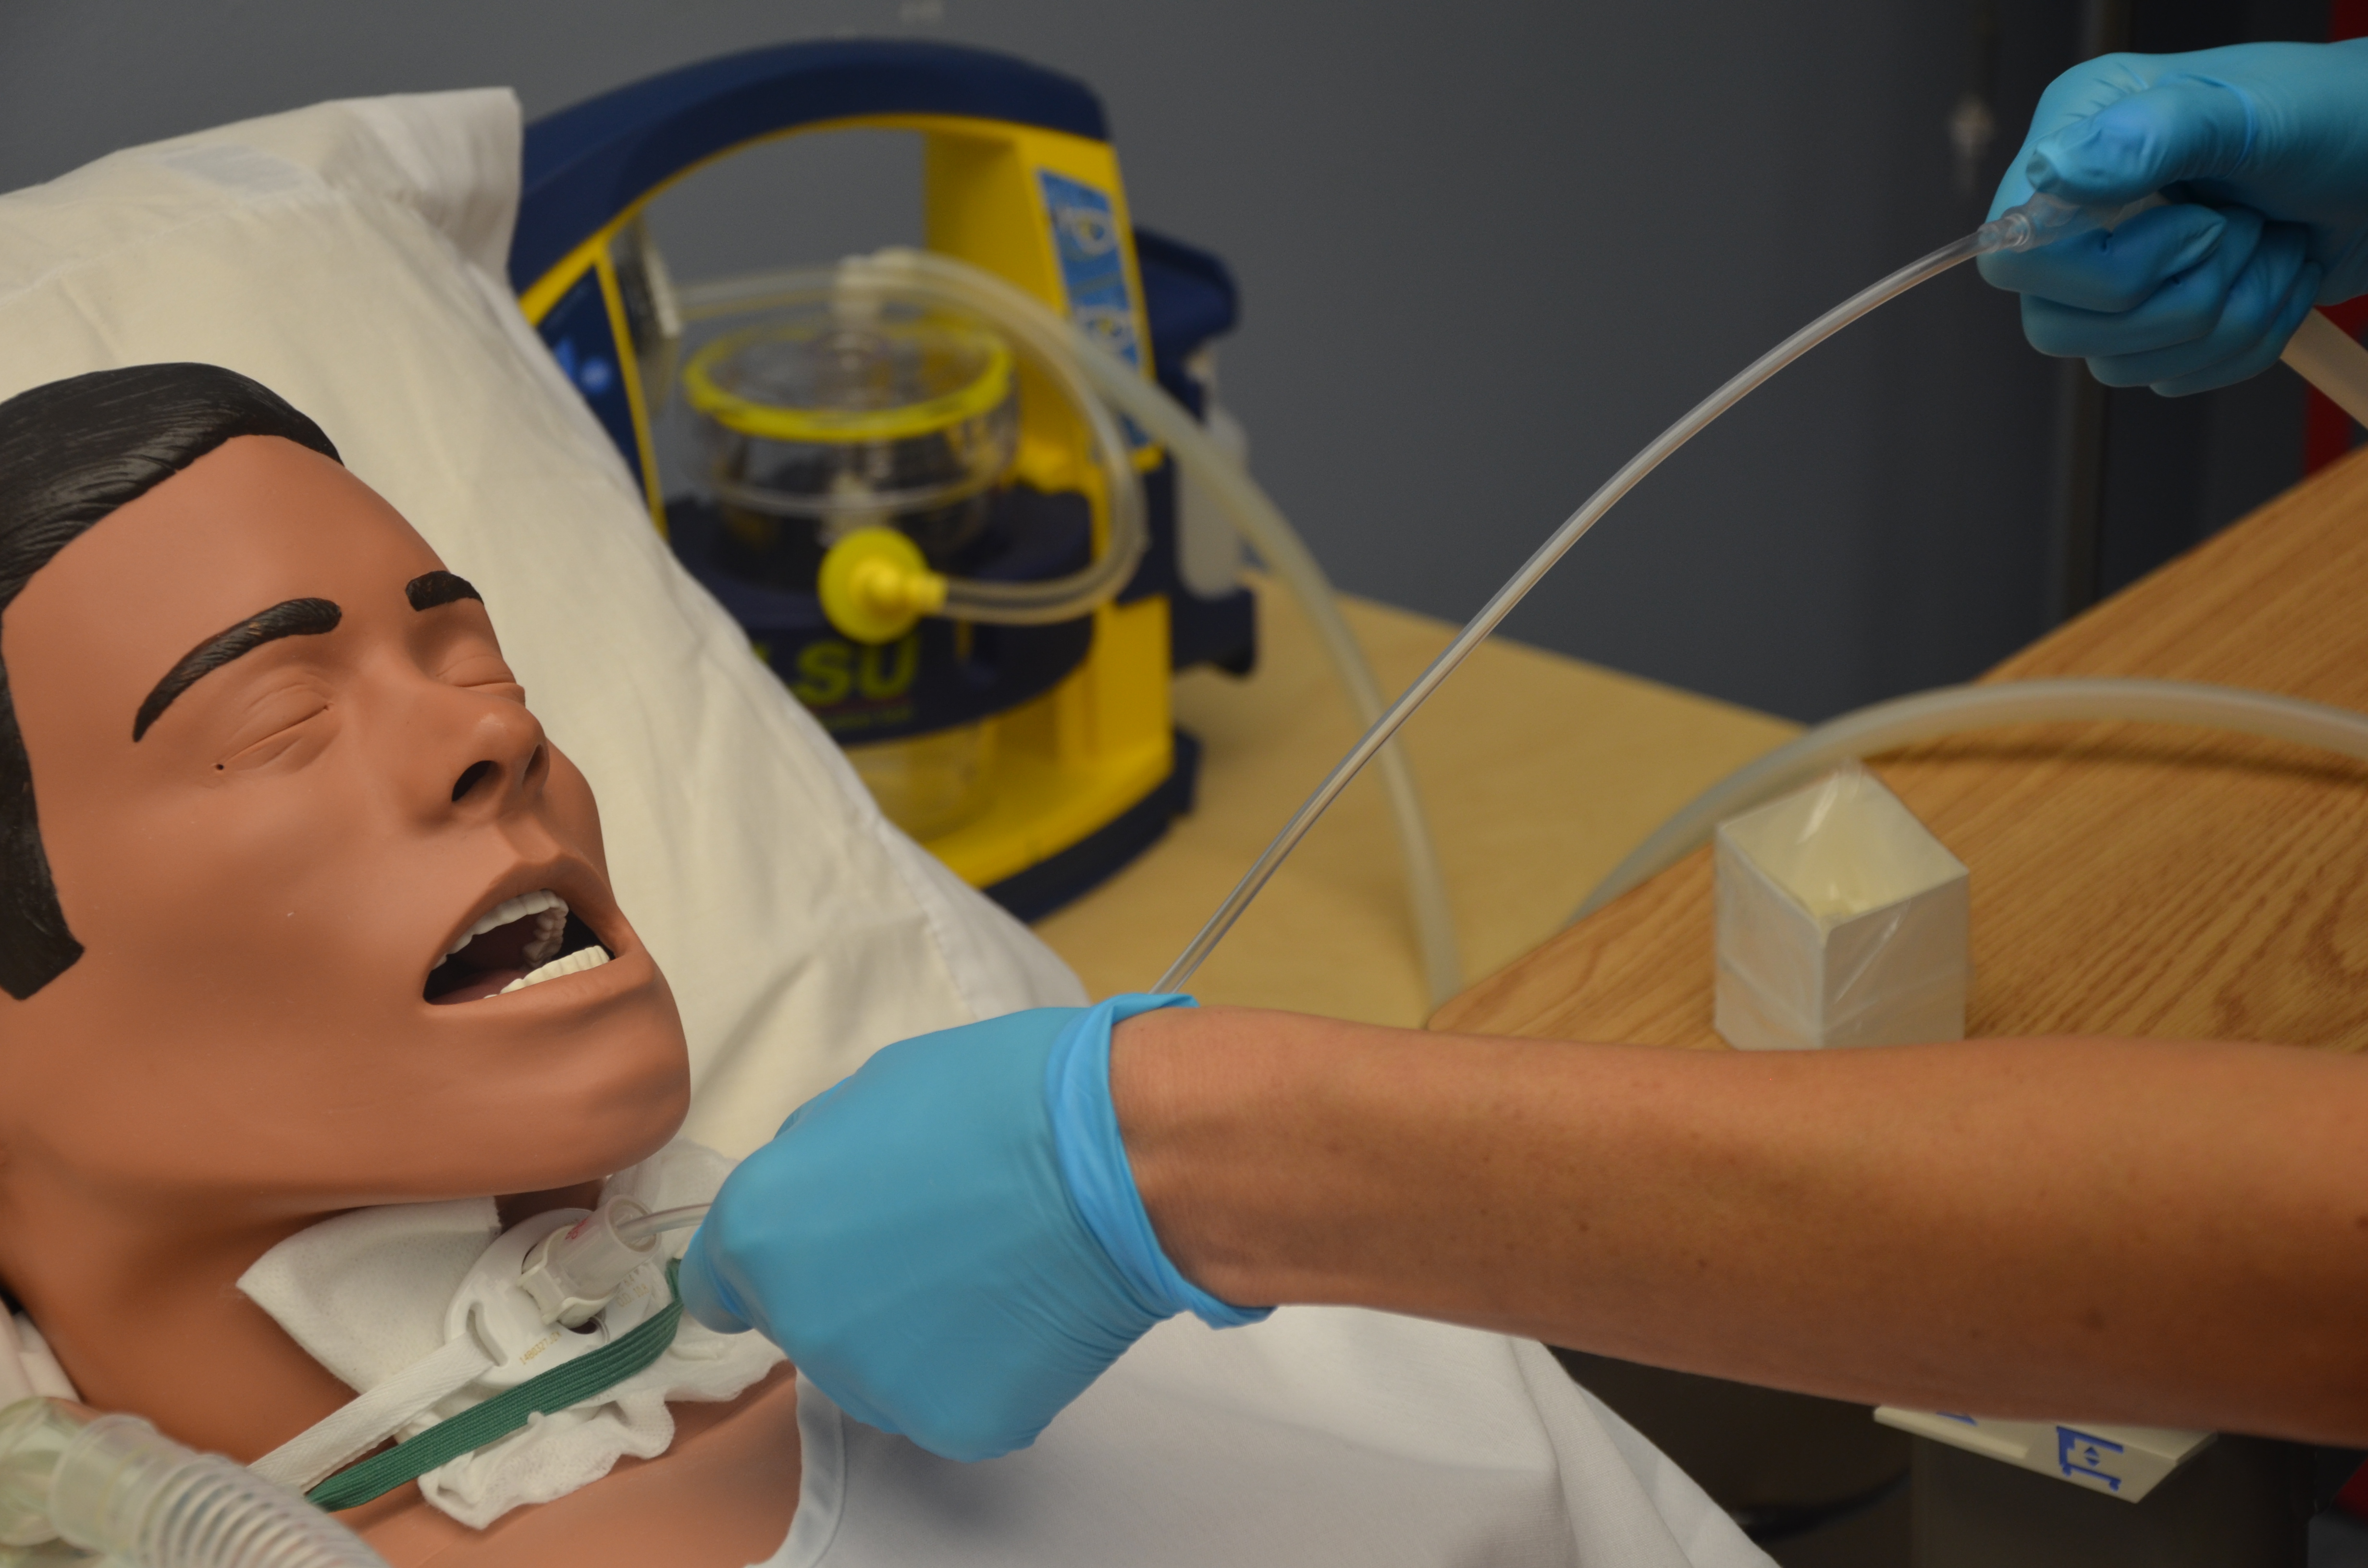
1. Connect one end of connecting tubing to suction machine and place other end in convenient location near patient.
Preparing equipment ahead of time promotes safety, organization, and timeliness.
2. Turn suction device on and set suction pressure to as low a level as possible that is still able to effectively clear secretions (between 80 and 120 mmHg in adults).
Set suction pressure between 80 and 120mmHg for adults
Excessive negative pressure damages mucosa and induces greater possibility for hypoxia.
3. Occlude end of suction tubing to check suction pressure between 80 and 20 mmHg.
This step ensures that equipment is functioning safely.
4. Using aseptic technique, open suction kit or catheter.
Do not allow suction catheter to touch any non-sterile surfaces.
Keep open suction package at bedside as a sterile surface on which to lay catheter between passes.
This prepares catheter, maintains asepsis, and reduces transmission of microorganisms.
This provides sterile surface on which to lay catheter between passes.
5. Unwrap or open sterile container and place on bedside table. Be careful not to touch inside of container. Fill with about 100 ml sterile normal saline solution or water.
Fill sterile container with about 100 ml sterile normal saline solution or water
Saline or water is used to clean tubing after each suction pass.
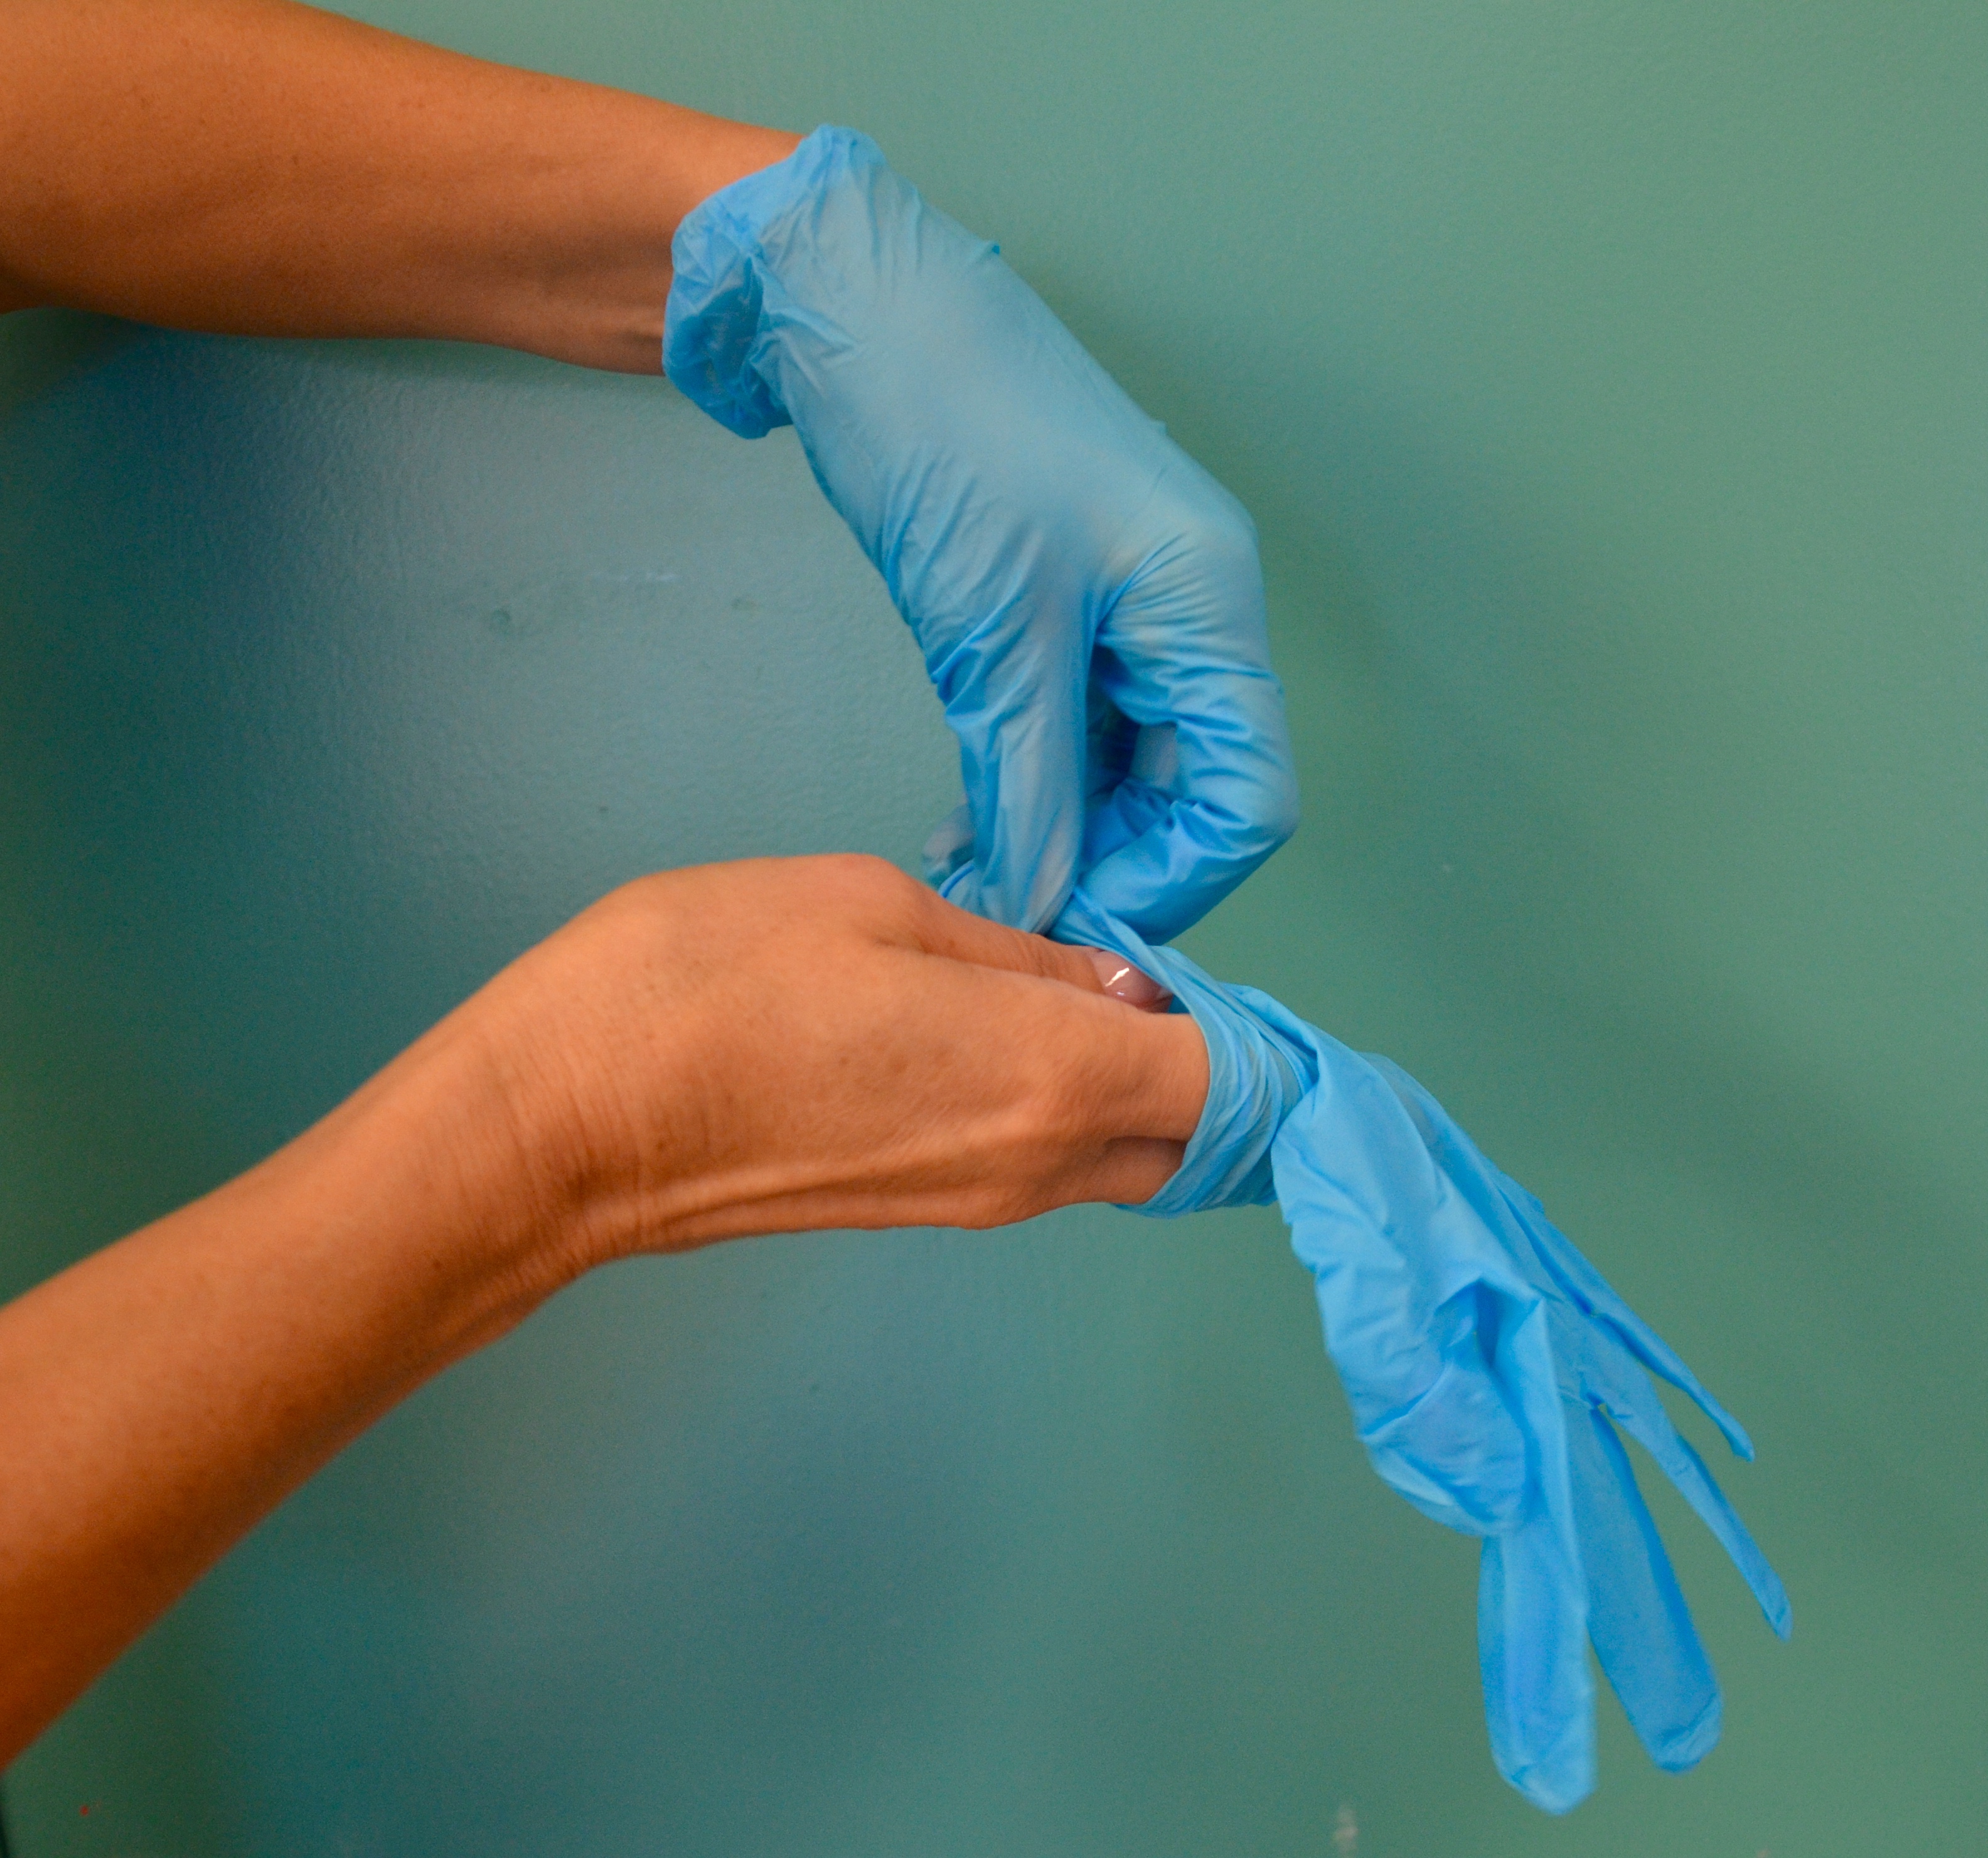
6. Apply PPE as per agency policy (e.g., goggles and mask).
This prevents transmission of microorganisms to health care provider.
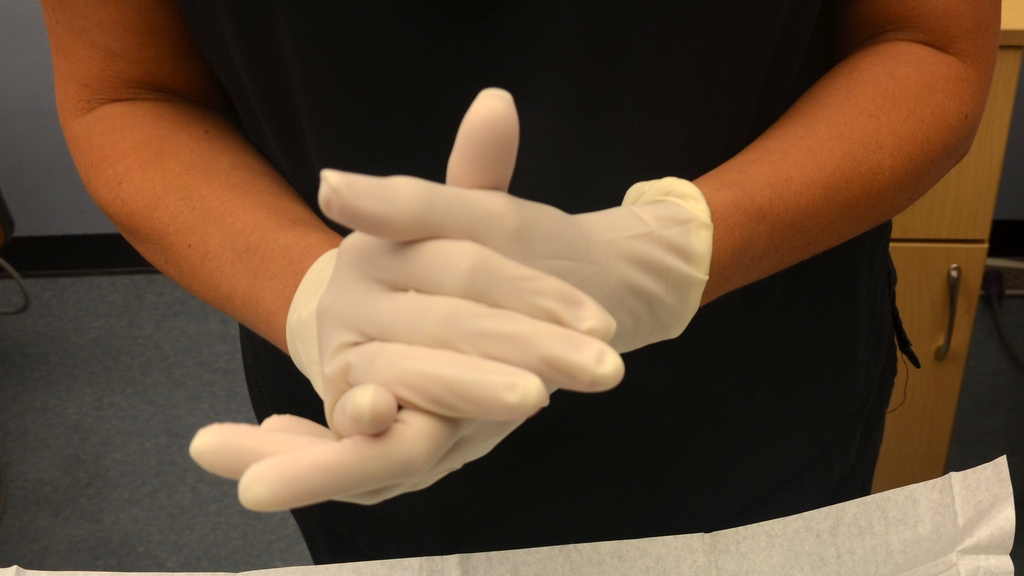
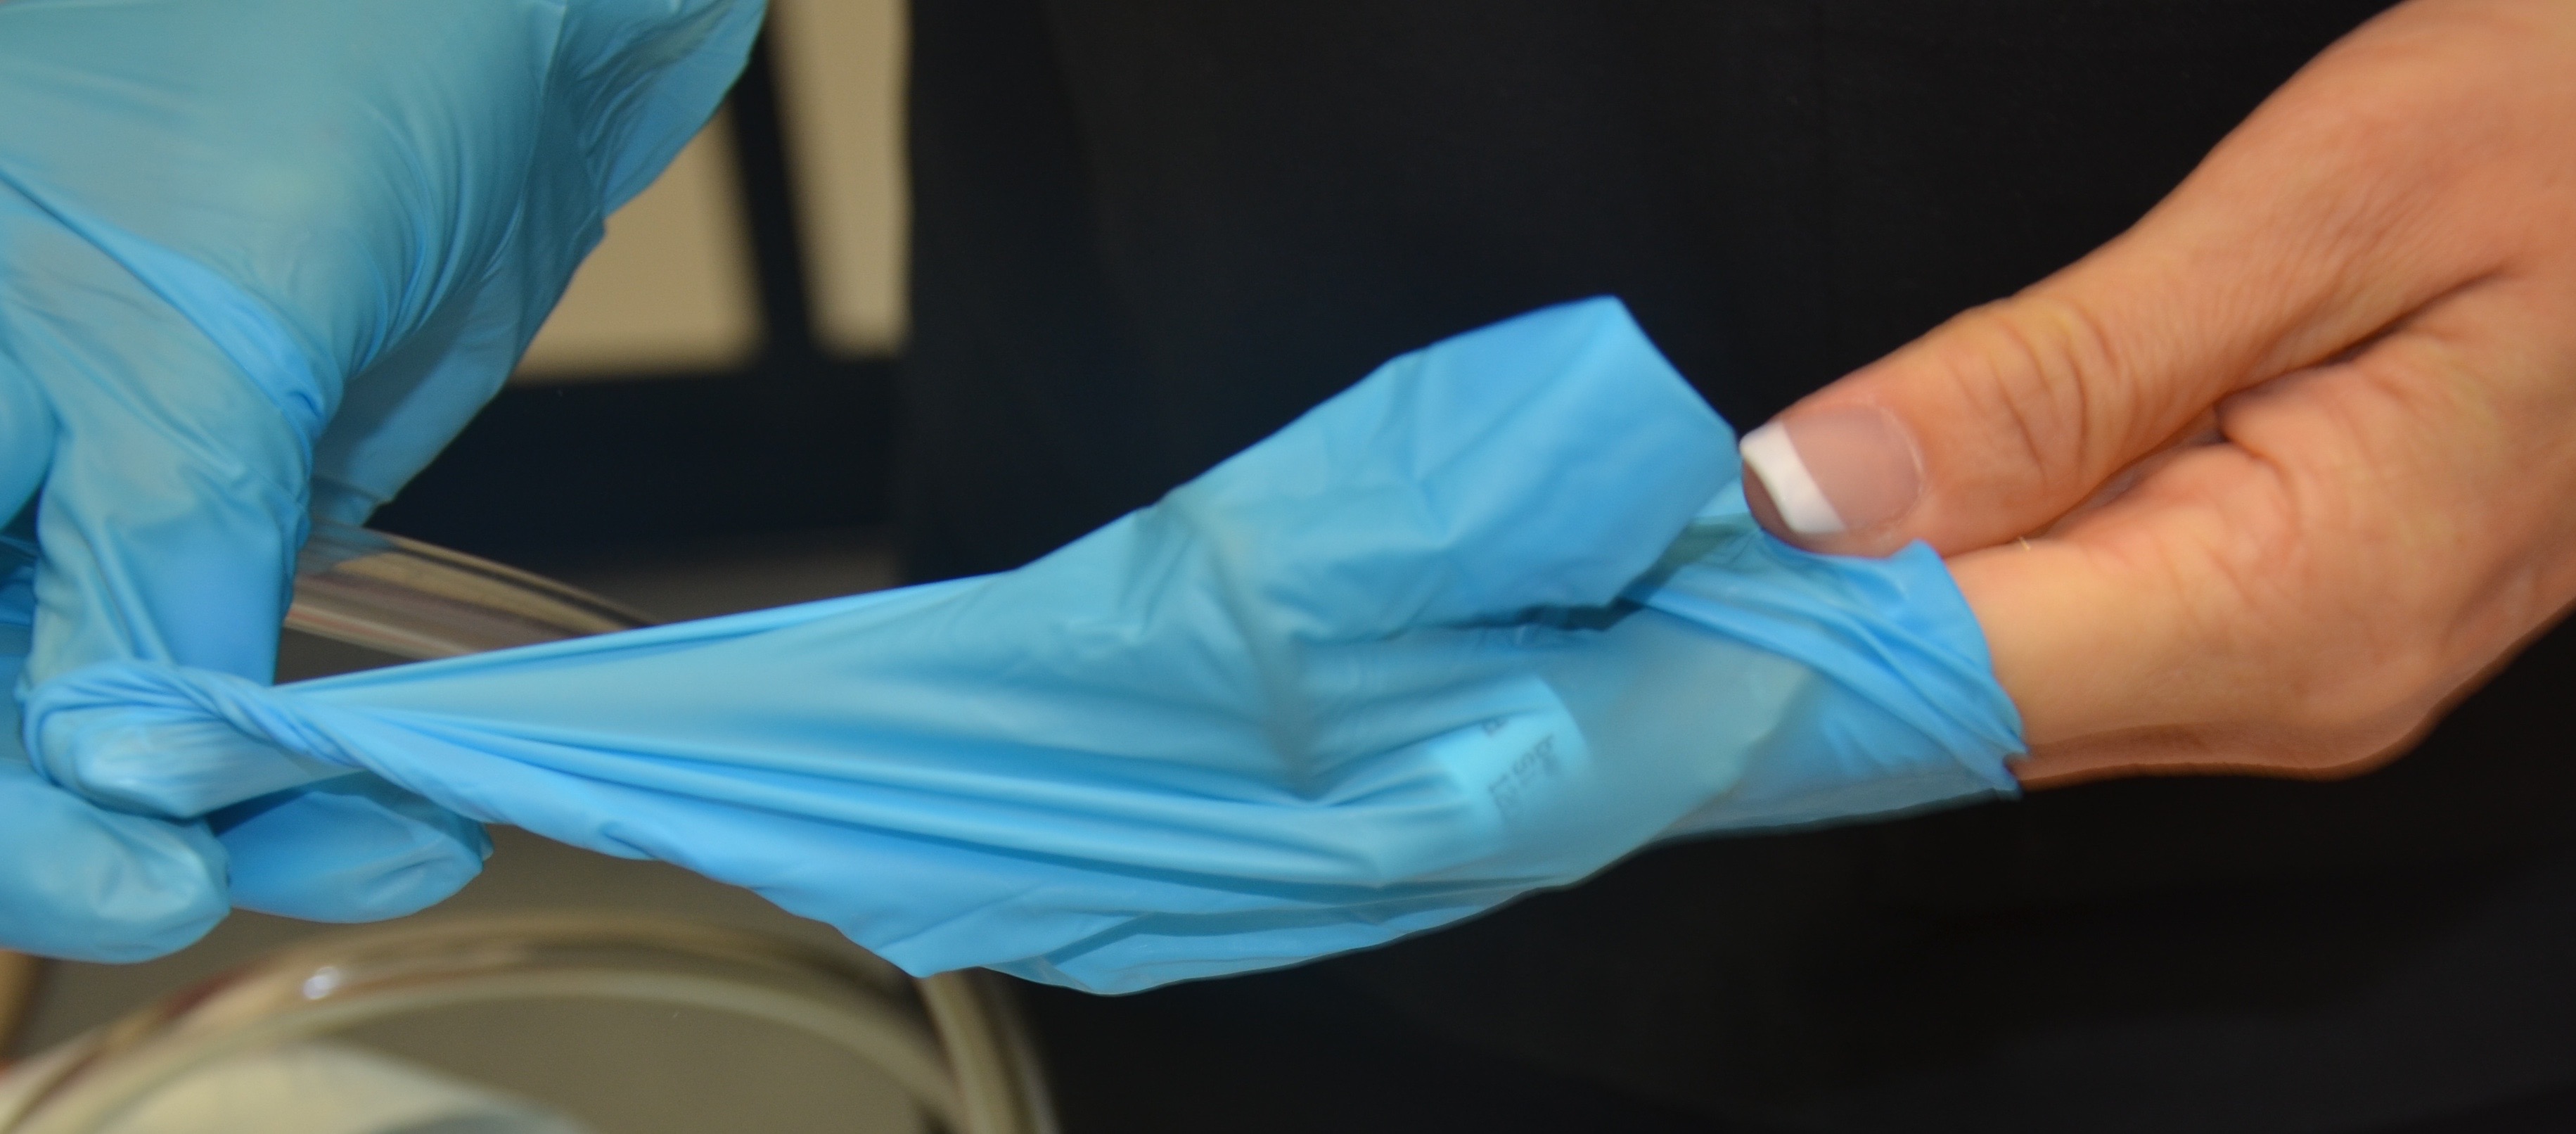
7. Apply sterile glove to each hand or apply non-sterile glove to non-dominant hand and sterile glove to dominant hand.
This reduces the transmission of microorganisms and maintains sterility of suction catheter.
Apply sterile glove to each hand or apply non-sterile glove to non-dominant hand and sterile glove to dominant hand
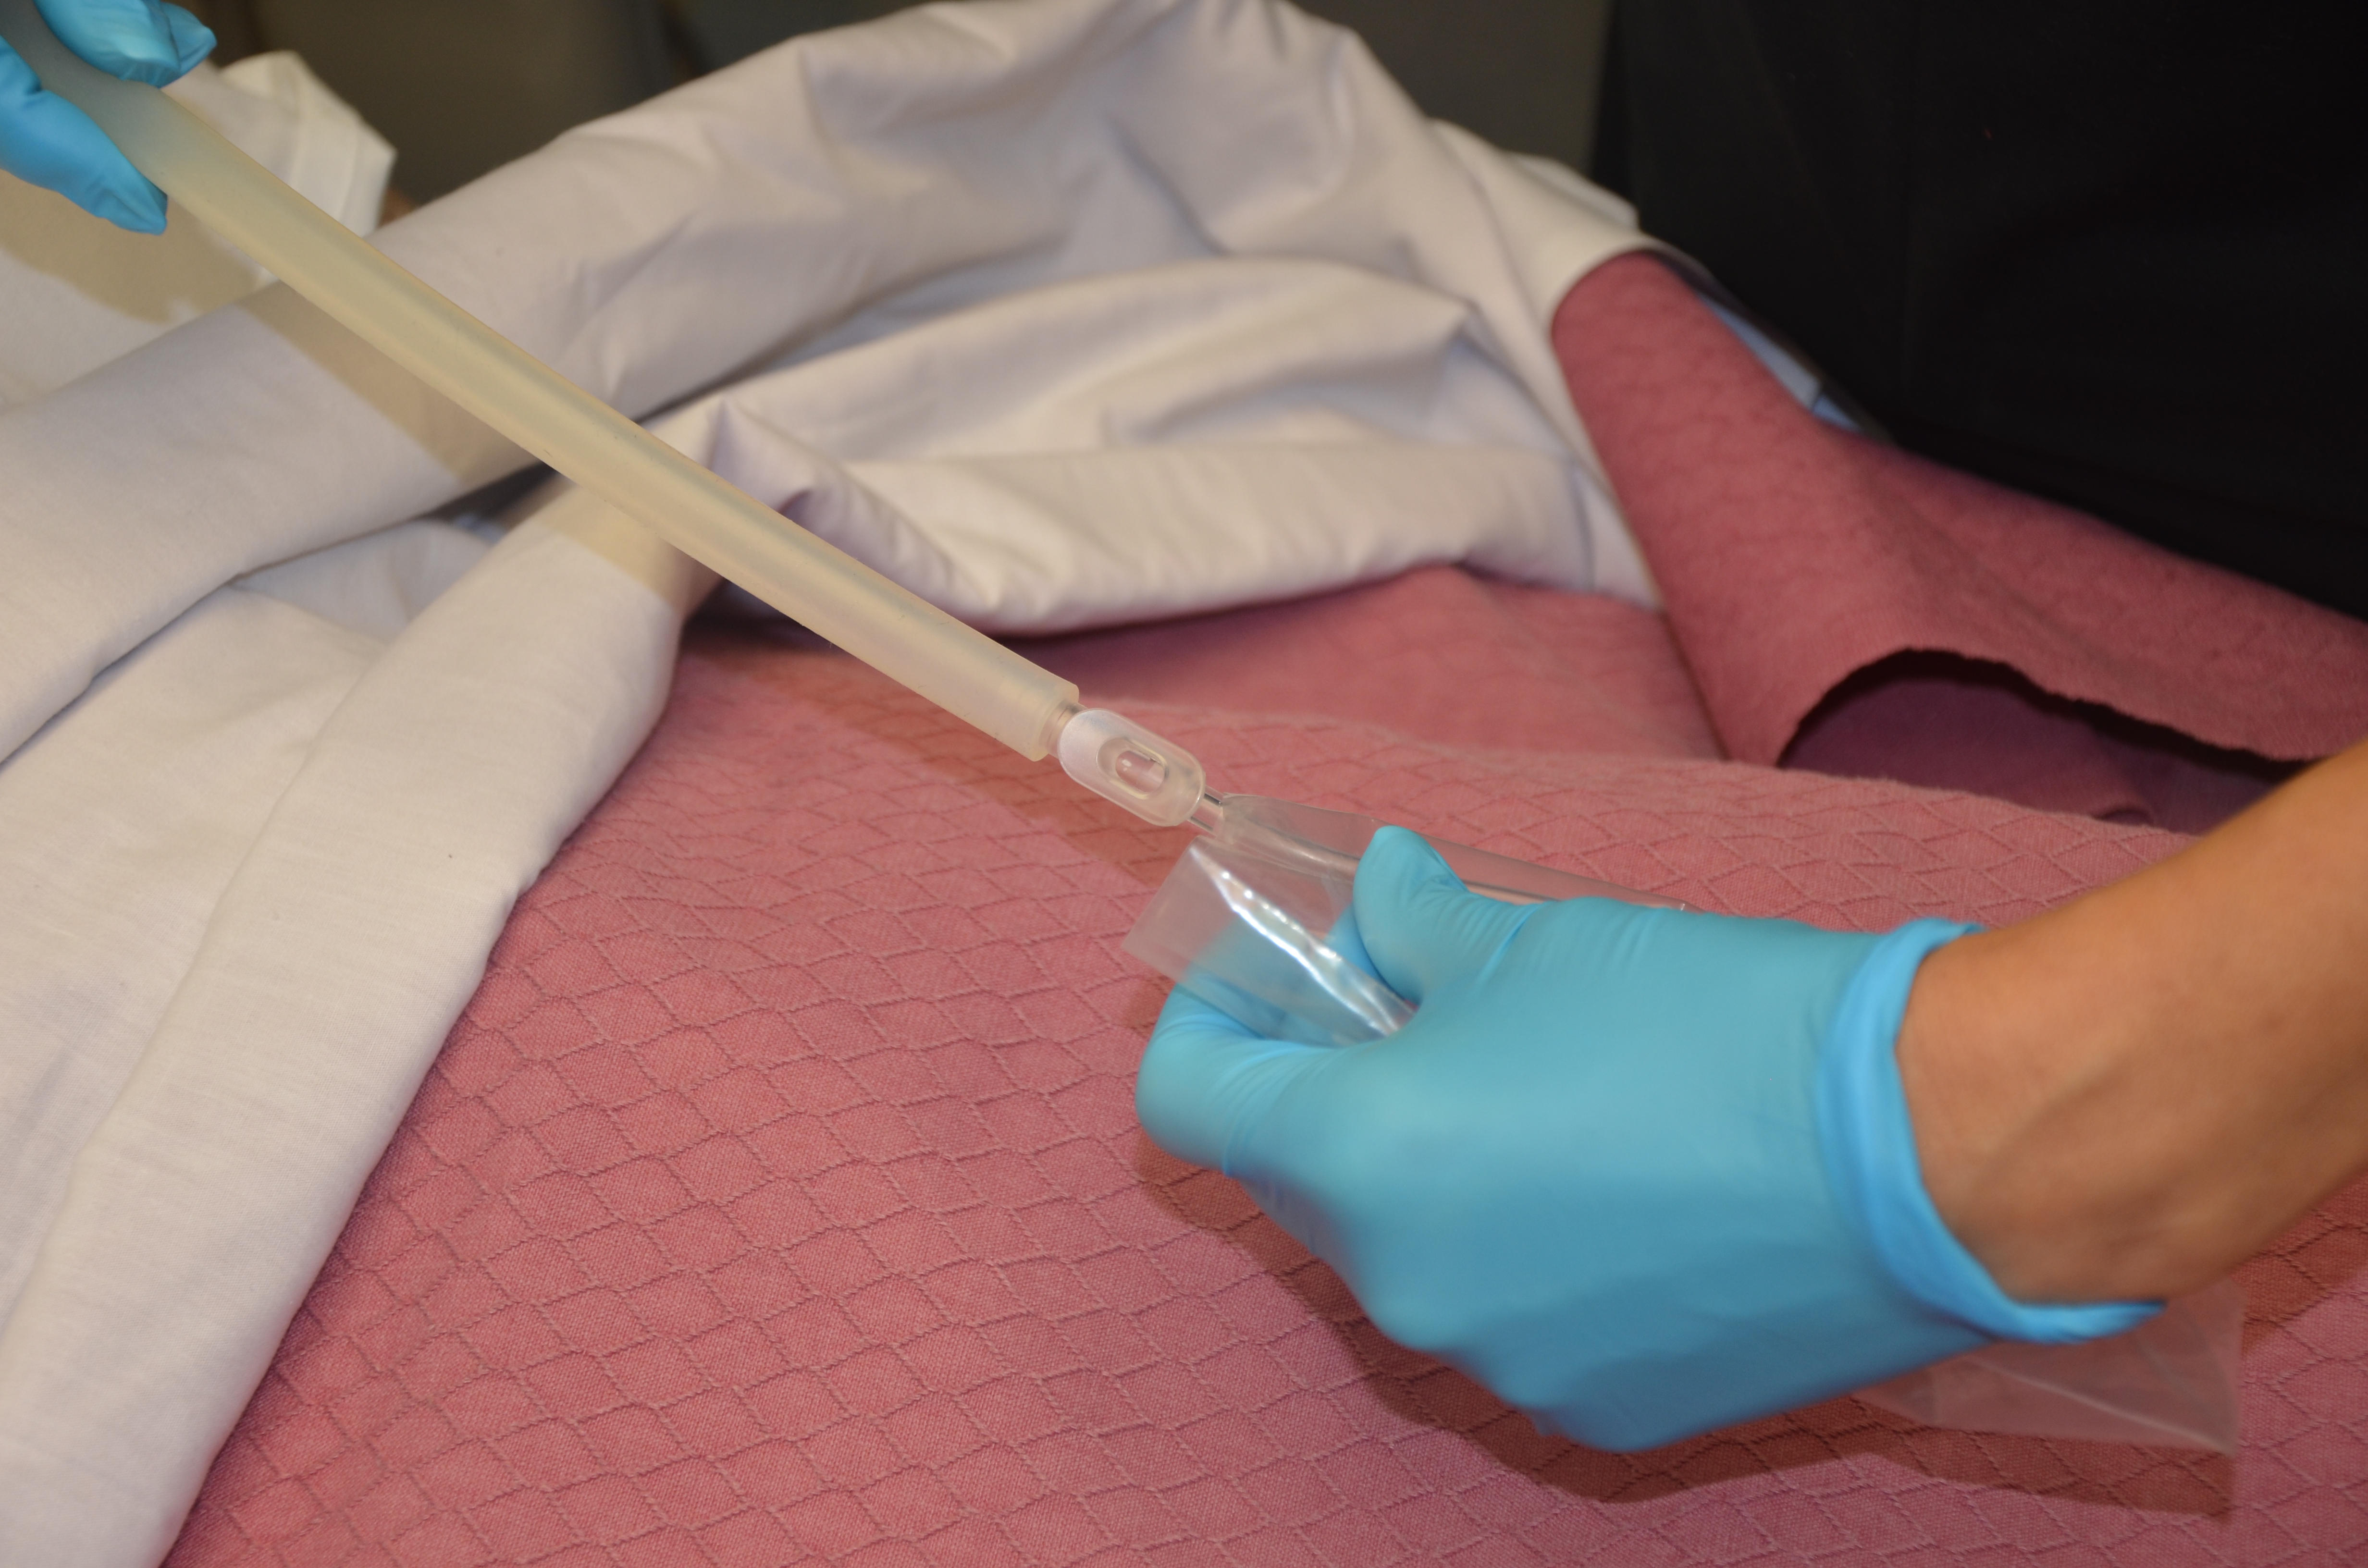
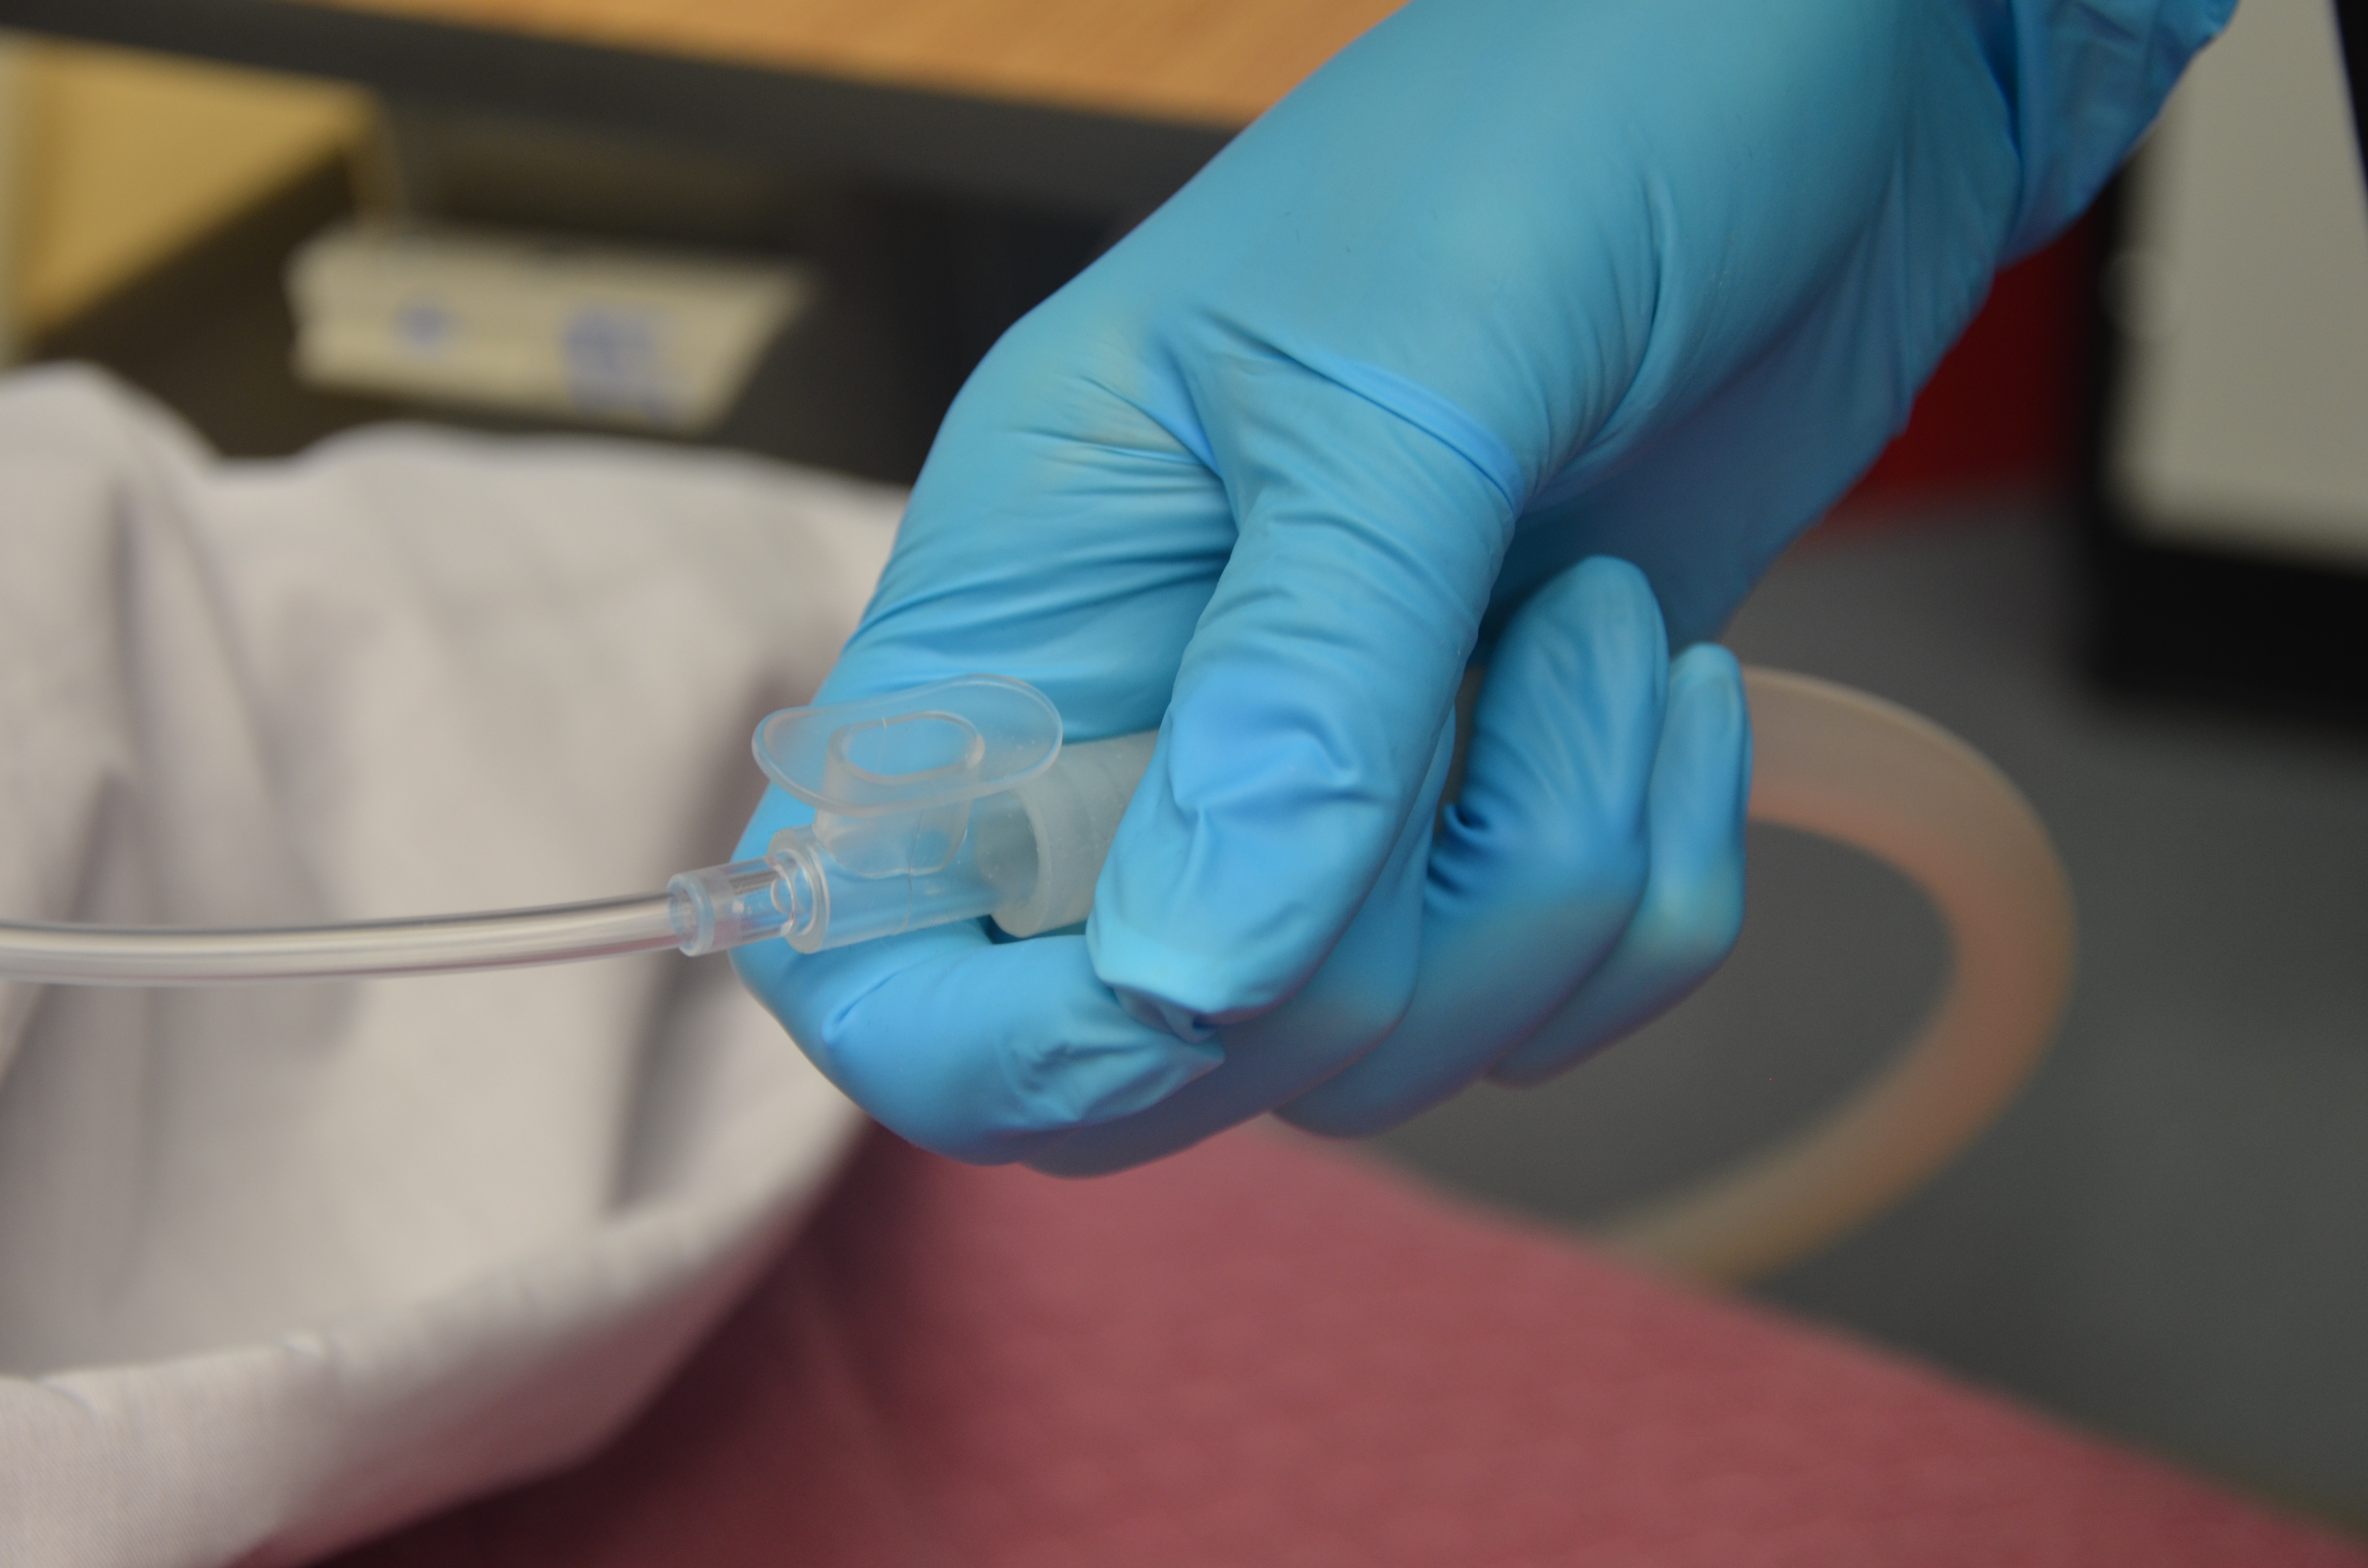
8. Pick up suction catheter with dominant hand without touching non-sterile surfaces. Pick up connecting tubing with non-dominant hand and secure catheter to tubing.
This maintains catheter sterility and connects catheter to suction.
Use aseptic technique to attach suction catheter to suction tubing
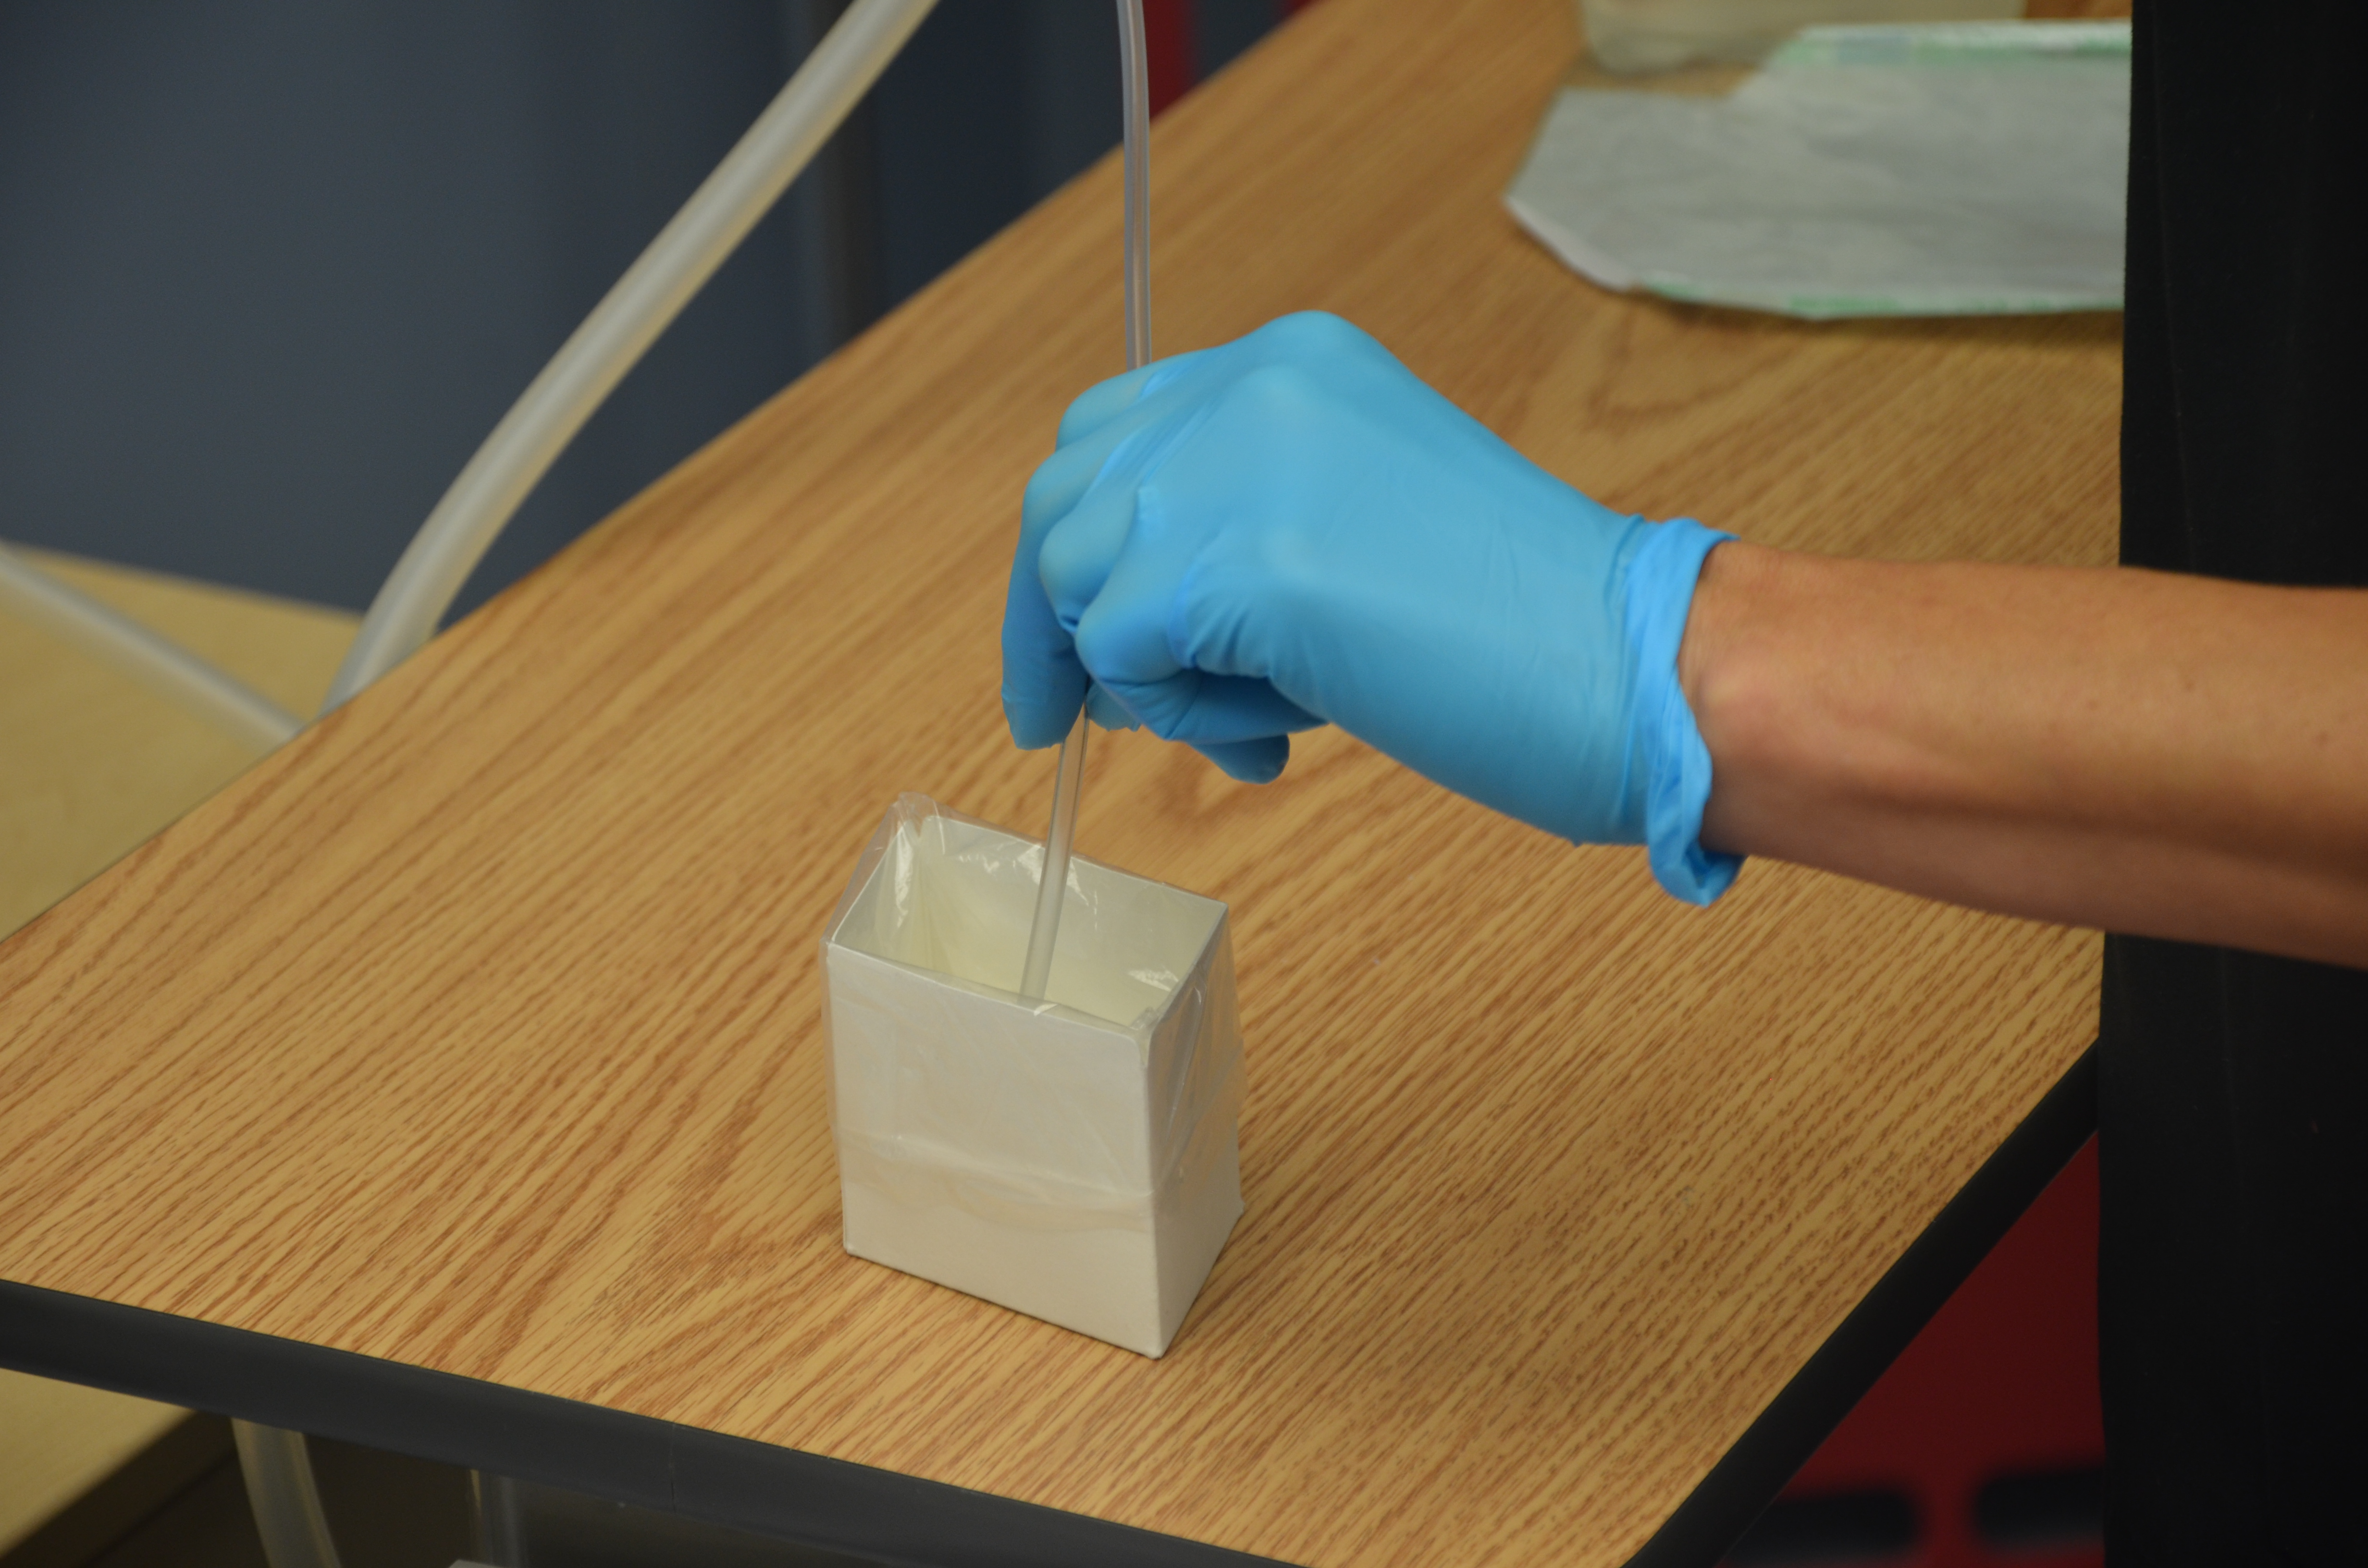
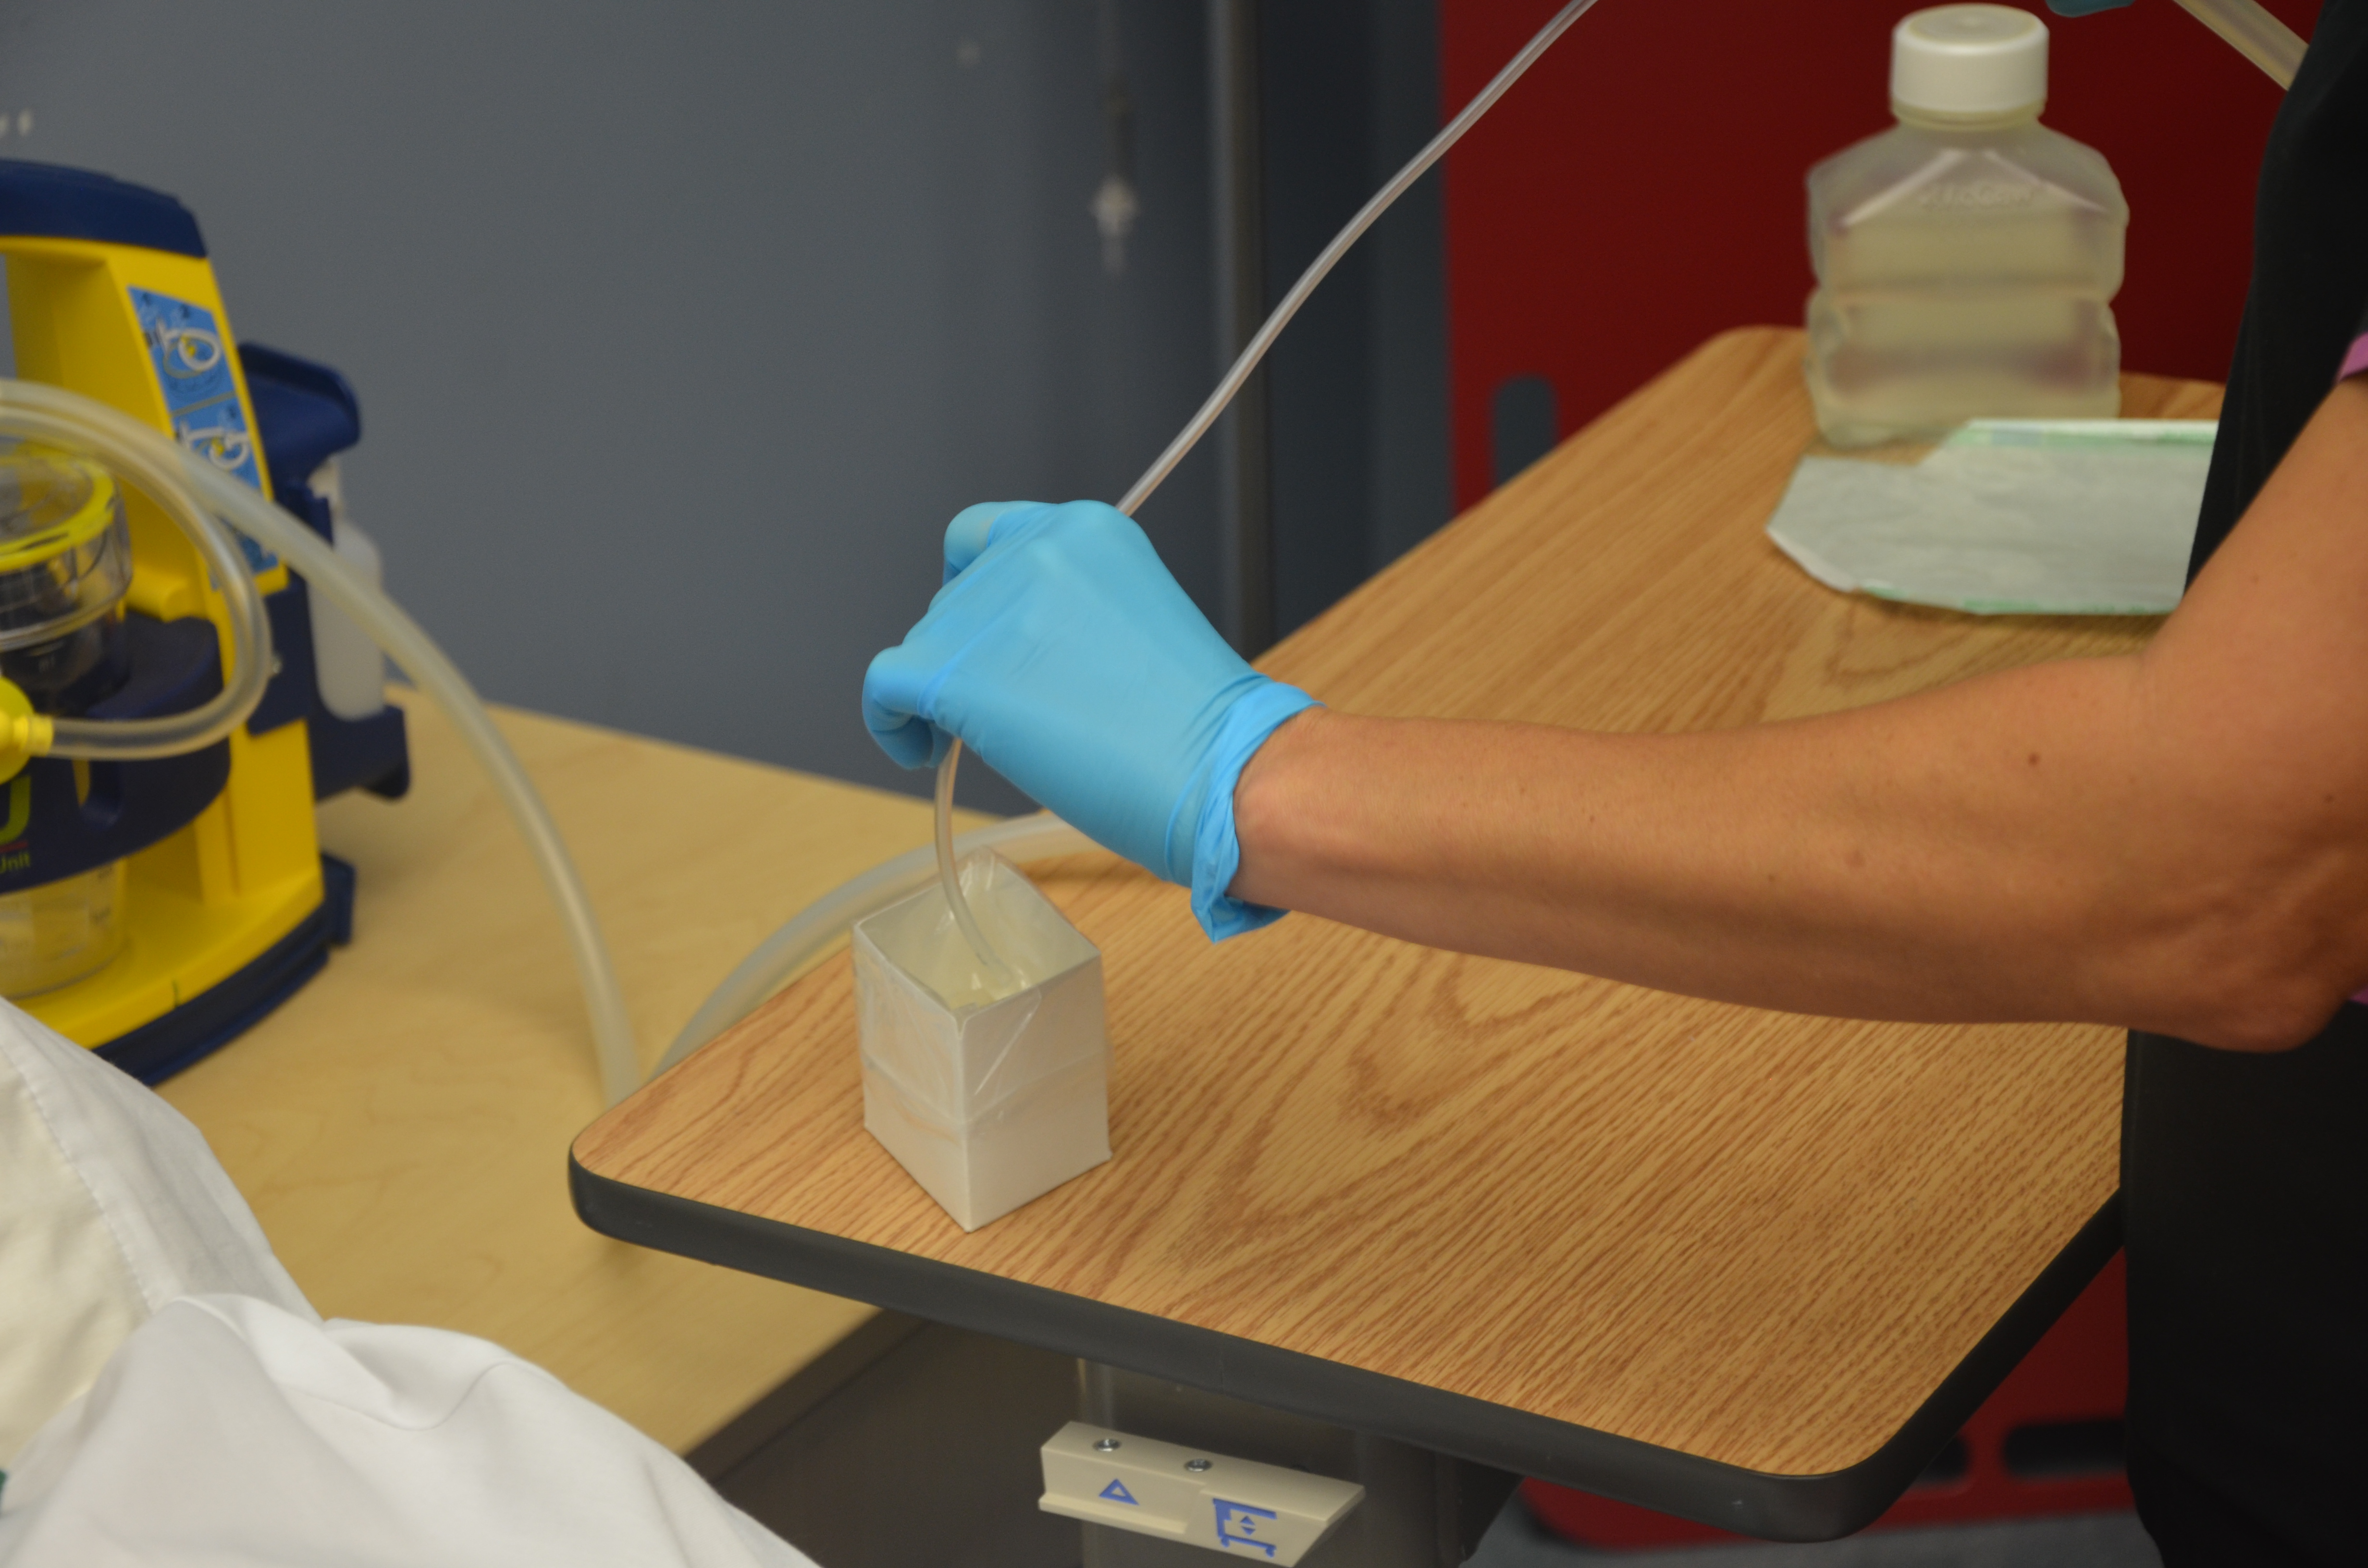
9. Check that equipment is functioning properly by suctioning small amount of sterile normal saline or water from sterile container. Suction is initiated by covering the hole on the suctioning tube with your thumb.
This ensures equipment is functioning and lubricates internal catheter and tubing.
Too high suction may increase tracheal damage.
Check that equipment is functioning properly by suctioning small amount of sterile normal saline or water from sterile containerSuction is initiated by covering the hole on the suctioning tube with your thumb
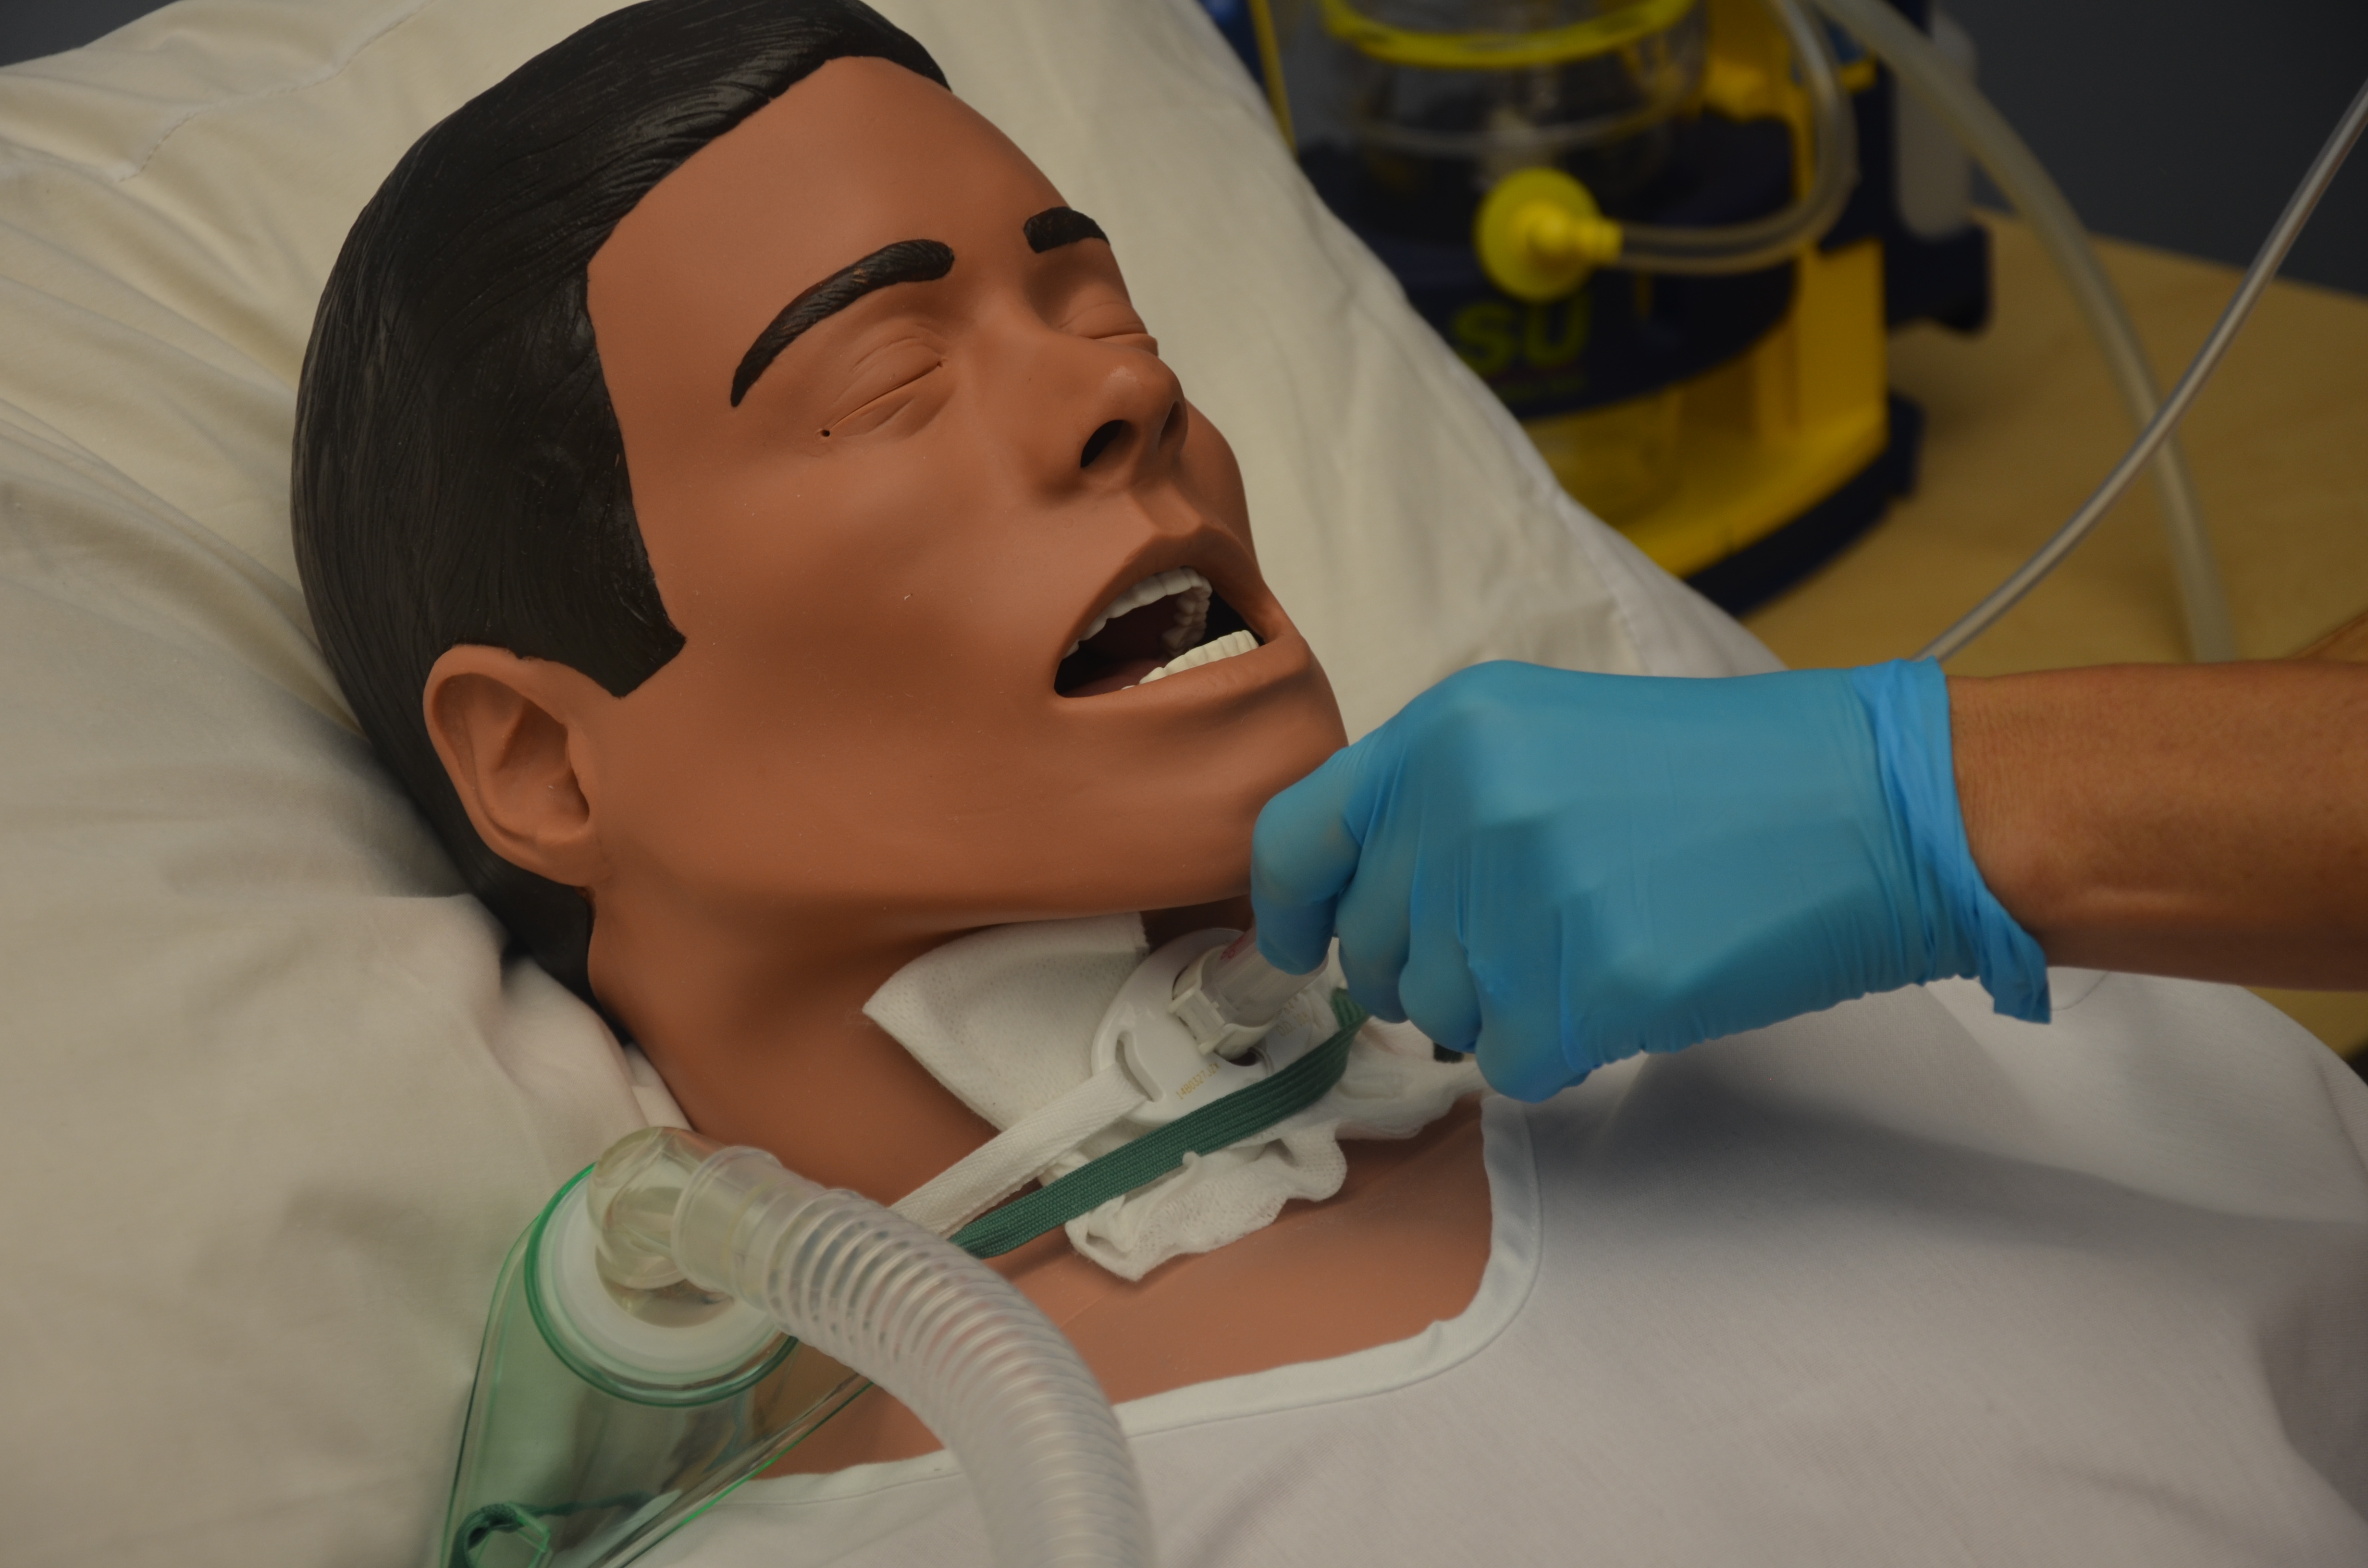
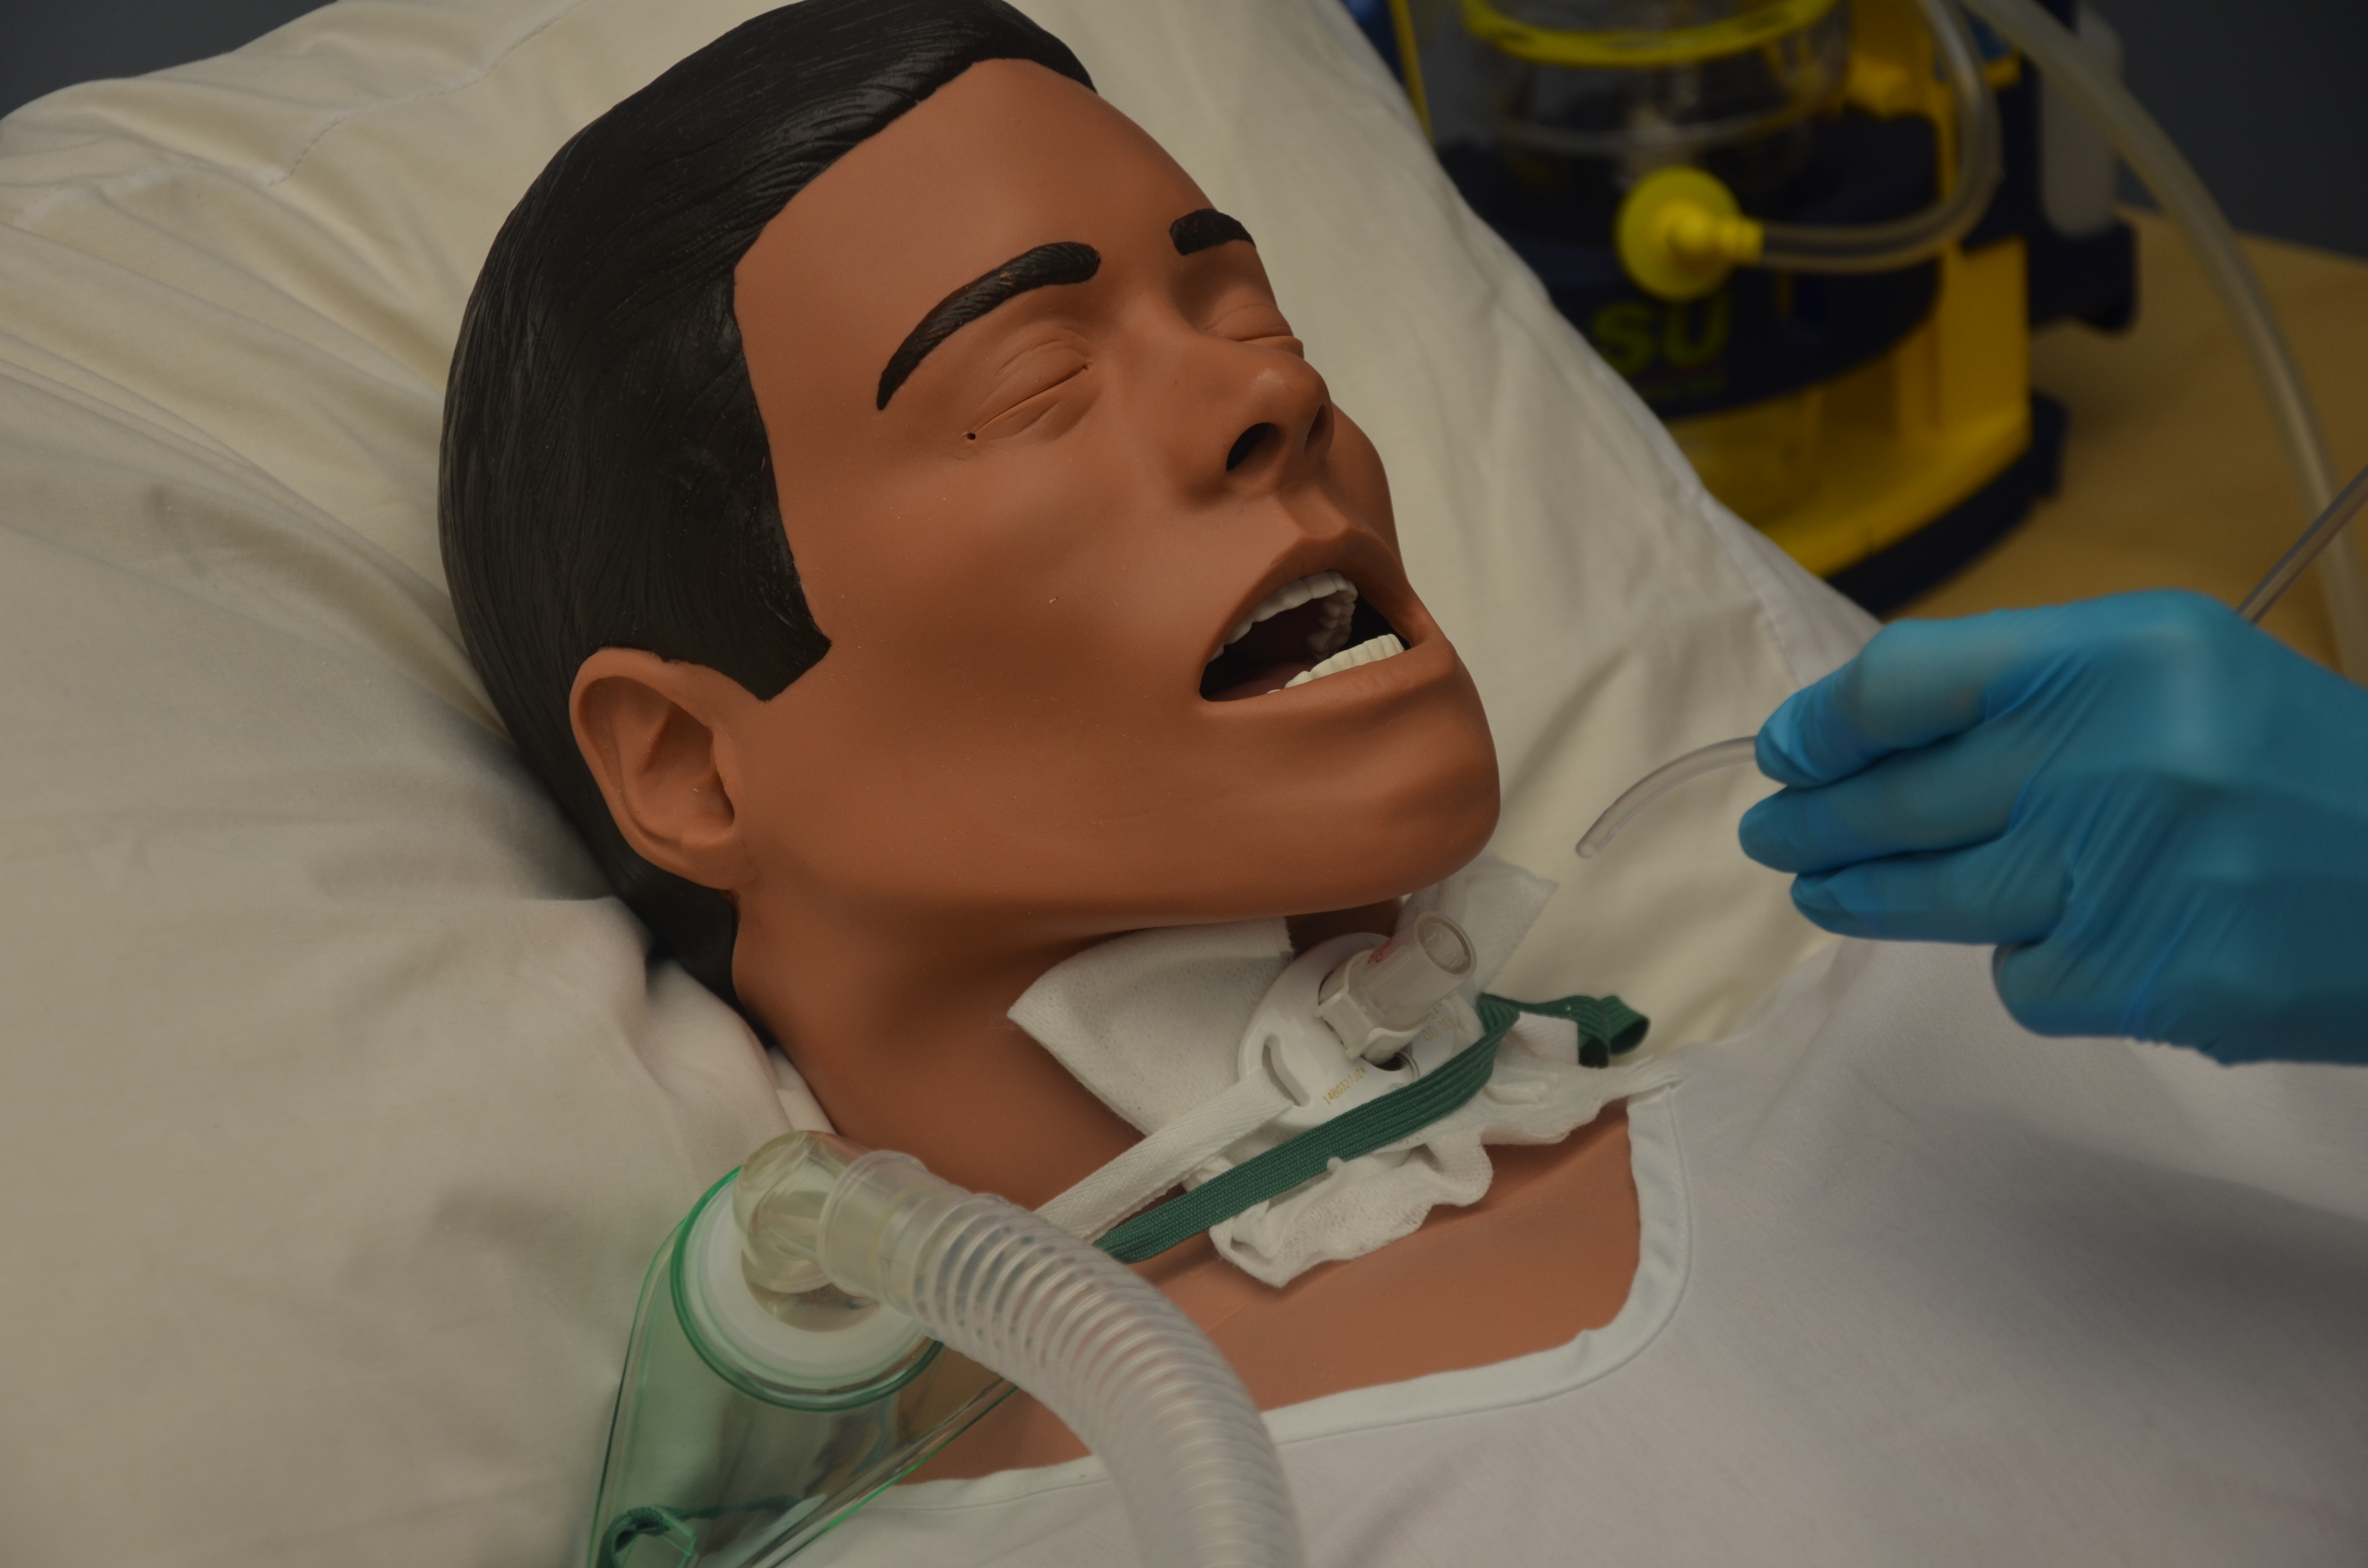
10. Insert suction catheter into tracheostomy until resistance is felt, then pull back about 1/2 inch. Do not apply suction when inserting suction catheter.
Resistance is felt at the level of the patient’s carina.
Insert suction catheter into tracheostomy until resistance is felt, then pull back about 1/2 inch
11. Suction intermittently while simultaneously rotating and withdrawing catheter for a maximum of 10 seconds.
Immediately reapply oxygen in between suctions to reoxygenate the patient.
*Instill sterile normal saline into tracheostomy prior to suction only if prescribed to induce coughing.
This reduces risk of tracheal damage and optimizes suction of secretions.
Suction intermittently while simultaneously rotating and withdrawing catheter for a maximum of 10 seconds
Suctioning decreases patient’s supply of oxygen. Oxgyen supports patient’s return to adequate oxygenation.
*Evidence-based practice indicates that normal saline is not effective in loosening or mobilizing secretions. Normal saline may occasionally be prescribed to induce coughing in patient.
12. Clear secretions from suction catheter by suctioning sterile normal saline or water from sterile container.
Clear secretions from suction catheter by suctioning sterile normal saline or water from sterile container
This clears catheter of secretions and avoids reintroducing pathogens into the airway.
13. Allow periods of rest between suction. The length of time between suctioning depends on patient tolerance. Patient may be suctioned up to three times with the same suction catheter. Do not pass (insert) suction catheter more than three times.
Release suction to allow patient time to rest
This reduces the risk of tracheal damage.
14. Reassess respiratory status and O2 saturation for improvements. Call for help if any abnormal signs and symptoms appear, or if respiratory status does not improve.
This identifies positive response to suctioning procedure and provides objective measure of effectiveness.
15. When suctioning is complete, wrap catheter around gloved hand, pull glove over catheter, and disconnect from suction. Discard supplies in appropriate garbage bags. Turn off suction.
Ensure all supplies are readily available at the bedside for next suction procedure.
Wrapping catheter in glove prevents secretions from being spilled from the catheter.
Wrap suction catheter in glove and dispose
Supplies are essential in case of an emergency or respiratory distress.
16. Return patient to a safe and comfortable position and ensure that call bell is within patient’s reach.
This promotes patient safety.
17. Clean up and dispose of suction supplies according to agency policy.
This reduces the transmission of microorganisms.
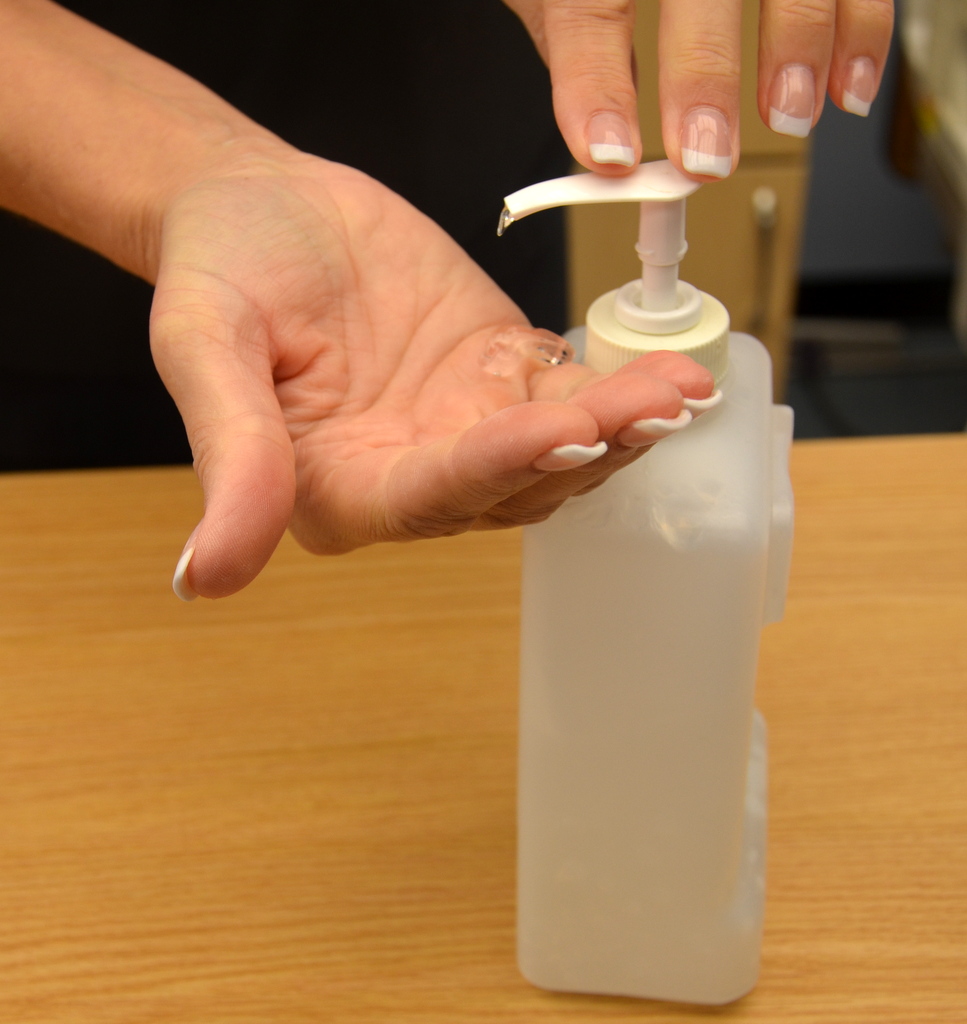
18. Perform hand hygiene.
Hand hygiene reduces the transmission of microorganisms.
Hand hygiene with ABHR
19. Document procedure according to agency policy.
Documentation may include the suction procedure; patient reaction; amount, thickness, and colour of secretions; if normal saline was instilled; and if sputum samples were sent to the lab. Documentation provides accurate details of response to suctioning and clear communication among the health care team.
Data source: BCIT, 2015c; Halm & Krisko-Hagel, 2008; Perry et al., 2014; Vancouver Coastal Health, 2006
Special considerations:
Suctioning can cause nosocomial infections, hypoxia, injury to the airway, and cardiac dysrhythmias. Follow agency policy on suction to prevent these complications.
Hyperoxygenate patient according to agency policy.
If a sterile sputum sample is required, follow agency policy for specific directions related to type of equipment in the agency.
Tracheostomy care is performed routinely and as required. Tracheostomy care is essential to avoid potential complications such as obstruction and infection. In addition to suctioning, tracheostomy care includes the following tasks:
Changing and replacing the inner cannula
Changing the outer dressing
Replacing the tracheostomy ties
If possible, these three tasks of tracheostomy care should be performed at the same time to minimize handling of the tracheal device. Collect all supplies at once and complete the procedure in the order listed above. However, there may be times when each task may be performed separately. Ongoing assessment is essential when caring for a patient with a tracheostomy.
Additional care includes:
Doing more frequent respiratory assessments and checking patency of tracheostomy tube to assess if suction is required (every two hours and as needed) according to agency policy
Keeping patient well hydrated (helps keep secretions thin)
Encouraging deep breathing and coughing (as required)
Reporting potential problems such as swelling, elevated temperature, change in sputum production, decreasing or increasing O2 requirements
Replacing and Cleaning an Inner Cannula
The primary purpose of the inner cannula is to prevent tracheostomy tube obstruction. Many sources of obstruction can be prevented if the inner cannula is regularly cleaned and replaced. The inner cannula can be cleansed with half-strength hydrogen peroxide or sterile normal saline. Always check the manufacturer’s recommendations for tube cleaning. Some inner cannulas are designed to be disposable, while others are reusable for a number of days. Inner tube cleaning should be done as often as two or three times per day, depending on the type of equipment, the amount and thickness of secretions, and the patient’s ability to cough up the secretions.
Changing the inner cannula may encourage the patient to cough, bringing mucous out of the tracheostomy. For this reason, the inner cannula should be replaced prior to changing the tracheostomy dressing to prevent secretions from soiling the new dressing. If the inner cannula is disposable, no cleaning is required. Checklist 83 describes how to clean and replace an inner tracheal cannula.
Checklist 83: Cleaning an Inner Tracheal Cannula
Disclaimer: Always review and follow your hospital policy regarding this specific skill.
Safety considerations:
Reassess your patient’s tolerance for tracheostomy care and watch for signs of respiratory distress.
Pre-hyperoxygenate patient if required and according to agency policy.
If removing oxygen while performing tracheostomy care, remember to replace it often to reoxygenate the patient.
Disposable inner cannulae should be inspected/cleaned every 8 hours or as needed.
Disposable inner cannulae should be inspected every 8 hours (during tracheostomy care) and replaced every 24 hours and as needed.
Steps
Additional Information
1. Perform hand hygiene, collect supplies, and verify whether inner cannula needs to be cleaned as per policy.
Supplies include cotton-tip applicator, sterile pipe cleaner, sterile dressing tray, NS, hydrogen peroxide, non-sterile gloves, waterproof pad, and PPE if required.
2. Perform hand hygiene, ID patient using two identifiers, explain procedure to patient, and create privacy if required. Ensure patient has a method to communicate with you during the procedure.
Hand hygiene reduces the transmission of microorganisms.
Hand hygiene with ABHR
Tracheal patients always require a method to communicate with the health care provider.
3. Apply gloves and PPE (if required), and cover chest with waterproof pad.
This prevents contact with secretions and prevents gown from becoming soiled.
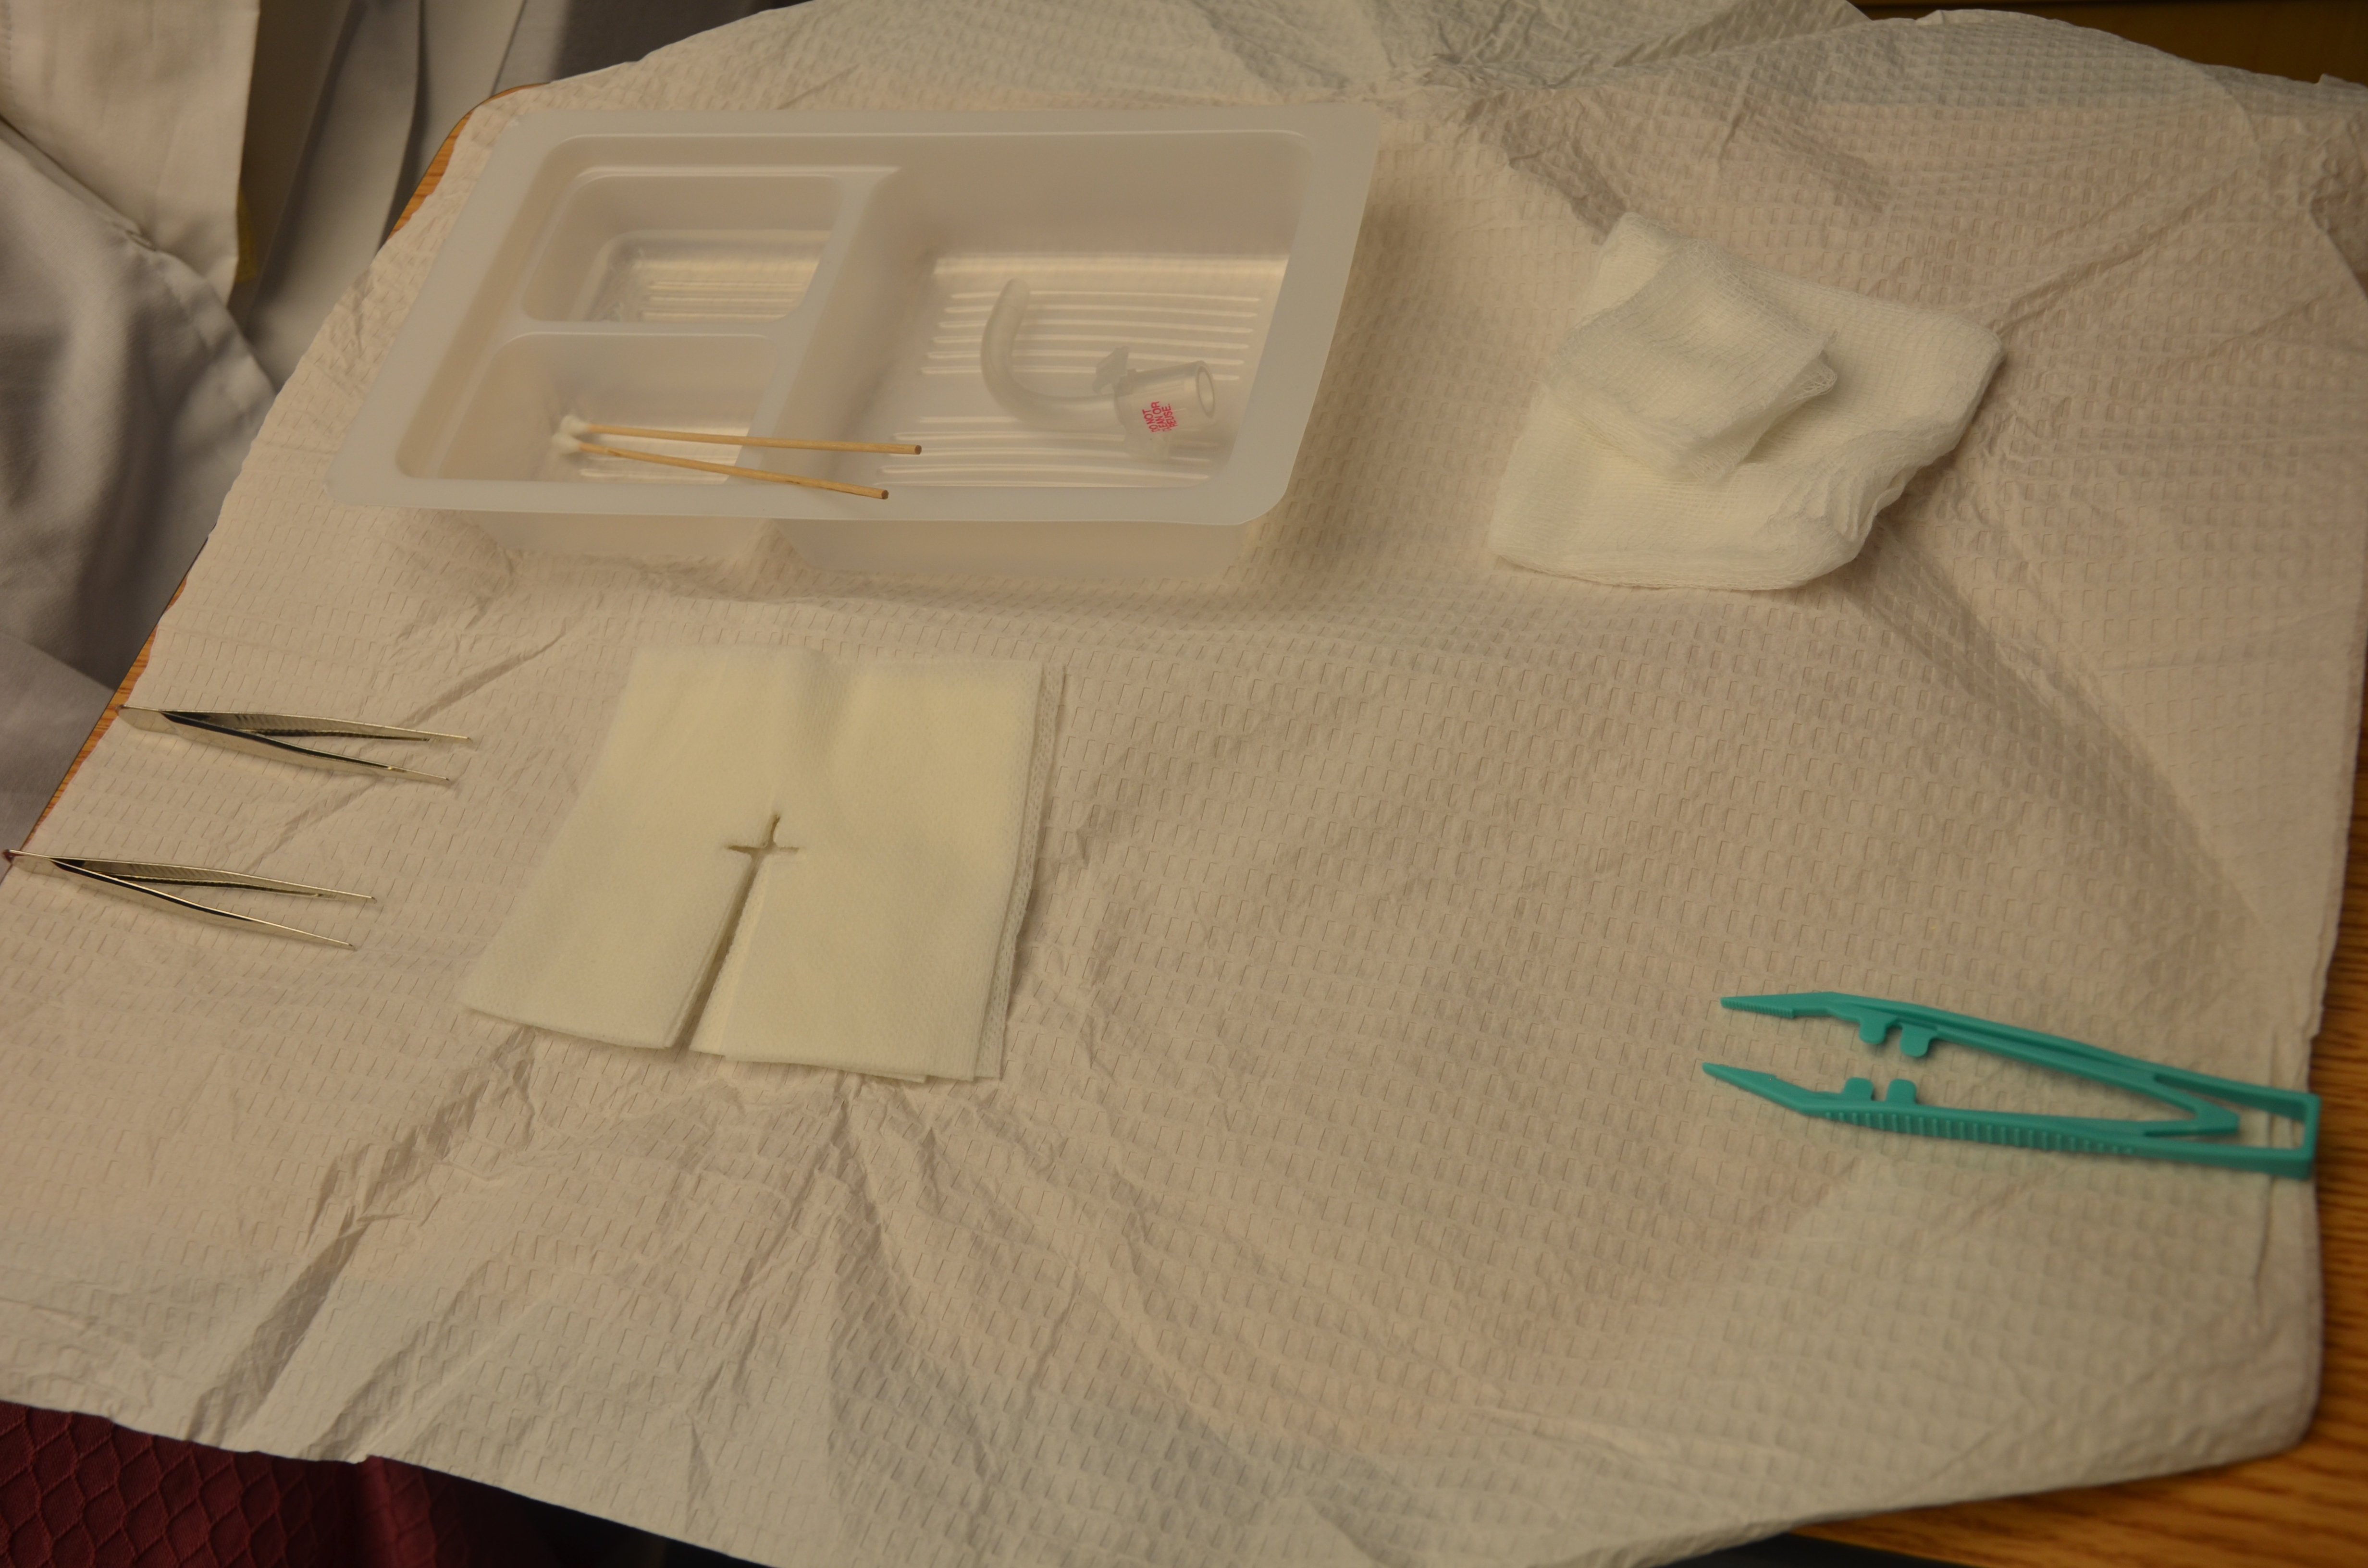
4. Set up sterile tray field; add cleaning solution and supplies.
Organization ensures the process is efficient and fast for the patient.
Set up sterile tray and add cleaning solution and supplies
5. Remove oxygen mask to clean dressing but replace frequently as required by patient.
Remove oxygen mask to clean dressing
Replace the tracheal oxygen mask frequently to prevent hypoxia.
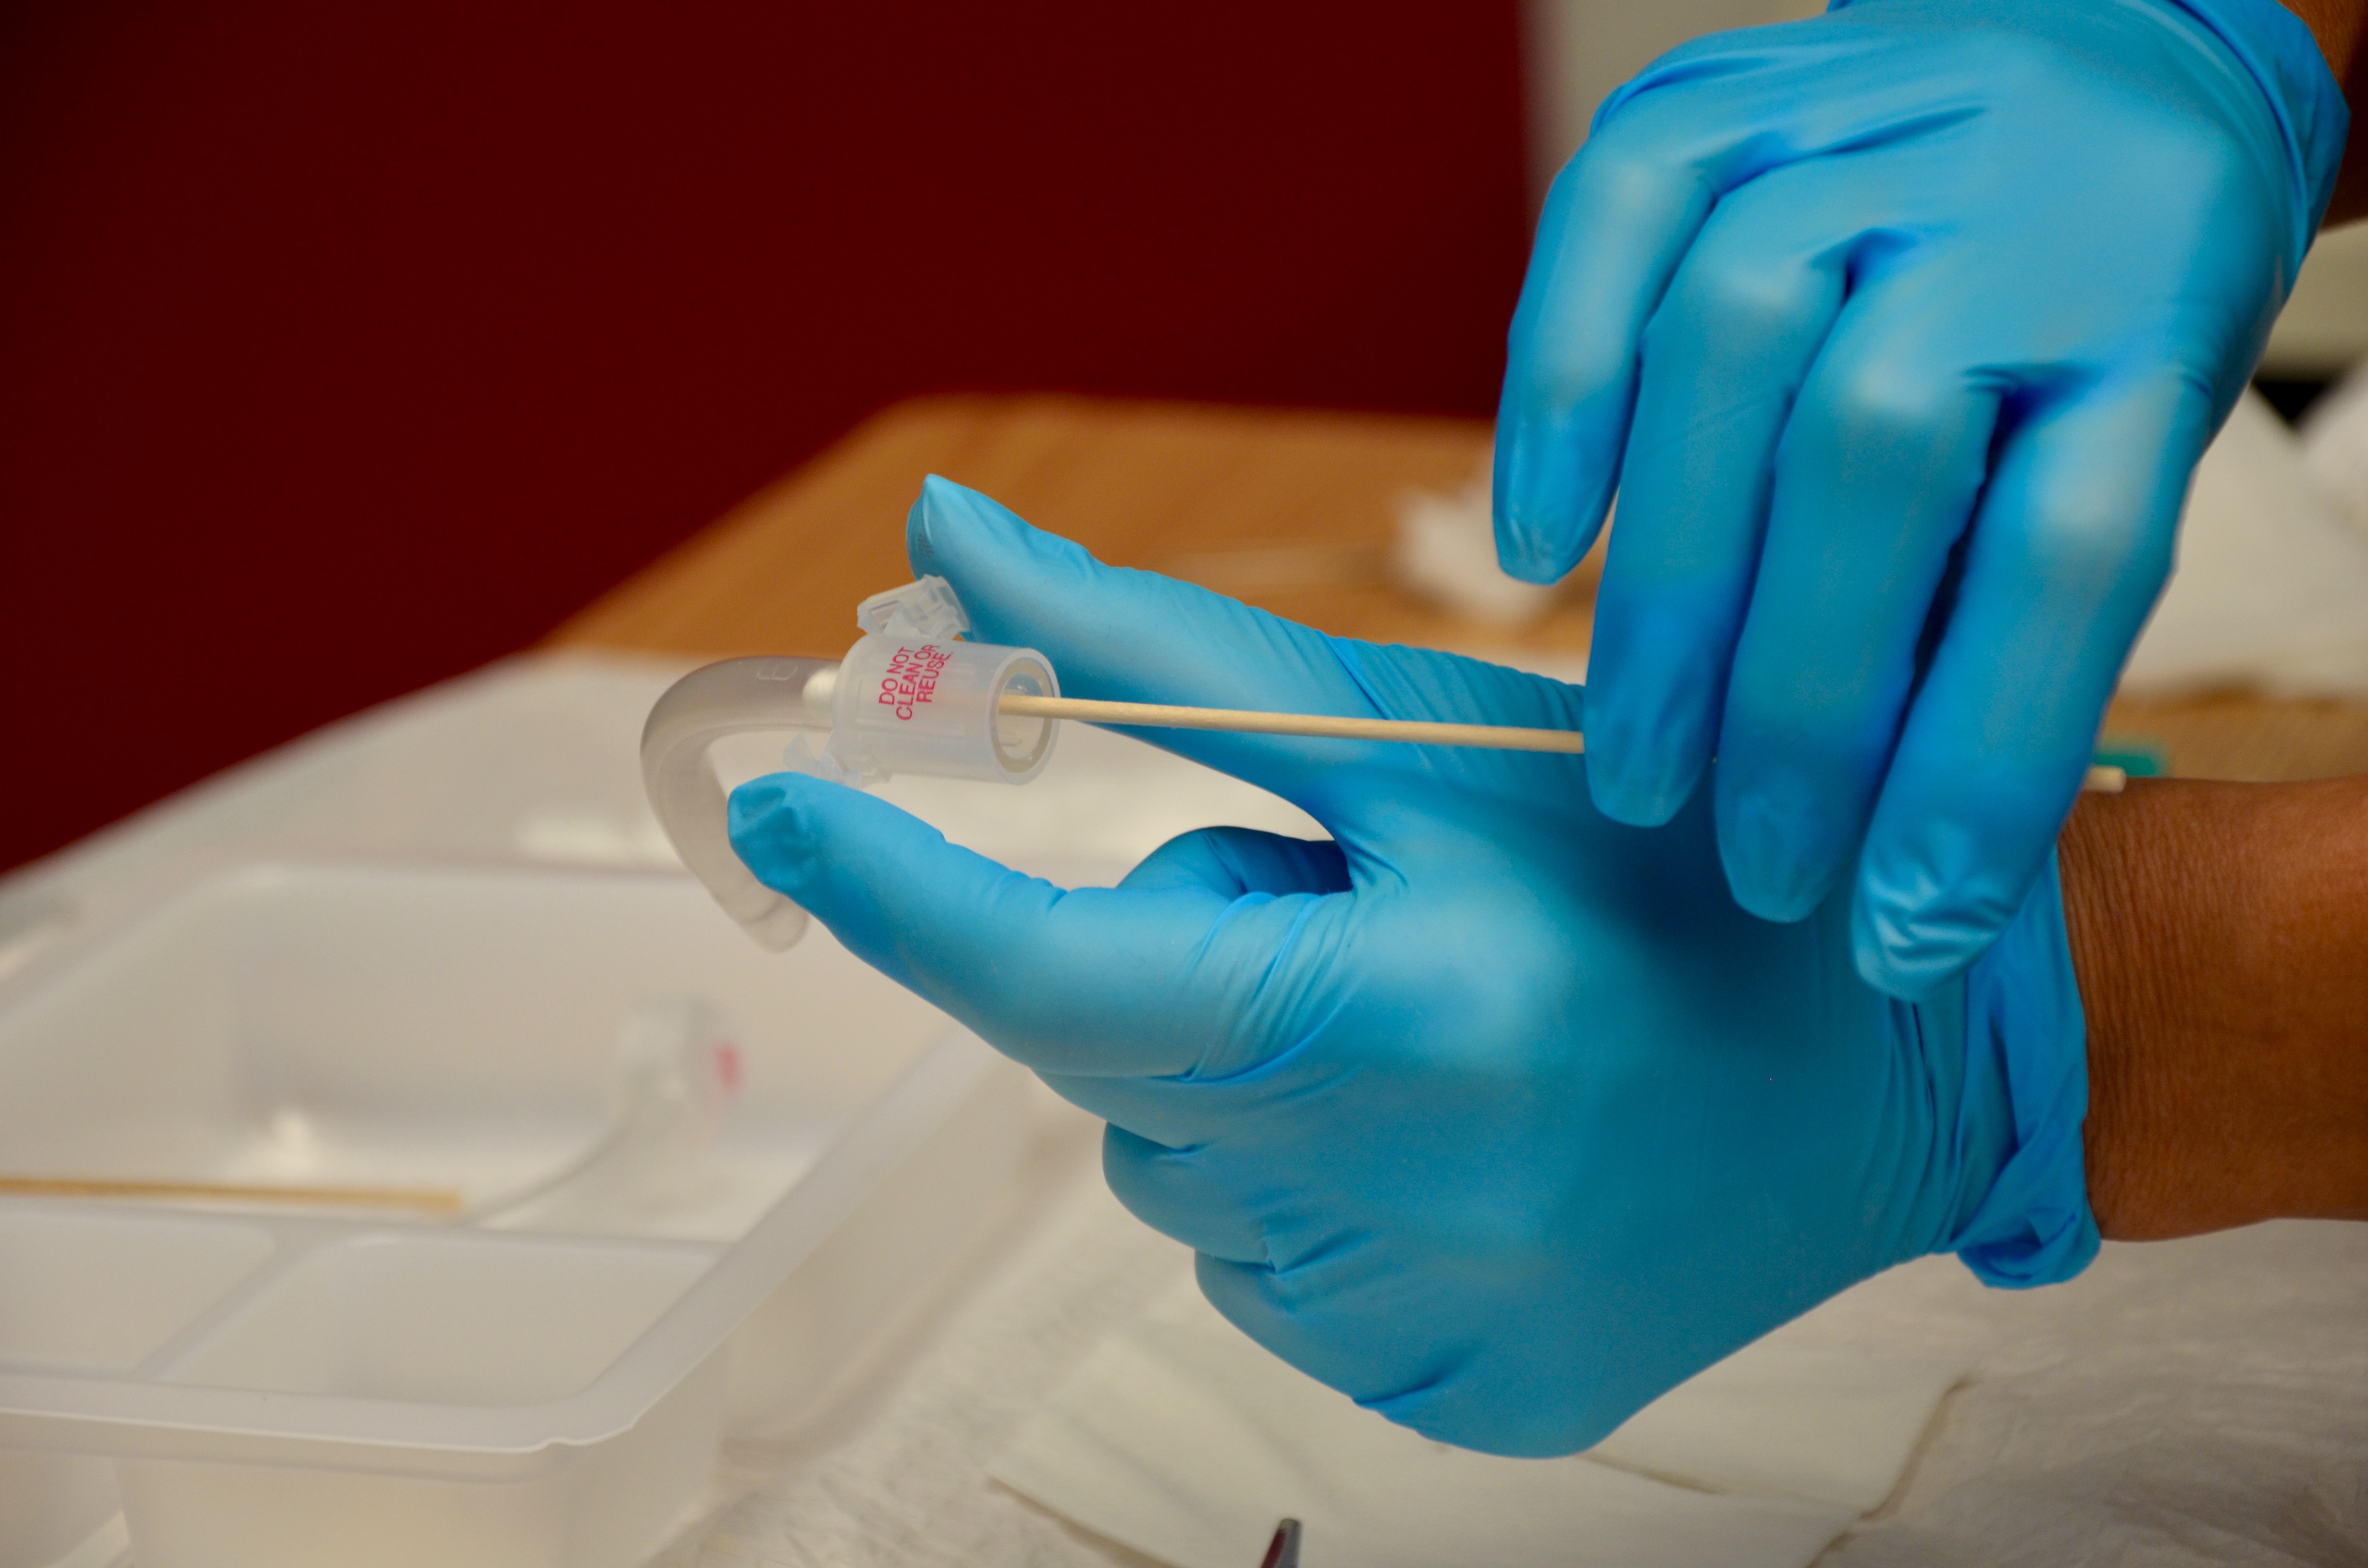
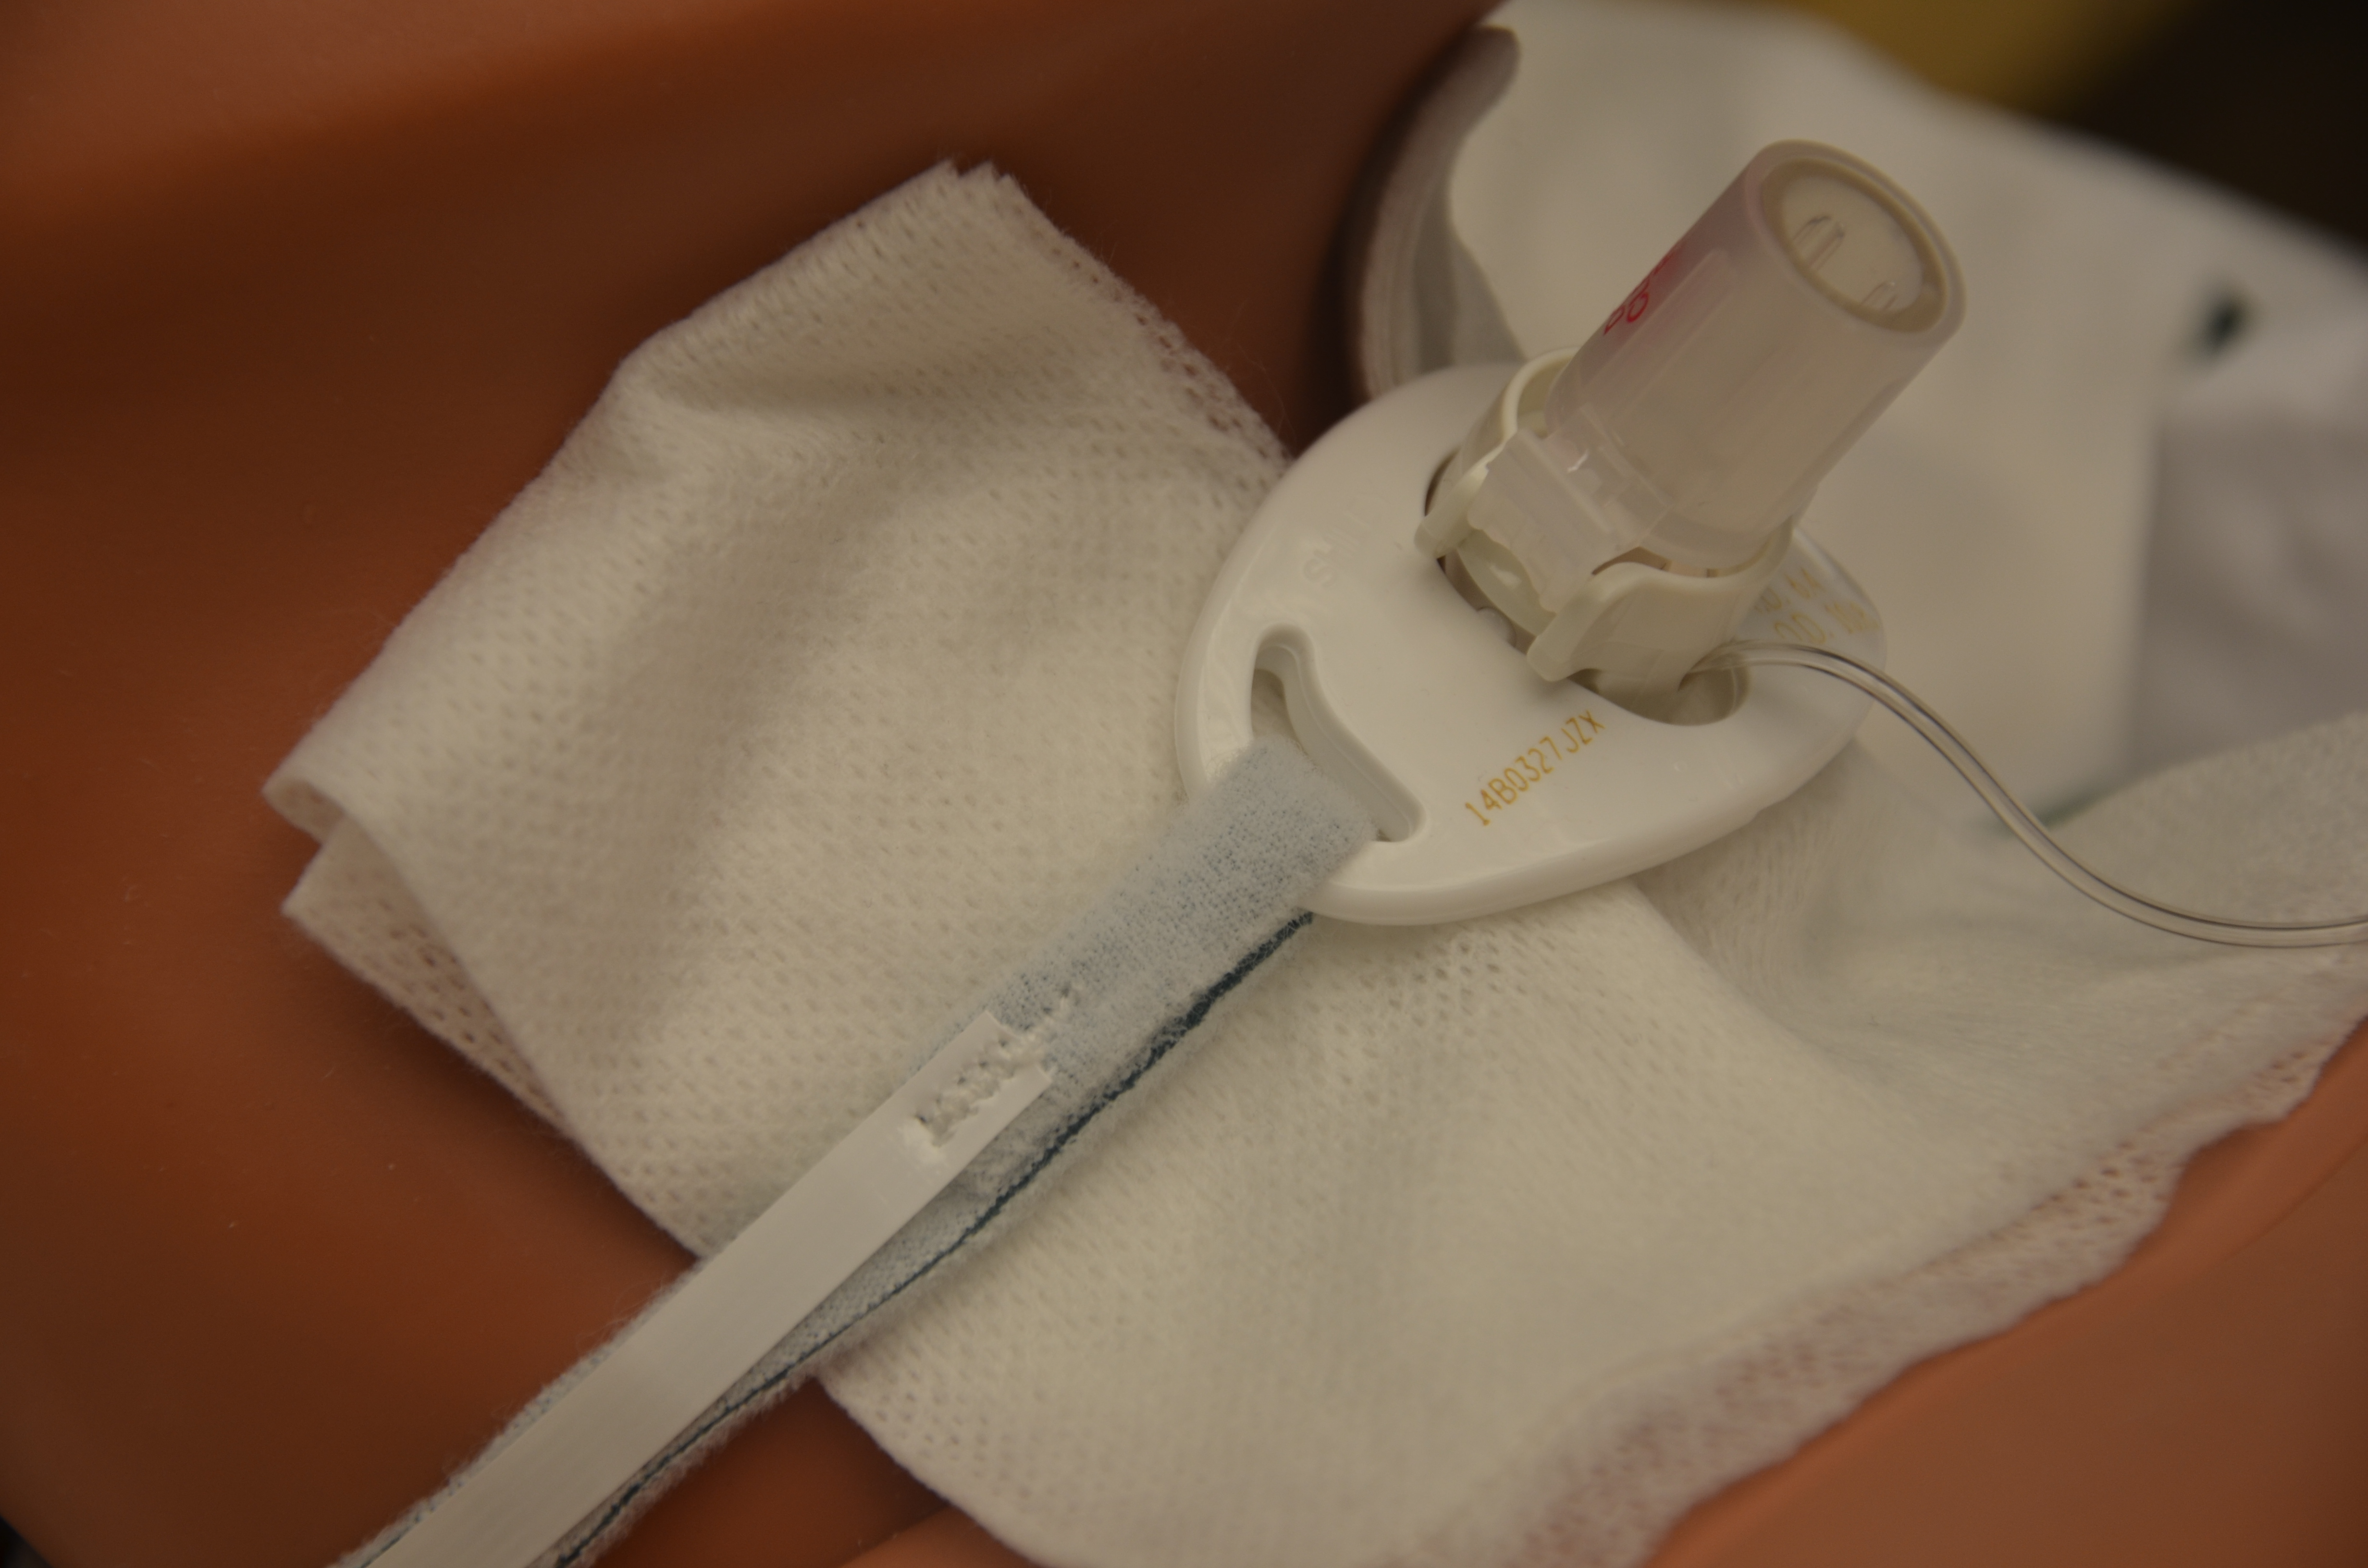
6. Remove inner cannula by stabilizing neck plate and gently grasping the outer white area. Rotate inner cannula counter-clockwise to unlock it. Pull cannula out in a downward motion. Some inner cannulae will “click” on, some twist on/off. Do not touch the inner cannula; only handle the white outer area unless you are wearing sterile gloves.
Review policy for cleaning frequency and cleaning solution.
Remove inner cannula by stabilizing neck plate and gently grasping the outer white area
7. Soak in appropriate solution and, if necessary, use a sterile pipe cleaner to remove exudate from the inner cannula.
Soaking the cannula helps loosen the secretions.
Soak in appropriate solution and, if necessary, use a sterile pipe cleaner to remove exudate from the inner cannula
8. Once clean, rinse off inner cannula and ensure all solution is removed. The inner portion may be dried off with a sterile pipe cleaner prior to reinsertion.
Ensure all cleaning solution is removed to prevent tracheal damage from the hydrogen peroxide (if used).
9. Reinsert inner cannula by stabilizing neck plate, holding the white part with the end upright, and twisting into the shape of the tracheostomy.
This prevents trauma to the tracheal stoma.
10. Ensure the inner cannula has “clicked” on by aligning the two dots, or ensure the clamp is secure.
Ensure that inner cannula is “clicked” securely into place
11. Perform hand hygiene.
Hand hygiene reduces the transmission of microorganisms.
Hand hygiene with ABHR
Data source: ATI, 2015b; BCIT, 2015c; Morris, Whitmer & McIntosh, 2013; Perry et al., 2014; Vancouver Coastal Health, 2012b
The stoma should be cleaned and the dressing changed every 6 to 12 hours or as needed, and the peristomal skin should be inspected for skin breakdown, redness, irritation, ulceration, pain, infection, or dried secretions. Patients with copious amounts of secretions often require frequent dressing changes to prevent maceration of the tissue and skin breakdown. Cotton-tip applicators can be used to get under the tracheostomy device, where cleaning can be done using a semi-circular motion, inward to outward. Always use aseptic technique. Checklist 84 provides a safe method to clean the tracheal stoma and replace the sterile dressing.
Checklist 84: Cleaning Stoma and Changing a Sterile Dressing
Disclaimer: Always review and follow your hospital policy regarding this specific skill.
Safety considerations:
Reassess your patient’s tolerance for tracheostomy care and watch for signs of respiratory distress.
Pre-hyperoxygenate patient if required and according to agency policy.
If removing oxygen while preforming tracheostomy care, remember to replace it often to reoxygenate the patient.
Steps
Additional Information
1. Perform hand hygiene, verify physician orders for tracheostomy care, and collect supplies.
Supplies include sterile dressing change, pre-cut 4 x 4 gauze, normal saline, cotton-tip applicators, non-sterile gloves, and garbage bag.
2. Perform hand hygiene, ID patient using two identifiers, explain procedure to patient, and create privacy if required. Ensure patient has a method to communicate with you during the procedure.
This reduces the transmission of microorganisms.
Hand hygiene with ABHR
Tracheal patients always require a method to communicate with the health care provider.
3. Apply non-sterile gloves and cover chest with waterproof pad.
This prevents gown from becoming soiled.
4. Organize all supplies and set up sterile tray field; add cleaning solution to sterile tray.
Organization ensures the process of cleaning is efficient and fast.
Set up sterile tray and add cleaning solution and supplies
5. Remove oxygen mask to clean dressing but replace frequently as required by patient.
This prevents hypoxia.
Remove oxygen mask to clean dressing
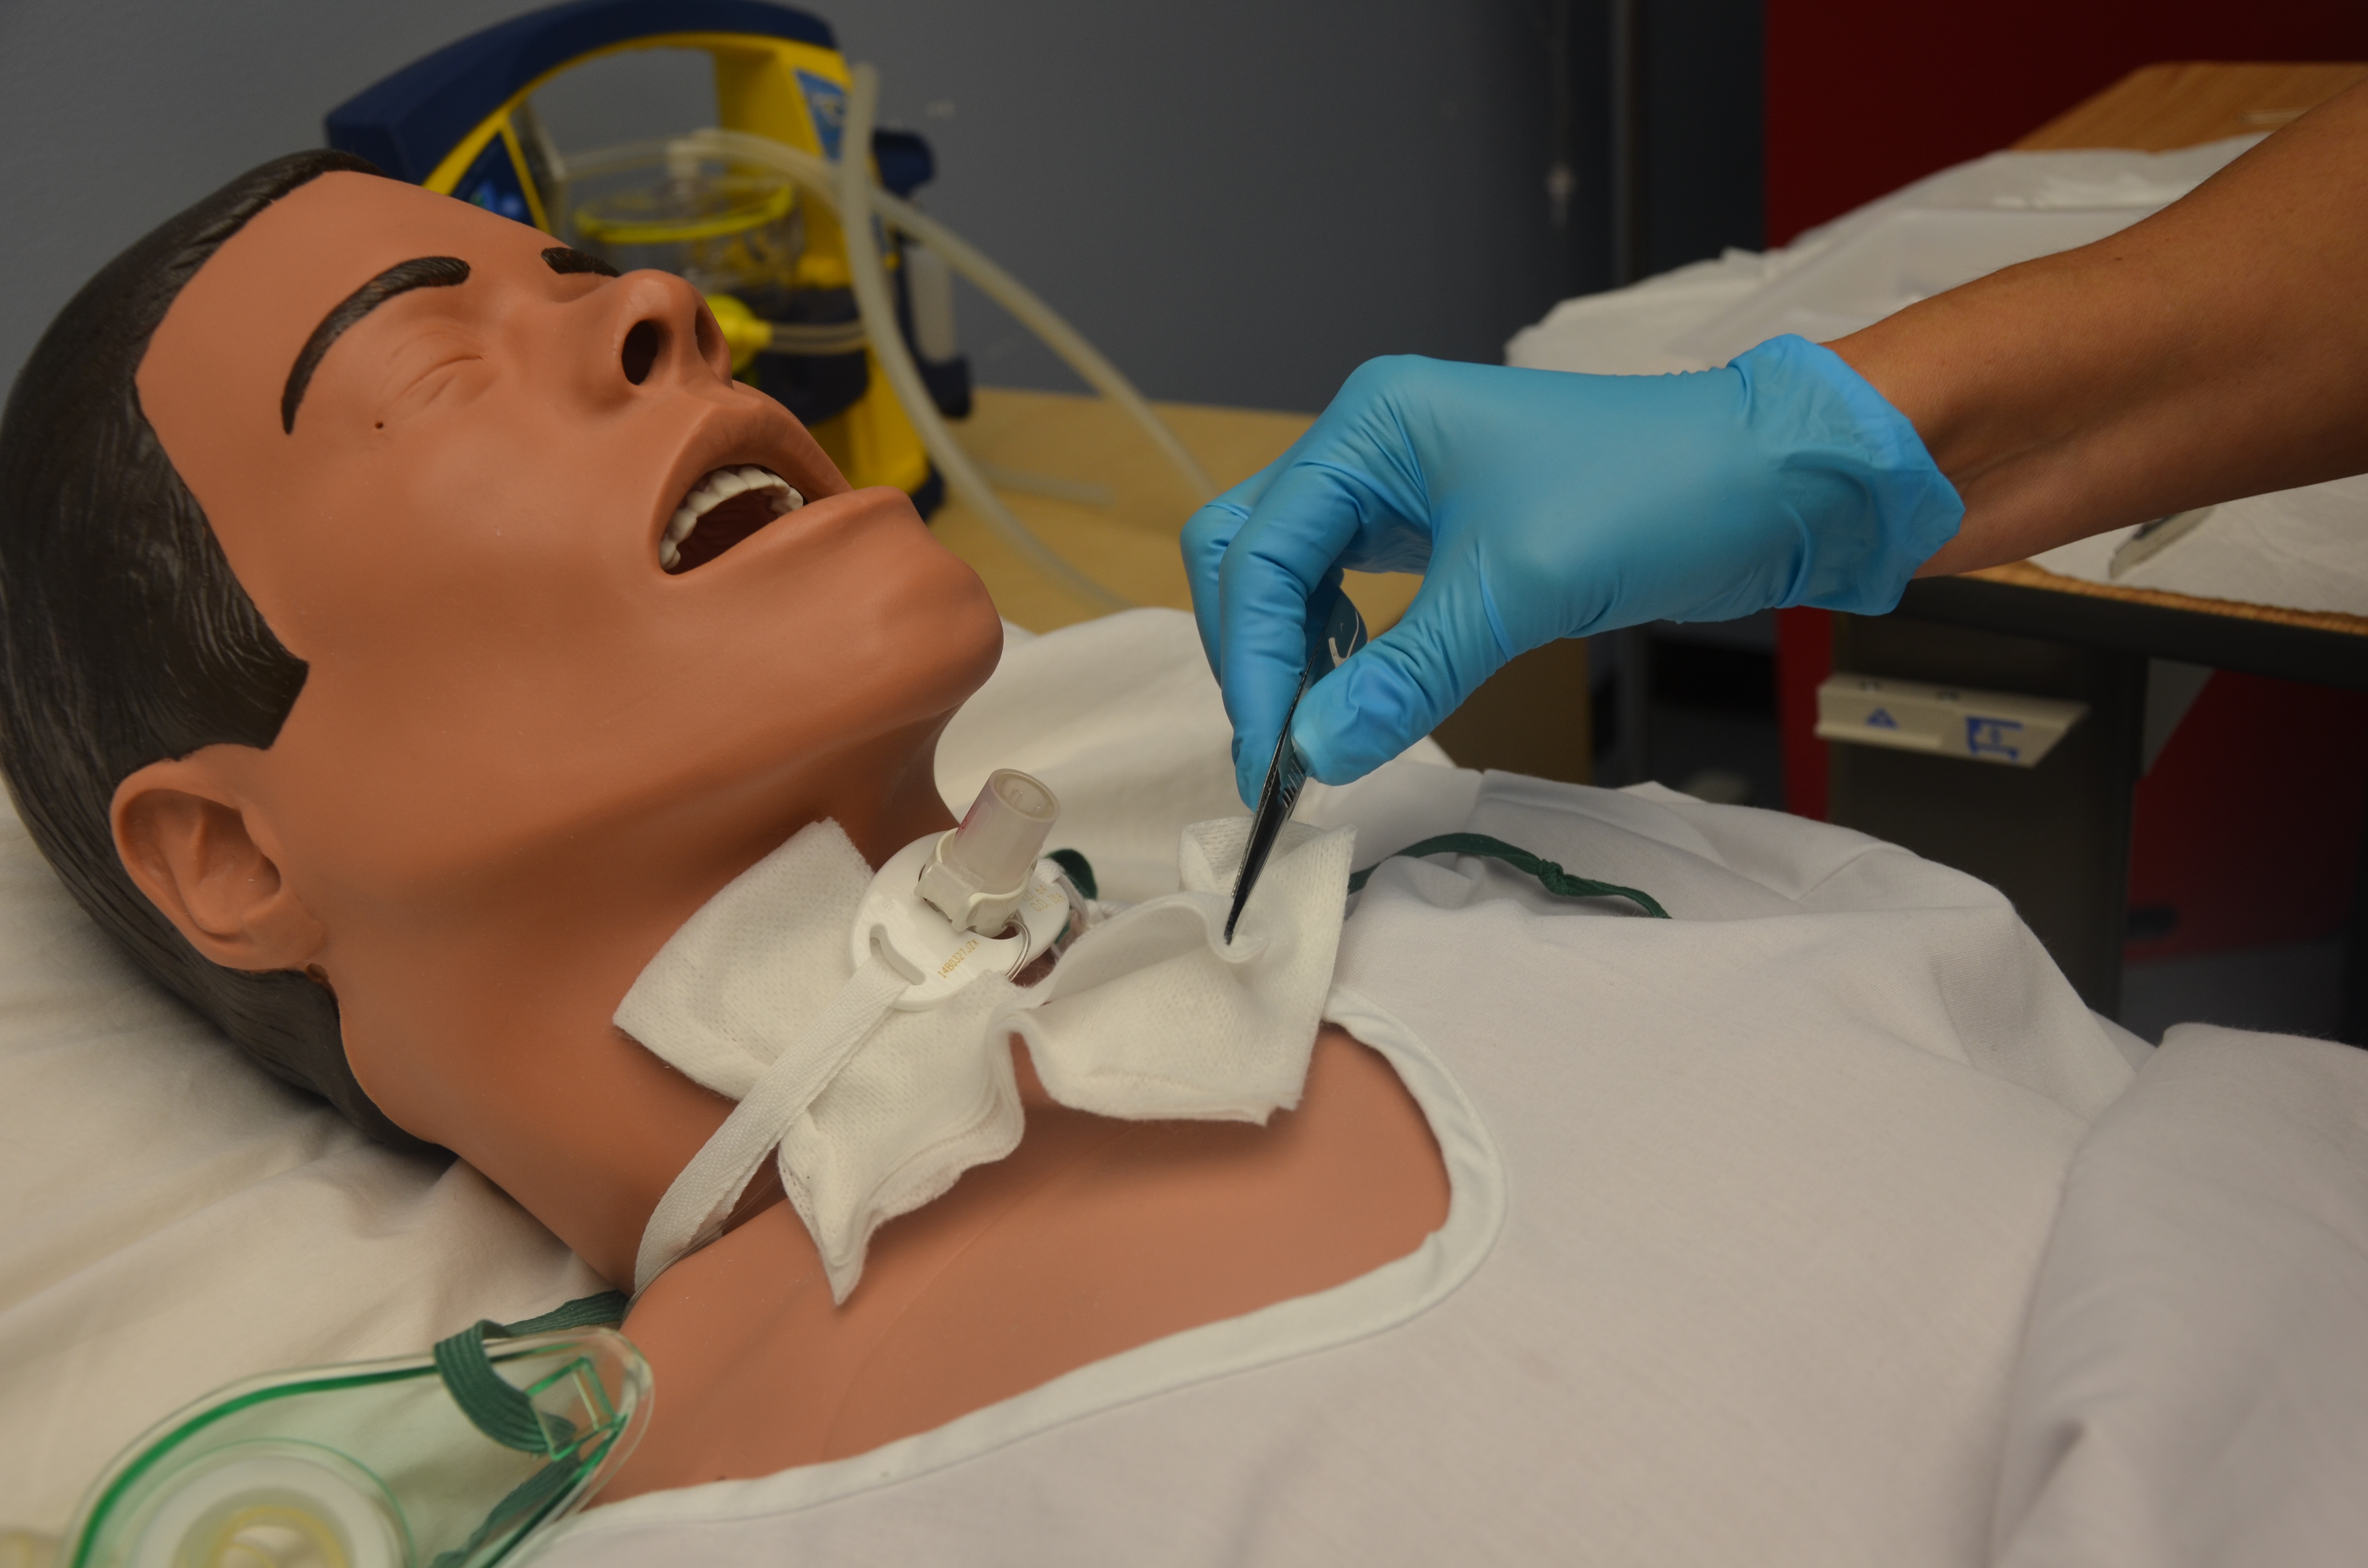
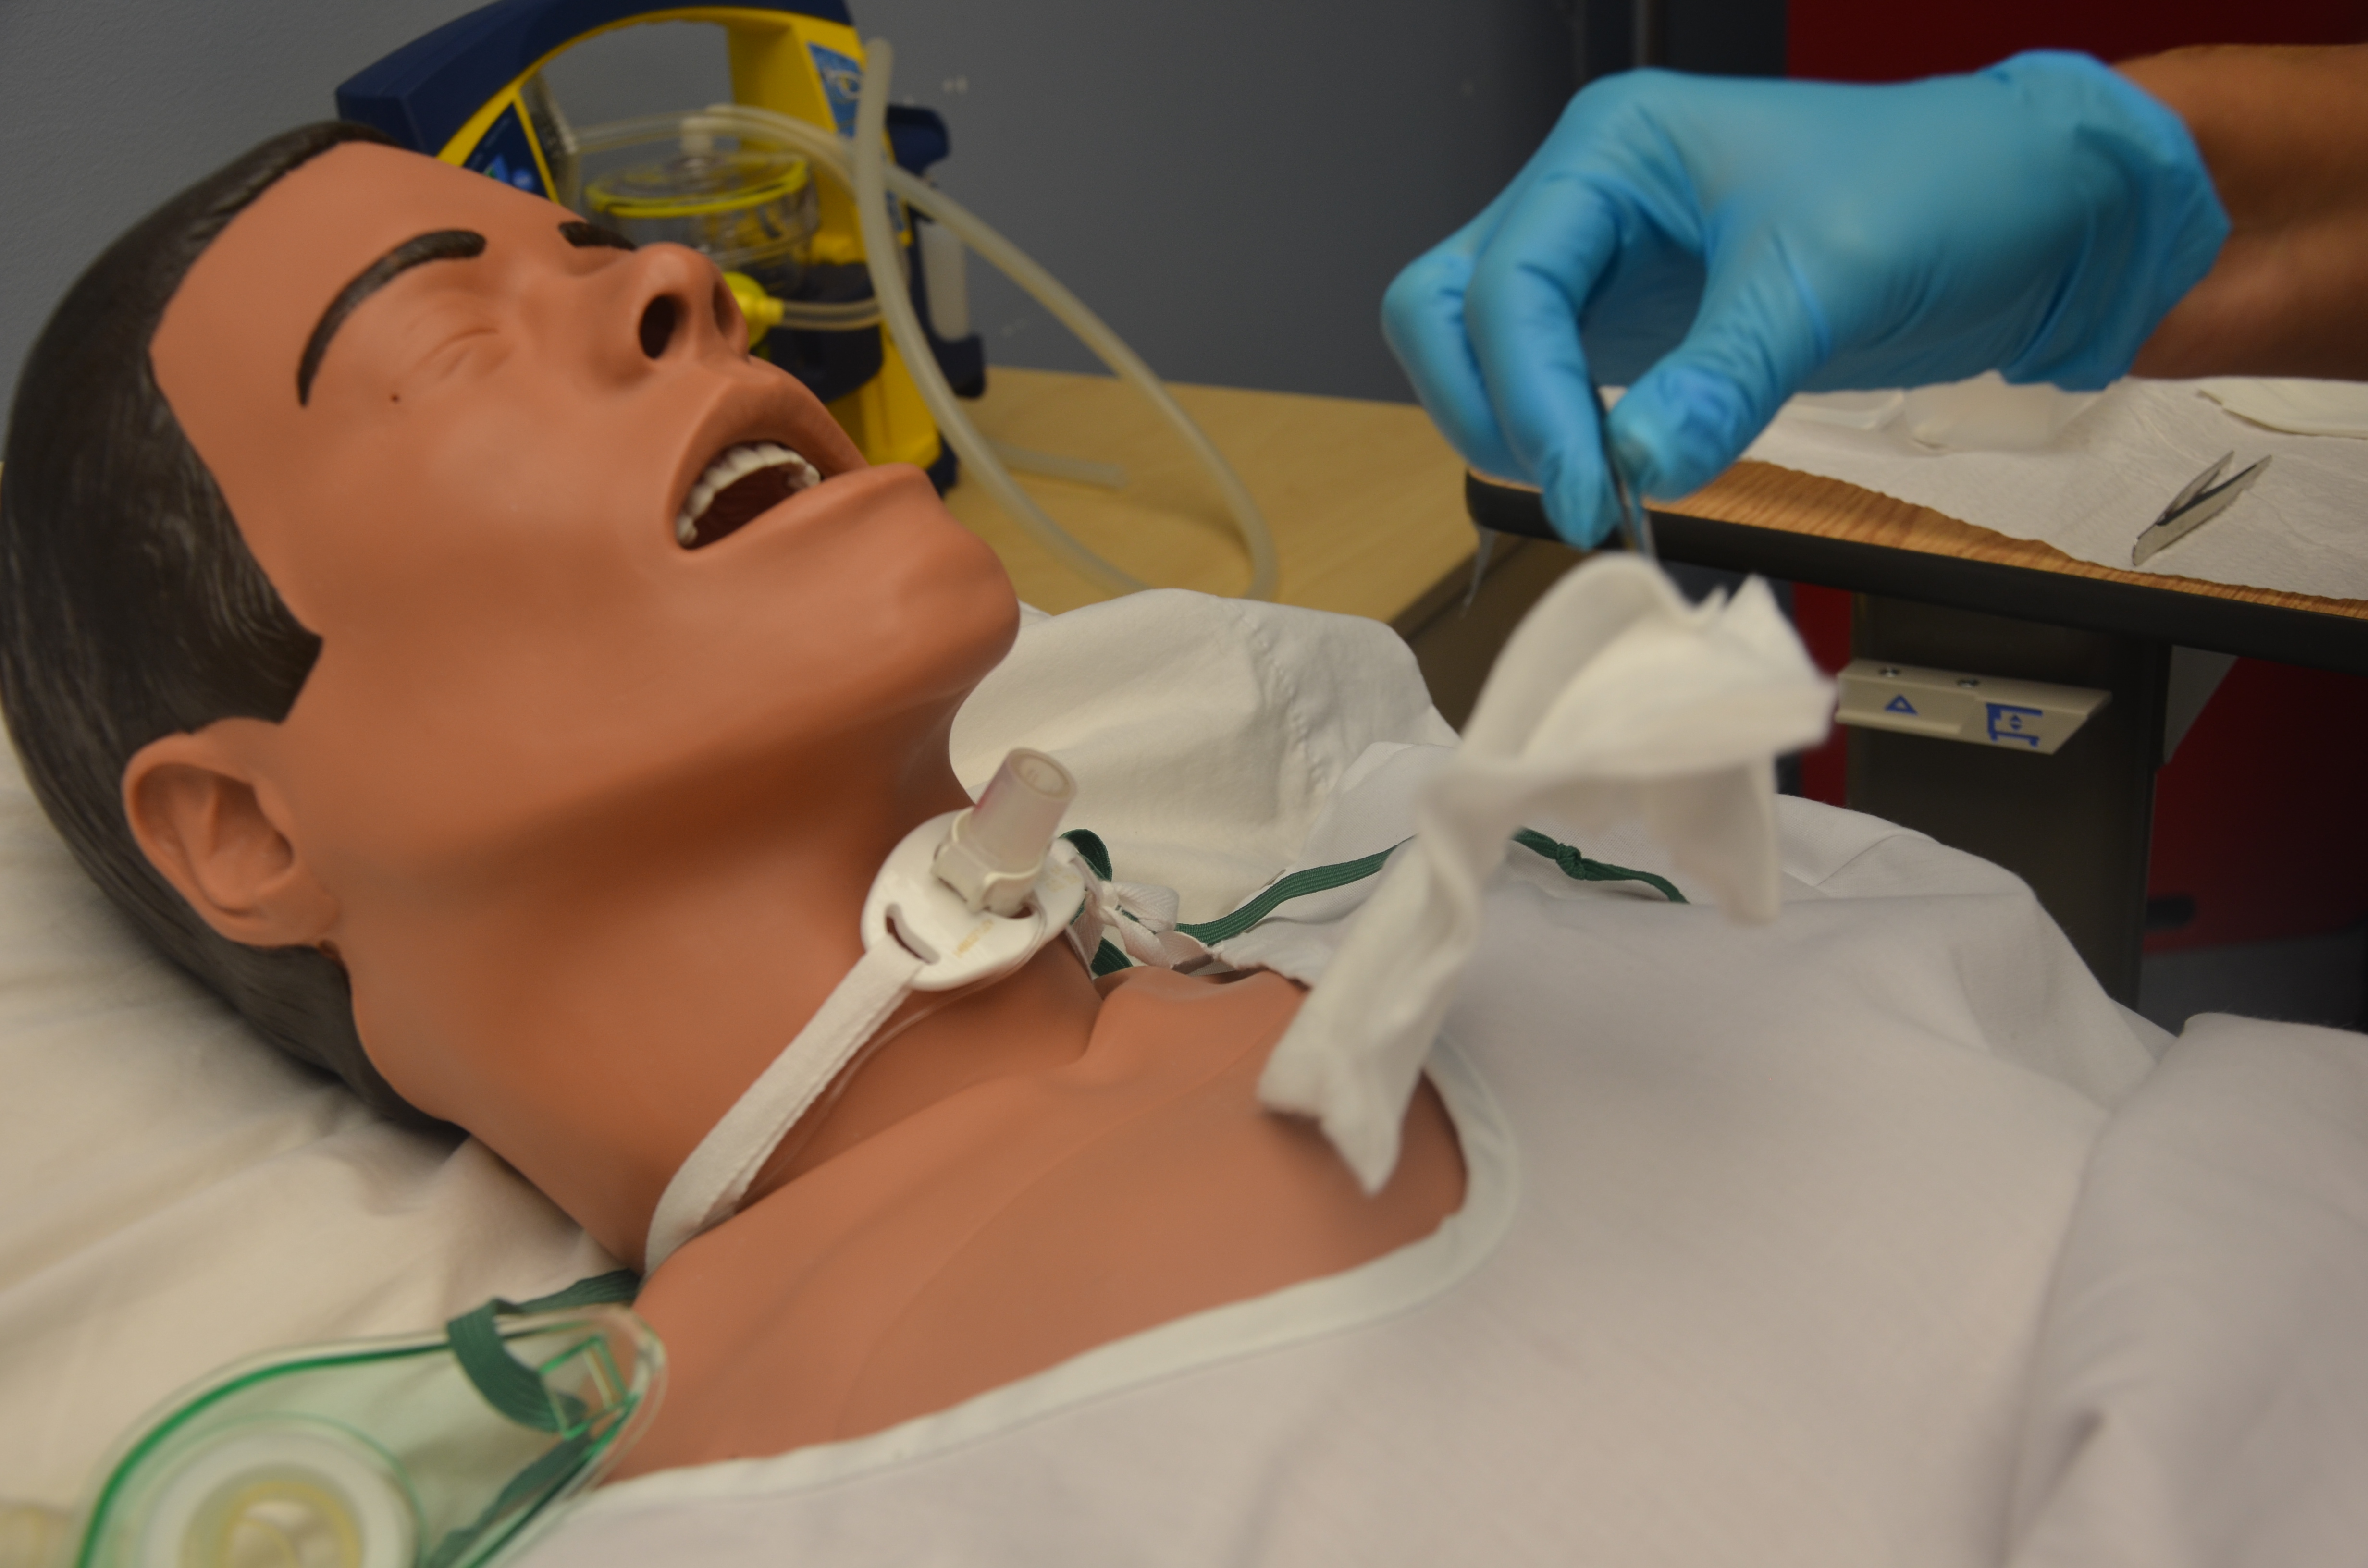
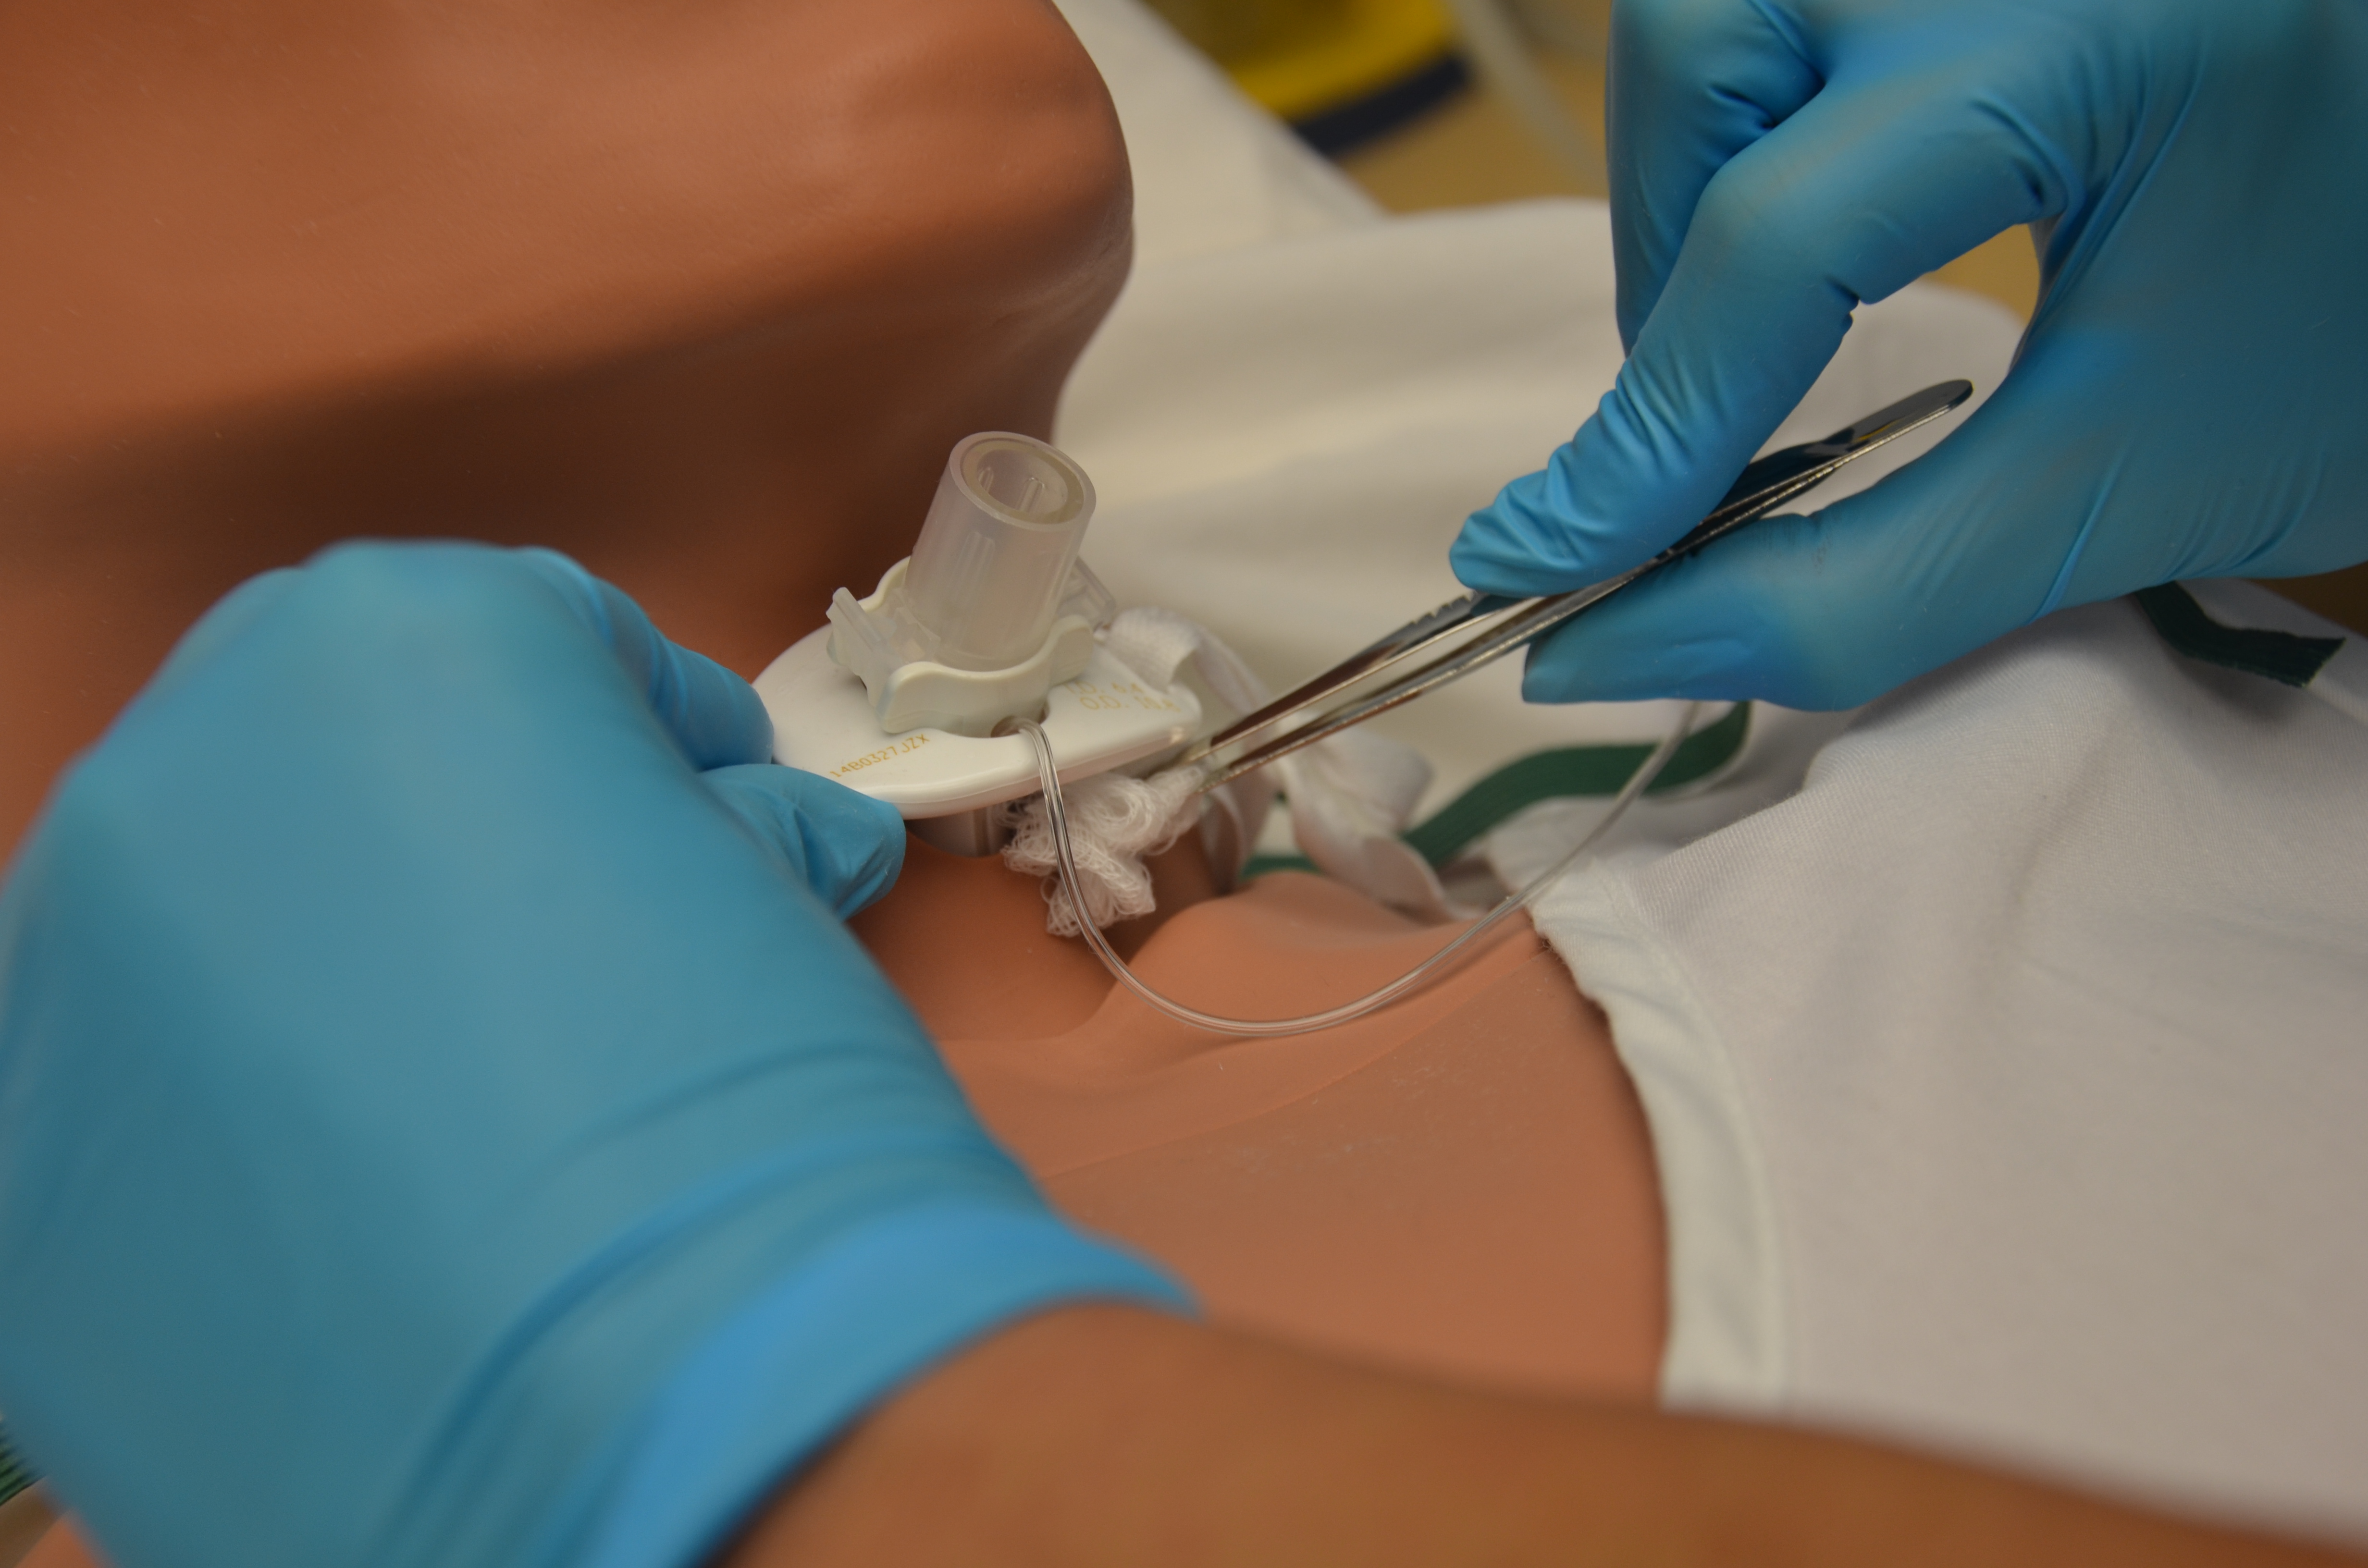
6. Using forceps, remove the soiled dressing around the tube and discard in garbage bag.
All soiled dressings should be removed, as they may excoriate the surrounding peristomal skin.
Use forceps to remove the soiled dressing
7. Assess the stoma site for bleeding, appearance of stoma edges, and peristomal skin for evidence of infection or redness (assess for increase in pain, odour, or abscess formation).
Assessment is important to identify and prevent further complications.
Assess stoma site
8. Clean the stoma site with a gauze or cotton-tip applicator soaked in normal saline. Be careful not to disturb the tracheostomy tube. Dry surrounding area if required.
Cleaning around the stoma removes any debris or exudate from the stoma. A tracheal stoma should be cleaned with normal saline.
Clean the stoma site with a gauze or cotton-tip applicator soaked in normal saline
9. Assess the site to determine if barrier film is required.
Follow agency policy.
10. Apply new manufactured pre-cut tracheostomy dressing to tube using sterile forceps.
Avoid cutting gauze for tracheostomy care. Use non-fraying material. The small fibres from the cut gauze may become loose and accidentally travel into the inner cannula. Always use manufactured pre-cut gauze.
Apply new manufactured pre-cut tracheostomy dressing to tube using sterile forceps
Data source: BCIT 2015c; Morris et al., 2013; Perry et al., 2014; Vancouver Coastal Health, 2012
Replacing Tracheostomy Ties (Velcro or Twill Tape)
Tracheal ties will become dirty and require replacing. Ties should be replaced as required, according to agency policy. Ideally, one person should hold the tracheostomy tube in place while the tracheostomy ties are replaced by another person. Alternatively, secure the new tracheostomy ties prior to removing the old tracheostomy ties to avoid accidental dislodgement of the tracheostomy tube if the patient coughs or the tracheostomy is accidentally bumped out. Once the new tracheostomy ties are on, only one finger should fit between the tracheostomy ties and the neck. Ensure twill ties are knotted using a square knot.
Checklist 85 lists the steps for replacing tracheostomy ties.
Checklist 85: Replacing Tracheostomy Ties (Velcro or Twill Tape)
Disclaimer: Always review and follow your hospital policy regarding this specific skill.
Safety considerations:
Reassess your patient’s tolerance for tracheostomy care and watch for signs of respiratory distress.
Pre-hyperoxygenate patient if required and according to agency policy
If removing oxygen while preforming tracheostomy care, remember to replace it often to reoxygenate the patient.
Steps
Additional Information
1. Perform hand hygiene, verify physician orders for tracheostomy care, and collect supplies.
Use twill ties or Velcro ties.
Wash hands
2. Have an additional health care provider assist with the tracheal tie change as required.
If tracheostomy is less than 24 hours old, or patient is confused, agitated, or unpredictable, always have an additional helper at the bedside to prevent accidental dislodgement.
3. Perform hand hygiene, ID patient using two identifiers, explain procedure to patient, and create privacy if required. Ensure patient has a method to communicate with you during the procedure.
This reduces the transmission of microorganisms.
Hand hygiene with ABHR
Tracheal patients always require a method to communicate with the health care provider.
4. Apply non-sterile gloves.
This reduces the transmission of microorganisms.
Apply non-sterile gloves
5. To secure the tracheostomy tube with Velcro ties:
If patient is at risk of tracheostomy dislodgement due to confusion or agitation, replace Velcro with ribbon tapes.
If possible, one health care worker can keep the tracheostomy tube in place by holding the flange with gloved hands, while the other can replace the tapes. This avoids potential dislodgement of the tube as this procedure can make the patient cough.
Thread the narrow Velcro tab through the slit in the flange of the tracheostomy tube and fold it back to adhere to the main tube holder; repeat on other side. Overlap the shorter length of collar with the longer length of collar and secure with the wider Velcro tab. Trim any excess length of collar to fit the size of the patient’s neck.
Check how secure the collar feels. Ensure you can fit one little finger between the collar and the patient. The tape should be tight enough to keep the tracheostomy tube securely in place but loose enough to allow the little finger to fit between the tapes and the neck.
To secure the tracheostomy tube with ribbon/twill tape:
Cut two pieces of cotton tape, each approximately 50 cm in length (depending on neck size).
Divide the tape into thirds and fold the first third over the remaining two-thirds of the ribbon.
Thread the folded edge through one flange hole, forming a loop.
Thread the loose tape ends through this loop and pull until tight and secure.
Repeat the process for the other side, securing the tapes with square knots on each side of the neck.
Tracheostomy ties are used to promote patient comfort and keep the tracheostomy secured and in situ.
Velcro tiesCotton twill ties
6. Perform hand hygiene.
Hand hygiene reduces the transmission of microorganisms.
Hand hygiene with ABHR
Data source: BCIT, 2015c; Morris et al., 2013; Perry et al., 2014